
![]()
WHAT’S INCLUDED
Component Checklist
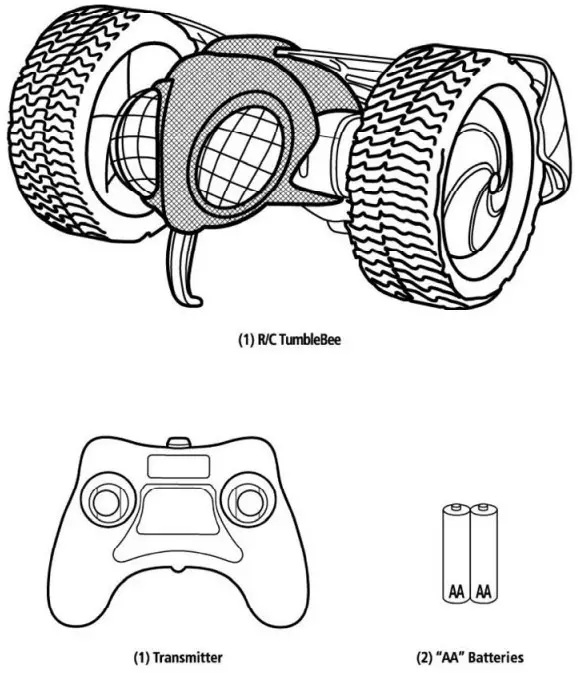
TRANSMITTER
Battery Installation
- To open the battery compartment cover on the transmitter, slide in the direction indicated by the arrow.
- Insert 2 “AK size batteries. Make sure the positive (+) and negative (—) markings on the batteries match up to the ones inside the Battery Compartment.
- Replace the Battery Compartment Cover making certain that the Compartment tab has “snapped” into the locked position.
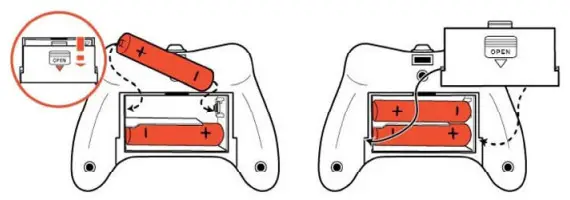
Note: When replacing Transmitter batteries: Do not mix old and new battene& Do not mix alkaline, standard or rechargeable batteries. Use alkaline batteries only.
Syncing
This transmitter is equipped with 2.4GHz technology which allows up to 6 vehicles to be used at the same time.
To sync transmitter and vehicle, follow these steps:
- Install batteries in Transmitter.
- Turn on Vehicle.
Once the batteries are installed and the vehicle is turned on, the Transmitter will sync automatically with the vehicle.
Sound
Touch the head to hear a Laughing sound.
Function
Note: The vehicle has working lights. When a vehicle is powered ON, eyes will glow. When a vehicle is in motion, eye color will change.
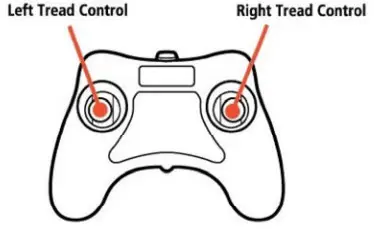
How to Drive
FORWARD AND REVERSE DRIVING

TURNING
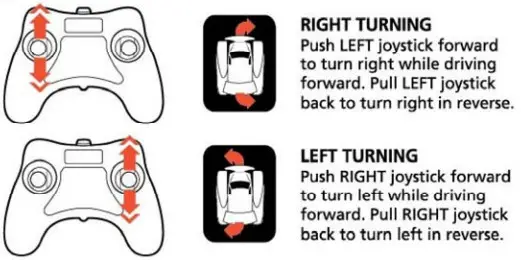
SPINS

VEHICLE
Functions
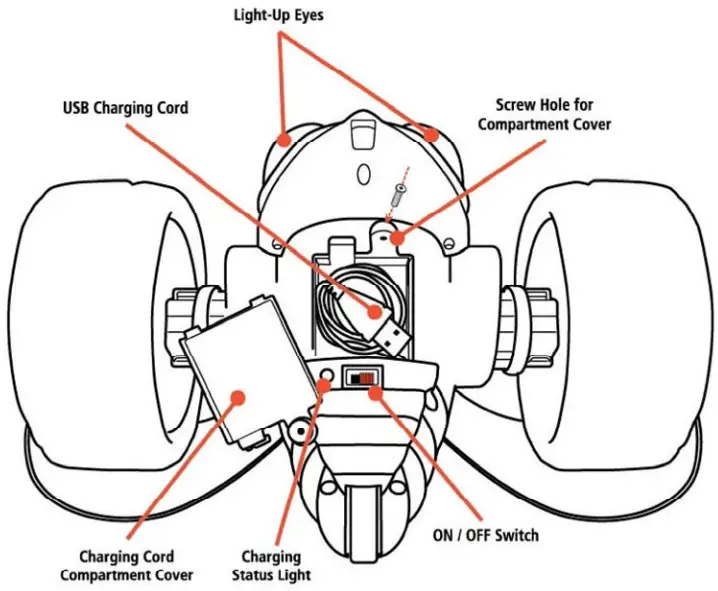
Charging
This vehicle is equipped with an internal Lithium-Ion battery that is recharged via USB.
ON/OFF Switch must be in the OFF position prior to charging.
- Locate the Charging Cord Compartment Cover on the underside of the vehicle.
- Use a screwdriver to remove the small screw keeping the cover in place.
- Remove the USB cable from the Storage Compartment. (Use care when extending the cord as it is attached to the inside internal battery). The cord can be plugged into any computer or USB outlet brick (not included).
- Insert the USB connector into a computer or other USB power source.
- While charging, the Charging Status Light under the vehicle will be on. Once fully charged the light will turn off. Charging is completed in approximately 2 hours (when charging from a computer).
- After charging is complete, store the USB cord in the Charging Cord Compartment. Replace the Compartment cover and screw it securely back into place.


