AUTEL Evo Lite Series Evo Lite Plus Drone
Reading notes
- Please read all documentation before your first flight.
- Failure to operate the aircraft responsibly could lead to injury or damages, and may void any applicable warranty coverage.
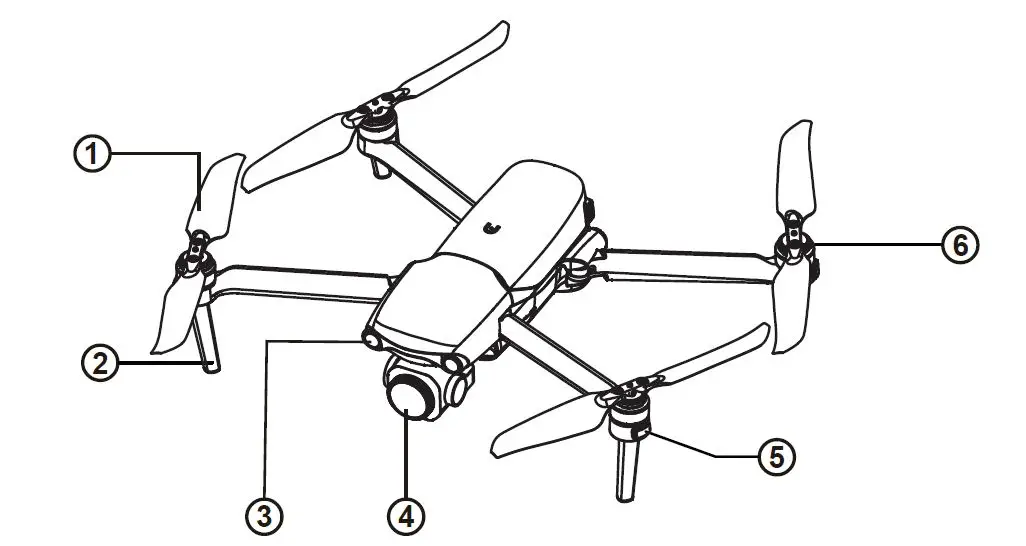
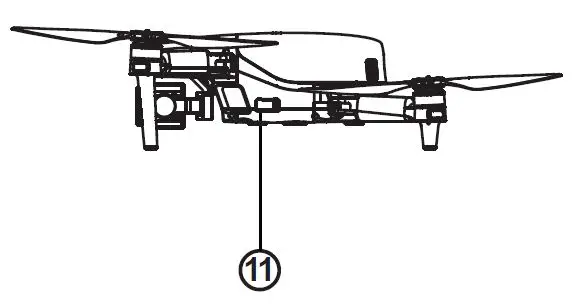
Aircraft
- Propeller
- Landing gear
- Forward vision system
- Gimbal camera
- Front LED indicator
- Motor

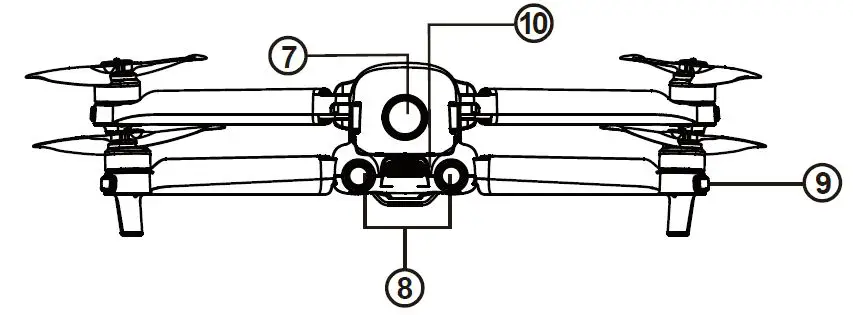
- Power button
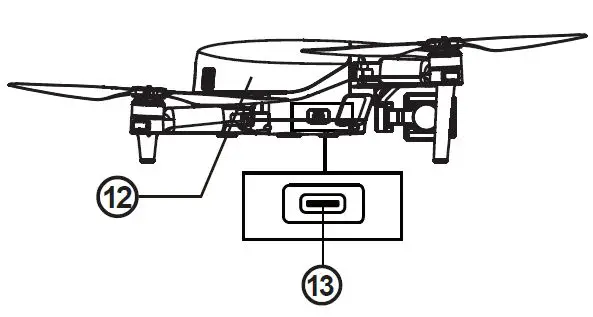
- Rear vision system
- Rear LED indicator
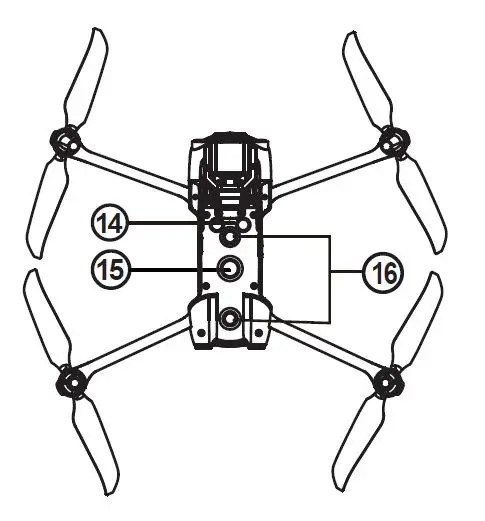
- Exhaust port

- SD card slot

- Aircraft battery
- USB-C port

- Ultrasonic sensor
- Downward vision lighting LED
- Downward vision system

Flight LED indicator
A LED indicator is located on the end of each aircraft arm. The front LEDs will light up solid blue to help you identify the direction of the aircraft’s nose. The rear LEDs will display the current flight status of the aircraft. The chart below shows the meaning of each status indicator. The chart below shows the meaning of each status indicator.
| Definitions of Flight LED Indicator Status | ||
| Front LED indicator | Rear LED indicator | Meaning |
| Normal status | ||
| Blue light is always on | Green light is always on | System self-test is activated |
| Blue light is always on | Green light flashes slowly | The aircraft is in GPS mode |
| Warning | ||
| Blue light is always on | Yellow light flashes slowly | The aircraft is in ATTI mode |
| Blue light is always on | Yellow light flashes slowly | Low battery warning |
| Blue light is always on | Red light flashes slowly | Critical low battery warning |
| Blue light is always on | Red light flashes slowly | Critical problems, IMU error |
| Compass calibration | ||
| Blue light is always on | Yellow light is always on | Ready to calibrate the compass |
| Blue light is always on | Green light is always on | Calibration is successful |
| Blue light is always on | Yellow light is always on | Calibration is failed |
| Pairing | ||
| Blue light flashes quickly | Green light flashes quickly | The aircraft and the remote control are being paired |
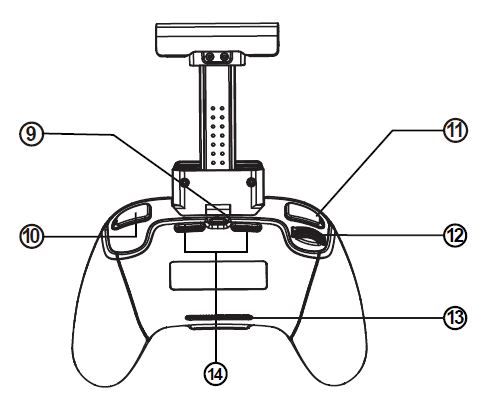
Remote control
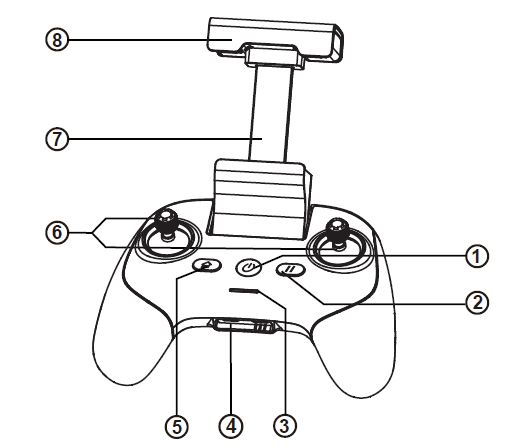
- Power button
- Pause button
- Battery indicator
- Charging interface
- Home button
- Joystick
- Mobile device stand
- Antenna

- Remote control adapter
- Camera/Video button
- Custom button
- Gimbal pitch control dial
- Air inlet
- Air outlet
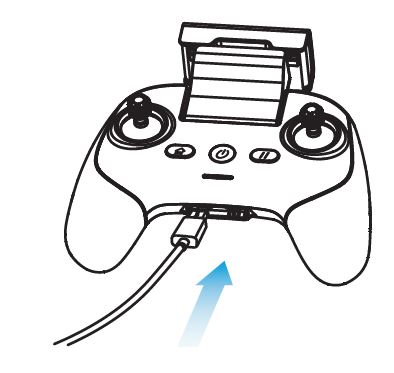
Charge the aircraft battery & remote control
- Aircraft battery: Press and hold the release button on both sides of battery and plug the charging cable into the charging slot of battery.

- Charging the remote control: Insert the Type-C charging cable into the Type-C port of the remote control.

Note
- Always fully charge the aircraft and remote control batteries before flying. Please use a dedicated charger to charge the device.
- It takes about 90 minutes to fully charge the aircraft battery and 120 minutes to fully charge the remote control.
- The aircraft battery indicator will flash cyclically when it is charging, and it will be off when the battery is full.
Install the Autel SkyTM app
Refer to the following steps to connect to the application.
- Enter the keyword “Autel Sky” in the App Store or Google Play, then search for and download the Autel SkyTM application.
- Launch the application on your mobile device.
- Follow the on-screen instructions to connect the mobile device and the remote control.
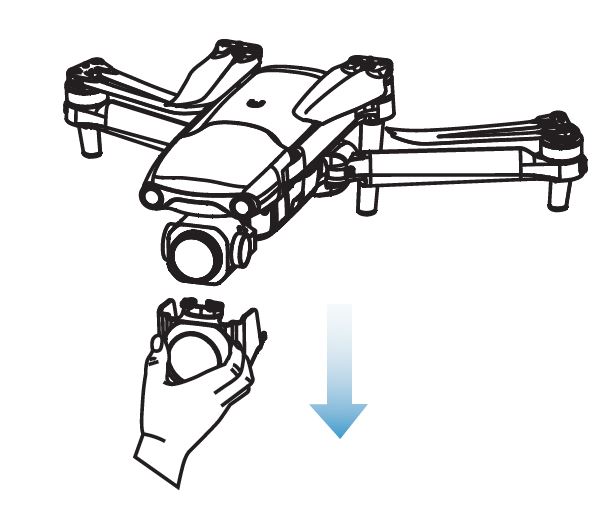
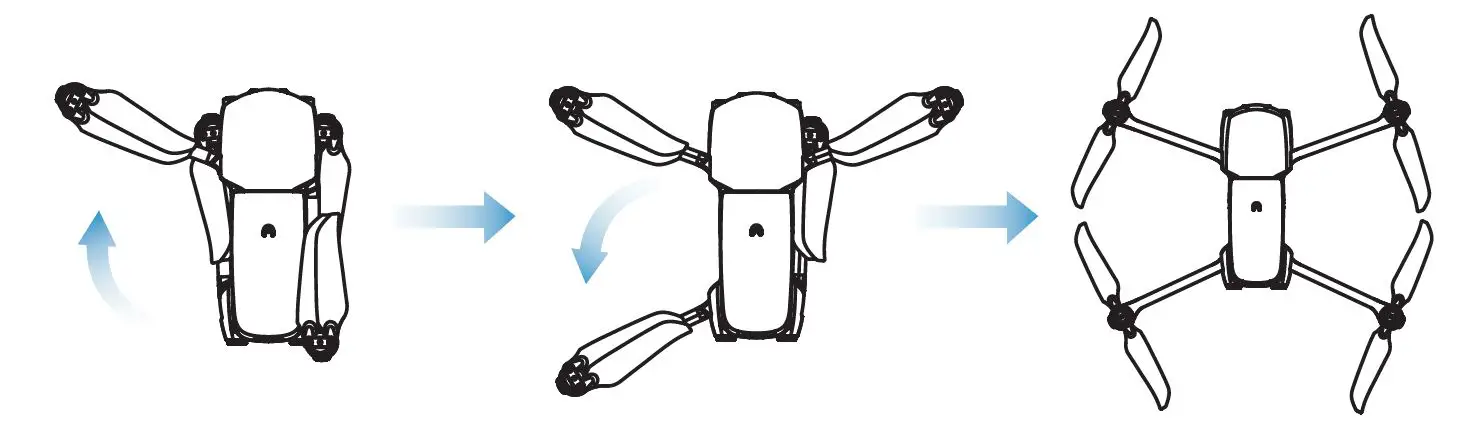
Prepare the aircraft
- Please always remove the gimbal protective cover before turning on the power switch of the aircraft.

- Unfold the arms and propellers.
 Important
Before folding the arms, turn off the power switch of the aircraft. Fold the rear arm and propeller first, then fold the front arm.
 Important
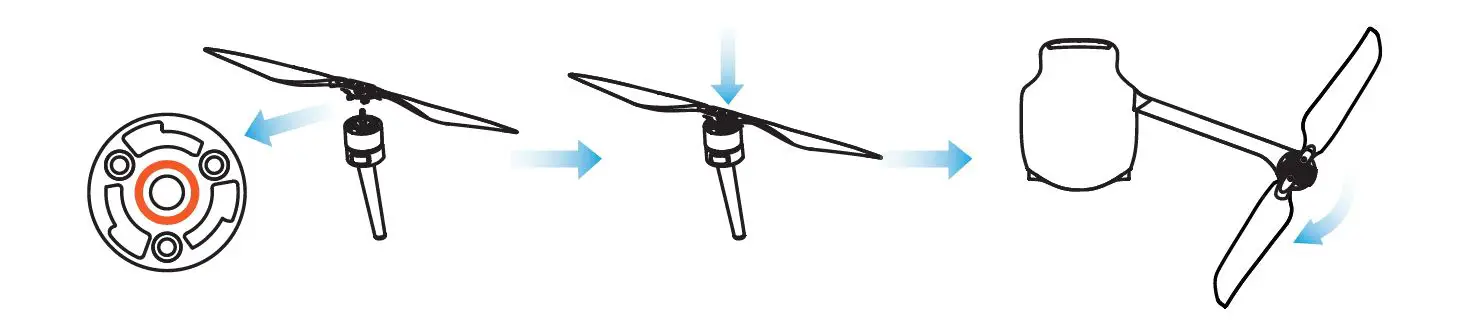
Install the propellers
The propeller is installed by default on the aircraft. If you need to re-install it, please refer to the following instructions. Note that the propeller must be intact and firmly installed on the aircraft, and the propeller with the white circle mark must be paired with the motor.
- Install the propeller
- Confirm that the aircraft is turned off.
- Choose the propeller that matches each motor.
- Press down the propeller firmly, and then turn it in the locked direction to securely install the propeller.
- Disassemble the propeller
- Turn off the aircraft.
- Press down the propeller firmly, and then turn it in the unlocking direction to remove the propeller.

Introduction
Lock direction: Rotate in the indicated direction to fix the propeller.
Unlocking direction: Rotate the propeller as instructed to loosen it.
Black coded propeller>Pairing>Black coded motor
White coded propeller>Pairing>White coded motor
Warning
Before installing or removing the propeller, turn off the power switch of the aircraft.
Important
While installing or removing the propeller, it is recommended to wear protective gloves.
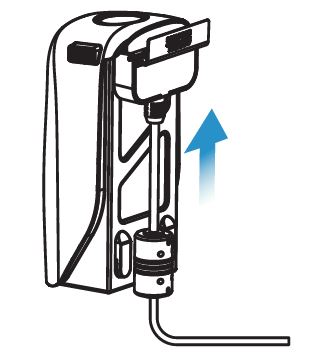
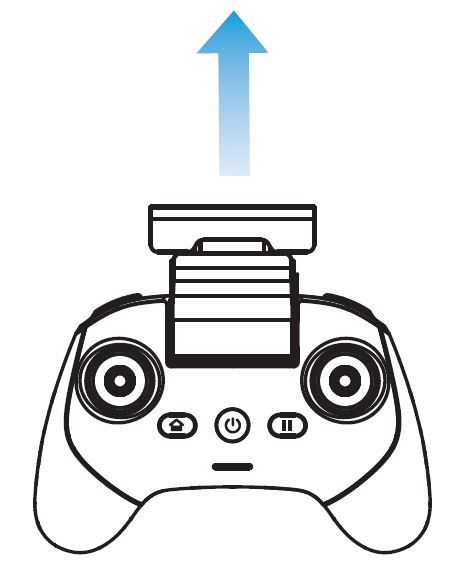
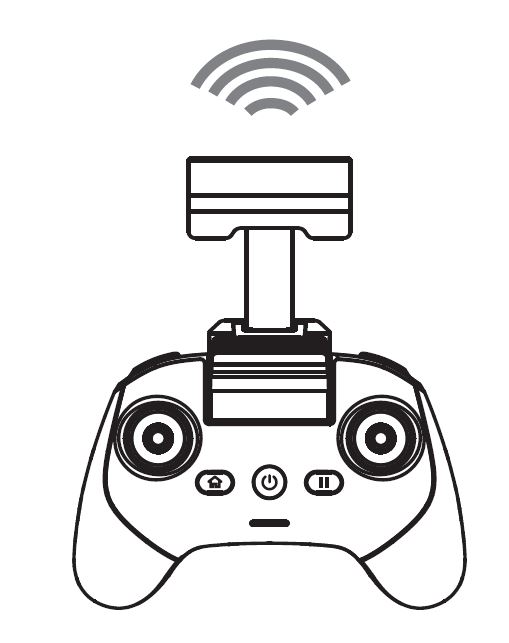
Prepare the remote control
- Slowly pull out the mobile device holder.

- When the antenna plane is facing the aircraft, the signal quality of the remote control and the aircraft can reach the best condition.

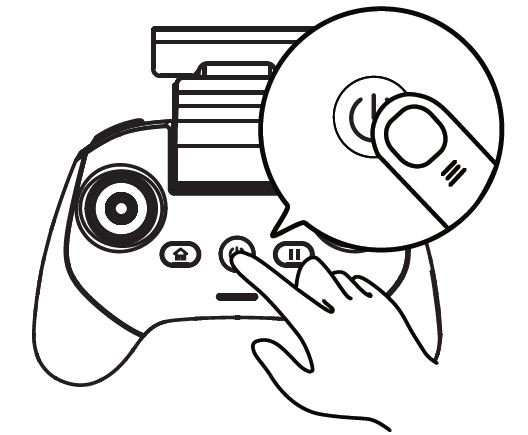
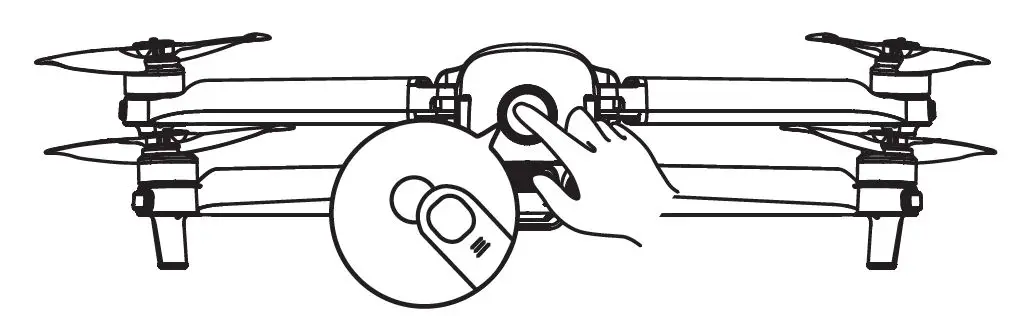
Power on
- Hold the power button for 2 seconds to turn on the remote control.

- Press and hold the power button for 3 seconds to turn on the aircraft. The battery indicator will then light up to show the current battery level of the aircraft.

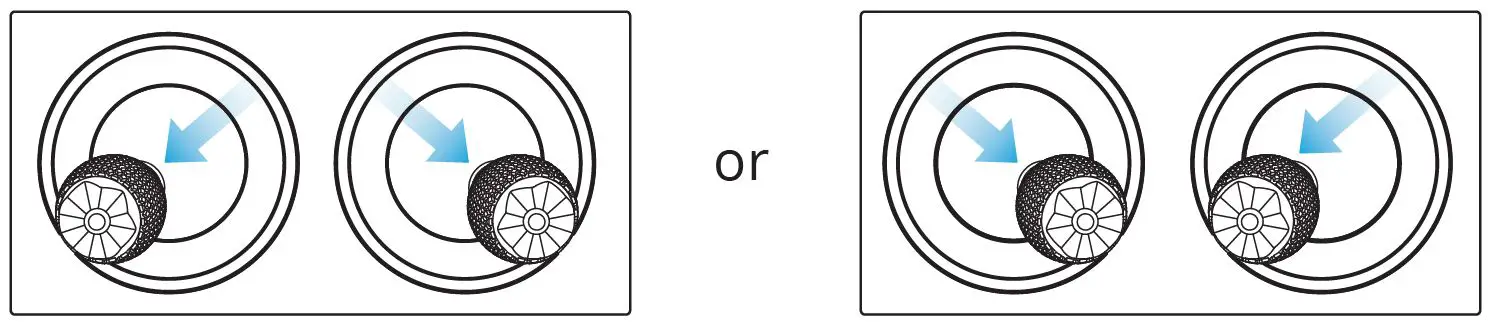
Take off
- Before taking off, please place the aircraft on a flat surface with the tail of the aircraft facing you.
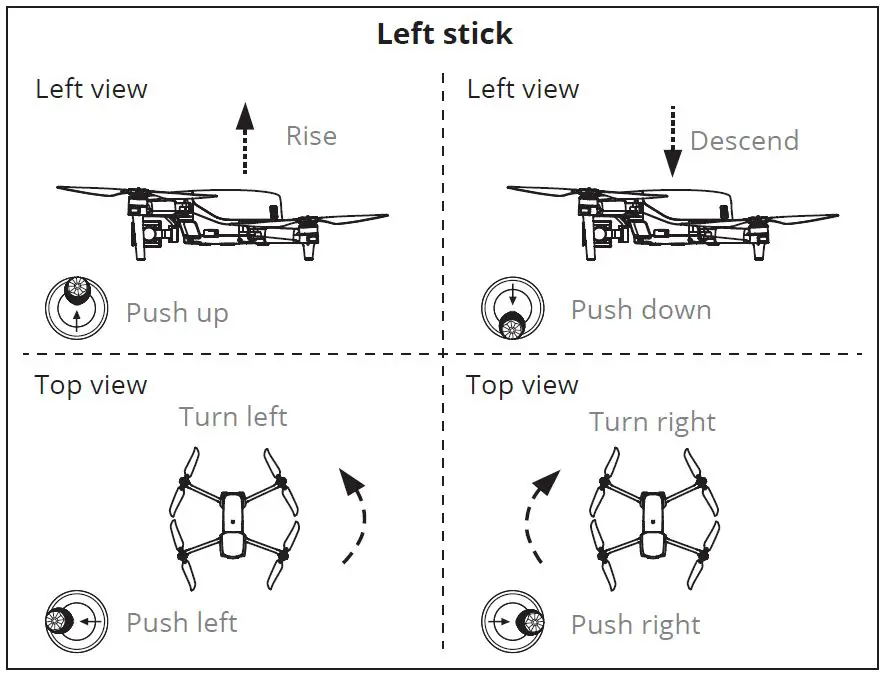
- Tilt the joystick inwardly or outwardly and hold for 1 second, as shown in the figure below.

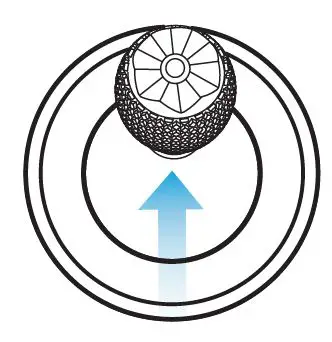
- After the motor starts, slowly push the left joystick upward (mode 2).
 Note: Before taking off, place the aircraft on a level surface with the back side of the aircraft facing you.
 Note: Before taking off, place the aircraft on a level surface with the back side of the aircraft facing you.
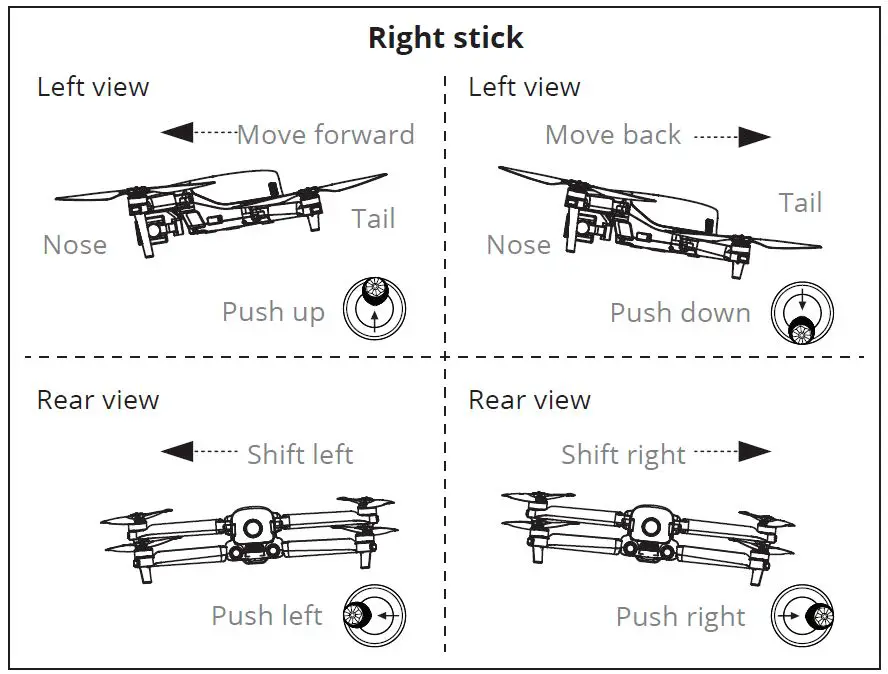
Joystick controls (Mode 2)

WWW.AUTELROBOTICS.COM
©2021-2022AUTEL ROBOTICS CO., LTD. ALL RIGHTS RESERVED


