 Razer RZ04-03460100-R3U1 Kraken V3-Pro Wireless Gaming Headset

WHAT’S INSIDE / WHAT’S NEEDED
WHAT’S INSIDE
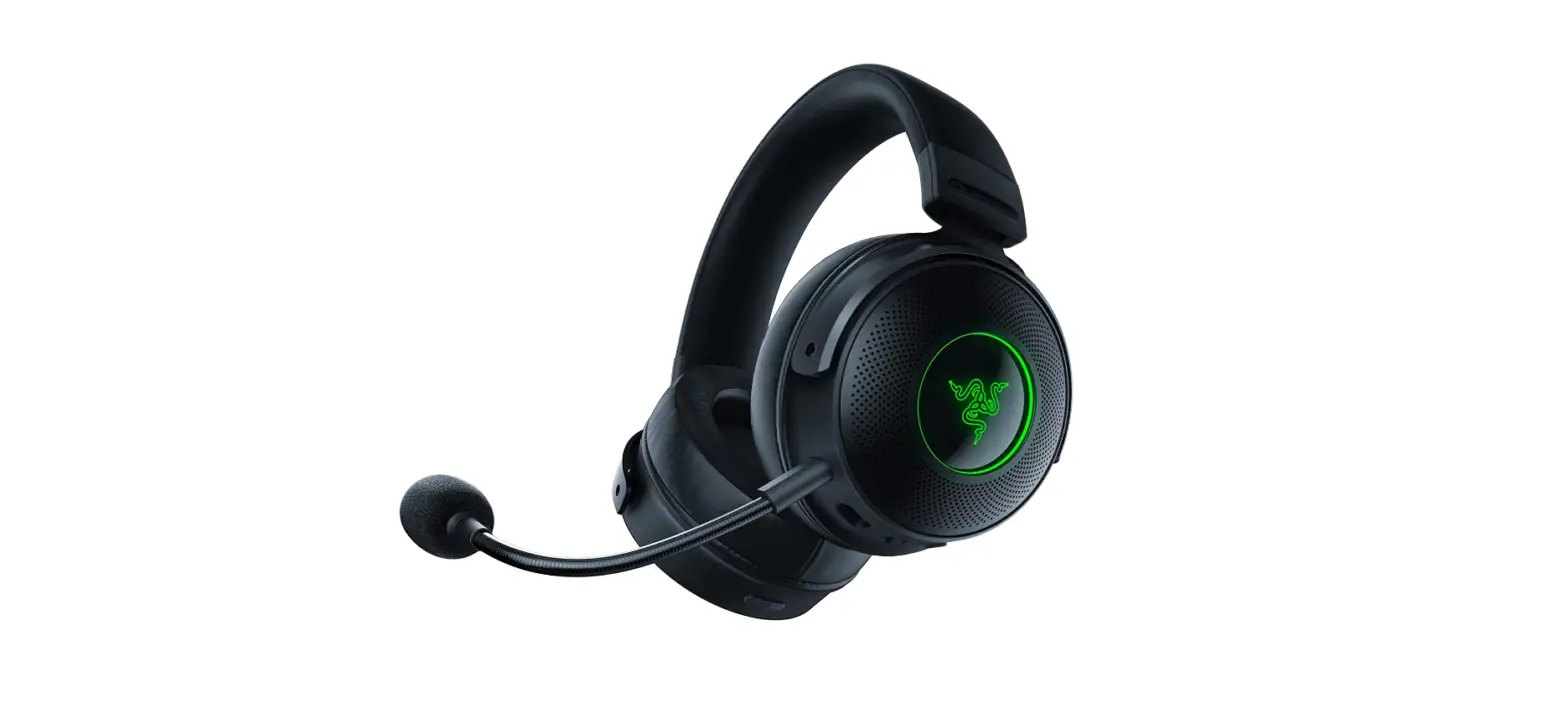
▪ Razer Kraken V3 Pro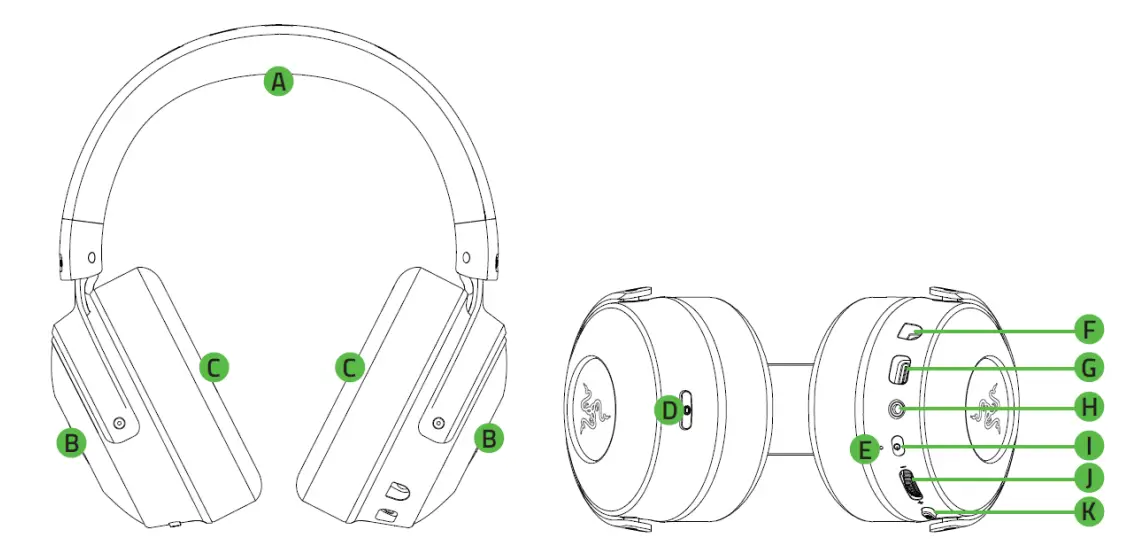
- Adjustable padded headband
- Backlit Razer logo Powered by Razer ChromaTM RGB
- Hybrid fabric and leatherette memory foam cushions
- HyperSense button
- Status indicator
- Microphone jack
- Charging port
- 3.5 mm audio + mic jack
- Power button
- Volume control wheel
- Mic mute button
Wireless USB dongle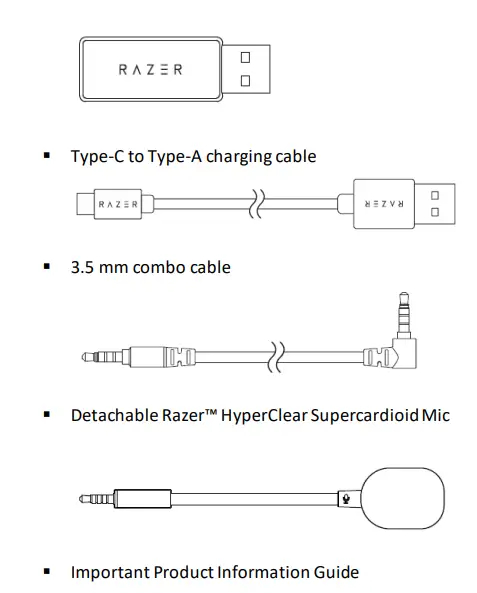 WHAT’S NEEDED
Product requirements
- [Wireless] USB-A port
- [Wired] 3.5 mm audio + mic combined jack
Razer Synapse requirements
- Windows® 10 64-bit (or higher)
- Internet connection for software installation
Compatible with PC / Mac / PS4 / PS5 / Switch and Xbox (wired).
LET’S GET YOU COVERED
You’ve got a great device in your hands, complete with a 2-year limited warranty coverage. Now maximize its potential and score exclusive Razer benefits by registering at razerid.razer.com
Got a question? Ask the Razer Support Team at support.razer.com
TECHNICAL SPECIFICATIONS
HEADPHONES
- Frequency response: 20 Hz – 20 kHz
- Impedance: 32 Ω @ 1 kHz
- Sensitivity: 96dBSPL/mW@1KHz by HATS
- Drivers: Customized Dynamic 50mm Driver
- Inner ear cup diameter: 62 x 42mm
- Connection type: 2.4GHz wireless and 3.5mm
- Cable length: 1.3m / 4.27ft
- Approx. weight: 368g / 0.81lbs
- Oval ear cushions: Full-ear coverage with cooling fabric and plush leatherette, for comfort and optimized haptics
MICROPHONE
- Frequency response: 100 Hz – 10 kHz
- Signal-to-noise ratio: ≥ 60 dB
- Sensitivity (@1 kHz): -42 ± 3 dB
- Pick-up pattern: Unidirectional
ON-EARCUP CONTROLS
- Volume up and down
- Mic mute on/off toggle
- Haptics intensity levels
AUDIO USAGE - Wireless audio usage: USB-A Dongle
- Wired audio usage: 3.5mm analog
- Surround sound: Only available on Windows 10 64-bit
HAPTIC DRIVERS
- 1 in each cup
- Frequency Response: 20-200Hz
- Maximum Generated Force: 4.3G
GETTING STARTED
CHARGING YOUR HEADSET
Connect the Razer Kraken V3 Pro to a powered USB port using the charging cable. For best results, please fully charge the headset before using it. A depleted headset will fully charge in about 3 hours.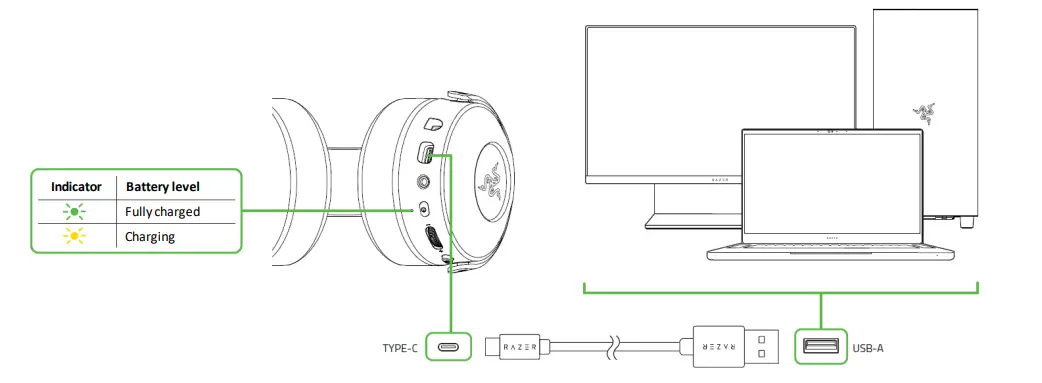
While the headset is charging, earcup lighting is disabled and will only resume when you disconnect the headset from a USB port.
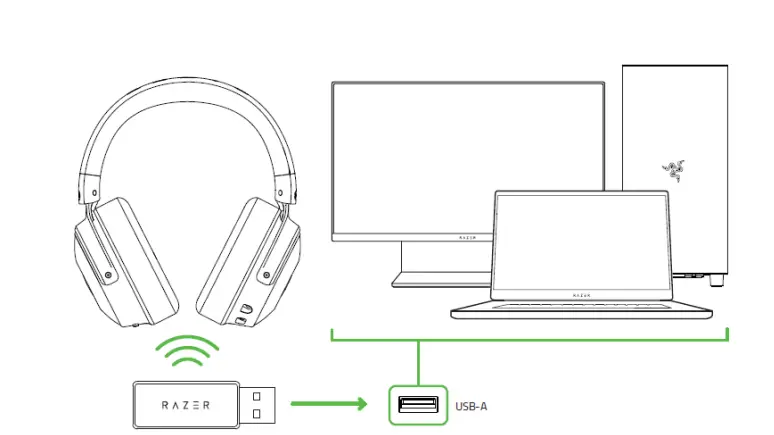
CONNECTING YOUR HEADSET
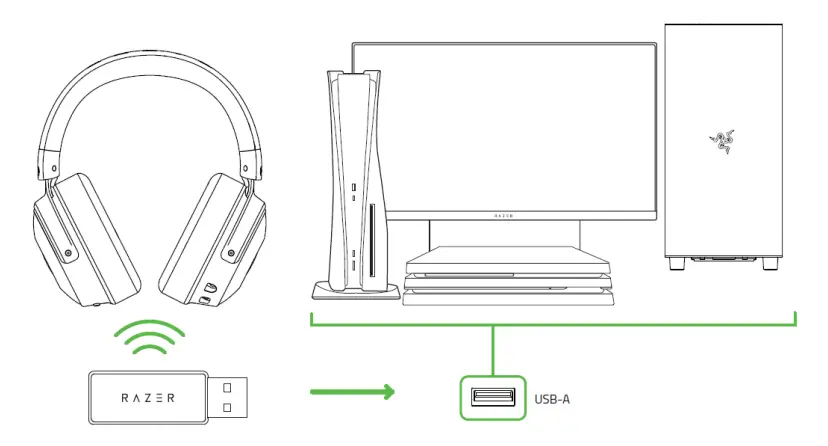
- To your PC
- Plug the wireless USB dongle to any of the USB-A ports on your PC.

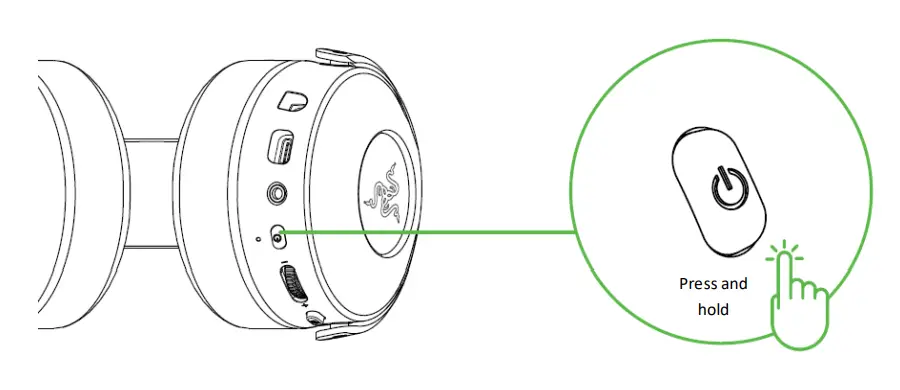
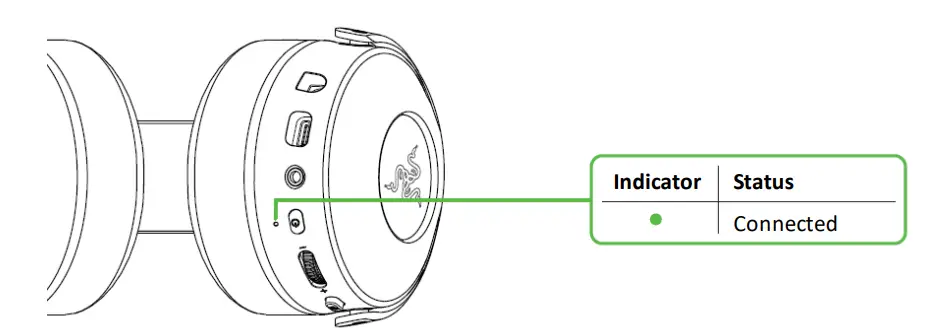
- Press and hold the power button until the status indicator is lit, or until you hear a tone.

- Wait until the status indicator briefly becomes static green indicating that the headset is now connected to the wireless USB dongle.

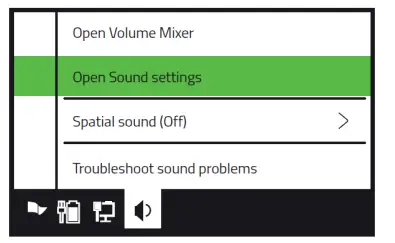
- On your PC, right-click on the sound icon on the system tray, and then select Open Sound settings.

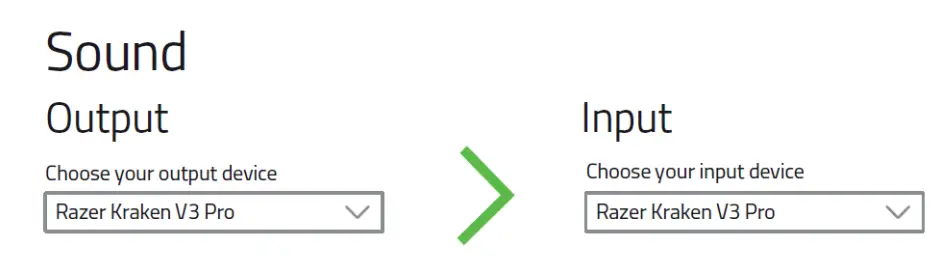
- Under Sound, set the Razer Kraken V3 Pro as the default Output and Input device.

- Use the Razer Synapse* app to customize your headset’s lighting and other features for an immersive gaming experience that’s truly yours.
*Install Razer Synapse when prompted or download the installer from razer.com/synapse.
- Plug the wireless USB dongle to any of the USB-A ports on your PC.
- To other devices via USB-A port
Plug the wireless USB dongle to your device and make sure the Razer Kraken V3 Pro is the default input and output audio device.
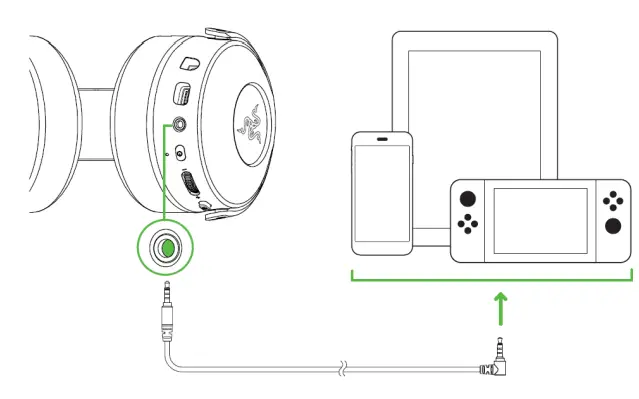
- To devices via 3.5 mm audio + mic jack
If your device has a 3.5mm audio + mic combined jack, simply plug the 3.5mm combo cable from your headset’s microphone jack to your device’s audio jack.
ACTIVATE THX SPATIAL AUDIO*
Unleash the full potential of the Razer Kraken V3 Pro by enabling 360° positional audio for a natural and lifelike experience through Razer Synapse.
USING THE HEADSET
POWER BUTTON
Power on or off the headset by holding the Power button until the status indicator is on; and holding the Power button again to turn off. Two distinct tones will help notify you that the headset is powered on or off.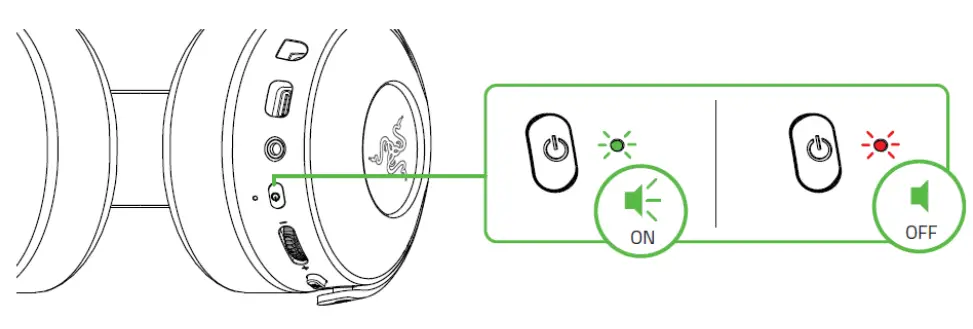
Other power button functions are available when the headset is powered on and connected to your device. These functions operate based on your device’s current activity.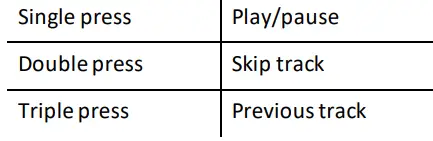
BATTERY LEVEL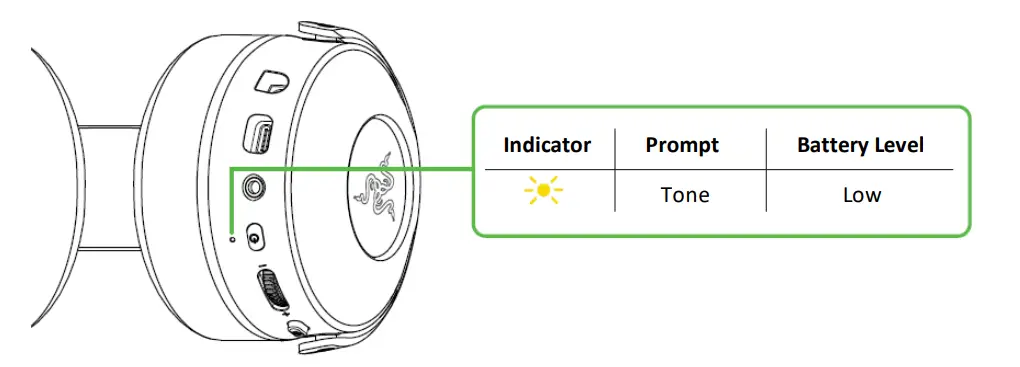
When unplugged and powered on, the status indicator will show the connection and battery status.
While in use, you’ll hear a tone when the headset needs to be recharged; during such time, the indicator will continue showing the battery level until you charge the headset.
HYPERSENSE BUTTON
With Razer HyperSense enabled, your headset will produce vibrations that flow in the direction of different sounds with varying intensities, making you hyper aware in your game. Simply press the HyperSense button to cycle through Low intensity, Medium intensity, High intensity, and Disable
HyperSense. The headset will briefly vibrate and play a distinct tone as you cycle through its settings.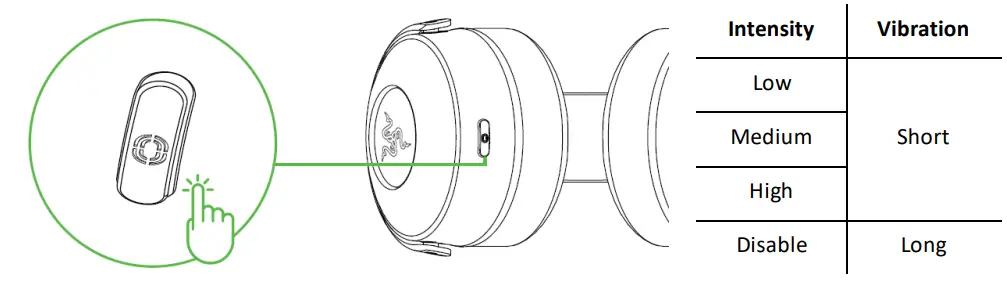
Razer HyperSense also works on 3.5 mm analog connection when the headset is on. Distinct tones, however, are only available on wireless. By default, this feature is enabled and set to Medium intensity.
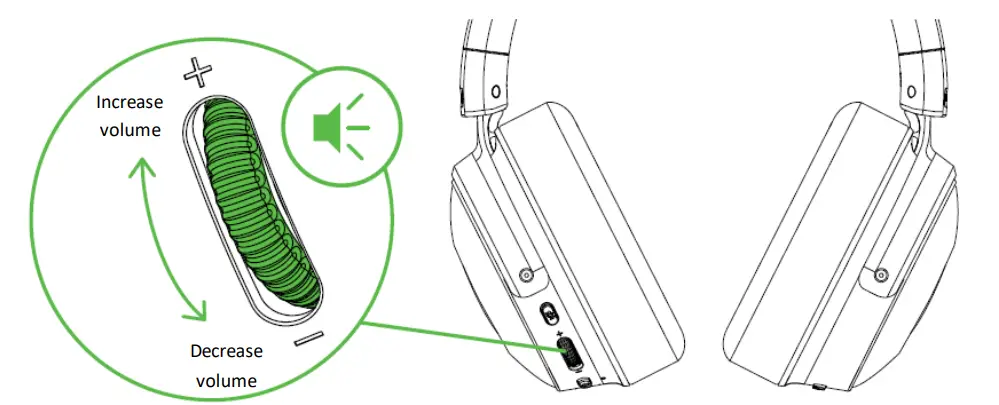
VOLUME CONTROL WHEEL
Rotate the volume control wheel to increase or decrease the volume.
RAZER HYPERCLEAR SUPER CARDIOID MIC
Plug the RazerTM HyperClear Supercardioid Mic to the headphone and bend until it is parallel to your mouth. Make sure the mic diaphragm is in front and the air vent is facing away from your mouth.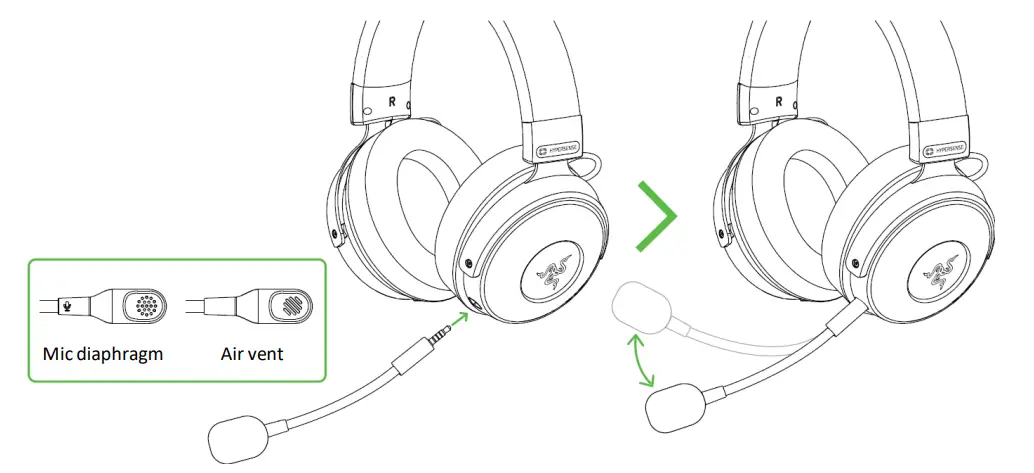
Press the mic mute button to mute or unmute the microphone.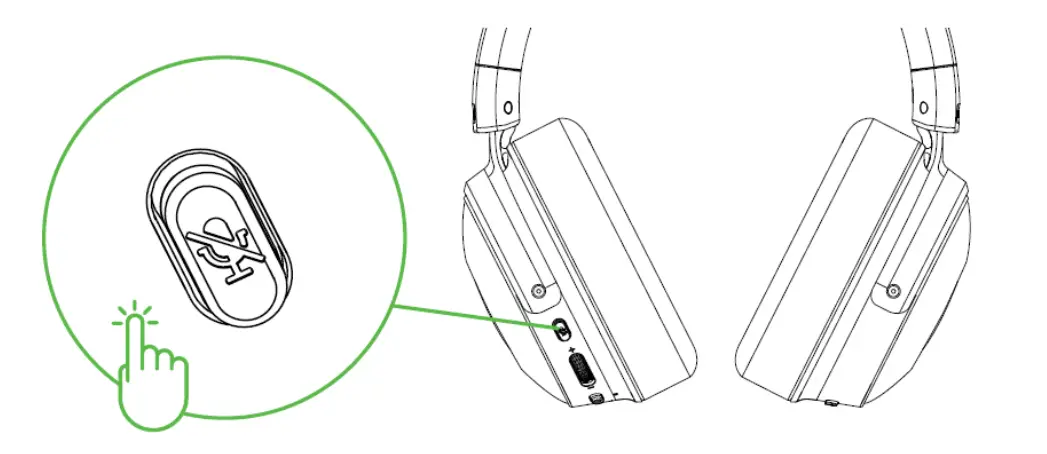
COMFORT
It’s recommended to gently stretch the headset before placing it over your head to minimize headband stress however, don’t stretch the headset beyond its limits.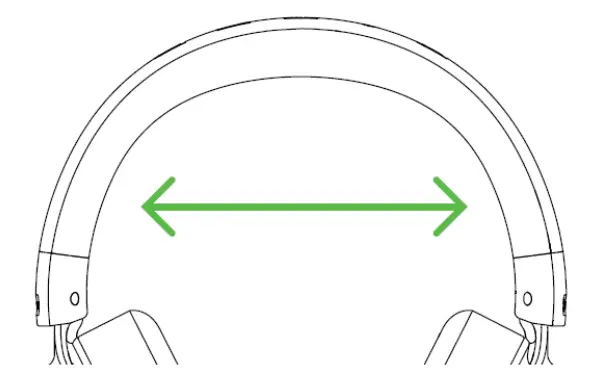
CONFIGURING YOUR RAZER KRAKEN V3 PRO
Internet connection is required for installation, updates and cloud-based features. Registering for a Razer ID account is recommended, but optional. All listed features are subject to change based on the current software version, connected device(s), and supported apps and software.
SYNAPSE TAB
The Synapse tab is your default tab when you first launch Razer Synapse. This tab allows you to navigate the Dashboard subtab.
FOR G AMERS . BY G AMERS .™ 16
Dashboard
The Dashboard subtab is an overview of your Razer Synapse where you can access all your Razer devices, modules, and online services.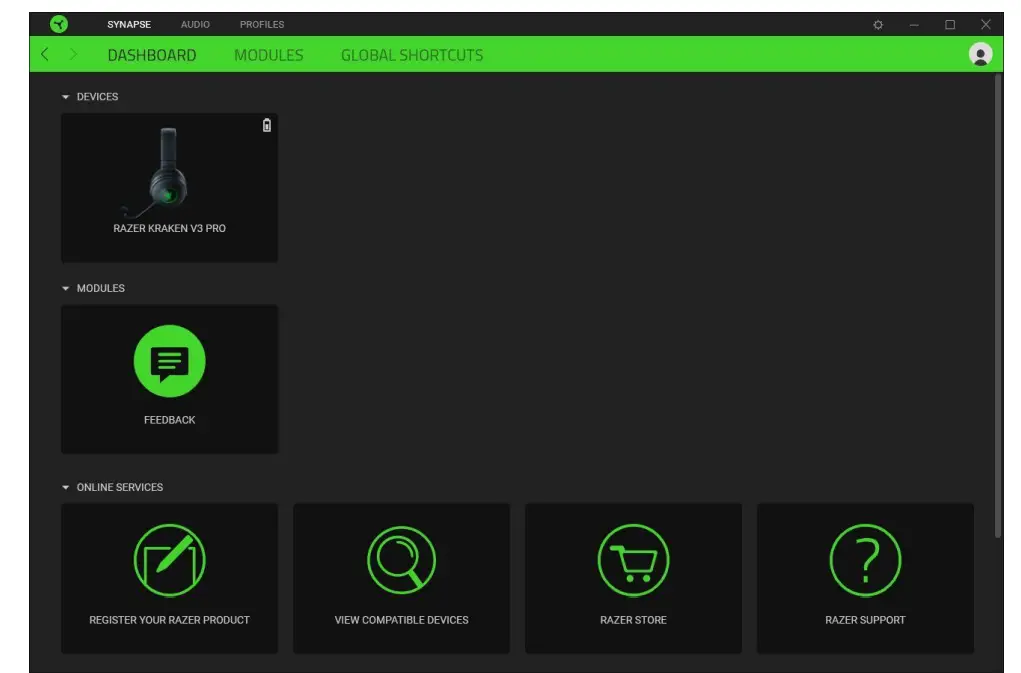
Modules
The Modules subtab displays all installed and available modules for installation.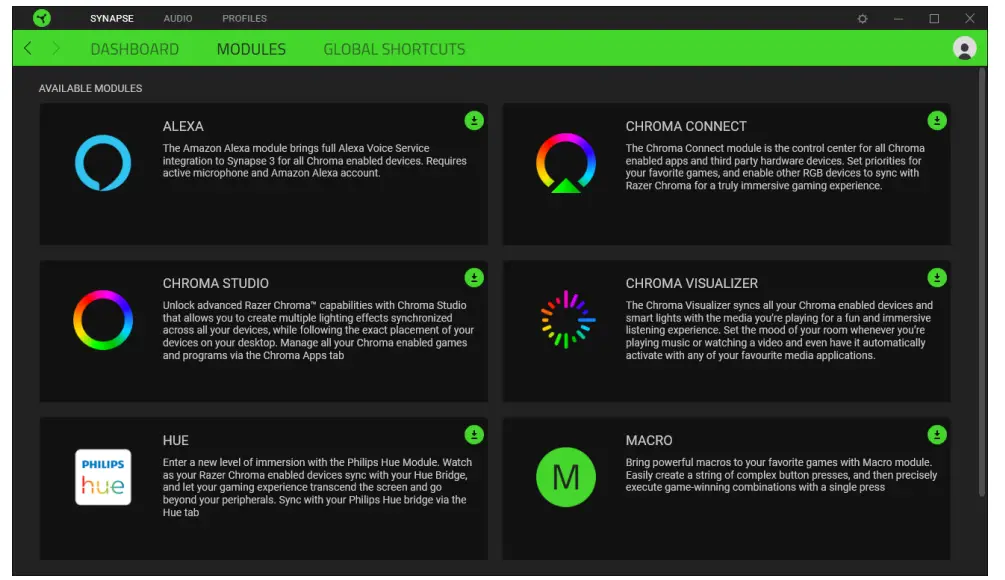
Global Shortcuts
Bind operations or Razer Synapse functions to custom key combinations from any Razer Synapse-enabled device inputs which apply across all device profiles. Learn more about Profiles
Only Razer Synapse-enabled device inputs will be recognized.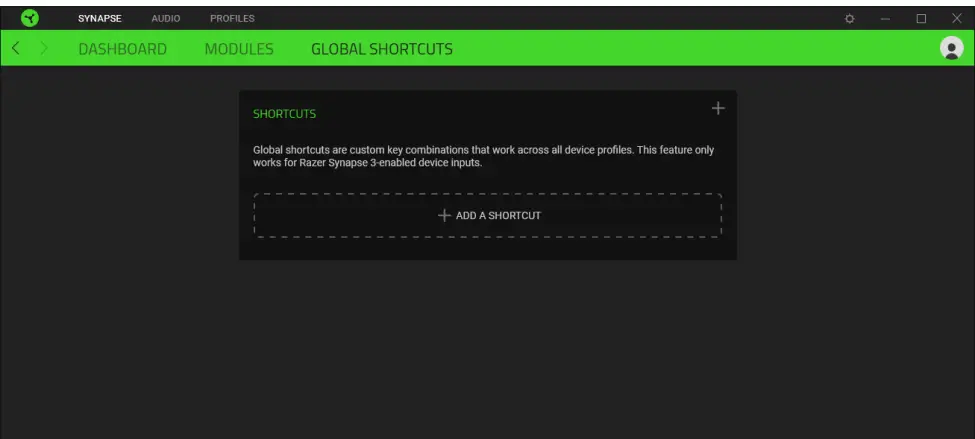
Make sure to select THX Spatial Audio as your default playback or output device from the Sound icon on the system tray.
The Audio tab is the main tab for your Razer Kraken V3 Pro. From here, you can customize your device’s settings to unleash its full potential. Changes made under this tab are automatically saved to your system and cloud storage.
Sound
The Sound subtab is for adjusting the overall system volume or individual volume of all active applications, changing the default fallback device, and accessing Windows Sound properties.
Profile
The profile is a data storage for keeping all your Razer peripheral settings. By default, the profile name is based on your system’s name. To add, rename, duplicate, or delete a profile, simply press the Miscellaneous button ( ).
Volume
Adjust the audio volume of the device. You may also access the Windows volume mixer of the current playback device where you can proportionally adjust the overall volume of the system or individually adjust the volume of each active application.
Haptic Intensity
Change the intensity of the vibrations produced by the headset.
Sound Properties
Set a default output device that the THX Spatial Audio will use when the Razer Kraken V3 Pro is not connected. You may also click on the Windows Sound Properties link to manage the sound settings of your system such as modifying the playback and recording device settings, sound scheme and default communications activity.
Mixer
The Mixer subtab allows you to enable or disable the THX Spatial Audio and its settings, as well as calibrate the audio positioning of all virtual speakers of the active spatial audio mode.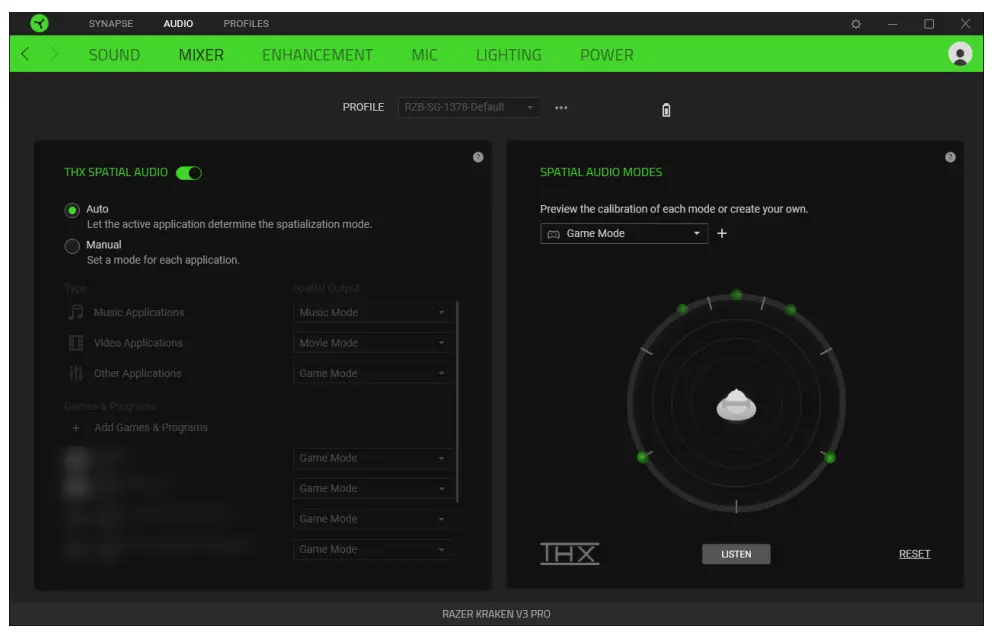
THX Spatial Audio
THX Spatial Audio technology is an advanced positional audio solution that delivers a heightened, immersive experience as you game.
Toggle this setting to enable or disable THX Spatial Audio and its settings. By default, this is set to Auto where all applications will use the recommended output setting. Using Manual will allow you to assign preferred spatial audio modes to specific application types and/or applications.
Spatial Audio Modes
Preview the calibration of each available spatial audio mode preset using the Listen button. Changing the position of any virtual speaker (in any preset mode) will automatically create a Custom Mode. Alternatively, you may also click on the Add button ( + ) to create a new Custom Mode.
On any Custom Mode, click on the miscellaneous button ( ) to rename, duplicate, or delete the selected custom mode. To revert the current mode to its original settings, click on the Reset button.
Enhancement
The Enhancement subtab is for customizing the incoming audio settings and frequency response of your audio system.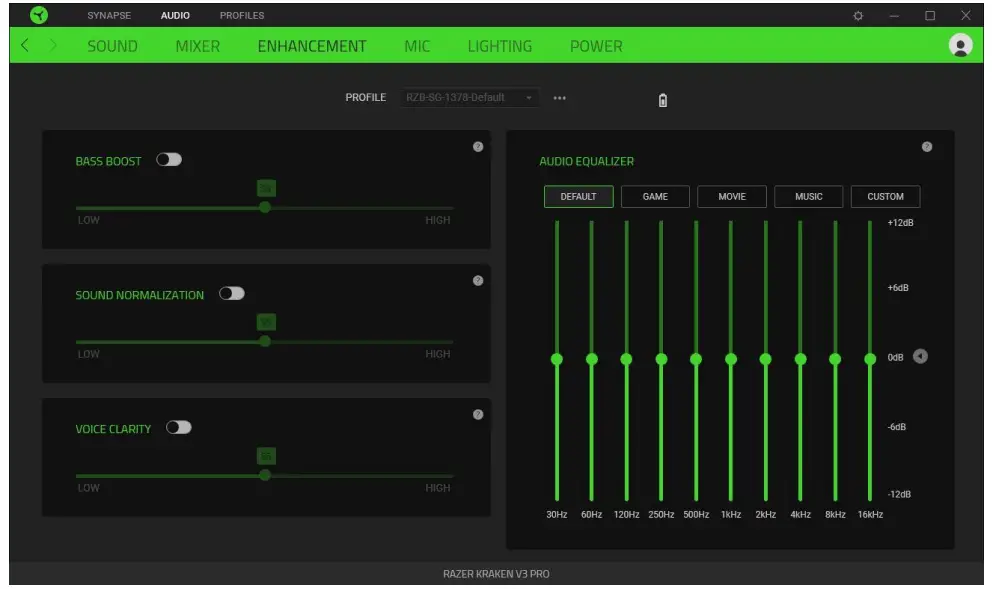
Bass Boost
Enhances the low frequency response to improve the bass output of your headset
Sound Normalization
Reduces the loudest audio received to avoid sudden and unpleasant increase in volume from effects such as shouting or explosions.
Voice Clarity
Enhances the quality of incoming voice conversations by filtering the sound to improve its clarity and volume.
Audio Equalizer
Select any of the available equalizer presets created for the best audio experience designed for balance, gaming immersion, movie viewing, or enjoying
Mic
The Mic subtab enables you to change the settings for all outgoing mic audio.
Microphone
Control the mic volume and amount of mic input for a clearer mic audio.
Mic Volume
Adjust the microphone input or mute the mic.
Voice Gate
Control the amount of mic input so that it cuts out background noises and isolates your voice. Any sound that registers below the threshold will be muted.
Enhancements
Improve the quality of the microphone by enabling any of the listed features below:
- Volume Normalization. Reduces the variation of loudness.
- Vocal Clarity. Emphasizes the voice frequency.
- Ambient Noise Reduction. Decreases environmental noise.
Mic Equalizer
Select any of the available mic equalizer presets that best fits your mic needs. Manually adjusting any equalizer preset will automatically set it as a Custom preset.
Mic Monitoring (Sidetone)
Enable this setting to monitor the microphone’s raw audio input through the headset with an additional option to increase or decrease the audio monitoring volume.
Lighting
The Lighting subtab enables you to modify your Razer device’s light settings.
Brightness
You can turn off your Razer device’s lighting by toggling the Brightness option or increasing/decrease the luminance using the slider.
Switch Off Lighting
This is a power-saving tool that allows you to disable your device’s lighting in response to your system’s display turning off.
Quick Effects
A number of quick effects can be selected and applied to your device’s lighting, as listed here:
If you have other supported Razer Chroma-enabled devices, you can synchronize their quick effects with your Razer device by clicking the Chroma Sync button ( ).
Only devices that support the selected lighting effect will synchronize.
Advanced Effects
The Advanced Effects option allows you to choose a Chroma Effect you want to use on your Razer Chroma-enabled peripheral. To start making your own Chroma Effect, simply press the Chroma Studio button ( ).
Power
The Power subtab allows you to manage your device’s energy consumption by setting it to power off when it has been idle for a certain amount of time.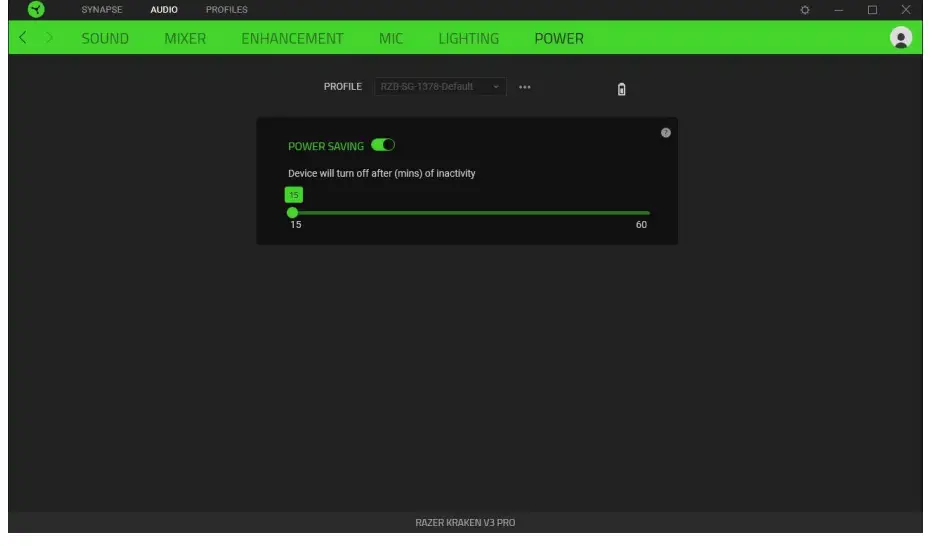
PROFILES TAB
The Profiles tab is a convenient way of managing all your profiles and linking them to your games and applications.
Devices
View which games are linked to each device’s profiles or which Chroma Effect is linked to specific games using the Devices subtab.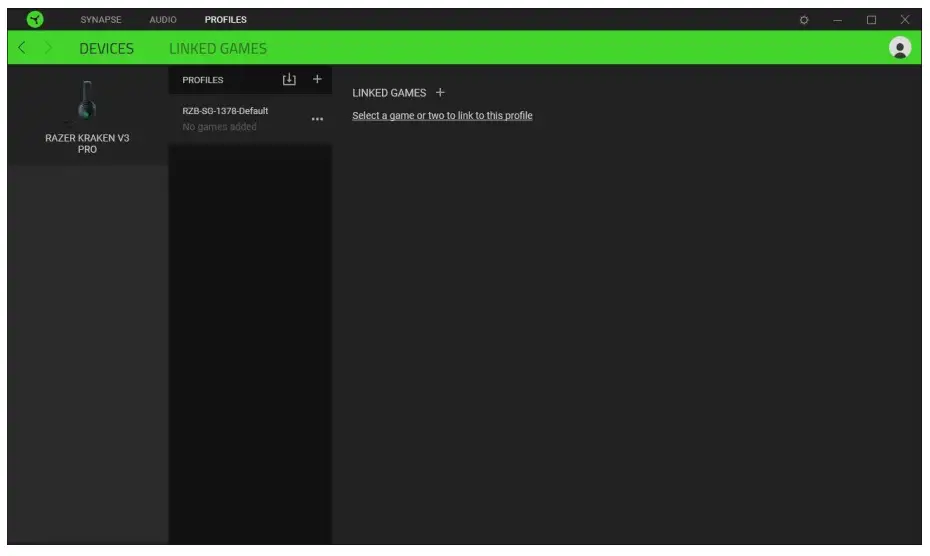
You can import Profiles from your computer or from the cloud through the import button ( ) or create new profiles within the selected device using the add button ( ). To rename, duplicate, export, or delete a profile, simply press the Miscellaneous button ( ). Each profile can be set to automatically activate when you run an application using the Linked Games option.
Linked Games
The Linked Games subtab gives you the flexibility to add games, view devices that are linked to games, or search for added games. You can also sort games based on alphabetical order, last played, or most played. Added games will still be listed here even if it is not linked to a Razer device.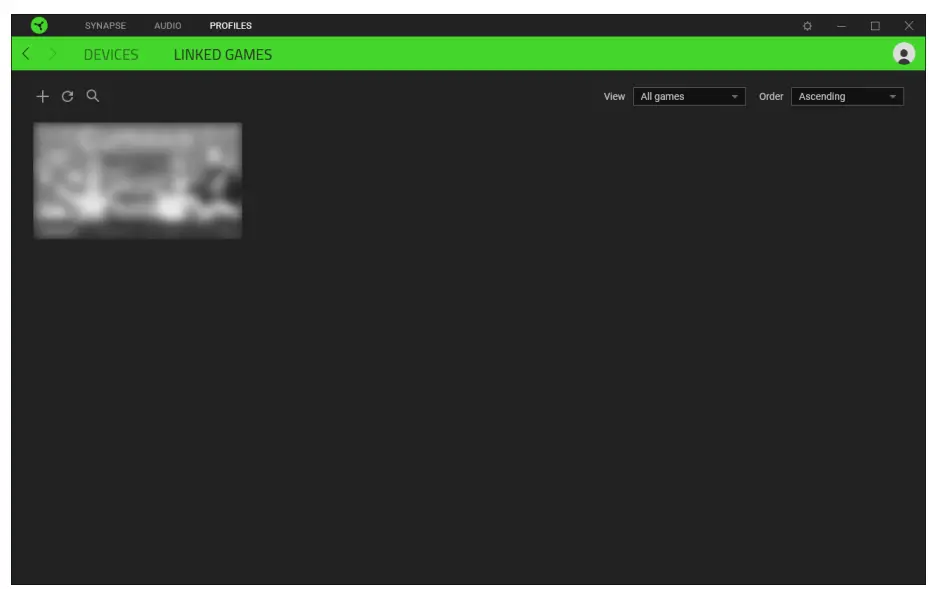
To link games to connected Razer devices or Chroma Effects, simply click on any game from the list, and then click Select a device and its profile to launch automatically during gameplay to select the Razer device or Chroma Effect it will link with. Once linked, you may click on the Miscellaneous button ( ) of the corresponding Chroma Effect or device to select a specific Chroma Effect or profile.
SETTINGS WINDOW
The Settings window, accessible by clicking the ( ) button on Razer Synapse, enables you to configure the startup behavior and display language of Razer Synapse, view the master guides of each connected Razer device, or perform factory reset on any connected Razer device.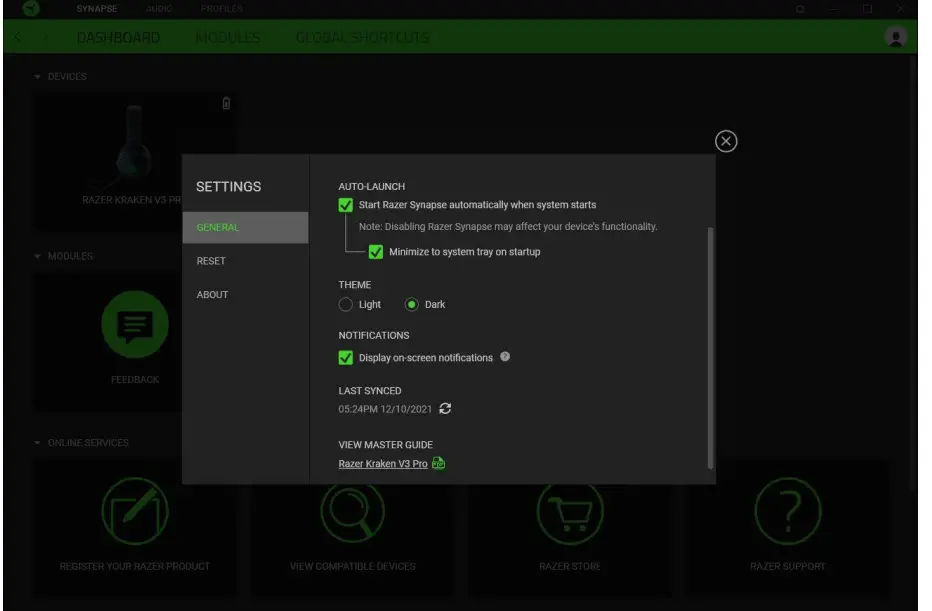
General tab
The default tab of the Settings window. The General tab enables you to change the software’s display language, start-up behavior, display theme, and on-screen notifications display. You may also manually sync your profiles to the cloud ( ) or view the master guide of all connected Razer devices and installed modules.
Reset tab
The Reset tab allows you to perform a factory reset on all connected Razer devices with on-board memory and/or reset Razer Synapse tutorials to acquaint yourself again with Razer Synapse’s new features on its next launch.
By resetting a Razer device, all profiles stored on the selected device’s on-board memory will be erased.
About tab
The About tab displays brief software information, copyright statement and provides relevant links for its terms of use. You may also use this tab to check for software updates, or as a quick access to Razer’s social communities.
SAFETY AND MAINTENANCE
SAFETY GUIDELINES
In order to achieve maximum safety while using your Razer Kraken V3 Pro, we suggest that you adopt the following guidelines:
Should you have trouble operating the device properly and troubleshooting does not work, unplug the device and contact the Razer hotline or go to support.razer.com for assistance.
Do not use or wear the headset while charging. Some features will be disabled while the headset is charging, such as earcup lighting and the Razer HyperSense button.
Do not take apart the device and do not attempt to operate it under abnormal current loads. Doing so will void your warranty.
Keep the device away from liquid, humidity or moisture. Operate the device only within the specific temperature range of 0°C (32°F) to 40°C (104°F). Should the temperature exceed this range, unplug the device in order to let the temperature stabilize to an optimal level.
The device isolates external ambient sounds even at low volumes, resulting in lowered awareness of your external surroundings. Please remove the device when engaging in any activities that requires active awareness of your surroundings.
Listening to excessively loud volumes over extended periods of time can damage your hearing. Furthermore, legislation of certain countries permits a maximum sound level of 86db to affect your hearing for 8 hours a day. We therefore recommend that you reduce the volume to a comfortable level when listening for prolonged periods of time. Please, take good care of your hearing.
MAINTENANCE AND USE
The Razer Kraken V3 Pro requires minimum maintenance to keep it in optimum condition. Once a month we recommend you clean it using a soft cloth or cotton swab to prevent dirt buildup. Do not use soap or harsh cleaning agents.
BATTERY WARNING
The Razer Kraken V3 Pro contains a Li-ion rechargeable battery. In general, the life expectancy of such batteries is dependent upon usage. If you suspect that the Li-ion rechargeable battery inside the Razer Kraken V3 Pro may be drained (has a low charge), try charging it.
Caution: Do not open, mutilate, or expose to conducting materials (metal), moisture, liquid, fire, or heat. Doing so may cause batteries to leak or explode, resulting in personal injury. Battery life varies with usage
LEGALESE
COPYRIGHT AND INTELLECTUAL PROPERTY INFORMATION
©2021 Razer Inc. All rights reserved. Razer, the triple-headed snake logo, Razer logo, “For Gamers. By Gamers.” and “Razer Chroma” are trademarks or registered trademarks of Razer Inc. and/or affiliated companies in the United States and other countries. Actual product may differ from pictures. All other trademarks are the property of their respective owners. Warranty not valid outside of product’s intended region.
Windows and the Windows logo are trademarks or registered trademarks of the Microsoft group of companies.
Razer Inc. (“Razer”) may have copyright, trademarks, trade secrets, patents, patent applications, or other intellectual property rights (whether registered or unregistered) concerning the product in this guide. Furnishing of this guide does not give you a license to any such copyright, trademark, patent or another intellectual property right. The Razer Kraken V3 Pro (the “Product”) may differ from pictures whether on packaging or otherwise. Razer assumes no responsibility for such differences or for any errors that may appear. Information contained herein is subject to change without notice.
LIMITED PRODUCT WARRANTY
For the latest and current terms of the Limited Product Warranty, please visit razer.com/warranty.
LIMITATION OF LIABILITY
Razer shall in no event be liable for any lost profits, loss of information or data, special, incidental, indirect, punitive or consequential or incidental damages, arising in any way out of distribution of, sale of, resale of, use of, or inability to use the Product. In no event shall Razer’s liability exceed the retail purchase price of the Product.
GENERAL
These terms shall be governed by and construed under the laws of the jurisdiction in which the Product was purchased. If any term herein is held to be invalid or unenforceable, then such term (in so far as it is invalid or unenforceable) shall be given no effect and deemed to be excluded without invalidating any of the remaining terms. Razer reserves the right to amend any term at any time without notice.
FAQS
It is single volume wheel, no wheel for chat/game balance.
Yes. Compatibility for the Razer Kraken V3 HyperSense headset is listed as PC, Playstation, and Nintendo Switch (docked mode) on the Razer website.
Yes
They do work wired. There’s not power,if you plug them in. They sound alright. But I don’t know how to get them to work wired for pc. PlayStation and my phone work. I must be missing something forpc settongs.. it’d be better to use the 2019 krakens for wired applications.
it’s 5.9 feet long
It dos not have a charger. Just a Usb-c cable. You can use a phone charger. they even have fast charging.
It does, but I have heard better things about THX vs Atmos when using these headphones though. The THX Spatial Audio that it comes with lets you calibrate any virtual speaker, and Dolby Atmos does not.Give THX a try too.
Yes, compatibility for the Razer Kraken V3 HyperSense headset is listed as PC, Playstation, and Nintendo Switch on the Razer website.
Yes, but it will need a USB to audio jack adapter, my son uses his just fine with our oculus
Compatibility for the Razer Kraken V3 HyperSense headset is listed as PC, Playstation, and Nintendo Switch on the Razer website.
If your xbox uses a USB connection for the headphone/mic jack then yes.
Compatibility for the Razer Kraken V3 HyperSense headset is listed as PC, Playstation, and Nintendo Switch on the Razer website.


