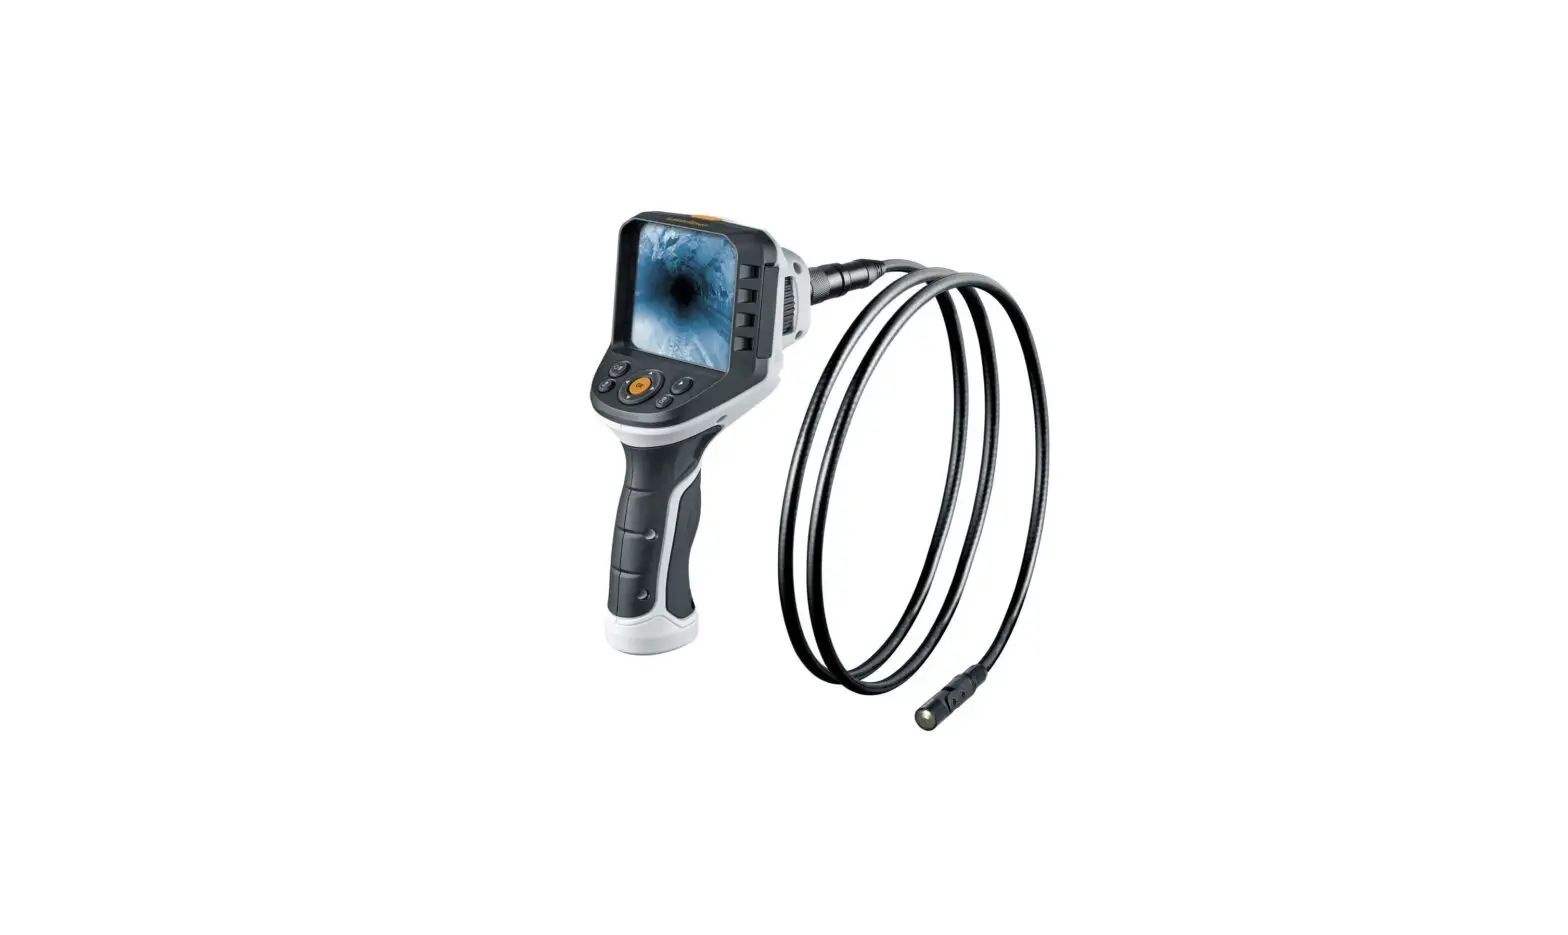
Laserliner VideoFlex G4 Professional Video Inspection System

Completely read through the operating instructions, the „Warranty and Additional Information“ booklet as well as the latest information under the internet link at the end of these instructions. Follow the instructions they contain. This document must be kept in a safe place and passed on together with the device.
Function / Application
This professional video inspection system VideoFlex G4 combined with an exchangeable camera unit is suitable for easy visual inspection of hard-to-reach places in pipes, cavities, shafts, masonry and motor vehicles. Images and videos can be stored on the SDHC memory card for analysis and documentation.
General safety instructions
- The device must only be used in accordance with its intended purpose and within the scope of the specifications.
- The measuring tools and accessories are not toys. Keep out of reach of children.
- The structure of the device must not be modified in any way.
- Do not expose the device to mechanical stress, extreme temperatures, moisture or significant vibration.
- The device must no longer be used if one or more of its functions fail or the battery charge is weak.
- When using the device outdoors, make sure that the weather conditions are appropriate and/or that suitable protection measures are taken.
- The LCD unit must not be immersed in water. The base unit must not come in contact with liquids.
- It is absolutely vital to ensure that the VideoFlex G4 does not come into contact with chemicals, voltage, moving or hot objects. This can damage the device and put its user at risk of serious injury.
- The VideoFlex G4 must not be used for medical examinations / examining people.
- Please ensure compliance with the safety regulations set out by local and national authorities with regard to the correct and proper use of the device.
- The unit is not suitable for taking measurements close to dangerous voltages. Therefore always make sure that conductive parts are at zero potential when carrying out measurements in the vicinity of electrical systems. Safe isolation from the power supply and precautions to prevent systems from being switched on again must be ensured by implementing suitable measures.
Safety instructions
Dealing with electromagnetic radiation
- The measuring device complies with electromagnetic compatibility regulations and limit values in accordance with EMC-Directive 2014/30/EU.
- Local operating restrictions – for example, in hospitals, aircraft, petrol stations or in the vicinity of people with pacemakers – may apply. Electronic devices can potentially cause hazards or interference or be subject to hazards or interference.
Information on maintenance and care
Clean all components with a damp cloth and do not use cleaning agents, scouring agents and solvents. Remove the battery(ies) before storing for longer periods. Store the device in a clean and dry place.
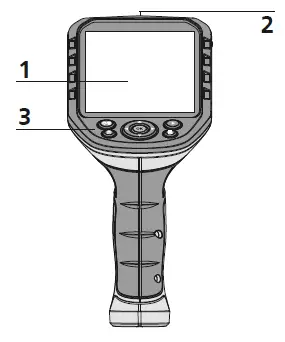
Overview
- LCD
- ON/OFF
- Hotkeys
- Type C USB interface
- Video output
- Micro SD card slot
- Camera unit with rotary control
- Battery compartment
- Camera unit connection
- a Rotation 180° / Mirroring / Delete recording
- b Menu control / LED lighting –
- c Menu control / Zoom in
- d Menu control / LED lighting +
- e Media Gallery
- f Settings mode / Cancel
- g Menu control / Zoom out
- h Trigger / Record / Confirm
- I Image / video selection
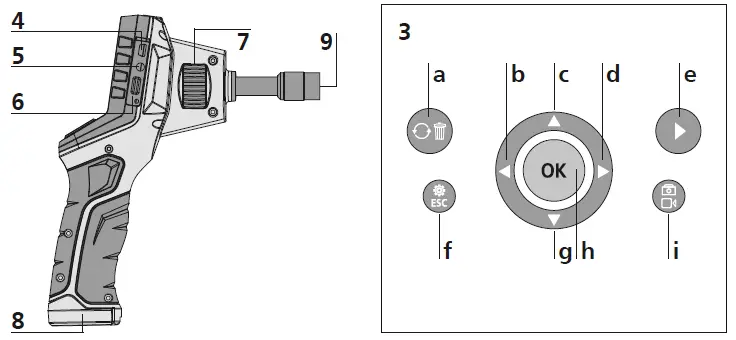
Image record mode/Video record mode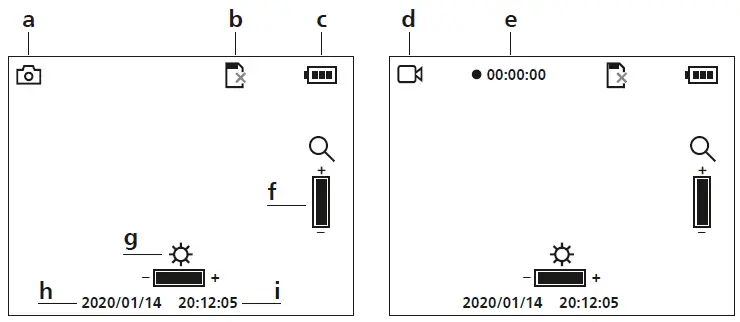
- a Image recording
- b Insert SD card
- c Battery status
- d Video recording
- e REC: Recording
- f Zoom
- g LED lighting
- h Current date
- I Current time
Image playback mode/Video playback mode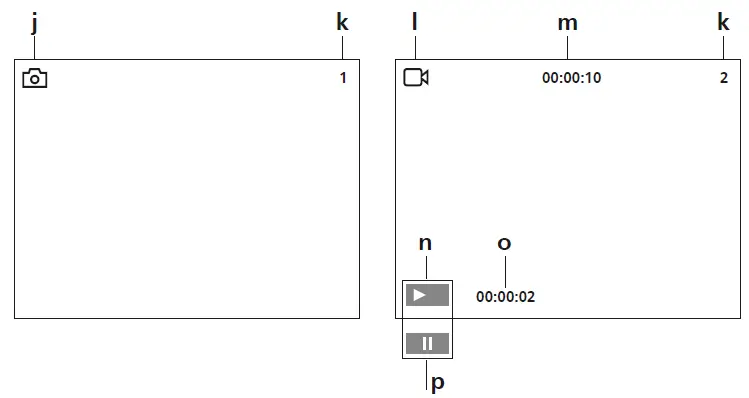
- j Image recording
- k Number of image
- l Video recording
- m Recording time
- n Play
- o Play duration
- p Pause
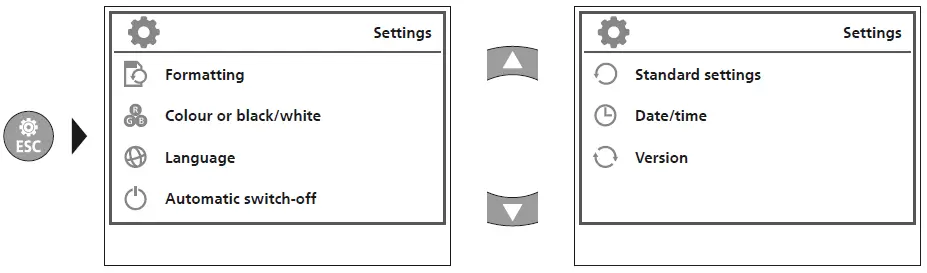
Settings mode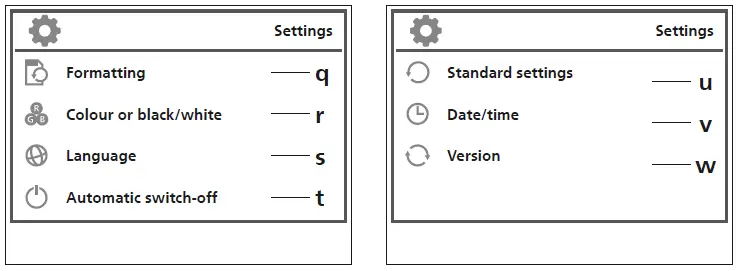
- q Format data medium
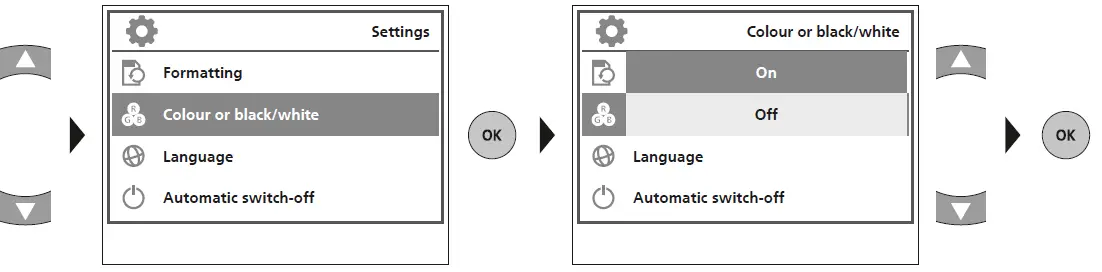
- r Select colour mode
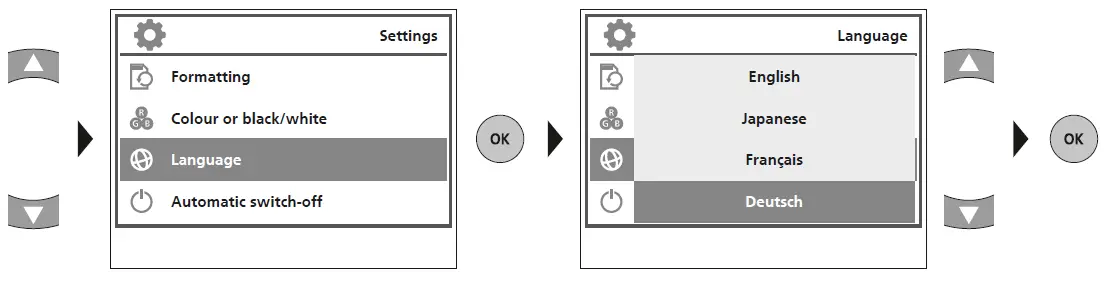
- s Select language (EN, JP, FR, DE, IT, PT, NL, ES)
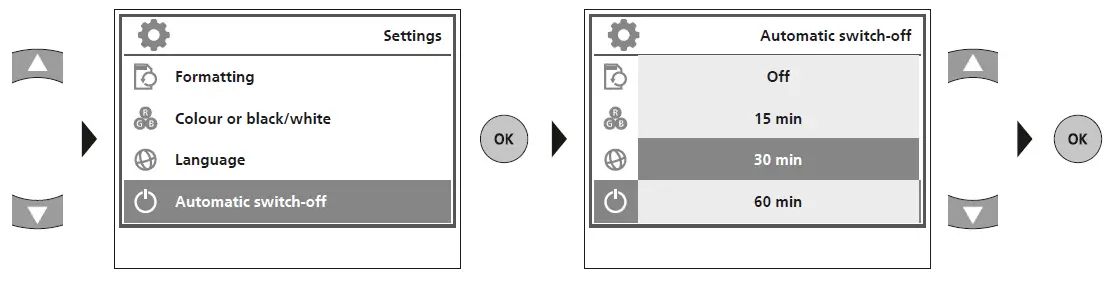
- t Auto shutdown
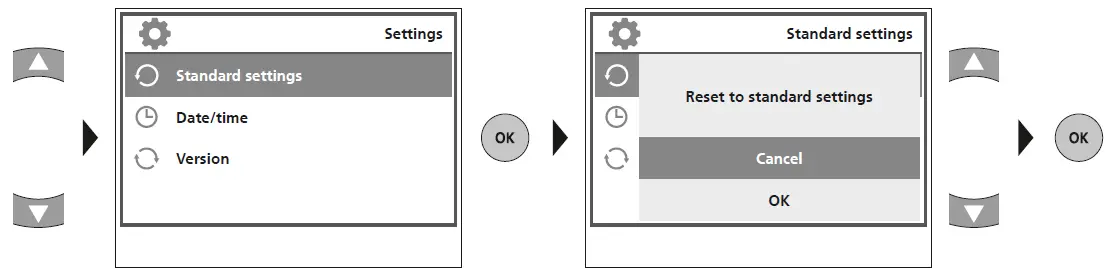
- u Factory setting
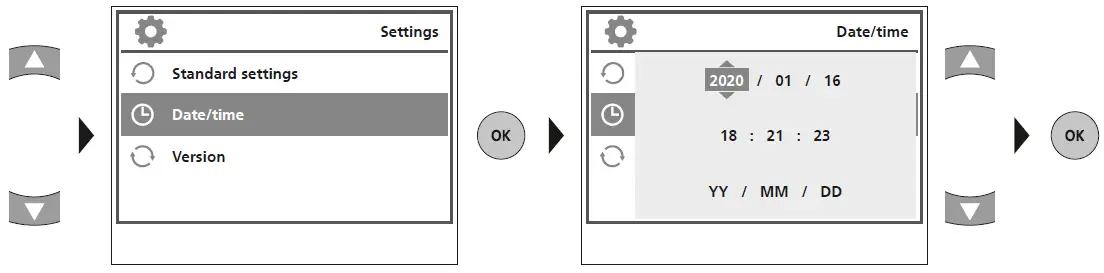
- v Set date/time
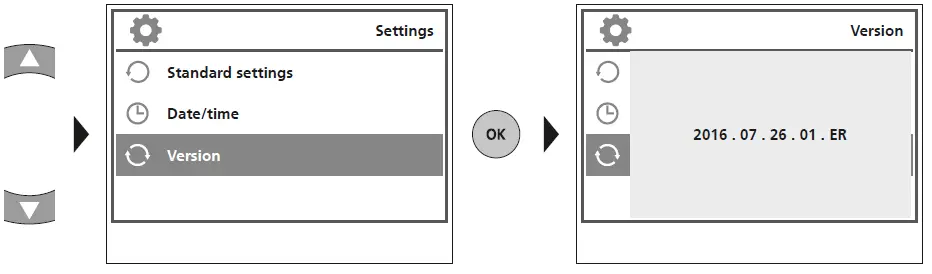
- w Firmware version
First use
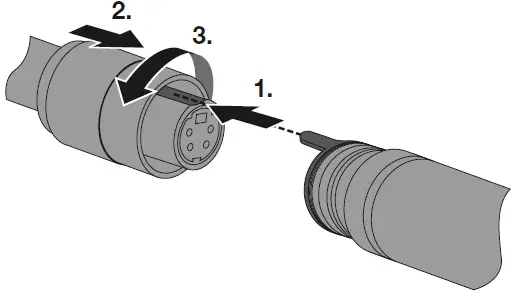
- Connection for flex cable

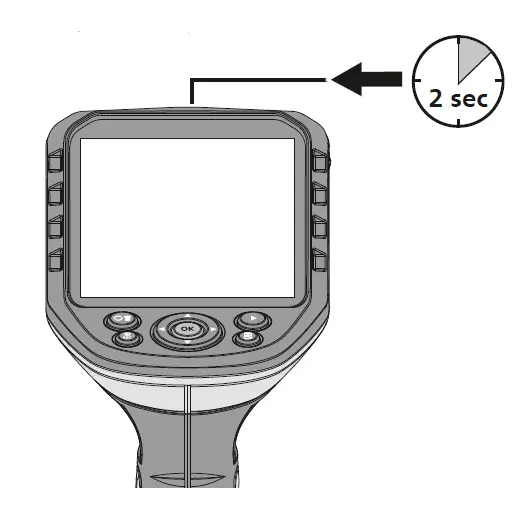
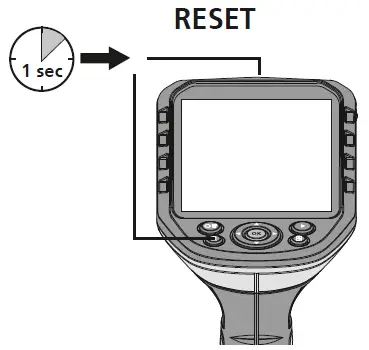
- ON/OFF/RESET


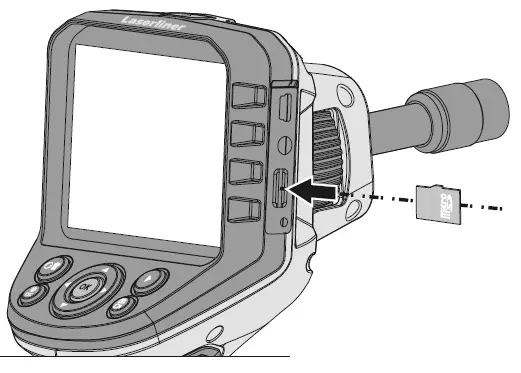
- Inserting micro-SD card
To insert a micro-SD card, first, open the rubber cover and then insert the memory card as illustrated. You cannot record anything without a storage medium.
The device must be switched off before removing the micro-SD.
- Settings mode
 To return to recording mode, press the ESC button several times.
- Format data medium

All data on the SD card will be deleted. This procedure cannot be undone. There is no further prompt to confirm the deletion. - Select color mode

- Select language (EN, JP, FR, DE, IT, PT, NL, ES)

- Auto shutdown

- Factory setting

- Set date/time

- Firmware version

- Format data medium
 To return to recording mode, press the ESC button several times.
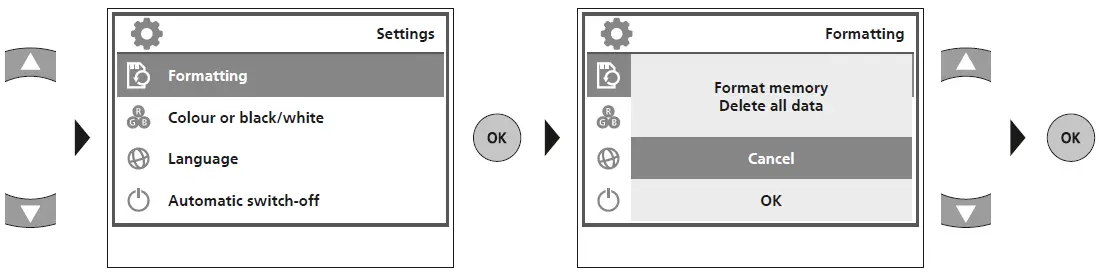
Record mode
Still images/Video recordings
Line up the camera head on the flex cable and move it to the required position. If lighting conditions are poor, switch on the LED lighting. Zoom in on distant or small objects. The manual image rotation function enables the image to be rotated by 180° on the monitor. Briefly press the OK button to take a still image or make a video recording and save it to the SD card. Press the button again to stop recording.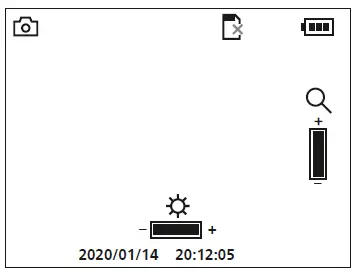
Image/video recording selection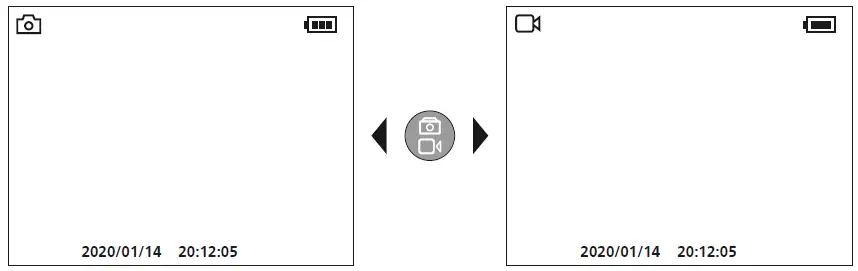
LED lighting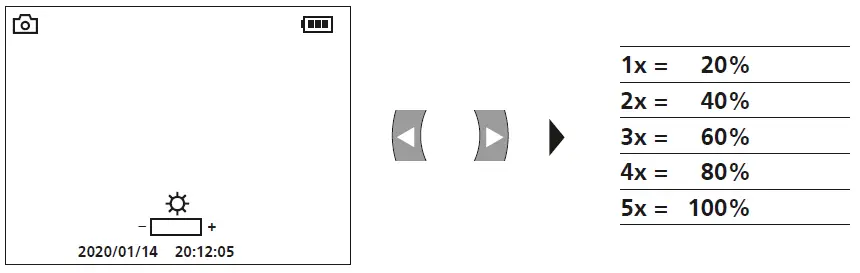
Zoom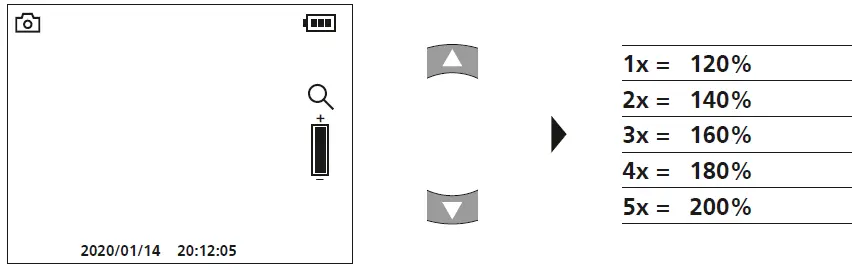
Image rotation / Mirroring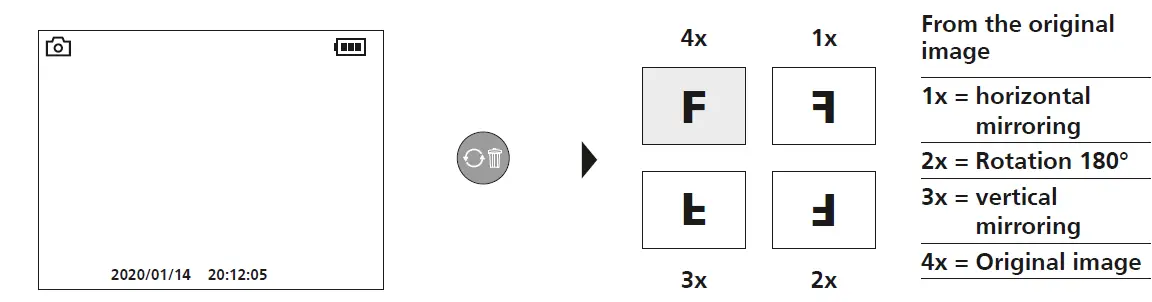
Record still image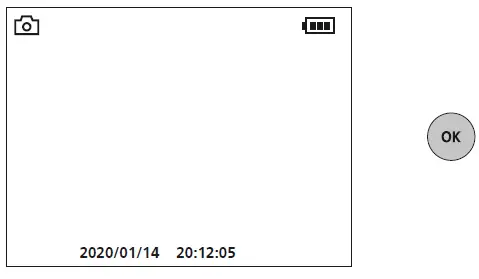
Start/stop video recording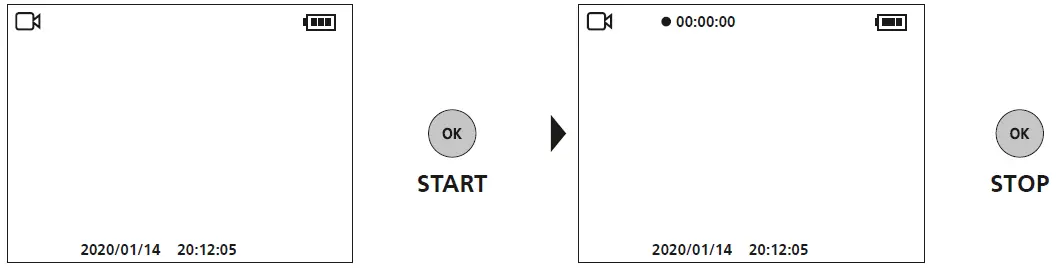
Manual image alignment
with the fixed camera unit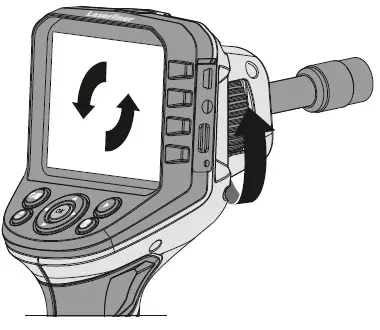
with the flexible camera unit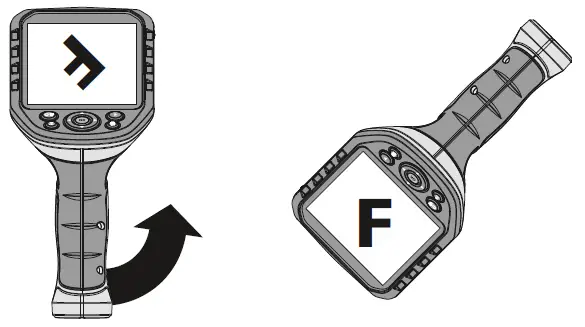
Playback mode
Playback of still images/video recordings
Press the „e“ button to call up the media gallery. Confirm with „OK“ to show the selected image or video in full-screen mode. Use the arrow keys to navigate in the media gallery and full-screen mode. Press the „f“ button to exit playback mode.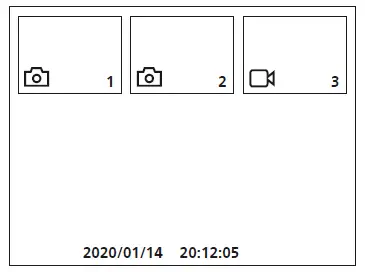
Navigation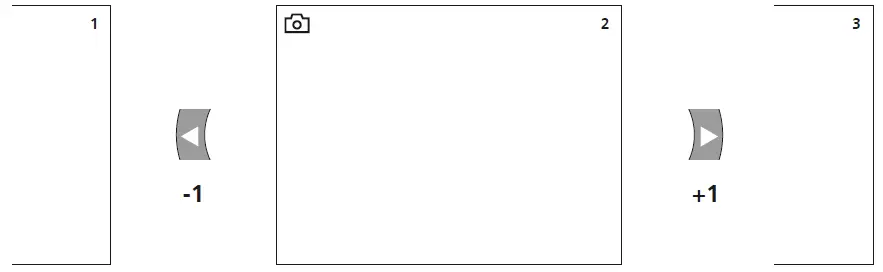
Delete recording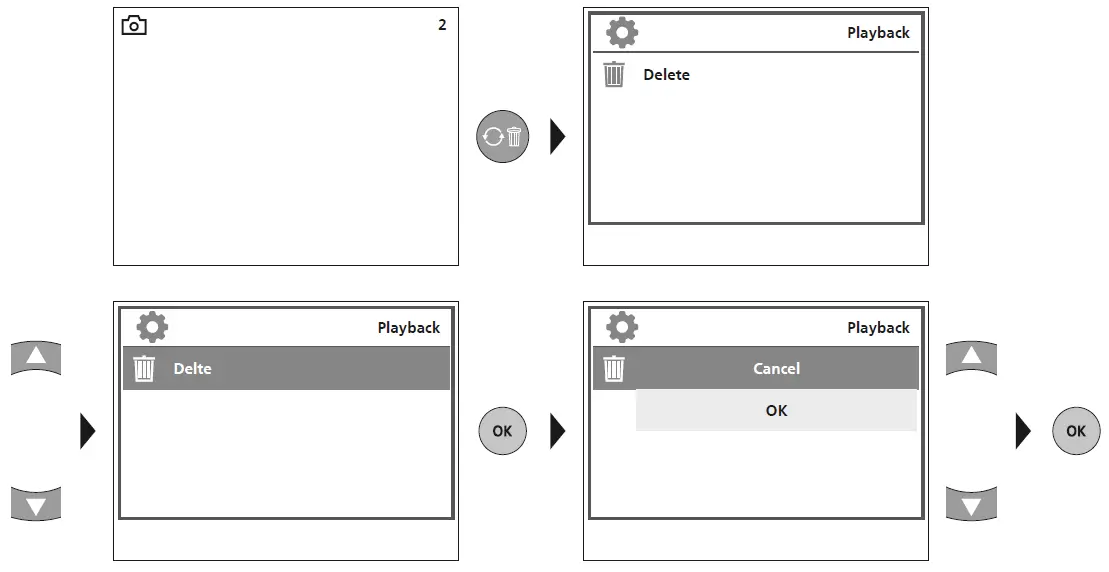
- Recordings can only be deleted in full-screen mode. Deleting cannot be undone.
- All files and folders can be deleted by reformatting the data medium. Refer to „4 a. Format Data Medium“.
Playback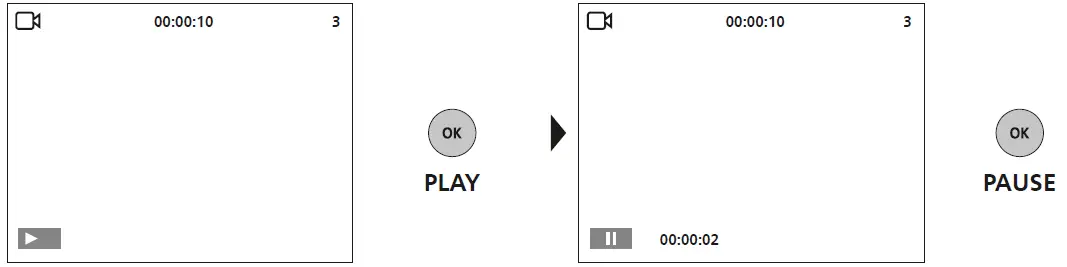
Press the „ESC“ button to stop playback.
USB data transfer
Data saved on the SD card can be transferred to PC either with a suitable card reader or directly via the USB port. Please refer to the manual supplied with your card reader for information about connecting your card adapter or card reader to a PC.
Connect power supply/battery charger
To charge the device, plug the supplied power supply/charger into the type C USB „4“ interface and connect it to a suitable power source.
Technical Data
| Technical Data | Technical | revisions | reserved. 21W09 | |
| Screen type | 3.5” TFT colour display | |||
| Display resolution | 320 x 240 pixels | |||
| Image/Video resolution | 640 x 480 pixels | |||
| Image format/Video format | JPEG / AVI | |||
| Memory | Micro-SD memory card up to 16 GB | |||
| Connections | USB type C, RCA video output | |||
| Power supply | Li-ion battery pack 3.7V / 2.8Ah | |||
| Operating time | approx. 5 hours | |||
| Operating conditions | 0°C … 45°C, max. humidity 20 … 85% rH, no condensation, max. working altitude 4000 m above sea level | |||
| Storage conditions | -10°C … 60°C, max. humidity 80% rH | |||
| Dimensions (W x H x D) | 181 x 207 x 96 mm | |||
| Weight | 342 g (incl. battery pack) | |||
EU directives and disposal
This device complies with all necessary standards for the free movement of goods within the EU. This product is an electric device and must be collected separately for disposal according to the European Directive on waste electrical and electronic equipment. Further safety and supplementary notices at: http://laserliner.com/info?an=AGG.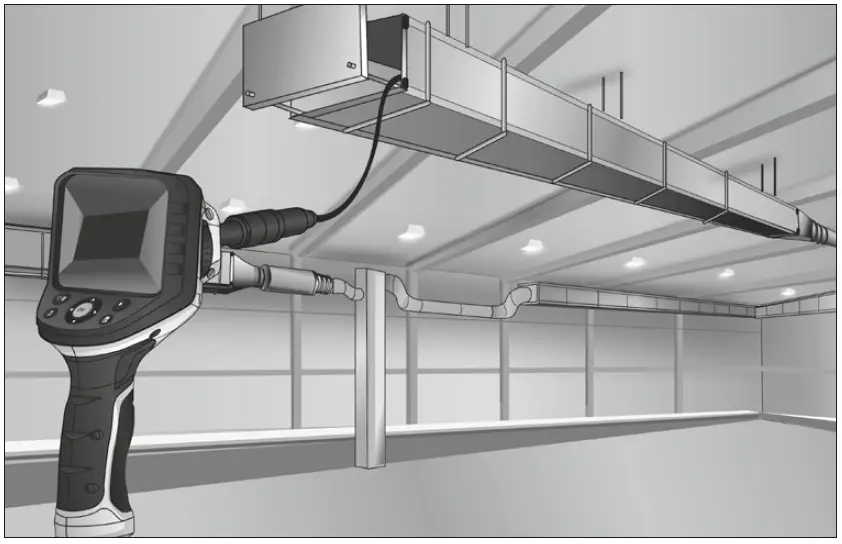
SERVICE
Umarex GmbH & Co. KG
Laserliner
- Möhnestraße 149, 59755 Arnsberg, Germany
- Tel.: +49 2932 638-300,
- Fax: +49 2932 638-333
- [email protected].
Umarex GmbH & Co. KG
- Donnerfeld 2 59757 Arnsberg, Germany
- Tel.: +49 2932 638-300,
- Fax: -333
- www.laserliner.com.


