![]()
KNA-CPO2-BK-01
Camera Porch Light LL)
INSTRUCTION MANUAL
PACKAGE CONTENTS
| PART | DESCRIPTION | QUANTITY |
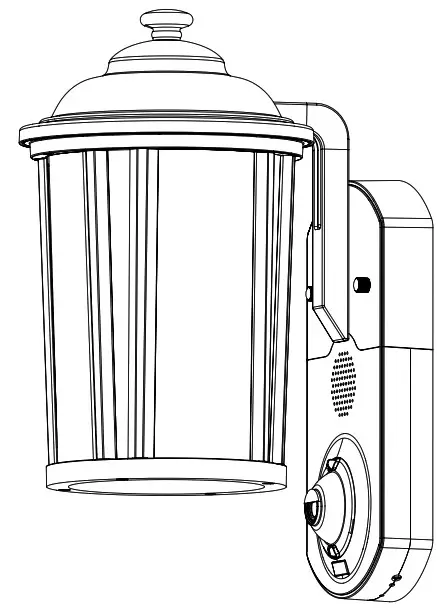
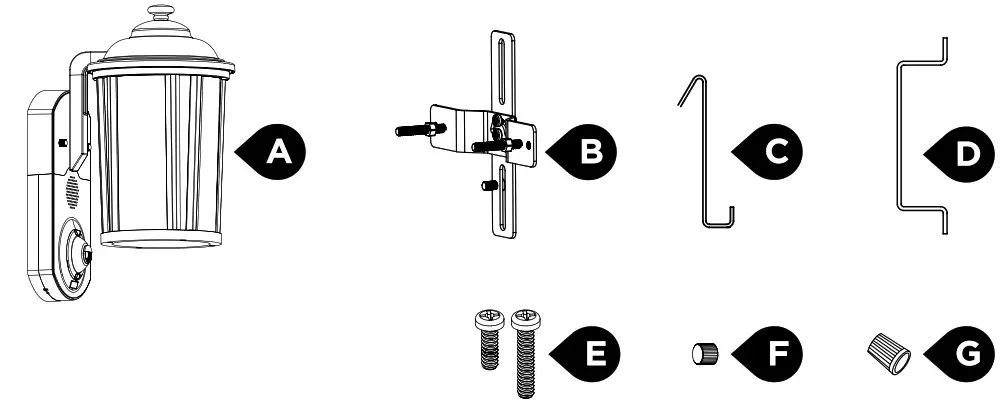
| A | Fixture | 1 |
| B | Mounting bracket with (2) long screws and (2) nuts | 1 |
| C | Fixture holding hook | 1 |
| D | Fixture screws length indicator | 1 |
| E | (2) long and short screws for junction box | 4 |
| F | Decorative fixture nuts | 2 |
| G | Wire nuts | 3 |
SAFETY INFORMATION
WARNING
- Risk of fire or electric shock. 120V light installation requires knowledge of luminaires electrical systems. If not qualified, do not attempt to install. Contact a qualified electrician.
- Disconnect power at fuse or circuit breaker before installing or servicing.
- No user-serviceable parts inside. To avoid electrical shock, do not disassemble product.
- To prevent wiring damage or abrasion, do not expose wiring to edges of sheet metal or other sharp objects.
- Use only on 120V AC, 60 Hz circuits, and with maximum 6O0W light bulb.
Any changes or modifications not expressly approved by the party responsible for compliance could void the user’s authority to operate the equipment. Please read and understand this entire manual before attempting to assemble, install, or operate this light fixture.
Your government may regulate the use of security cameras and other recording devices. It is the purchaser’s sole responsibility to ensure compliance with all applicable laws and to provide any legally required notices. Check local laws regulating the use of any recording devices and cameras prior to installation.
NOTE
This equipment has been tested and found to comply with the limits for a Class B digital device, pursuant to Part 15 of the FCC Rules. These limits are designed to provide reasonable protection against harmful interference in a residential installation. This equipment generates, uses, and can radiate radio frequency energy and, if not installed and used in accordance with the instructions, may cause harmful interference to radio communications. However, there is no guarantee that interference will not occur in a particular installation. If this equipment does cause harmful interference to radio or television reception, which can be determined by turning the equipment off and on, the user is encouraged to try to correct the interference by one or more of the following measures: (1) Reorient or relocate the receiving antenna. (2) Increase the separation between the equipment and receiver. (3) Connect the equipment into an outlet on a circuit different from that to which the receiver is connected. (4) Consult the dealer or an experienced technician for help.
PREPARATION
Before beginning assembly of product, make sure all parts are present. Compare parts with package contents list. If any part is missing or damaged, do not attempt to assemble the product.
Tools needed:
- Phillips screwdriver
- Step ladder
- Silicone sealant Coptional)
INSTALLATION
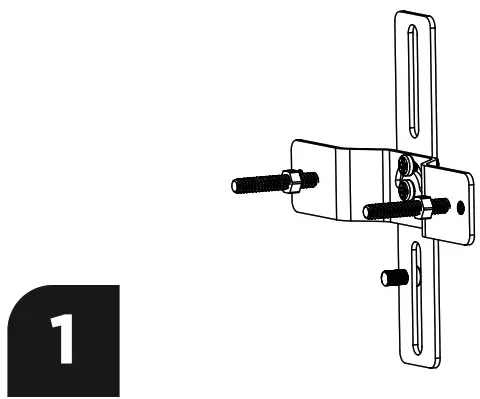 | 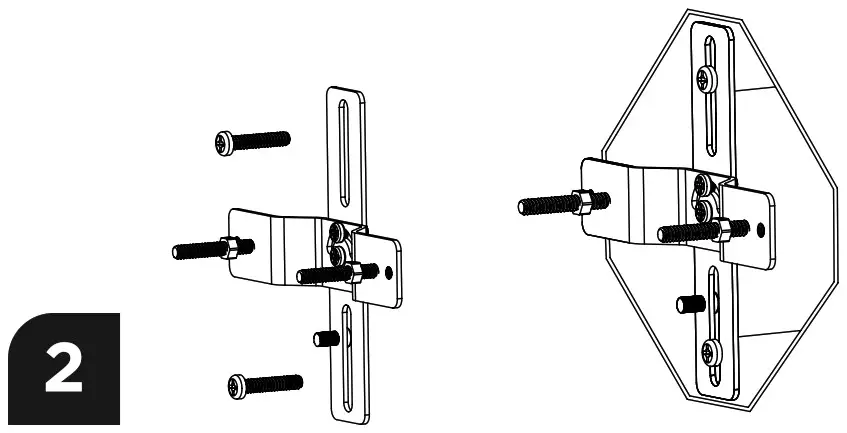 |
| Disconnect power at fuse or circuit breaker before installing the light. Ensure fixture screws and nuts are inserted into the bracket as shown. Adjust the swivel angle based on your junction box. | Tighten middle screws in the bracket so it’s firm and doesn’t wobble. Fasten bracket to junction box using 2 junction box screws. Choose short or long as needed. |
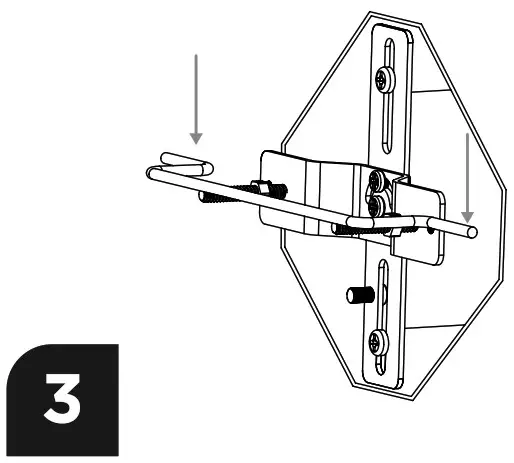 |  |
| Use the screw length indicator to adjust the length of the two long screws. Then, tighten the two nuts. | Use the holding hook to suspend the light fixture and free up both hands for wiring. Connect the bottom of the hook (square) to the right screw pole. Hang the top of the hook onto the mounting bracket. |
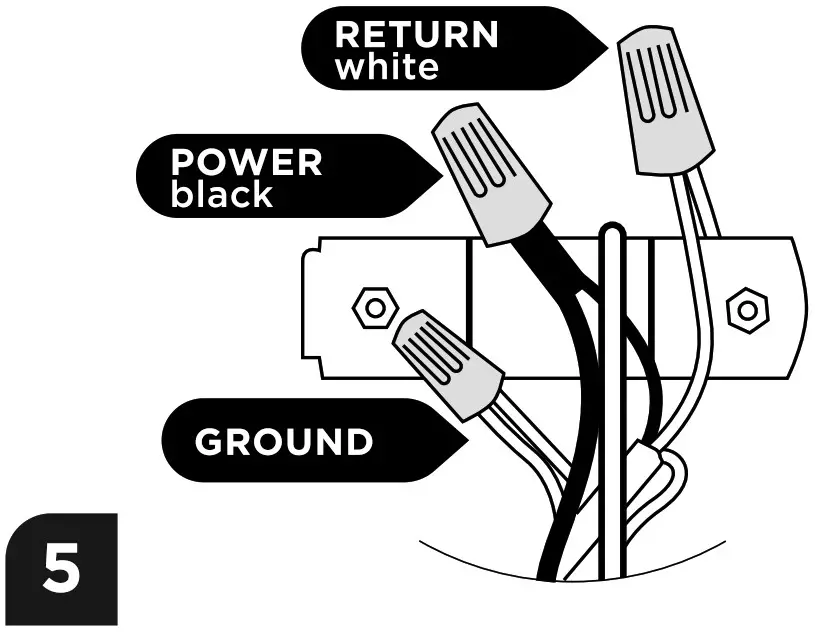 | 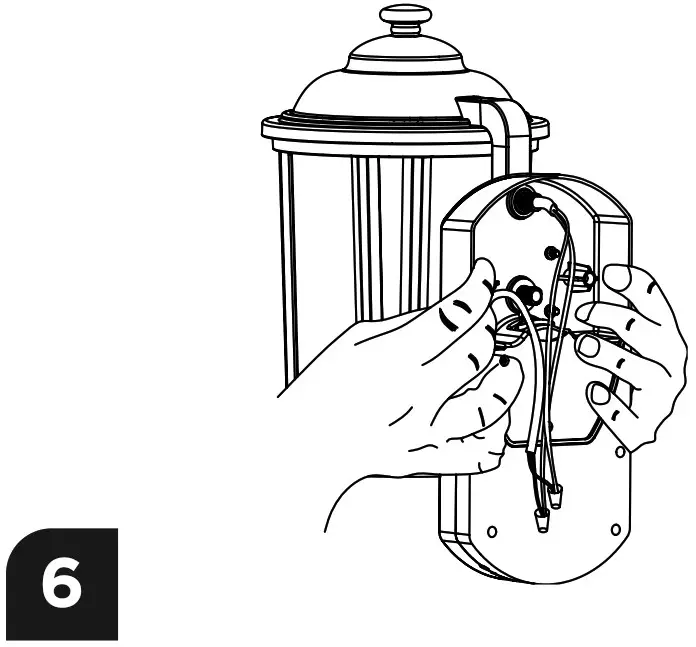 |
| Use wire nuts to connect black wires together. Insert both wires all the way into the nut and twist until secure. Then repeat for the white wires and for the ground wires. Wall wire colors may vary. Recommended: Use of a voltage detector to confirm the power is off. | Holding light fixture with both hands, align the two fixture long screws into the light fixture screw posts. |
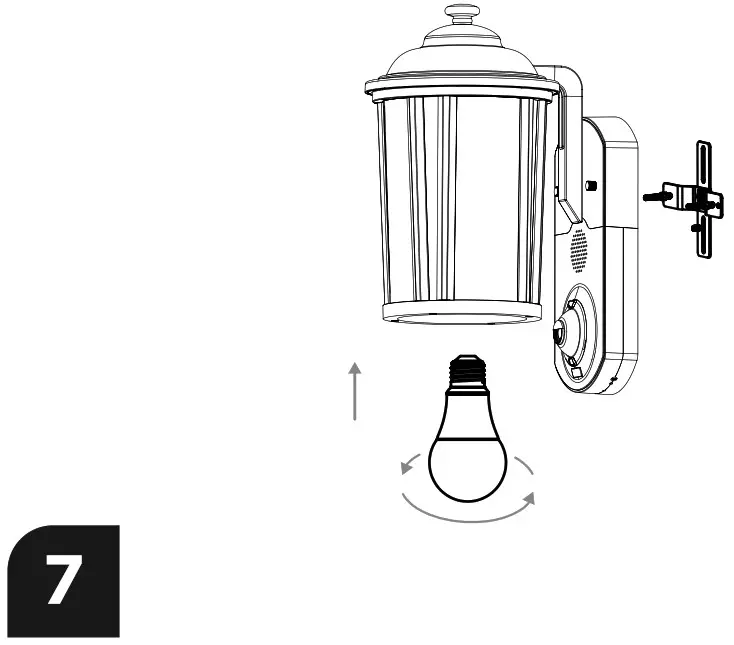 | 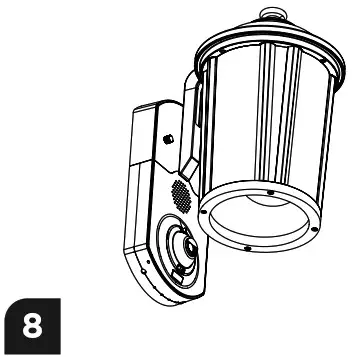 |
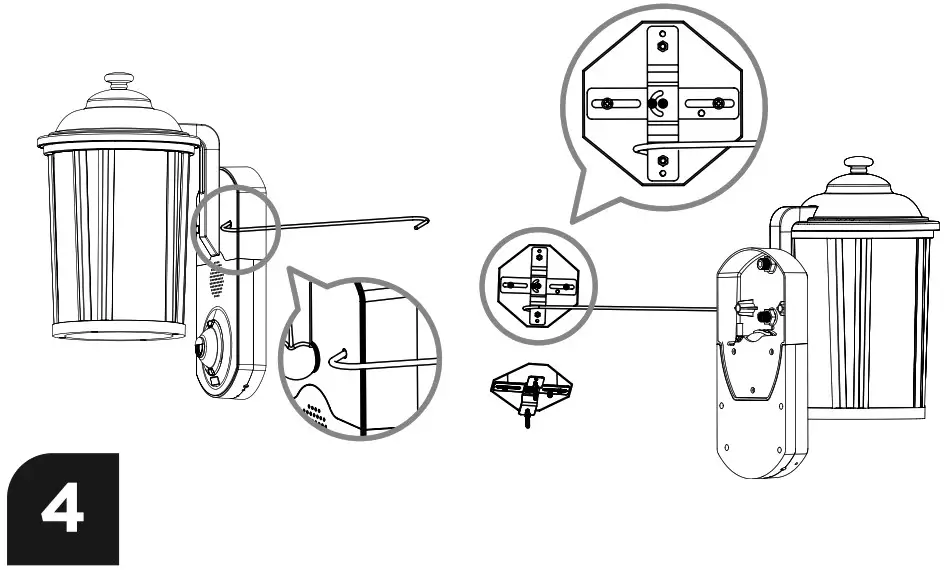
| Mount light fixture to long screws as shown, then install both decorative nuts. Install a light bulb (maximum wattage: GOW). Apply silicone sealant between wall and light fixture (optional). Reconnect power at fuse or circuit breaker after installing the light. | Adjust the angle of the camera lens, loosening up the locking ring. Use two fingers and turn it counter-clockwise. Lock it back up by turning the locking ring clockwise. For final adjustment, see the video feed on the phone after downloading the app and setting up WiFi. |
![]()
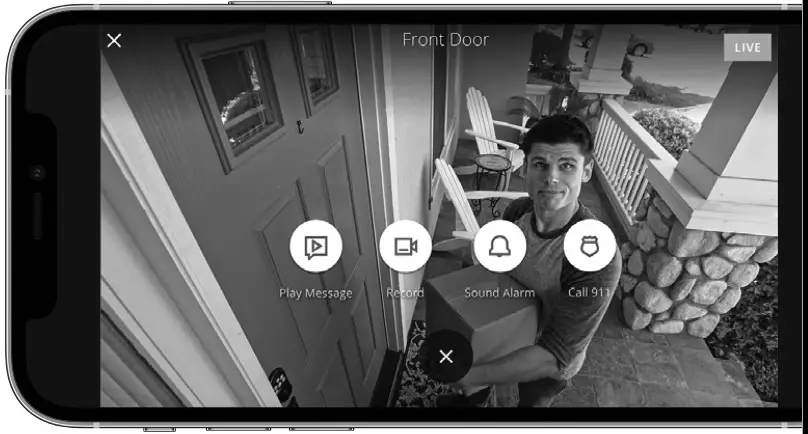
WiFi Setup
After installation, on your iOS or Android smartphone, please visit getkuna.com/app to download and install our free Kuna App.
Follow in-app instructions to set up your Kuna Camera Porch Light.
Get powered. Get the app.
Welcome
to the next generation in smart security
| Your Kuna Camera Porch Light installs in minutes using existing wiring. It’s powered by the Kuna app for wireless intelligence. | Activate your light now! Visit getkuna.com/app to download the Kuna app on your Apple or Android mobile device. | Create your account and connect your light. |
![]()
FCC STATEMENT
WARNING: Changes or modifications to this unit not expressly approved by the party responsible for compliance could void the user’s authority to operate the equipment.
NOTE: This equipment has been tested and found to comply with the limits for a Class B digital device, pursuant to Part 15 of the FCC Rules. These limits are designed to provide reasonable protection against harmful interference in a residential installation. This equipment generates, uses, and can radiate radio frequency energy and, if not installed and used in accordance with the instructions, may cause harmful interference to radio communications. However, there is no guarantee that interference will not occur in a particular installation. If this equipment does cause harmful interference to radio or television reception, which can be determined by turning the equipment off and on, the user is encouraged to try to correct the interference by one or more of the following measures:
- Reorient or relocate the receiving antenna.
- Increase the separation between the equipment and receiver.
- Connect the equipment into an outlet on a circuit different from that to which the receiver is connected.
- Consult the dealer or an experienced radio/TV technician for help.
This equipment complies with FCC radiation exposure limits set forth for an uncontrolled environment. This equipment should be installed and operated with minimum distance 20cm between the radiator and your body. This device complies with Part 15 of the FCC Rules. Operation is subject to the following two conditions:
- this device may not cause harmful interference, and
- this device must accept any interference received, including interference that may cause undesired operation.
IC STATEMENT
This device complies with Industry Canada licence-exempt RSS standard(s). Operation is subject to the following two conditions:
- This device may not cause interference, and
- This device must accept any interference, including interference that may cause undesired operation of the device.
This equipment complies with IC RSS-102 radiation exposure limits set forth for an uncontrolled environment. This eqioment should be installed and operated with minimum distance 20cm between the radiator and your body.
Learn more or need support?
Visit help.getkuna.com, email us at [email protected] or call 1-844-905-1914, Mon-Fri 8:00 AM-5:30 PM Pacific Time


