
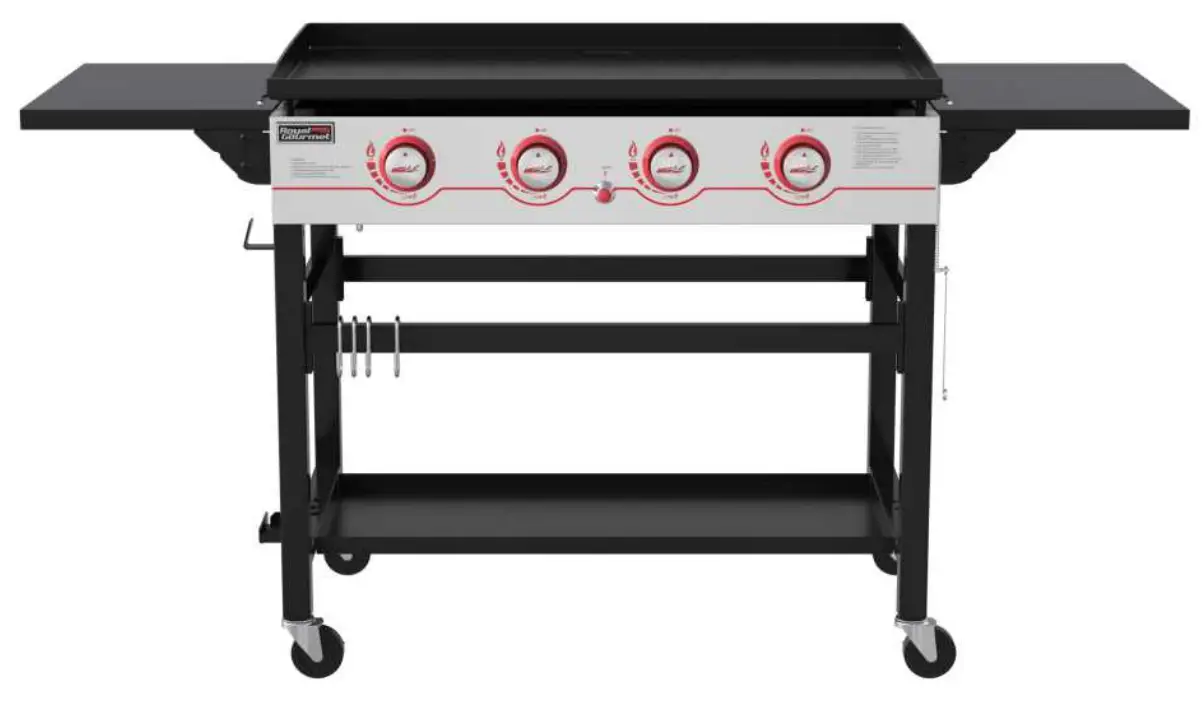
Royal Gourmet GB4000 36 Inch 4-Burner Gas Griddle
FOR YOUR SAFETY
Use outdoors only!
Read the instructions before assembling and using the appliance.
CONTACT US FIRST!
If you have any questions that are not addressed, please contact us first.
Customer Service
![]() 1-800-618-6798
1-800-618-6798 ![]() [email protected]
[email protected]
 |
If you smell gas:
|
 |
|
In case of any issue, call us first! DO NOT return the griddle to the retailer. This griddle has been made to high quality standards. If you have any questions not addressed in this user’s manual, or you need parts, please call our customer service hotline.
|
|
⚠ CALIFORNIA PROPOSITION 65 WARNING |
For more information, go to: www.P65Warnings.ca.gov |
|
|
|
Liquid propane gas is flammable and hazardous if handled improperly. Understand the characteristics before using any propane product.
|
|
|
INSTRUCTIONS FOR USE
Follow the instructions carefully to avoid seriously damaging your griddle and causing injury to yourself and to property.
- Assemble the griddle as per the assembly instructions carefully.
- Connect the LP cylinder to the griddle {LP cylinder not included).
- Turn all control knobs to the OFF position before turning on the gas supply to the griddle.
- Operate the regulator in accordance with the instructions supplied with the regulator.
LP GAS AND CYLINDER INFORMATION
Your new gas griddle operates on LP (Liquified Petroleum) Gas. It is odorless, colorless, and non-toxic when produced.
You can smell LP gas as it has been given an odor similar to rotten eggs, for your safety.
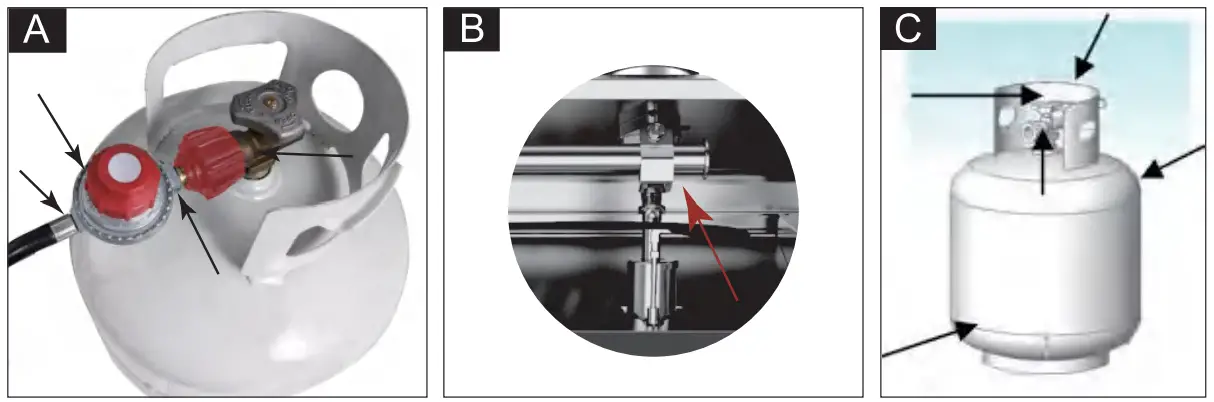
The LP cylinder used with your griddle must have two features: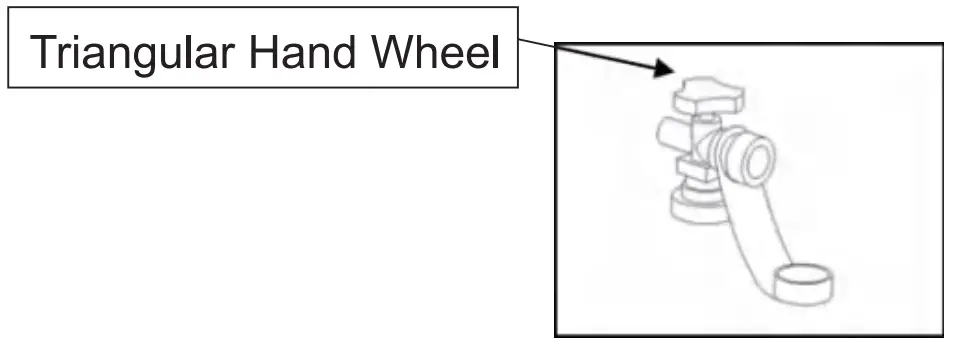
- An OPD (Overfill Protection Device) that prevents accidental gas leaks caused by overfilling of the cylinder. Each cylinder contains a float that closes the input value when the cylinder is 80% full. This allows room or the propane gas to expand in hot temperatures. A triangular hand wheel distinguishes this type of cylinder.
- An QCC1 Type1 Quick Connect Valve that provides fast cylinder hook-ups and requires only to be tightened by hand.

TRANSPORTATION AND STORAGE
- The LP cylinder must include a collar to protect the gas supply valve.
- Do not store a spare LP cylinder under or near the griddle.
- Never fill the LP cylinder beyond 80% capacity.
- If the warnings 2 and 3 above are not heeded exactly, a fire causing death or serious injury may occur.
- Always transport in an upright position.
- Do not smoke when transporting your LP cylinder.
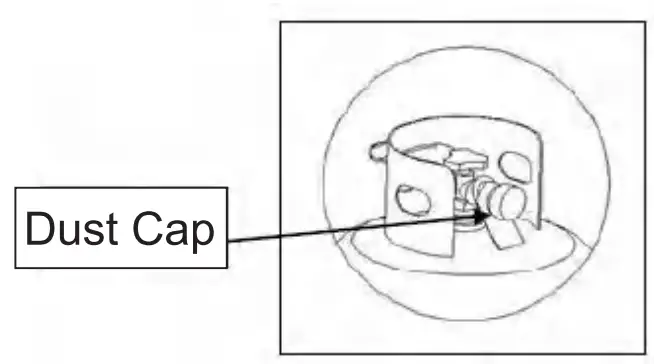
- Place a dust cap on the cylinder gas valve outlet whenever the cylinder is not in use. Use only the type of dust cap that is provided with the cylinder valve when purchased. Other types of cap or plugs may result in leakage of propane.
CYLINDER SPECIFICATIONS
- Cylinder purchased or exchanged for your gas griddle must be manufactured and marked in accordance with the specifications for LP Gas cylinder of the U.S. Department of Transportation (DOT) or the National Standard of Canada, CAN/CSA-8339, Cylinders, Spheres and Tubes for Transportation of Dangerous Goods and Commission, be equipped with a listed over-filling prevention device (OPD), and be equipped with a cylinder connection device compatible with connection for outdoor cooking appliances.
- The LP gas cylinder used for this appliance must not have a capacity exceeding 20 lb. (9.1 kg). Approximately 18″ (45.7cm) high and 12″ (30.5cm) diameter.
- This griddle is designed to fit Worthington, Manchester, or SMPC brand 20 lb. (9.1 kg) cylinders. Other brands may fit this griddle if the top collar and bottom support ring have similar dimensions.
The cylinder must also be equipped with:
- A shut-off valve terminating in a Type 1 gas cylinder valve outlet
- A Type 1 valve that prevents gas flow until a positive seal is made
- A collar to protect the cylinder shut-off valve
- A safety relief device that is directly linked with the vapor space of the cylinder
|
A frosty cylinder valve indicates possible gas overfill. Close the LP valve and call your LP dealer immediately.
|
CONNECTING REGULATOR TO LP CYLINDER
 |
| Only use the gas pressure regulator provided with this outdoor cooking appliance. This regulator is set for an outlet pressure of 11 inches water column. |
Your regulator is equipped with a QCC Type 1 quick connect system. It does not allow gas to flow until a positive seal has been made. It has a thermal element that will shut off the gas flow if the temperature reaches 115 °C (240 °F). It also has a flow-limiting device that restricts the flow of gas to 0.28 cubic metrics per hour (10 cubic feet per hour).
- Make sure the LP cylinder is OFF by turning the hand wheel clockwise until it stops.
- Properly secure the LP cylinder onto the cylinder hook and base.
- Be sure all burner controls are turned to the OFF position.
- Remove the safety cap from the cylinder valve.
- Center the regulator nipple into the cylinder valve.
- Turn the black nut clockwise until it stops. Hand tighten Only. Do not use a wrench.

|
|
LP CYLINDER LEAK TEST
- Leak test must be repeated each time the LP cylinder is exchanged or refilled.
- DO NOT smoke or have anything nearby that can easily ignite, such as lighters or matches.
- DO NOT use an open flame to check for gas leaks.
- The appliance must be leak checked outdoors in a well-ventilated area away from open flames or sparks.
- REMOVE any pots or other cookware from the burner before beginning the test.
STEPS FOR LEAK TEST:
Use a clean paint brush and 50/50 soap and water solution.
NOTE: Use a mild soap and water. DO NOT use household cleaning agents, which could damage the gas component.
- Turn all burner control knobs, regulator and cylinder valves OFF.
- Be sure regulator is tightly connected to LP cylinder.
- Completely open LP cylinder valve by turning hand wheel counterclockwise. If you hear a rushing sound, turn gas off immediately. There is a major leak at the connection. Correct before proceeding.
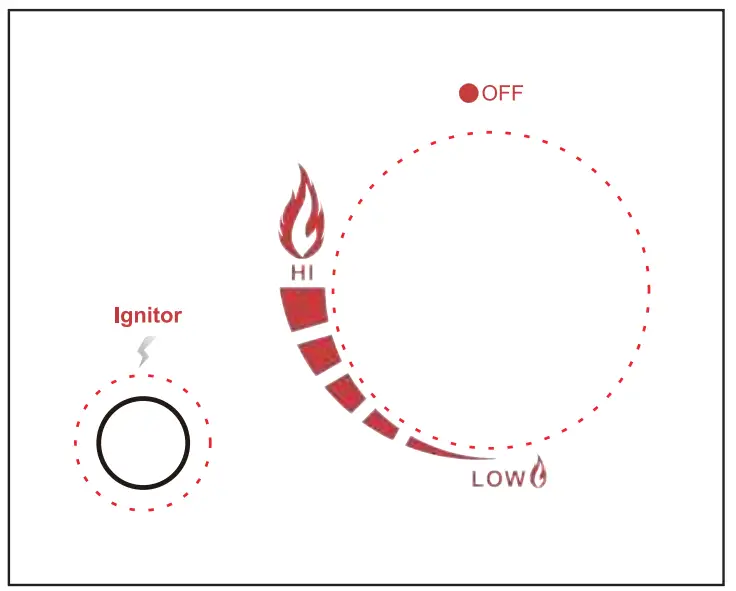
- Brush the soapy solution onto all metal seams and the entire valve area as shown in figures below.

- Slowly turn the LP cylinder valve counterclockwise to the open position.
- A leak is identified by a flow of bubbles from the area of the leak. Close LP cylinder valve immediately and retighten connections.
- If leaks cannot be stopped, do not try to repair, contact your gas griddle dealer for assistance. Do not attempt to operate appliance if a leak is present.
- Always examine the hose for any damage. If damage is observed, do not attempt to patch the hose.
Replacing the hose is the only safe option. - For assistance with any malfunction related to the LP cylinder, regulator or hose, contact customer service.
- Always close LP cylinder valve after performing leak test by turning hand wheel clockwise.
UNDER NO CIRCUMSTANCE SHOULD THE VALVE REMAIN IN THE ON POSITION FOR MORE THAN 12 SECONDS.
|
|
Each griddle burner is tested and calibrated at the factory prior to shipment; however, variations in the local gas supply may make it necessary to adjust the burners. Please visually check the flames of the burners. Always visually inspect your griddle before lighting. Replace any hose that is frayed or cracked. Look for anything that could block ventilation and remove such a blockage or move the griddle. After lighting, check the flame pattern to ensure you have even heat distribution for each burner. If burners don’t light up, or if the flame pattern is uneven, see the Troubleshooting section.
|
|
LIGHTING THE MAIN BURNERS USING ELECTRONIC IGNITION
- Turn ALL control knobs to OFF position.
- Turn gas supply on at LP cylinder valve or at regulator.
- Push in control knob and turn it anti-clockwise to HI position. Push and hold ignitor button to light the burner.
- If the burner does not ignite, turn control knob to OFF position, wait for 5 minutes before attempting to relight the burner.
- If the burner ignites, repeat for other burners, and turn the control knobs to the temperature setting required for your food.
* Should the burner still fail to ignite, check the gas supply.
MANUALLY LIGHTING THE BURNERS WITH MATCH STICK
- Turn ALL control knobs to OFF position.
- Turn gas supply on at LP cylinder valve or at regulator.
- Put a match in the match holder. Match holder is attached to side panel.
- Place the lit match through the match lighting hole on side panel. Make sure the lit match is close to the burner ports.
- Push in control knob and turn it anti-clockwise to HI position. The burner should light immediately.
- If the burner does not ignite, turn control knob to OFF position, wait for 5 minutes before attempting to relight the burner.
- If the burner ignites, repeat for other burners, and turn control knobs to the temperature setting required for your food.
* Should the burners still fail to ignite, check the gas supply.
TURNING OFF YOUR GRIDDLE
- Turn off the gas supply at the LP cylinder by turning the valve clockwise to a full stop.
- Turn all burner control knobs to OFF position.
Do not use spirit or petrol for lighting or re-lighting! |
BURNER FLAMES
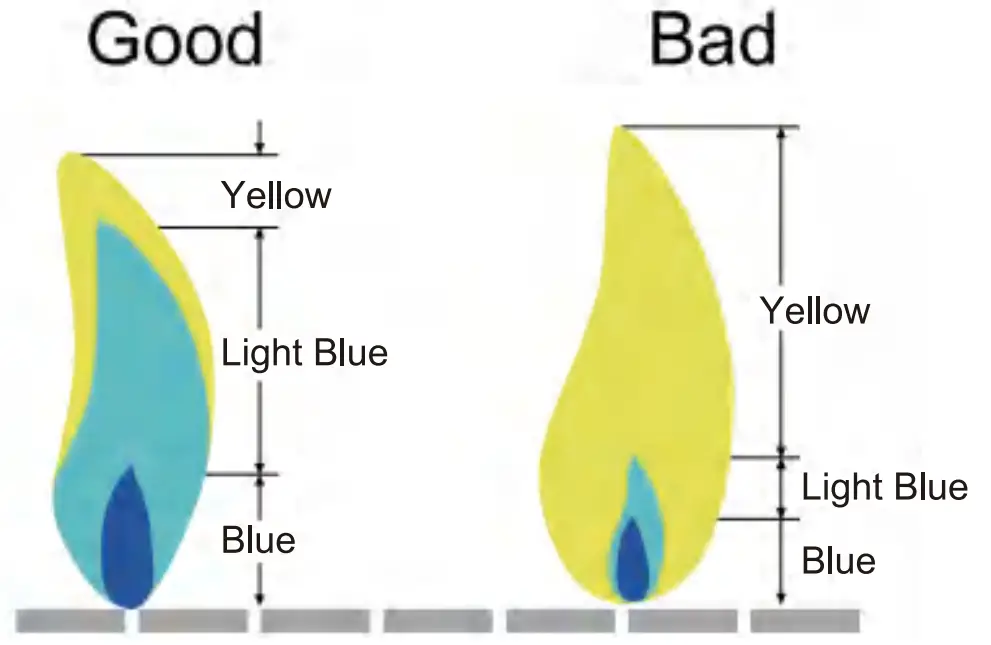
Always check the burner flame patterns after lighting. A good flame should be primarily blue with a yellow tip and have a minimal amount of flicker. Some yellow tips are OK if they are smaller than 2.5 cm (1 “).
New burners sometimes have oil residue, which will cause yellow flame when burning off. Variations in gas supply, altitude, weather, and other factors can all impact burner performance. Older griddles can also show more yellow flame due to food deposit, oil, and fat buildup.
SEASONING GUIDE
Seasoning your cooking griddle will help create relative non-stick surface for cooking while also protecting it against oxidization. When you receive your griddle it will already have a thin layer of oil applied on the griddle.
That has been done to protect the griddle from rust during shipping and storing, that is normal.
First Seasoning:
- Wash off the shipping oil by using soapy water and a towel or paper towels. Rinse off the soap and air dry.
- Next, apply some virgin olive oil or other vegetable oil on the griddle surface. Using a paper towel to rub a thin coat of oil on the entire surface of the griddle.
- Turn on your griddle at medium-high heat. The oil will eventually begin to smoke which is good. Leave it heating until the smoke stops. Turn off your griddle.
- Let the surface cool down and repeat above process for 2-3 times until you get a nice black surface on the griddle. Once you’ve completed this process, you’ll have a perfect grilling surface to get cooking on! Use long-handled barbecue utensils and oven mitts to avoid burns and splatters. Proceed to “PREHEATING”.
*After you are done using your griddle you should apply a very thin coat of cooking oil to maintain your seasoning bond and protect it from rust.
PREHEATING
It is necessary to preheat the griddle before cooking, depending on the type of food and the cooking temperature.
Preheat the gas griddle on MEDIUM/HIGH for 5 to 10 minutes. Reduce heat as appropriate for what you are grilling. Next, brush or spray the cooking griddle to prevent food from sticking.
Cleaning and Maintenance
Your new griddle has been designed and manufactured to high quality standards. It will provide you with many years of fun grilling time, however, it requires a minimal amount of maintenance.
Clean griddle often, preferably after each cookout. If a bristle brush is used to clean any of the griddle cooking surfaces, ensure no loose bristles remain on cooking surfaces prior to grilling.
|
Grease is flammable. Let hot grease cool down before attempting to handle it. Avoid letting grease deposits collect in the bottom of the firebox.
COOKING GRIDDLE
Most foods can be cleaned up by scraping and wiping down the cooking griddle with a paper towel or wet soft cloth.
To remove tough food residue, you can use a mild cream cleaner and pad. You can also use soapy water or a paper towel and 1/4 cup of table salt as another method to clean your griddle. Rinse well and dry it.
STAINLESS STEEL
Clean with multipurpose, low-abrasion, non-phosphorous metal or stainless steel polish and a soft cloth. Always polish in the direction of the finish. Do not allow grease and dirt to accumulate. In addition, several products and naturally occurring substances can damage all stainless-steel finishes. These include, but are not limited to, swimming pool chemicals (chlorine and bromine), lawn and garden fertilizers, ice-melting products, sea or other salt water, urine, bird droppings, and tree sap. Upon contact with these substances, immediately wash and dry the stainless-steel surface and be careful to avoid burns.
OTHER EXTERIOR SURFACES
Wash with a mild dishwashing detergent and warm water. You can use a cloth, soft brush (non-metallic), or plastic cleaning pad. Rinse thoroughly and wipe dry.
GREASE CUP
Check after each use. Remove and empty the grease cup when half full. It can be washed with warm water and mild dishwashing detergent.
BURNERS
We recommend you clean your burners at least twice a year, or before use if the griddle has not been used in over one month.
| Small insects and spiders may enter the burner tubes. Sometimes they will build nests or spin webs that can block or reduce the amount of gas flowing through the burner. You will usually see a smaller flame, or a flame that is mostly yellow rather than blue, coming from the burner when this happens. Other signs include the griddle generating uneven or low heat, or difficulty in igniting the burners. In cases of severe blockage, this can cause the flame to burn backwards, and outside of the burner tubes, which can damage your griddle and/or cause personal injury. IMMEDIATELY SHUT OFF THE FLOW OF PROPANE GAS AT THE CYLINDER BY TURNING THE HAND WHEEL CLOCKWISE SHOULD THIS HAPPEN. Wait for the griddle to cool down and then clean all burners. |
CLEANING THE BURNERS
- Ensure the gas is turned off at the LP cylinder.
- Remove the cooking griddle.
- Lift each burner up and out.
- Clean the inside of the burner using a stiff wire. A straightened coat hanger will work.
An alternative is to use compressed air. Always wear protective gear for your eyes when using this method.
Never enlarge the burner ports during cleaning. - Brush the outer surface of the burner.
- Ensure all ports (holes) are free of debris.
- Inspect the burners. Replace any that have cracks or enlarged ports.
- Replace the cooking griddle.
- Perform the Leak Test described earlier in this Owner’s Manual.
|
GRIDDLE STORAGE
- Clean your griddle before storage. Store at a cool dry place.
- Storage of a gas griddle indoors is permissible only if the LP cylinder is disconnected and removed from the gas griddle.
- A cover is highly recommended to protect your griddle. Choose from a variety of griddle covers offered by the manufacturers.
- Perform a Leak Test before using the griddle after it has been kept in storage for some time.
Troubleshooting Guide
| Emergencies | Possible cause | Prevention / Solution |
| Gas leaking from cracked / cut/ burned hose | Damaged hose | Turn off gas at LP cylinder, if hose is cut or cracked, replace hose. Conduct LP cylinder leak test and check regulator connection to the LP cylinder. |
| Gas leaking from LP cylinder | Mechanical failure due to aging or mishandling | Turn off LP cylinder valve. |
| Gas leaking from LP cylinder valve | Failure of cylinder valve due to mishandling or mechanical failure | Turn off LP cylinder valve. Return LP cylinder to gas supplier. |
| Gas leaking between LP cylinder and regulator connection | Improper installation, loose connection, failure of rubber seal | Turn off LP cylinder valve, remove regulator from cylinder and visually inspect the rubber seal for damage. Conduct LP cylinder leak test and check regulator connection to the LP cylinder. |
| Fire coming through control panel | Fire in burner tube section of the burner due to partial blockage | Turn off control knobs and LP cylinder valve. After the fire is out and griddle is cold, remove the burner and inspect for spider nests or rust. See natural hazards and cleaning the burner assembly pages. |
Troubleshooting: Problem | Possible cause | Prevention / Solution |
| Grease fire or continuous excessive flame above cooking surface | Too much grease buildup in burner area | Turn off LP cylinder. After cooling, clean food particles and excess grease from inside the firebox area, grease cup / pan / tray, and other surfaces. |
| Burner will not light when using the ignitor | Gas issues:
|
|
Electrical issues:
|
| |
| Burner will not light with matchstick |
| See “MANUALLy LIGHTING THE BURNERS WITH MATCH STICK” section in Operation Instructions. |
| Sudden drop in gas flow or low flame |
|
|
| Flame blows out | High or gusting winds / Low LP gas / Excess flow valve tripped | Turn front of griddle to face wind or increase flame height. Refill LP cylinder. |
| Persistent grease fire | Grease trapped by food buildup around the burner system | Turn knobs to OFF. Turn gas off at the LP cylinder. After the griddle cools, remove and clean all parts. |
| Flashback … (fire in burner tube(s)) | Burner and burner tubes are blocked. | Turn knobs to OFF. Clean burner and/or burner tubes. See burner cleaning section in Cleaning and Maintenance. |
| Flare-up |
|
|
| Unable to fill LP cylinder | Some dealers have older fill nozzles with worn threads. | When turning worn nozzles, they don’t have enough “bite” to engage the valve. Try a different LP dealer. |
| One burner does not light from other burner(s) | Grease buildup or food particles in end of carryover tube | Clean carry-over tube with wire brush. |
If your problem is not resolved using the troubleshooting information above, please contact your local gas dealer.
CAUTION: If the burners go out during use, close the gas supply at cylinder, and turn off all gas valves. Wait for five minutes before attempting to re-light (this allows accumulated gas fumes to clear).
CAUTION: In case of a grease fire, close the gas supply at cylinder, turn off all burners until the fire is out.
CAUTION: DO NOT attempt to disconnect any gas fitting while the griddle is being used. As with all appliances, proper care and maintenance will ensure your griddle is in top operating condition and will prolong its life.
Grilling Temperature Chart
| BEEF INTERNAL TEMPERATURE CHART | |||
| Cooking Degree | Internal Core Temperature | Internal Description | Firmness |
| Rare | 125 °F | Center is bright red, pinkish toward the outer portion, and warm throughout | Soft to the touch |
| Medium Rare | 130-135 °F | Center is very pink, slightly brown toward the outer portion and slightly hot | Yields only slightly to the touch |
| Medium | 140-145 °F | Center is light pink, outer portion is brown and hot throughout | Beginning to firm to the touch |
| Medium Well | 150-155 °F | Mostly brownish gray throughout with a hint of pink in the center | Firm to the touch |
| Well Done | 155 °F and above | Steak is brownish gray throughout | Firm or hard to the touch |
| POULTRY INTERNAL TEMPERATURE CHART | |||
| Whole Chicken | 165 °F | Cook until the juices run clear | Firm to the touch |
| Dark Meat | 165 °F | Cook until white throughout but still moist | Firm to the touch |
| Breast Meat | 165 °F | Cook until white throughout but still moist | Firm to the touch |
| Thigh, Wings and Legs | 165 °F | Mostly brownish gray throughout with a hint of pink in the center | Firm to the touch |
| PORK INTERNAL TEMPERATURE CHART | |||
| Medium | 150 °F | Pink in the center | |
| Well Done | 160 °F and above | Pork is uniformly white/brown throughout | |
| Pork Ribs | 180-200 °F | Pale white. Cook medium to well done | |
| Raw Sausage | 160 °F | No longer pink | |
| Sausage (Pre-cooked) | 140 °F | No longer pink | |
Warranty and Customer Service
Thanks for purchasing this Royal Gourmet® 36 Inch 4-Burner Gas Griddle.
Royal Gourmet warrants its products to be free from defects in materials and workmanship under proper assembly, normal residential use and recommended care for 1-Year Full Warranty from the date of original retail purchase. The warranty does not cover paint finish as it may burn off during normal use. RUST is not considered a manufacturing or materials defect.
For 5 Years from the date of purchase, any stainless steel burner that rusts through will be replaced free of charge.
Within the stated warranty period, Royal Gourmet, at its discretion, shall replace defective components free of charge, with the owner being responsible for shipping. Royal Gourmet reserves the right to require that defective parts be returned, postage and or freight pre-paid by the consumer for review and examination. In the event of parts availability issues, Royal Gourmet reserves the right to substitute like or similar parts that are equally functional. Upon the expiration of such warranty, all such liability shall terminate.
Note: A dated sales receipt along with Model Number and Series Number will be required for the warranty service.
The limited warranty will not reimburse you for the cost of any inconvenience, food, personal injury or property damage. All warranty coverage is void if this griddle is ever used for commercial or rental purposes. And this limited warranty applies to the functionality of the product ONLY and does not cover cosmetic issues such as scratches, dents, corrosions or discoloring by heat, abrasive and chemical cleaners or any tools used in the assembly or installation of the appliance, surface rust, or the discoloration of stainless steel surfaces.
ITEMS NOT COVERED IN THE WARRANTY SERVICE
Any failures or operating difficulties due to accident, abuse, misuse, alteration, misapplication, vandalism, improper installation or improper maintenance or service, or failure to perform normal and routine maintenance, including but not limited to damage caused by insects within the burner tubes, as set out in the owner’s manual.
Deterioration or damage due to severe weather conditions such as hail, hurricanes, earthquakes or tornadoes, discoloration due to exposure to chemicals either directly or in the atmosphere.
Cost of service calls to your home.
Costs of removal or re-installation.
Pickup and delivery of your product.
Shipping or transportation costs.
Labor costs for installation and repair.
Liability for indirect, or consequential damages.
This limited warranty is the sole warranty given by Royal Gourmet and is in lieu of all other warranties, expressed or implied including implied warranty, merchantability, or fitness for a particular purpose. Neither
Royal Gourmet nor the retail establishment selling this product has authority to make any warranties or to promise any remedies in addition to or inconsistent with those stated above.
Royal Gourmet’s maximum liability, in any event, shall not exceed the purchase price of the product paid by the original consumer purchaser. Some states do not allow the exclusion or limitation of incidental or consequential damages. In such a case, the above limitations or exclusions may not be applicable.
Do not return parts without prior to obtaining return authorization from our customer service department.
Please do not hesitate to contact our customer service when you have any questions regrading assembly, warranty, or accessories.
We will be happy to offer any replacement parts you need during the warranty period.
Parts Diagram
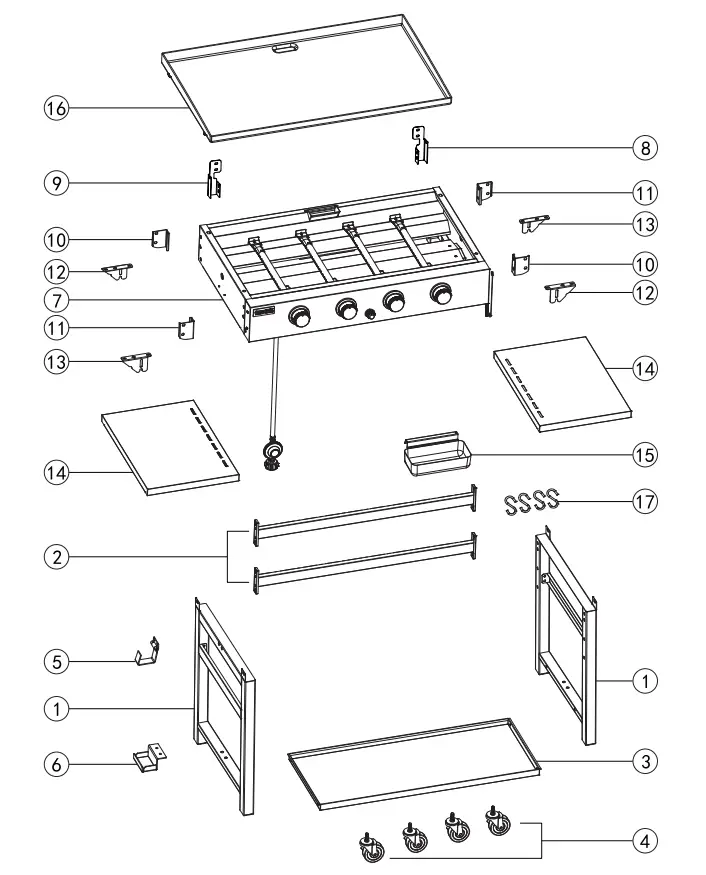
Parts List
| No. | # | QYT | Description | Image |
| 1 | H-GB4002002 | 2 | Leg assembly | 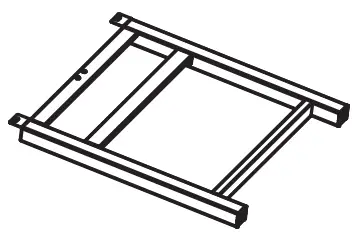 |
| 2 | H-GB4002004 | 2 | Cart beam | 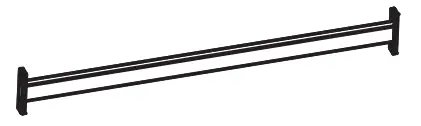 |
| 3 | Z-GB4002022 | 1 | Bottom shelf | 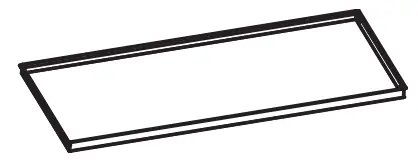 |
| 4 | W-GC33A0030 | 4 | Caster | 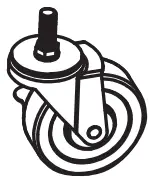 |
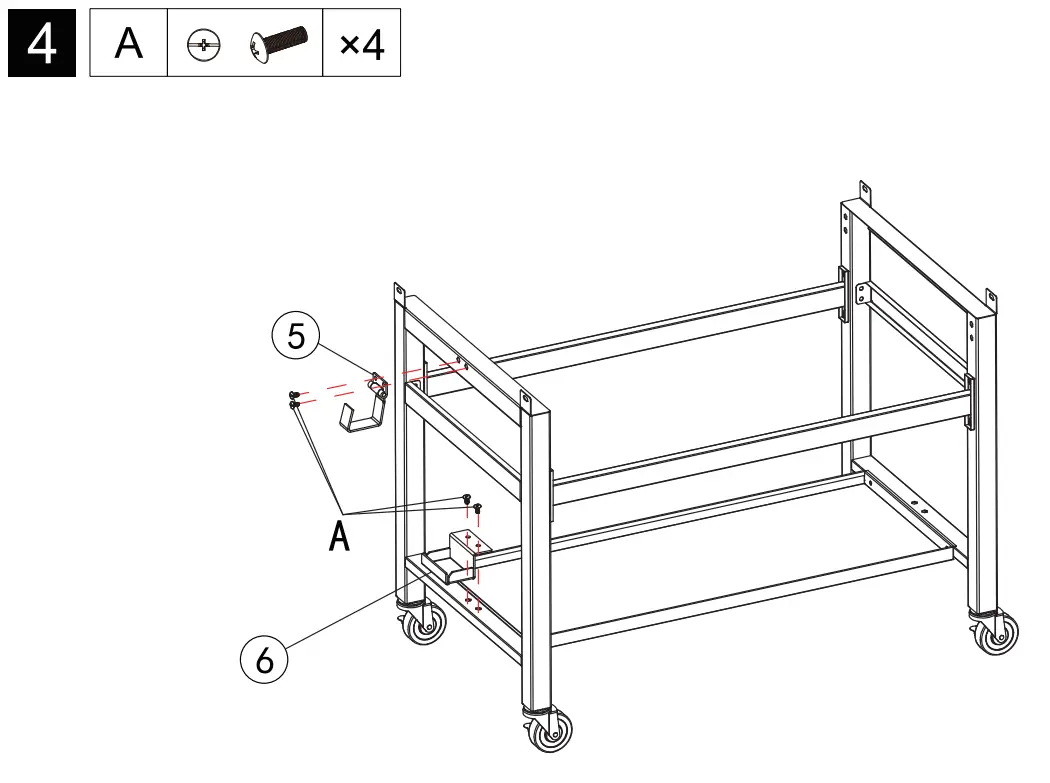
| 5 | W-GD430016 | 1 | LP cylinder hook | 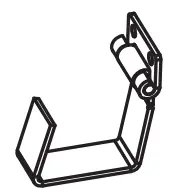 |
| 6 | W-GD430017 | 1 | LP cylinder base | 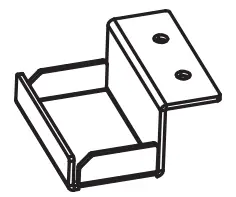 |
| 7 | 1 | Main body | 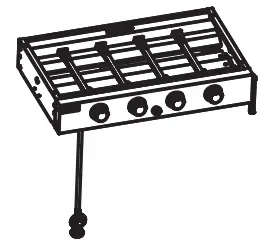 | |
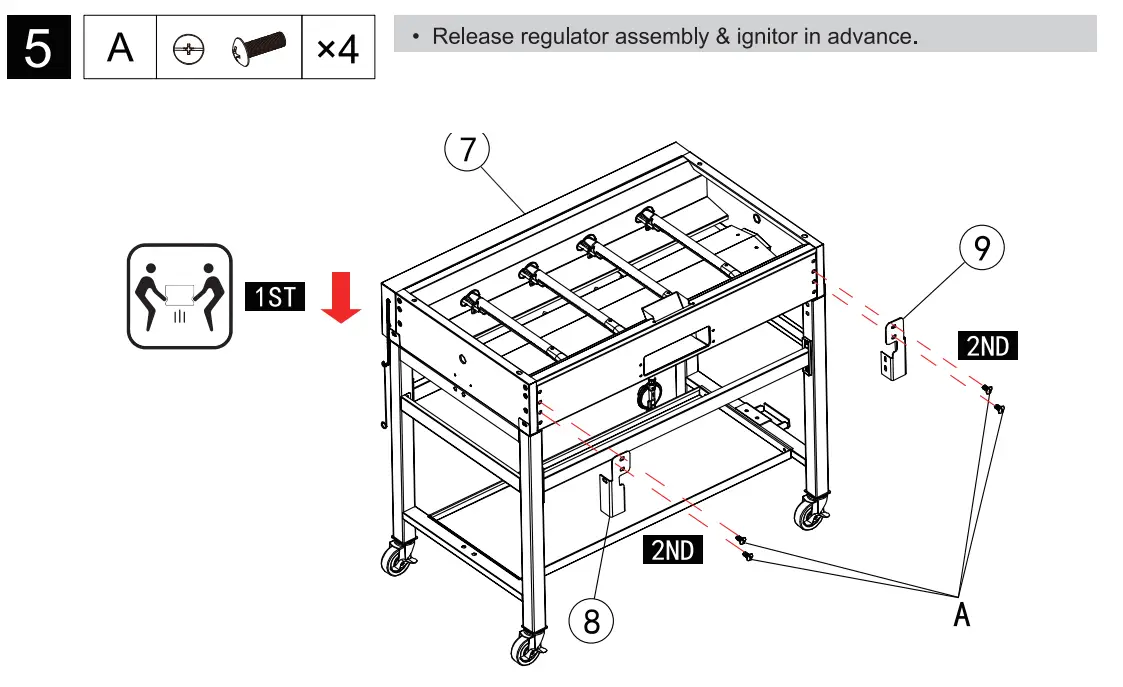
| 8 | Z-GB4002033 | 1 | Main body cart joint (R) | 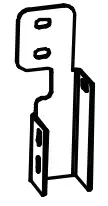 |
| 9 | Z-GB4002032 | 1 | Main body cart joint (L) | 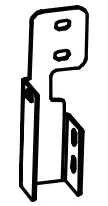 |
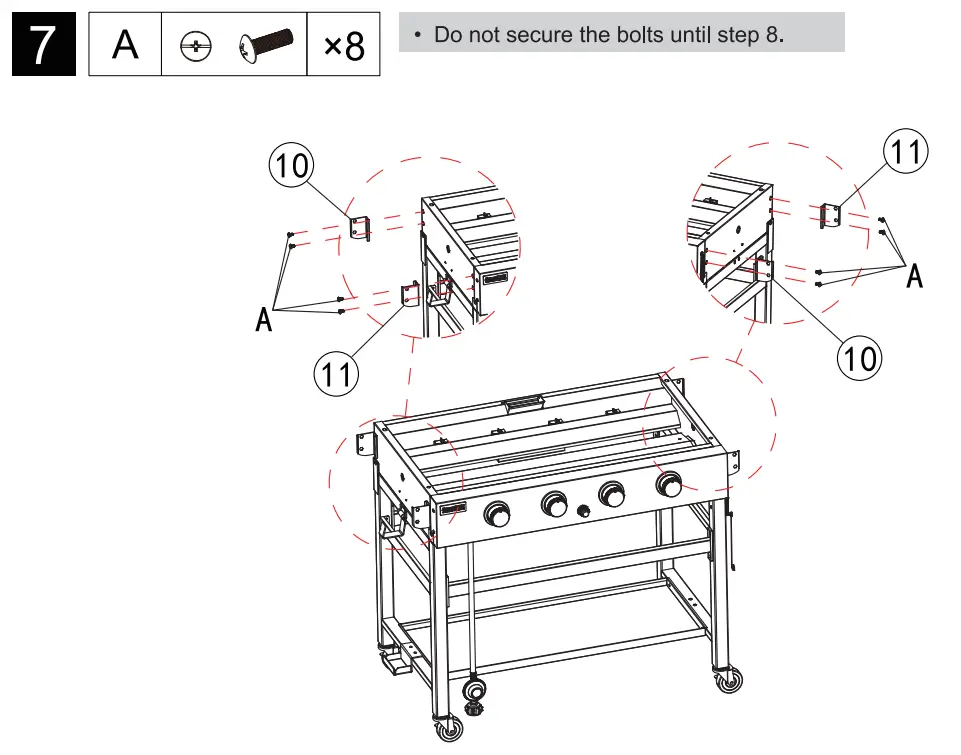
| 10 | Z-GB4002035 | 2 | Side table brace (L) | 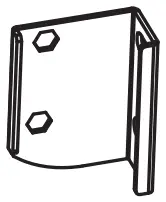 |
| 11 | Z-GB4002034 | 2 | Side table brace (R) | 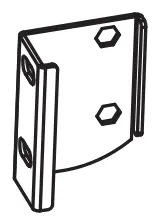 |
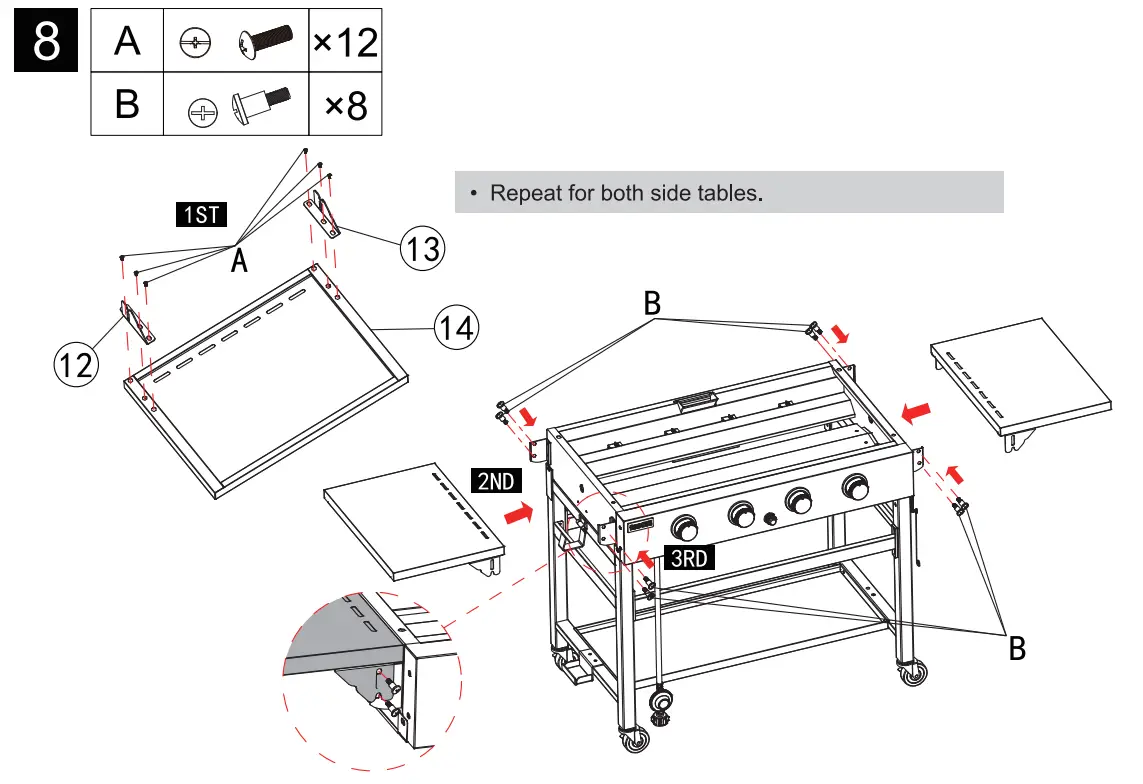
| 12 | Z-A1C12004 | 2 | Side table joint (L) | 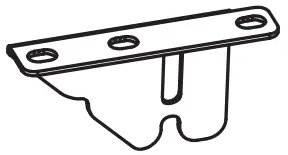 |
| 13 | Z-A1C12005 | 2 | Side table joint (R) | 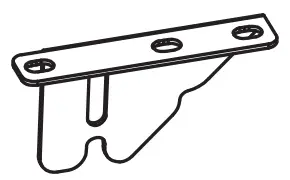 |
| 14 | Z-GB4002025 | 2 | Side table | 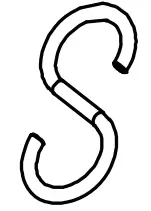 |
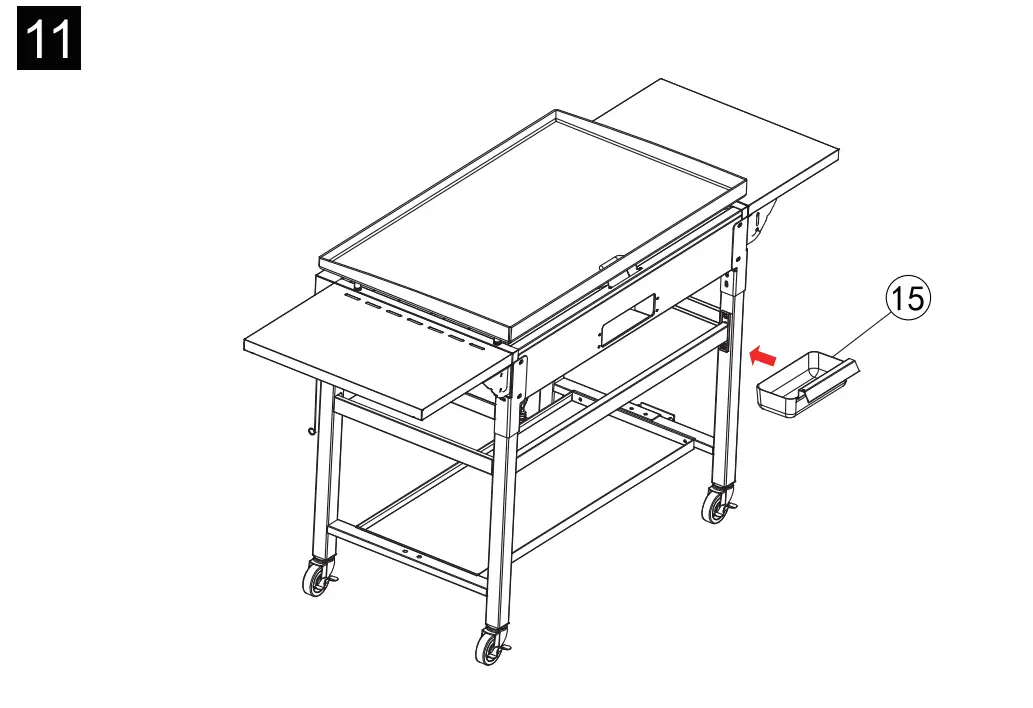
| 15 | H-GB4002007 | 1 | Grease cup | 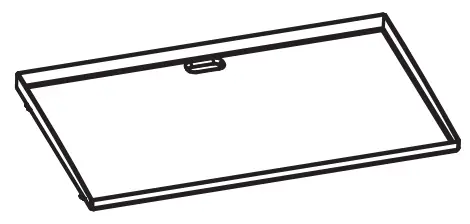 |
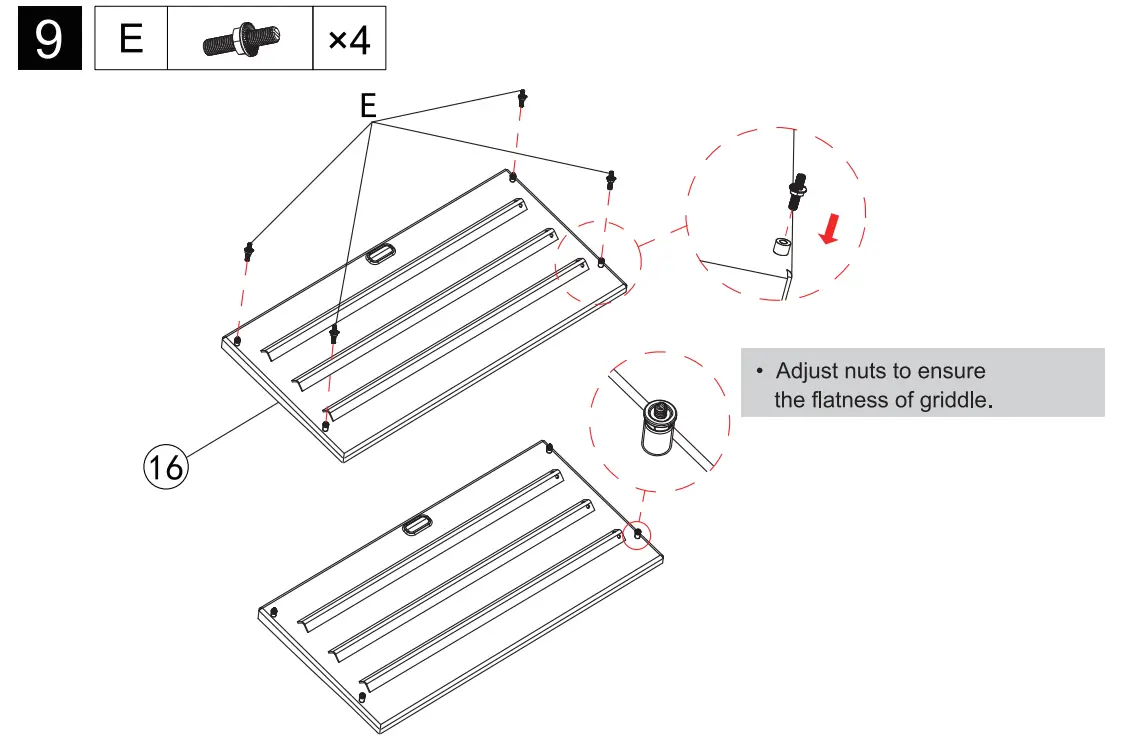
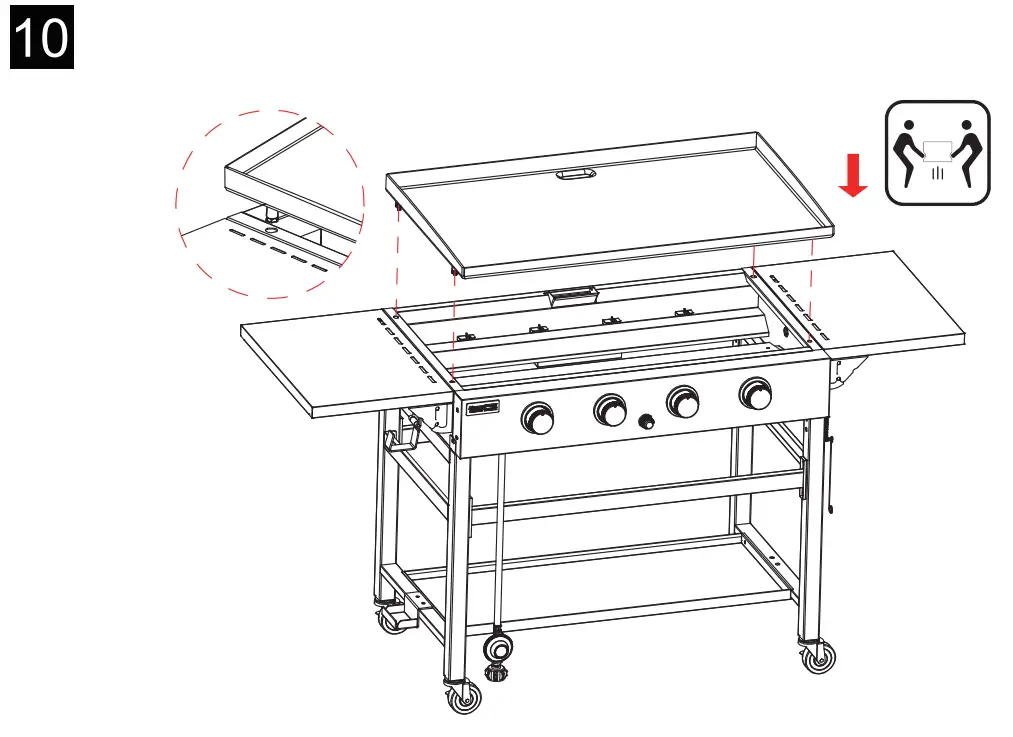
| 16 | H-GB4002005 | 1 | Cooking griddle |  |
| 17 | W-GB4002003 | 4 | “S” hook | 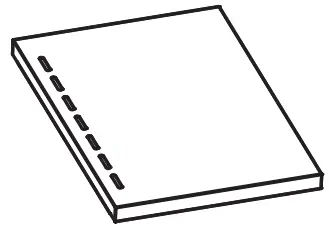 |
Hardware List
| Key | Description | QTY | Image |
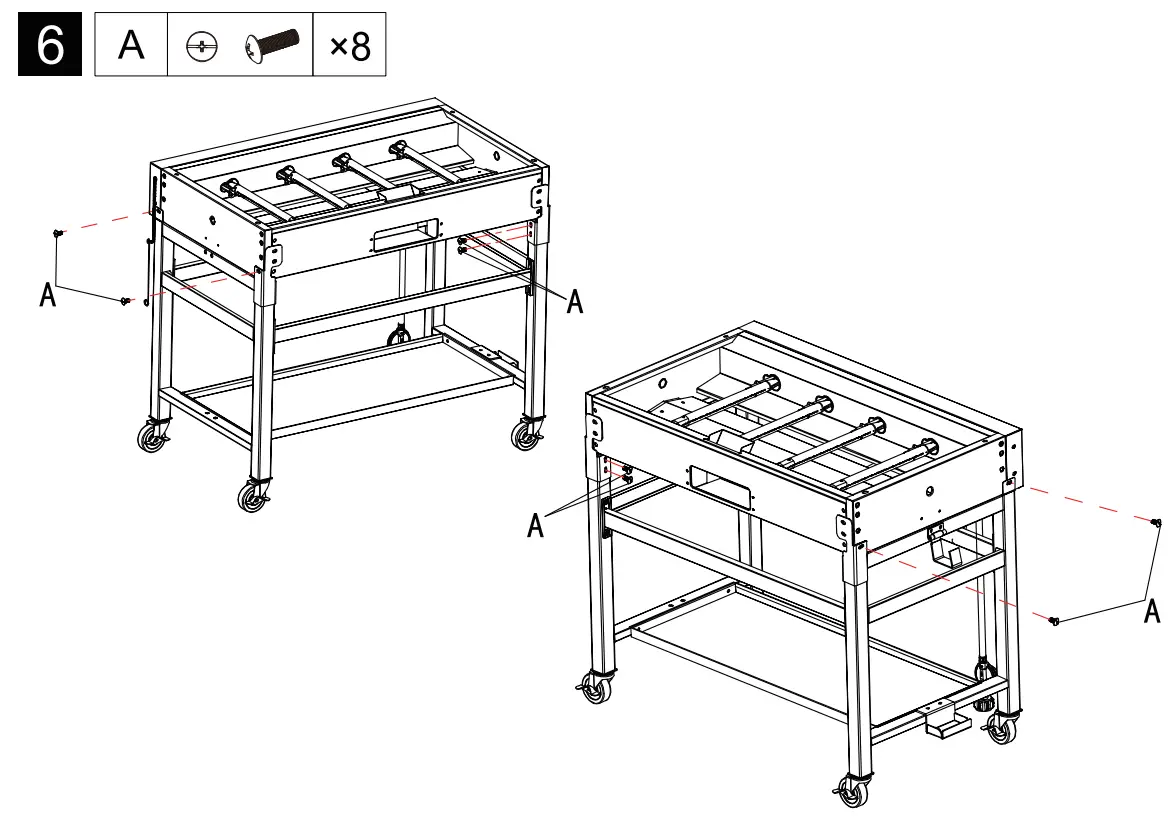
| A | M6x12 | 48 | 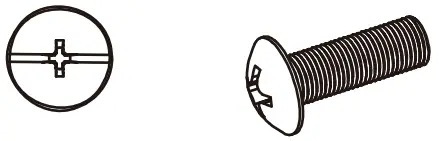 |
| B | Shoulder bolt | 8 | 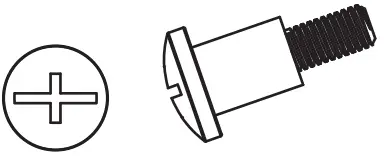 |
| E | Stud with nut | 4 | 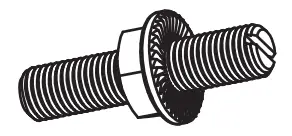 |
TOOLS REQUIRE
| Description | Image |
| Phillips screwdriver |  |
Before beginning assembly, make sure all parts are present. If any parts are missing or damaged, do not attempt to assemble the products. Contact customer service for replacement parts via telephone or email.
- Tools needed (not included): Phillips screwdriver
- Approximate assembly time: 40 minutes
- Note: The right and left sides of the griddle are designed as if you are facing the front of the griddle.
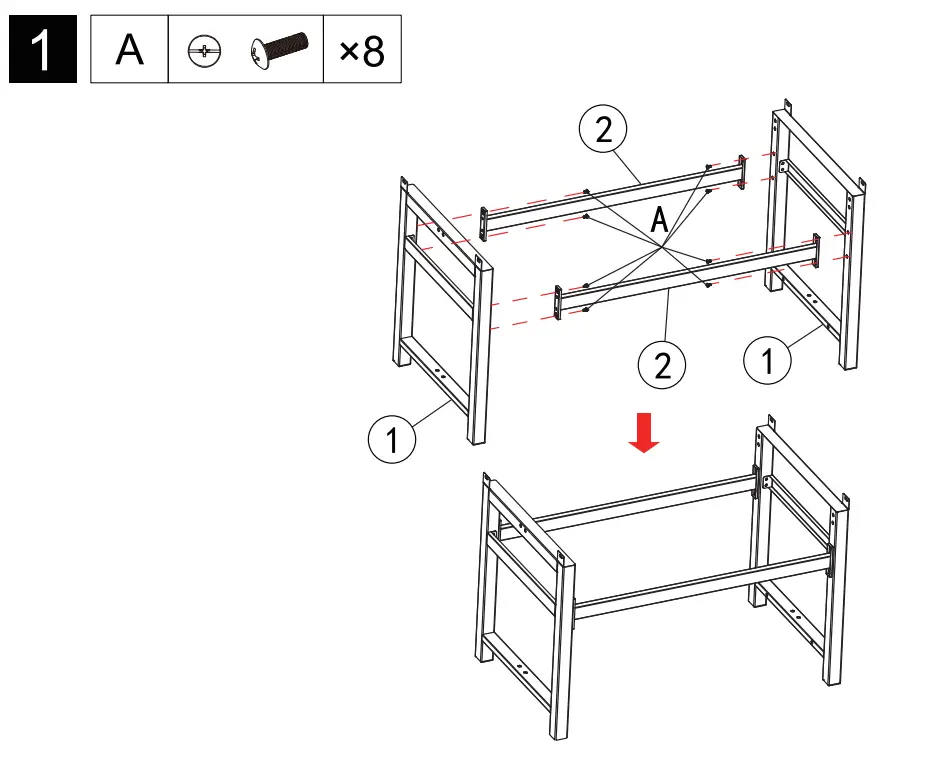
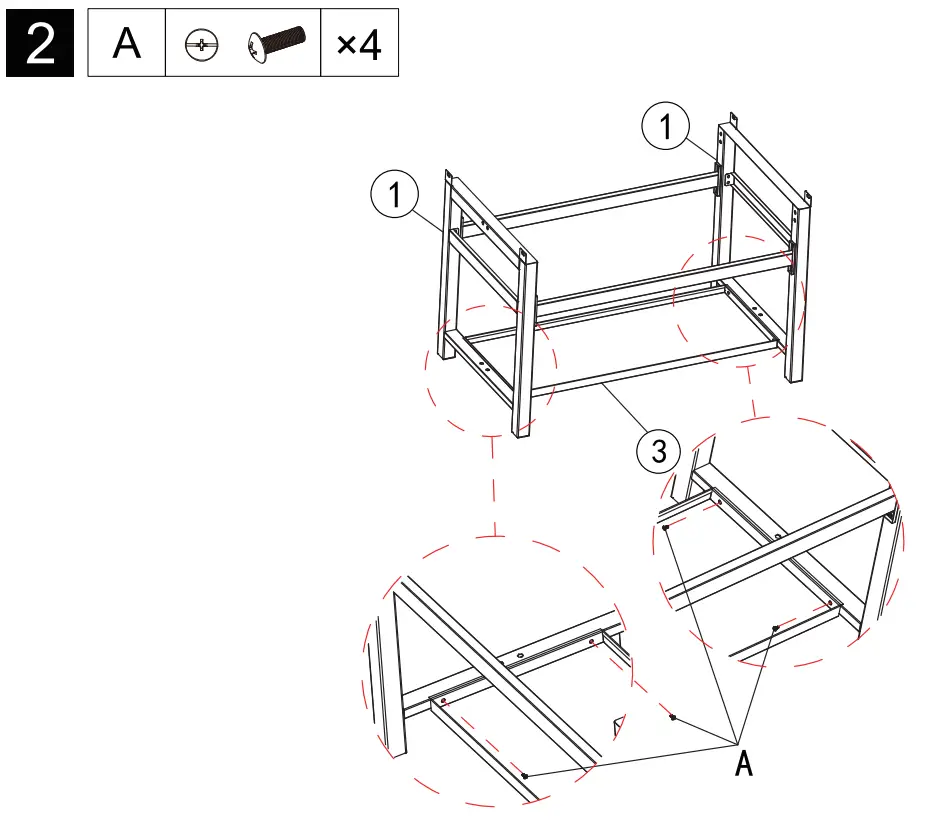
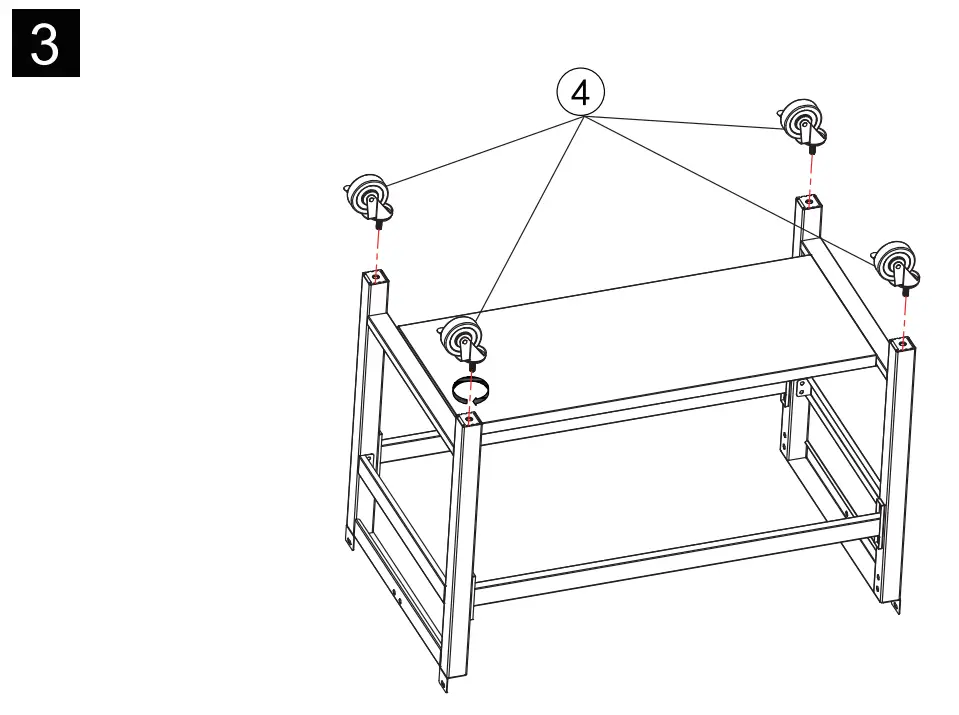
Assembly

![]() 1-800-618-6798
1-800-618-6798![]() [email protected]
[email protected]
Mon-Fri, 8:30 AM-5:30 PM, EST
Thank YouFor Choosing Us.
Any Problem!We Can Help!
CustomerService
1-800-618-6798
Monday to Friday ( 8:30 am – 5:30 pm EST)
[email protected]


