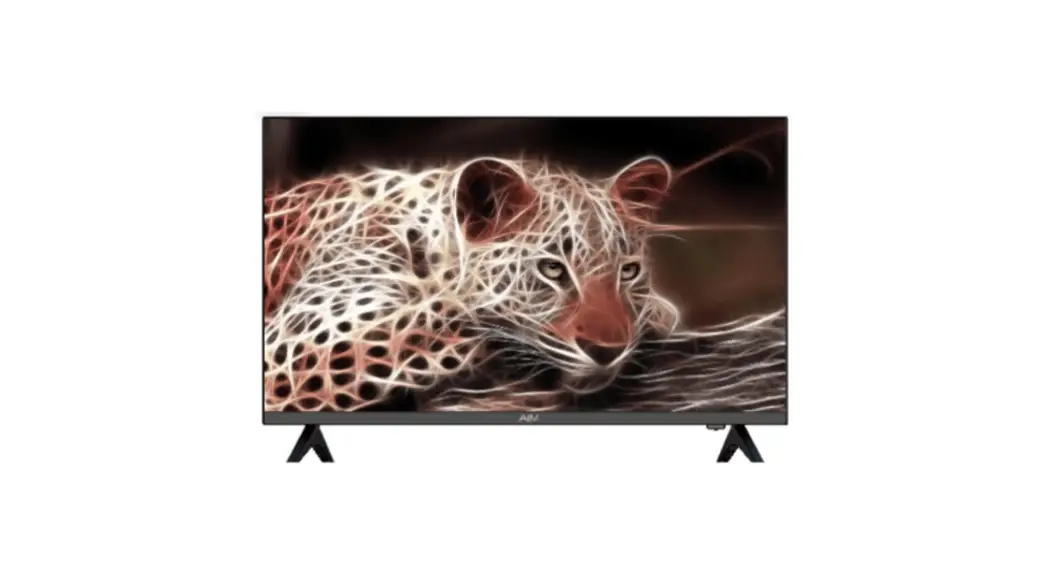
![]() ALED-32HDA 32 Inch Digital HD Ready LED TV
ALED-32HDA 32 Inch Digital HD Ready LED TV
User Manual
ALED-32HDA 32 Inch Digital HD Ready LED TV
- RESOLUTION: 1366X768
- HDMI INPUT: X 3
- USB INPUT: X 2
- VGA INPUT: X 1
- PC AUDIO INPUT: X 1
- AV INPUT: X 1
- EARPHONE OUT: X 1
- COAXIAL OUT: X 1
- MAX AUDIO OUTPUT: 8W + 8W
Important Notice: Please retain original packaging for Warranty purposes. Please return with ALL supplied accessories. Supplier reserves the right to make changes at any time without prior notice.
INTRODUCTION
Warning
![]() WARNING: TO REDUCE THE RISK OF ELECTRIC SHOCK,DO NOT REMOVE COVER(OR BACK). NO USER SERVICEABLE PARTS INSIDE. REFER ALL SERVICING TO QUALIFIED SERVICE PERSONNEL.
WARNING: TO REDUCE THE RISK OF ELECTRIC SHOCK,DO NOT REMOVE COVER(OR BACK). NO USER SERVICEABLE PARTS INSIDE. REFER ALL SERVICING TO QUALIFIED SERVICE PERSONNEL.![]() The lightning flash with arrowhead symbol, within an equilateral triangle, is intended t o alert the user to the presence of uninsulated “dangerous voltage” within the products enclosure that may be of sufficient magnitude to constitute a risk of electric shock t o a person.
The lightning flash with arrowhead symbol, within an equilateral triangle, is intended t o alert the user to the presence of uninsulated “dangerous voltage” within the products enclosure that may be of sufficient magnitude to constitute a risk of electric shock t o a person.![]() The exclamation point within an equilateral triangle is intended to alert the user to the presence of important operating and maintenance(servicing)instructions in the literature accompanying the unit.
The exclamation point within an equilateral triangle is intended to alert the user to the presence of important operating and maintenance(servicing)instructions in the literature accompanying the unit.
REGULATORY INFORMATION
This equipment generates, uses and can radiate radio frequency energy and if not installed and used in accordance with the instructions, may cause external interference to radio communication. However, there is no guarantee that interference will not occur in a particular installation. If this equipment does cause external interference to radio or television reception, which can be determined by turning the equipment off and on, the user is encouraged to try to correct the interference using one or more of the following measures:
- Relocate the receiving antenna.
- Increase the distance between the equipment and receiver.
- Connect the equipment into an outlet on a circuit different from the one to which the receiver is connected.
- Consult the dealer or an experienced radio/TV technician for help.
Any changes or modifications not expressly carried out by an authorized service centre will void the warranty of the appliance.
CAUTION:
DO NOT attempt to modify this product in any way without written authorization from the supplier.
Where the MAINS plug is used as the disconnect device, the disconnect device shall remain readily operable.
WARNING
Never place a television set in an unstable location. A television set may fall, causing serious personal injury or death. Many injuries, particularly to children, can be avoided by taking simple precautions such as:
- Using cabinets or stands recommended by the manufacturer of the television set.
- Only using furniture that can safely support the television set.
- Ensuring the television set does not hang over the edge of the supporting furniture.
- Not placing the television set on tall furniture (for example, cupboards or bookcases) without anchoring both the furniture and the television set to a suitable support.
- Not placing the television set on cloth or other materials that may be located between the television set and supporting furniture.
- Educating children about the dangers of climbing on furniture to reach the television set or its controls.
If your existing television set is being retained and relocated, the same considerations as above should be applied.
Safety Instructions
WARNING
To reduce the risk of fire or electric shock, do not expose this unit to rain or moisture.
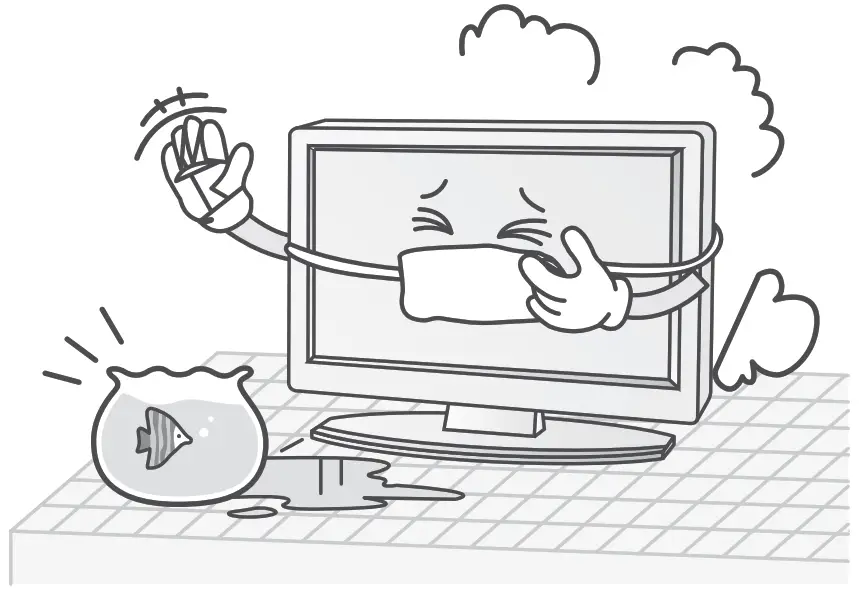
The unit should not be exposed to dripping or splashing and objects filled with liquids, such as vases, should not be placed on the unit.
IMPORTANT SAFETY INSTRUCTIONS
- Read these instructions.
- Keep these instructions.

- Heed all warnings.
- Follow all instructions.
- Do not use this unit near water.

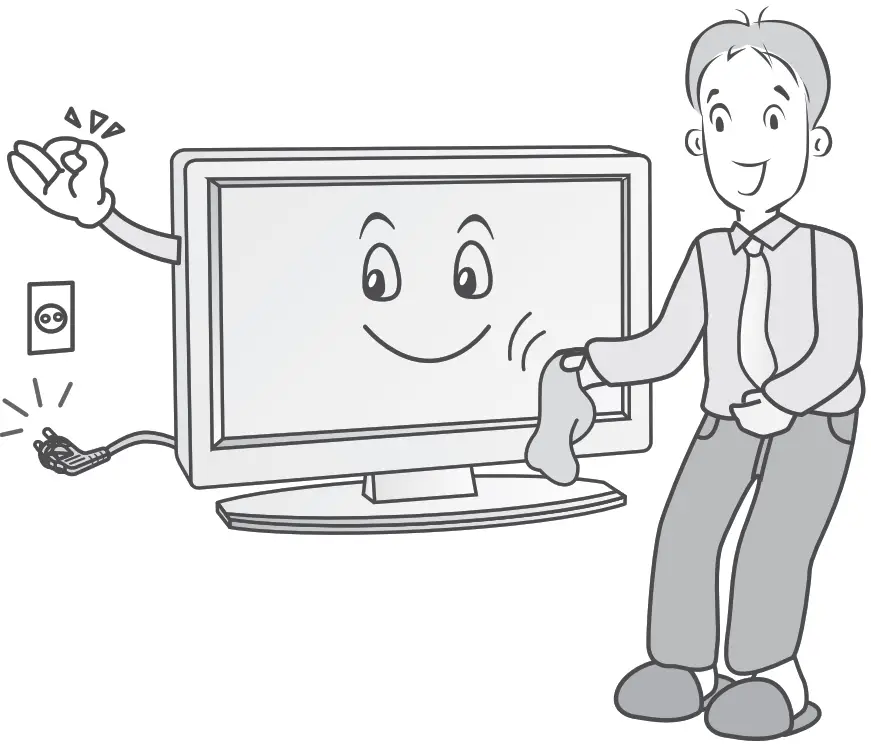
- Clean only with a dry cloth.

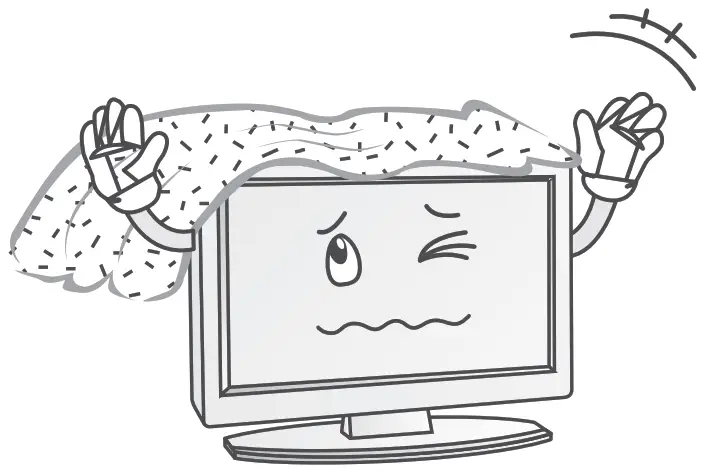
- Do not block any of the ventilation openings. Install in accordance with the manufacturer’s instructions.

- Do not install near any heat sources such as radiators, heaters, stoves, or other apparatus(including amplifiers)that produce heat.

- Protect the power cord from being walked on or pinched particularly at plugs and at the point where they exit from the unit.

- Only use attachments or accessories specified by the manufacturer.
- Only use a cart, stand, tripod, bracket or table specified by the manufacturer or sold with the unit.

- Unplug this unit during lightning storms or when it is not going to be used for along period of time.

- Refer all servicing to qualified service personnel. Servicing is required when the unit has been damaged in any way.


Please note:
- If the TVis cold, there may be a small “flicker” when you turn it on.
- Avoid touching the LCD screen or holding your finger(s) against it.
Precautions when connecting the power cord:
Do not overload wall power outlets. Overloaded wall power outlets could damage the TV and could result in electric shock or fire. Periodically examine the cord of your appliance; if its appearance indicates damage or deterioration, unplug it. Stop using i t until you have had it replaced with the appropriate cord which has been installed by an authorized dealer. Protect the power cord from physical or mechanical abuse, such as being twisted, kinked or pinched.
Disposal:
- The fluorescent lamp used in this product contains a small amount of mercury.
- Disposal of this product must be carried out i n accordance with the regulations of your local authority.
Accessories
- LED TV x 1
- Remote Control x 1
- Batteries x 2
- Stand x 2
- Screws x 4
- User Manual x 1
Base Installation Instructions
(For the physical structure, please refer to the actual TV)
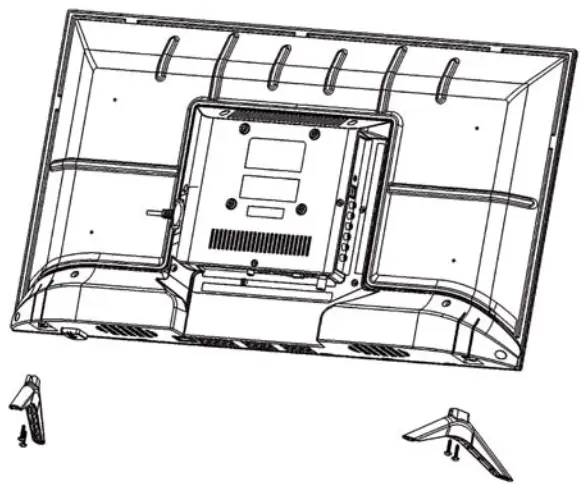
- Place the TV with the front panel facing downwards on a soft cloth or on soft pads on a desk.
- Insert the stand into the bottom socket o f the TV.
- Insert the screws into the sockets and tighten them.
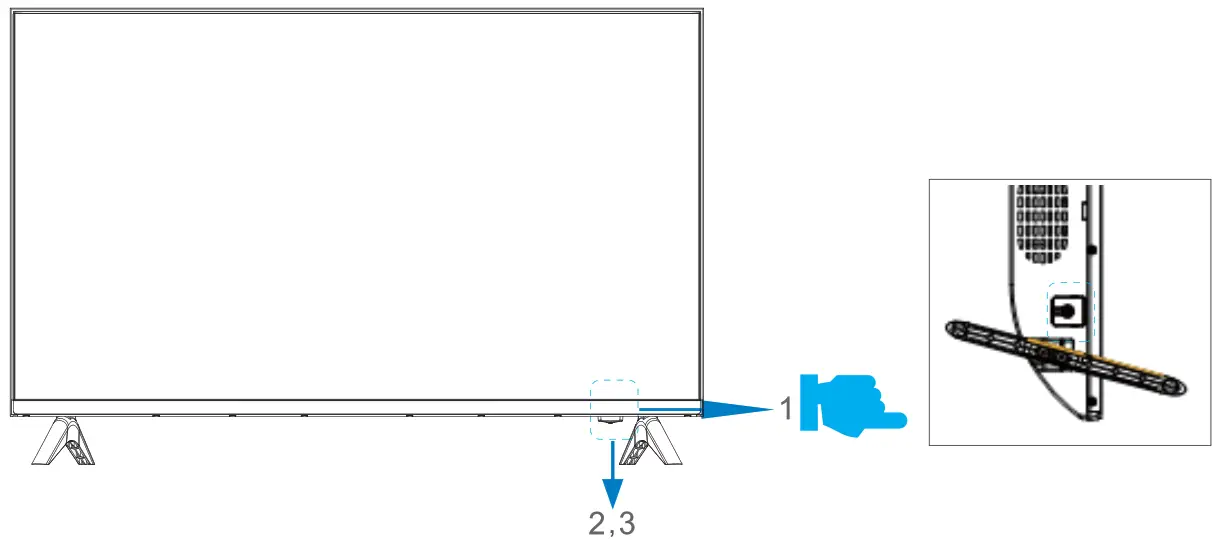
Keys and Interfaces
Press the Multi Function Standby button on the TV unit to perform the following functions:
- When the TV is in Standby mode, press this button to turn the TV on.
- When the TV is on, press this button to display the menu below:

- Press the Multi Function Standby button once to move between the various icons.
- Press and hold to enter the function menu for that icon. Use +or- buttons for further operation.
- The function menu will disappear once the Multi Function Standby button i s no longer pressed.

| ITEM | BUTTON NAME | FUNCTION DESCRIPTION |
| 1 | Press to switch the TV on during Standby mode or vice versa. | |
| Press to bring up the main menu to the screen. | ||
| Press to select the input source /Press to confirm. | ||
| Press to scan through channels /Press to move up or down. | ||
| Press to increase or decrease the sound level /Press to move left or right. | ||
| 2 | POWER INDICATOR | Indicator shows red in Standby mode and green when TV is switched on. |
| 3 | REMOTE SENSOR | Infrared sensor for the remote control. |

Wall Mount Specifications
| Compatible wall-mount size | Screw size for connecting the TV to the wall mount |
| VESA 1 00*1 00 | PWM4 screws, length 6 mm x2 pcs* PWM4 screws, length 12 MM x2 pcs* |
| * The length of the screw specified is only a recommendation; actual length required can vary depending on the type of wall mount used. | |
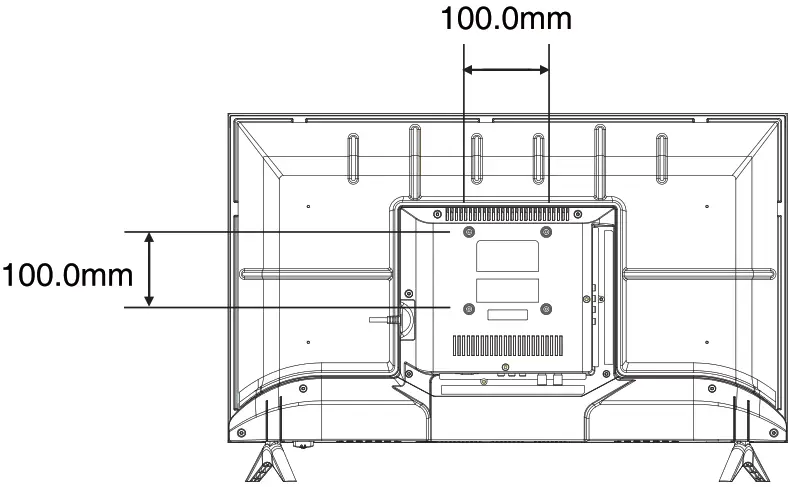
Note:
- The wall mount is not included with the TV; it needs to be purchased separately.
- Use only VESA-compatible wall mounts according to the specifications recommended for this model. Use of other wall mounts, or inappropriate installation may cause personal injuries or damage to the TV.
- Please follow all instructions from the user manual of your chosen wall mount.
Connection Options
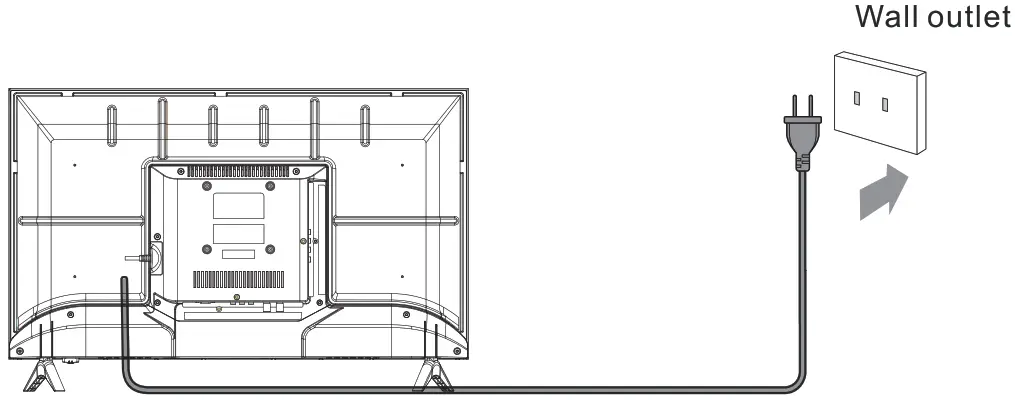
Power Cord Connection:
- Connect the power cord correctly as shown below.
- Press the POWER switchover TV to turn the TV on. The power indicator on the front panel will lignt up red.

Antenna Connection:
- Antenna or Cable Service without Cable Box Connections.
- For optimum picture quality, adjust antenna direction i f needed.
 Multi- family dwellings or apartments
(Connect to wall antenna socket)
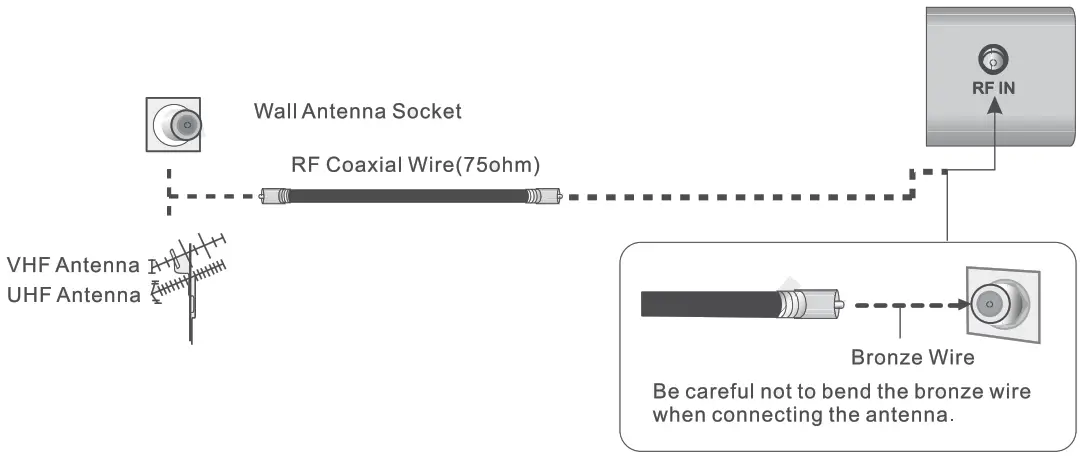
Outdoor Antenna Single-family dwellings or houses
( Connect to wall jack for outdoor antenna)
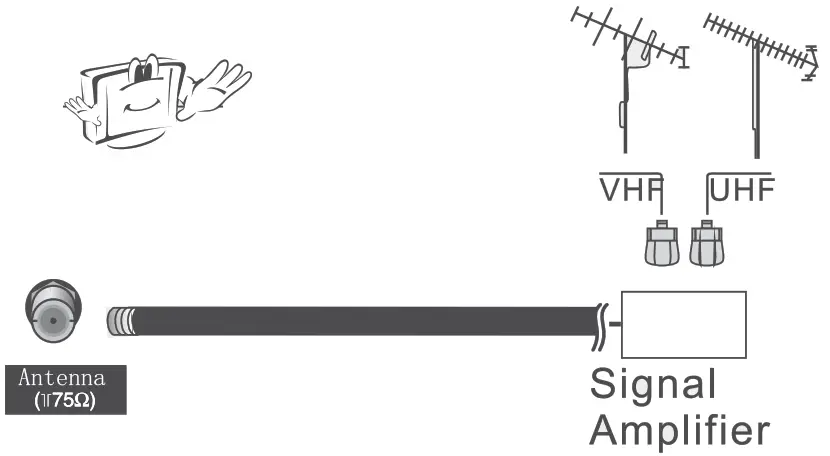
- To improve picture quality in a poor signal area, purchase and install a signal amplifier.
- If the antenna needs to be split for two TV’ s, install a “2-Way signal splitter’ in the connections.
- If the antennas is not installed properly,contact your dealer for assistance.
![]() Before connecting any external equipment, turn off the main power for safety.
Before connecting any external equipment, turn off the main power for safety.
External Equipment Connections
You can connect a VCR, DVD player, set-top box , computer, game console or other video equipment to the TV. To view external source images, press ![]() to select the input source.
to select the input source.
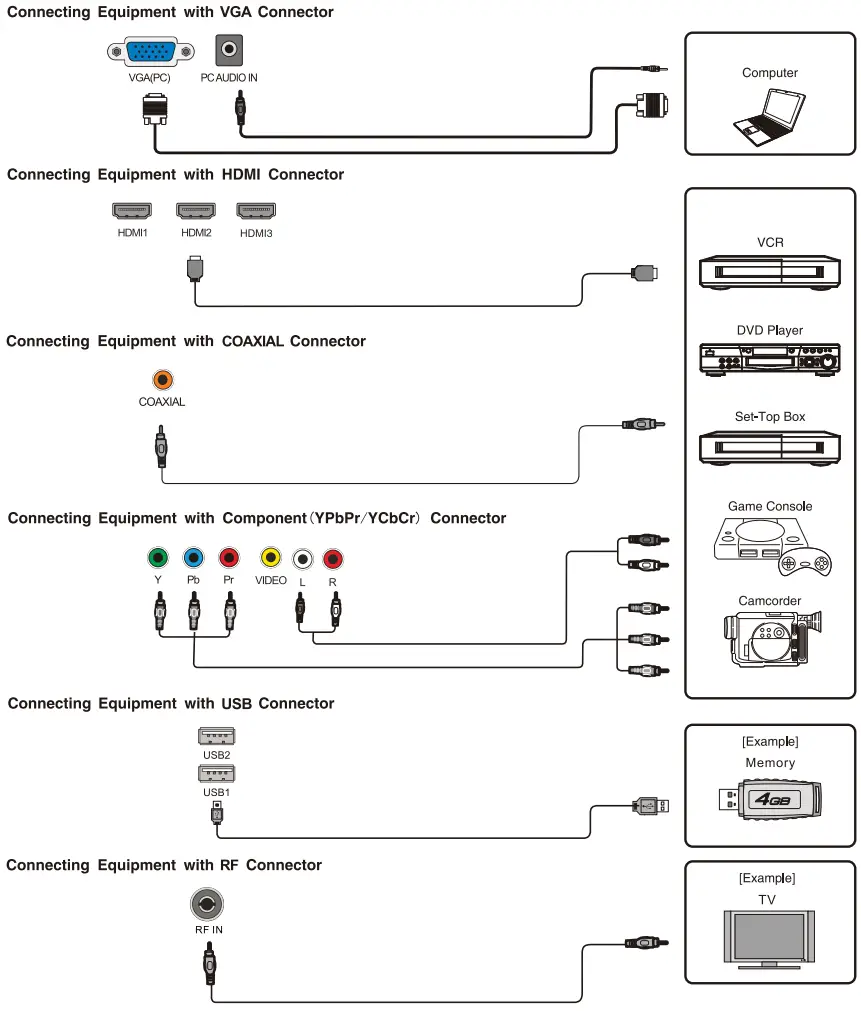
 If the external equipment has DVI output, you can connect it to the HDMI terminal using a HDMI-DVI cable. When using a HDMI-DVI cable, connect the analogue audio signal to RGB/HDMI analogue audio input terminal.
- Please refer to the user manual of the external equipment for more information on the connection to the TV.
- Please disconnect the power supply to the equipment and TV before connecting.
REMOTE CONTROL
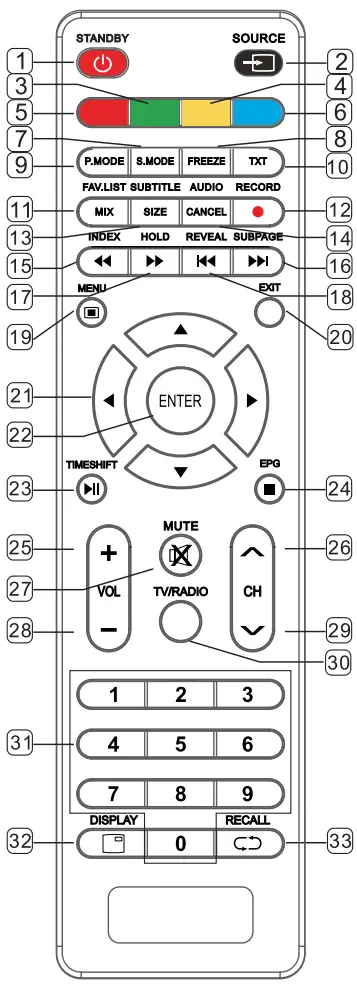
- STANDBY(
 ): Press to turn the TV on or switch to Standby mode.
 - SOURCE: Press to select the signal source.
- GREEN: Press to access the green item or page.
- YELLOW: Press to access the yellow item or page.
- RED: Press to access the red item or page.
- BLUE: Press to access the blue item or page.
- S.MODE: Press to select the sound mode.
- FREEZE: Press to freeze the picture.
- P.MODE: Press to select the picture mode.
- TXT: Press to enter or exit Teletext.
- FATALIST: Favorited channel list. MIX(in TXT): Press to set transparency.
- RECORD: In DTV mode, press to record data.
- SUBTITLE: In DTV mode, press to select subtitle mode. SIZE(in TXT): Press to set the character sizes.
- AUDIO: Press to select TV audio mode. CANCEL(in CANCEL):Press to cancel TXT on screen.
- INDEX: Press to display the index page. MEDIA mode:
 Rewind.
 - SUB PAGE: Press to enter sub page. MEDIA mode:
 Next.
Next. - HOLD: Press to hold the current page. MEDIA mode:
 Fast Forward.
 - REVEAL: Press to reveal the hidden information. MEDIA mode:
 Previous.
 - MENU: Press to enter or exit menu.
- EXIT: Press to exit menu or operation.
 Key: Menu item selection.
- ENTER: Press to confirm or enter.
- TIME SHIFT: DTV mode time shift.
MEDIA mode: Press once to pause, press again to playback.
 - EPG: Enter or exit EPG(Electronic Program Guide).
MEDIA mode: Stop playback and return to file list.
 - VOL+: Press to increase the volume.
- CH ∧: Press to select the next channel up.
- MUTE: Press to mute the sound.
- VOL-: Press to decrease the volume.
- CH ∨: Press to select the previous channel.
- TV/RADIO: Press to select TV or radio mode.
- 0∼9: Press the keys to select a channel.
- DISPLAY : Press to display the current video/ audio information.
- RECALL: Press to return to previous channel.
Installing the Remote Control Batteries
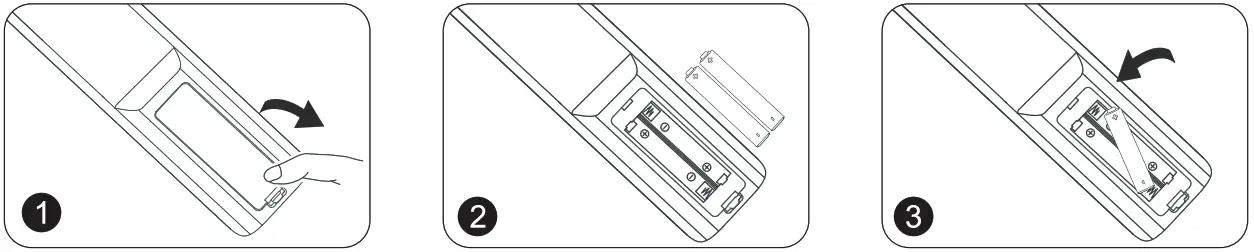 | ||
| 1.Open the battery cover. | 2. Load two AAA alkaline batteries in the compartment. Place batteries with their terminals observing the + and – indications. | 3. Replace the cover of the batteries. |
- The batteries must not be exposed to excessive heat such as sunshine, fire or the like.
- Danger of explosion if battery is incorrectly replaced. Replace the batteries with the same or equivalent type.
- Dispose of batteries according to the instructions of your local municipal bylaws.
- Do not dispose of batteries in a fire, as they will explode.
TV OPERATION
Menu Function Description
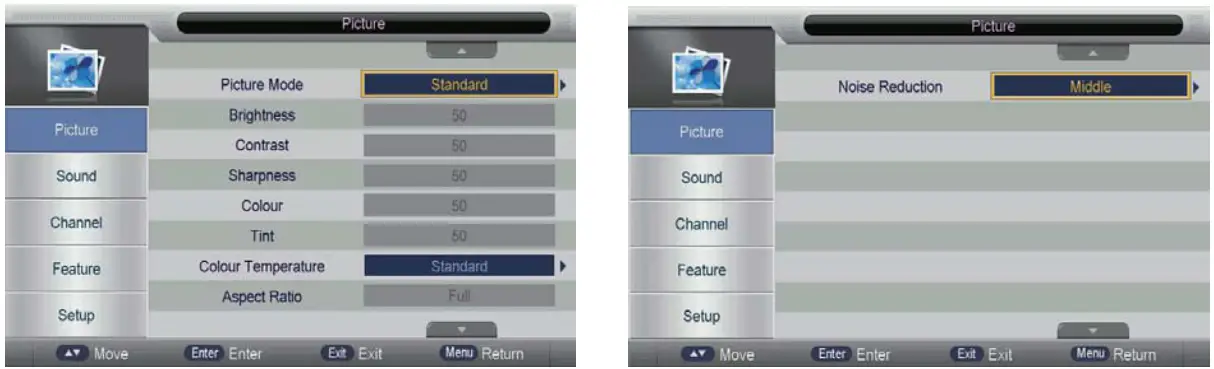
Picture Menu
Press the MENU button on the remote control to display the Main menu then press the “Right” button to shift the focus to the sub-items within the Picture menu. You can then set the functions within this menu.
The Picture menu is as follows:
| Key Stroke | Action |
| KEY_UP | Highlights the previous sub item. |
| KEY_DOWN | Highlights the next sub item. |
| KEY_LEFT | Press to return to the Main menu. |
| KEY_RIGHT | If the current focus sub item is “Picture Mode”. “Color Temperature”. “Aspect Ratio” or “Noise Reduction’,a popup menu will appear for the user to make further choices. |
| KEY_ENTER | Same as KEY_RIGHT. |
| KEY_MENU | Press to return to the Main menu. |
| KEY_EXIT | Press to exit the Main menu. |
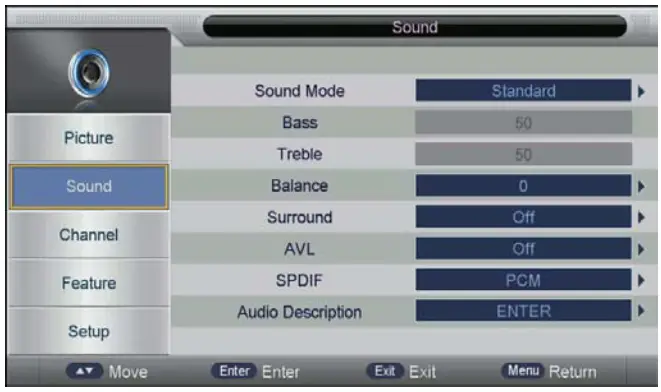
Sound Menu
Press the MENU button on the remote control to display the Main menu, press “Down” button to highlight Sound, then press the “Right” button to shift the focus to the sub-items within the Sound menu. You can then set the functions within this menu.
The Sound menu is as follows:
| Key Stroke | Action |
| KEY_UP | Highlights the previous sub item. |
| KEY_DOWN | Highlights the next sub item. |
| KEY_LEFT | Press to return to the Main menu. |
| KEY_RIGHT | If the current focus sub item is “Picture Mode”. “Color Temperature”. “Aspect Ratio” or “Noise Reduction’,a popup menu will appear for the user to make further choices. |
| KEY_ENTER | Same as KEY_RIGHT. |
| KEY_MENU | Press t o return back to the Main menu. |
| KEY_EXIT | Press to exit the Main menu. |
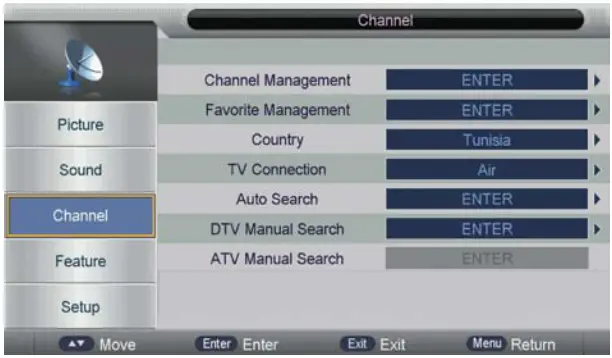
Channel Menu
Press “Menu” → “Down (![]() ) ” → “Down (
) ” → “Down (![]() ) “> “Right (
) “> “Right (![]() ) ” to enter the Channel menu in ATV/DTV/Radio source.
) ” to enter the Channel menu in ATV/DTV/Radio source.
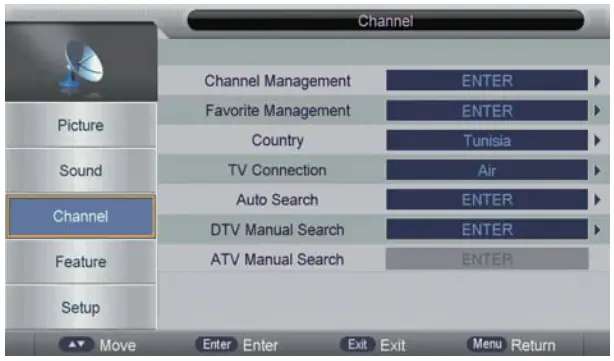
Channel Management: To manage (Delete/Swap/Lock/Skip) all channels.
Favourite Management: To manage (Add/Delete) Favourite channels.
Country: To select a country.
TV Connection: To select the DTV signal mode(Air/Cable).
Auto Search: To select auto search mode (AIl/DTV/ATV).
Digital Manual Search: To search digital channel by entering parameters manually(only for Air/Cable).
Analogue Manual Search: To search analogue channel by entering parameters manually(only for ATV).
Function Description
Channel Management
Press “ENTER?” o r “RIGHT” key on “Channel Management” on the “Channel” page in ATV or DTV source.
The operation interface will appear as follows:
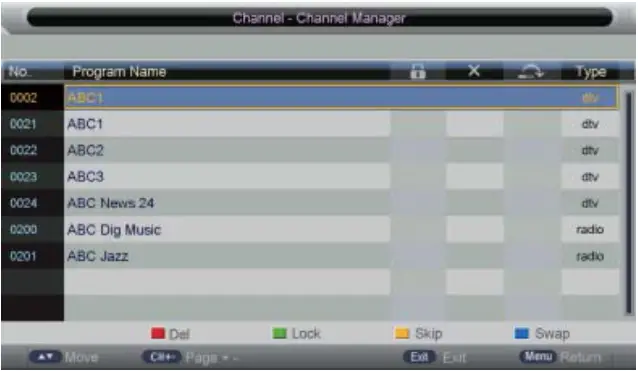
Delete/Skip/Lock Channel
- Press “Up (
 )” or “Down (
 )’keys to select the program t o manage then press “RED”, “GREEN” or “YELLOW?” key to mark them as follows:
- After marking press “MENU” key to save t h e result.
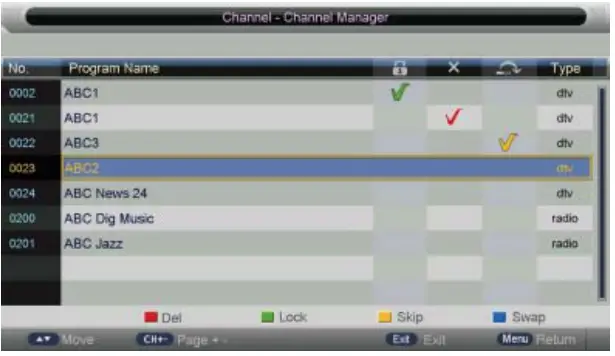
Swap Channel
Select the program to be swapped then press “BLUE” key, the selected program will flicker. You then need to select another program and press “BLUE” key again to swap them.
Favourite Management
- Press “ENTER” o r “RIGHT” key on “Favorited Management” on the “Channel” page in ATV or DTV source.
- Press “UP ()” or “DOWN ()’ keys to select the program t o be added to the Favorited list.
- Press “MENU’key to return t o the “Favorited Management” page and save the result.
Country
Select a country.
Auto Search
Air Signal Mode
Select “Auto Search” to enter auto search user operation interface as follows:
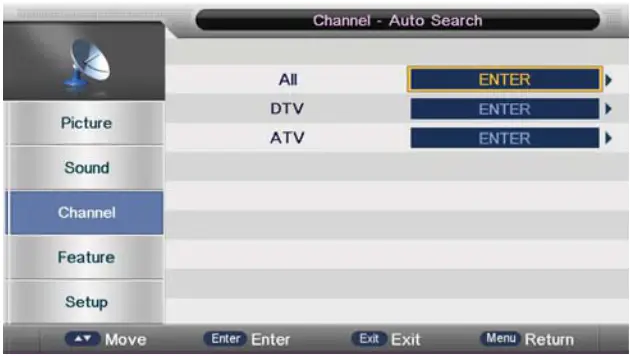
All Mode: Select “All” — to scan all Ana log channels carried by your local carrier. You can then choose to switch to scan all Digital channels in your selected country as well. User can skip or stop Analog Auto search by entering “Exit” or “Menu” key during this process.
DTV Mode ( Digital): Select “DTV” to search All Digital channels available in your selected country. User can stop search by selecting “EXIT” or “MENU” key.
ATV Mode (Analog): Select “ATV” to search All Analog channels available in your selected country. User can stop search by selecting “EXIT” or “MENU” key.
Digital Manual Search
Select “Digital Manual Search” to enter air channel manual search in DTV source. The operation interface will appear as follows:
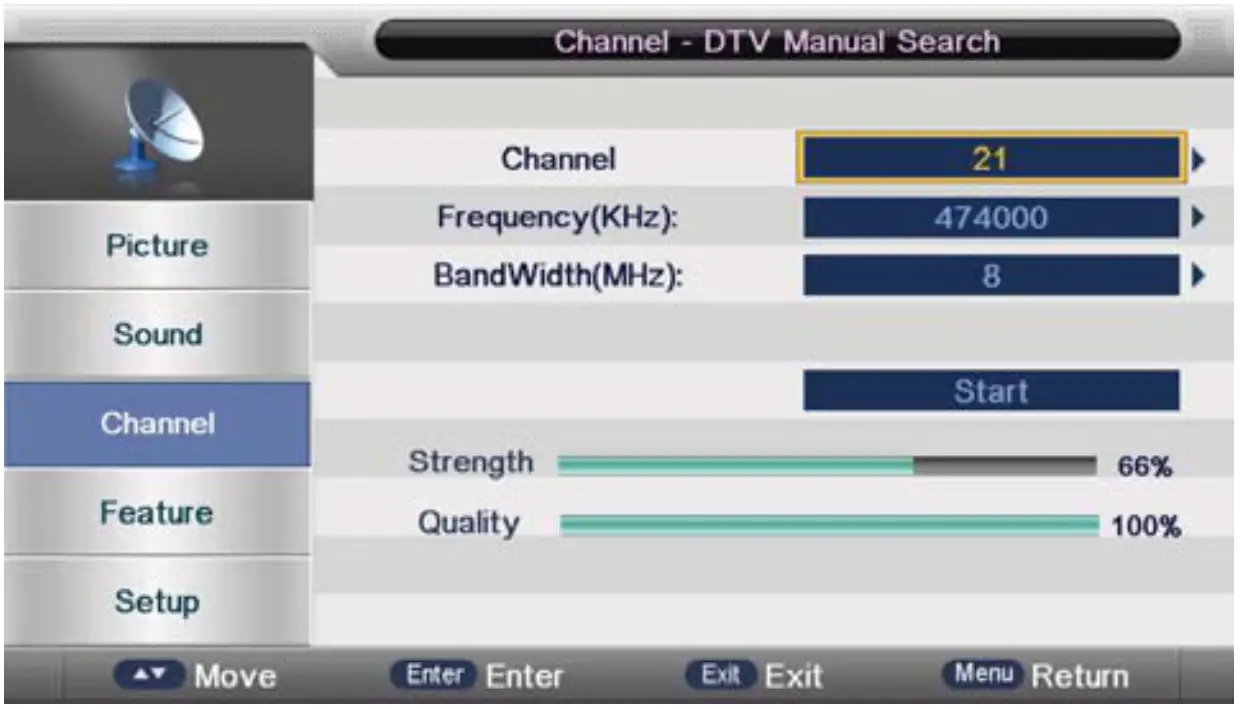
Press the “Right” key to select a channel number or enter the number directly. The strength and quality will appear at the bottom. Press Enter on “Start” to begin the current channel search. The manual and auto search user interfaces are the same.
Analog Manual Search
Select “Analogue Manual Search” to enter analogue manual search in ATV source. The operation interface will appear as follows:
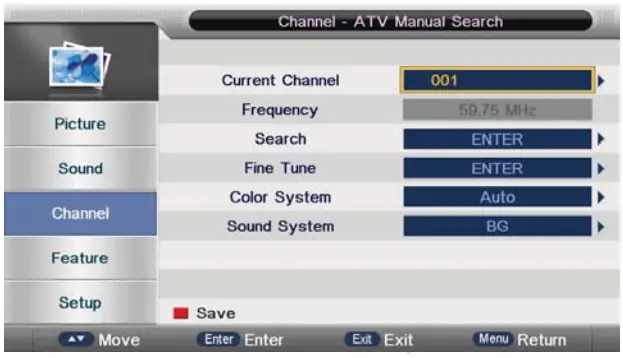
| Analog Parameters | Value |
| Current Channel | 001-100 |
| Frequency | Shows the frequency when searching |
| Search | Press Enter to open the Search sub page. |
| Fine Tune | Press Enter to open the Fine Tune sub page. |
| Color System | Auto/PAL/SECAM |
| Sound System | BG/Dk/I |
Feature Menu
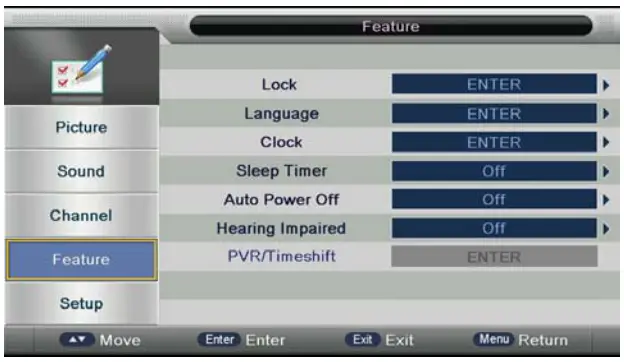
Lock: The Lock sub page includes three parts:Lock Channel,Parental Lock, Change Pin Code.
Language: System language setting includes OSD Language, Preferred Subtitle, Preferred Audio, Digital Teletext Language, Anglog Teletext Language.
Clock: It is used to check the current system time and set time zone/DST.
Sleep Timer: This function allows you to power off the TV within a specific period of time.
Auto Power Off: This function allows you to power off the TV within a specific period of time.
Hearing Impaired: This function offers subtitles in case the user is hard of hearing.
| Key Stroke | Action |
| KEY_UP | Highlights the previous sub item. |
| KEY_DOWN | Highlights the next sub item. |
| KEY_LEFT | Press to return to the Main menu. |
| KEY_RIGHT | To access “Lock” – press the up or down arrow to select this option and press “Enter” to select this option To access “Hearing” — press the up or down arrow to the Hearing Impaired menu and select “Enter” to select option |
| KEY_ENTER | Same as KEY_RIGHT. |
| KEY_MENU | Press to return back to the Main menu. |
| KEY_EXIT | Press to exit the Main menu. |
Setup Menu
The Setup menu is shown as follows
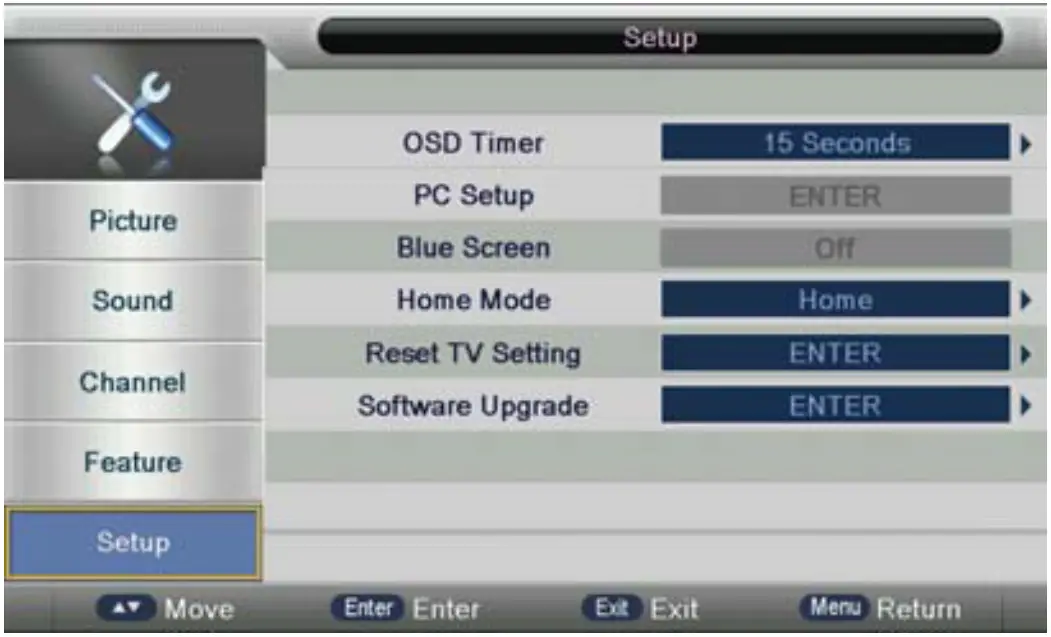
| Setup Menu Items | Value |
| OSD Timer | (5, 10, 15, 20, 25, 30 Seconds,Never) |
| PC Setup | * ENTER ” |
| Blue Screen | Off/On |
| Home Mode | Home,Dynamic |
| Reset TV Setting | “ENTER ” |
| Software Upgrade | “ ENTER ” |
| Key Stroke | Action |
| KEY_UP | Highlights the previous sub item. |
| KEY_DOWN | Highlights the next sub item. |
| KEY_LEFT | Press to return to the Main menu. |
| KEY_RIGHT | I f the cursor is on “OSD Timer”. “Auto SCART”, “Blue Screen”, a popup menu will appear for the user to make further choices. |
| KEY_ENTER | Same as KEY_RIGHT. |
| KEY_MENU | Press to return to the Main menu. |
PC Setup
It is only available in PC source.
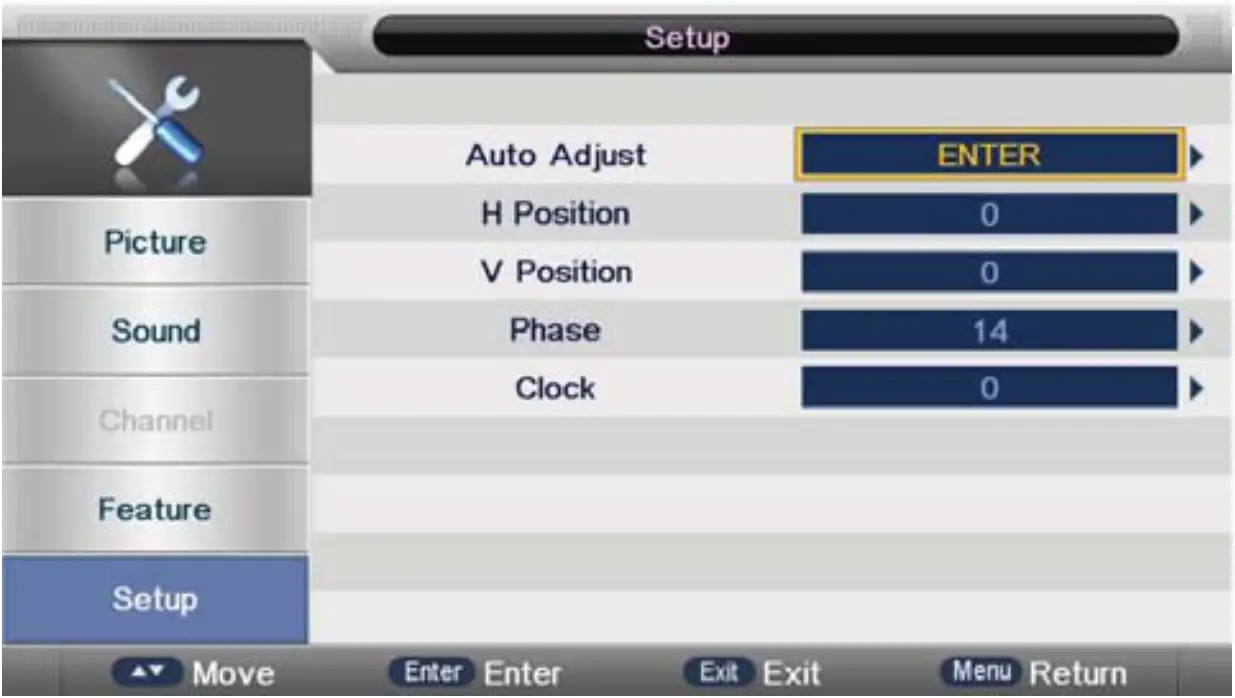
| Mode-Options | Value |
| Auto Adjust | “ENTER” |
| H Posit | -32 |
| V Position | -16~16 |
| Phase | O ~ 3 1 |
| Clock | -30~30 |
- Auto Adjust: Auto Adjust the H Position, V Position, Phase, Clock
- H Position: Manually adjust H Position
- V Position: Manually adjust V Position
- Phase: Manually adjust Phase
- Clock: Manually adjust Clock
Multimedia
Photo
Highlight “PHOTO” in the Multimedia Main menu by pressing the Right/Left key then press Enter to enter the Photo page.
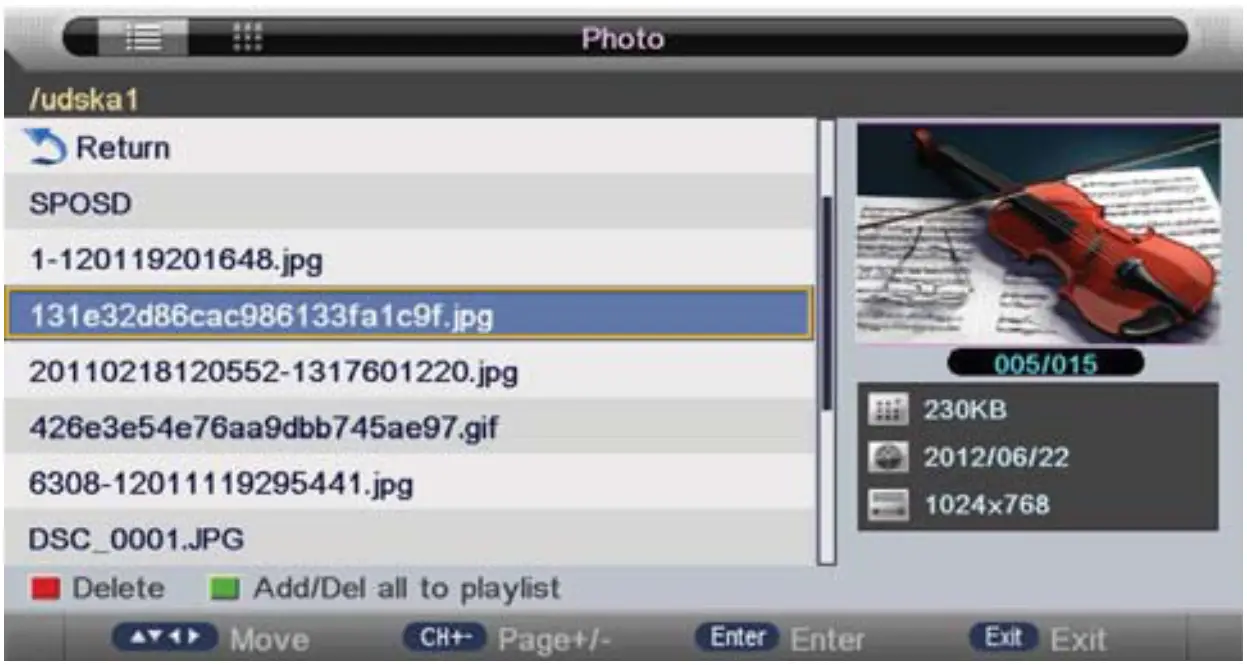
Key Operation
- RED: Delete the highlighted folder/file.
- GREEN: Add/Delete all the photo files to/from the playlist.
- ENTER: Add/Delete highlighted files to/from the playlist.
- CH+/-: Page up/Page down.
- PLAY: Play the files in the playlist.
Playback
Press PLAY to start playback.

Key Operation
 :Same as “PLAY” key on the remote – press to start playing pictures in slide show mode.
 : Same as “PAUSE” key on the remote – press to pause the playing file.
 : Same as “STOP” key on the remote – press to stop the slide show and return to the file browser.
 : Same as “|<<” / “>>|” key on the remote – press to play the previous/next file.
 : Press to rotate the current picture.
 : Press to zoom in or out of the picture.
 : Same as “INFO” key on the remote – press to display the information of the current file.
 : Press to enter the Photo Setup menu which includes: “Repeat Mode”, “Background Music’, “Music Source”, “Slide Time’, “Effect”.
 : Press to enter the playlist menu.
Music
Highlight “MUSIC” in the Multimedia Main menu by pressing the Right/Left key then press Enter to enter the Photo page.
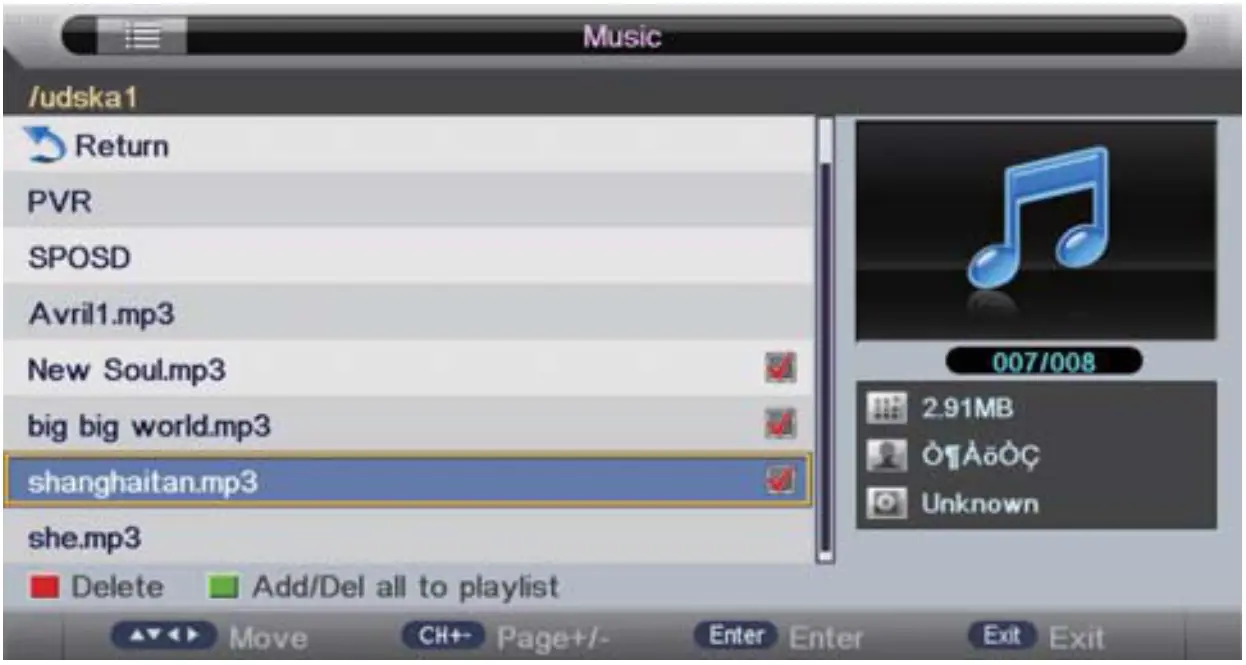
Key Operation
- RED: Delete the highlighted folder/file.
- GREEN: Add/Delete all the photo files to/from the playlist.
- ENTER: Add/Delete highlighted files to/from the playlist.
- CH+/-: Page up/Page down.
- PLAY: Play the files in the playlist.
Playback
Press PLAY to start playback.
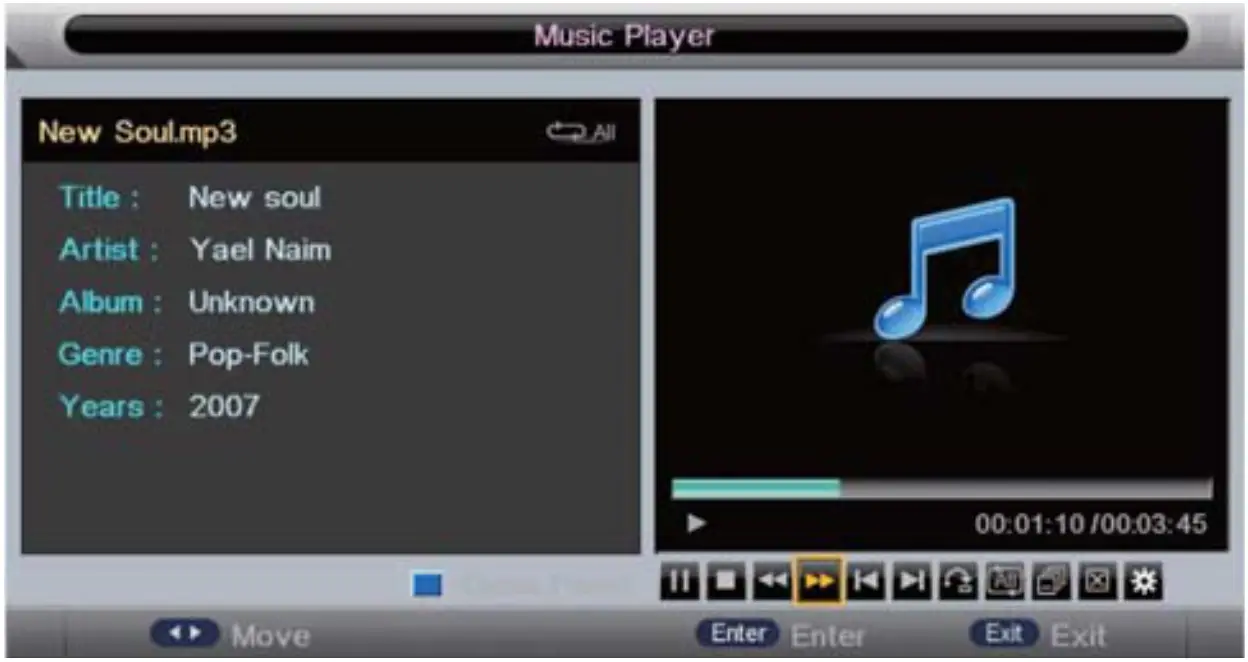
Key Operation
- : Same as “PLAY” key on the remote – press to start playing the file or resume the paused file.
- : Same as “PAUSE” key on the remote – press to pause play.
- : Same as “STOP” key on the remote – press to stop play.
 : Same as “<<” / “>>” key on the remote – press to rewind or fast forward. The speed can switch to twice, four times, eight times and sixteen times,and will be displayed as “X2.X4. X 8. X16” on screen.
- : Same as “|<<” / “>>|” key the remote – press to play the previous or next file directly.
 : Press to switch between the following repeat modes: “Repeat 1”,“Repeat All’,“Repeat Dir’ or “Random” mode.
 :Press to switch between“Information”and“Play List’.
 :Same as “Blue” button on remote — press to close / exit the “MUSIC” mode, then you can access other features / functions using your remote.
- : Press to enter the“Music Setup’menu.
Movie
Highlight “MOVIE” in the Multimedia Main menu by pressing the Right/Left key then press Enter to enter the Movie page.
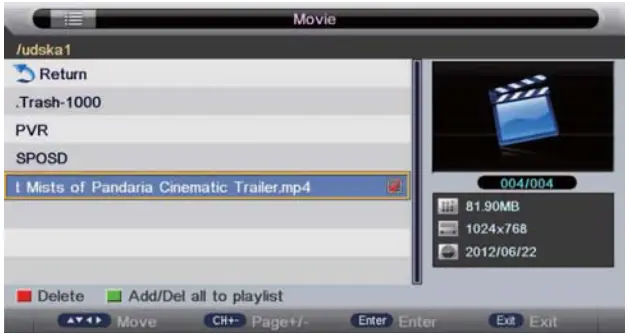
Key Operation
- RED: Delete the highlighted folder/file.
- GREEN: Add/Delete all the photo files to/from the playlist.
- ENTER: Add/Delete highlighted files to/from the playlist.
- CH+/-: Page up/Page down.
- PLAY: Play the files in the playlist.
Playback
Press PLAY to start playback.
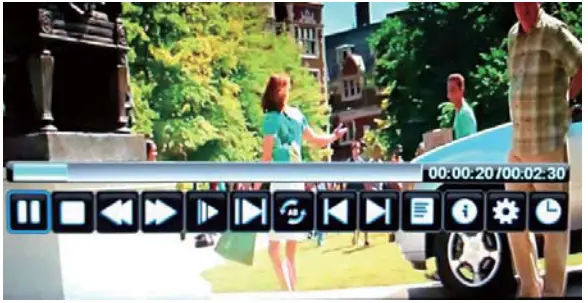
Key Operation
- : Same as “PLAY” key on the remote – press to start playing the file or resume the paused file.
- : Same as “PAUSE” key on the remote – press to pause play.
- : Same as “STOP” key on the remote – press to stop play.
- : Same as “<<“/ “>>” key on the remote – press to rewind or fast forward. The speed can switch to twice, four times, eight times and sixteen times and will be displayed as “X2.X4. X8. X16” on screen.
- : Same as “|<<” / “>>|” key the remote – press to play the previous or next file directly.
- : Enter slow mode. The speed can switch to 1 / 2 , 1/4, 1 / 8 , 1 / 1 6 and will be displayed as “X1/2, X1/4, X1/8,X1/16” Press to screen.
 : Press to enter step mode.
 : Press to set AB repeat – first press sets point A, second press sets point B then A to B will play repeatedly.
- : Press to enter the playlist menu.
- : Same as “INFO” key on the remote – press to display the information of the current file.
- : Press to enter the Movie Setup menu which includes: “Program”, “Subtitle”, “ Audio” , “Repeat Mode”.
 : Press to enter the “GOTO” function.
eBook
Please note: Only text format eBook i s supported.
Highlight “eBook’ in the Multimedia Main menu by pressing the Right/Left key then press Enter to enter the eBook page.
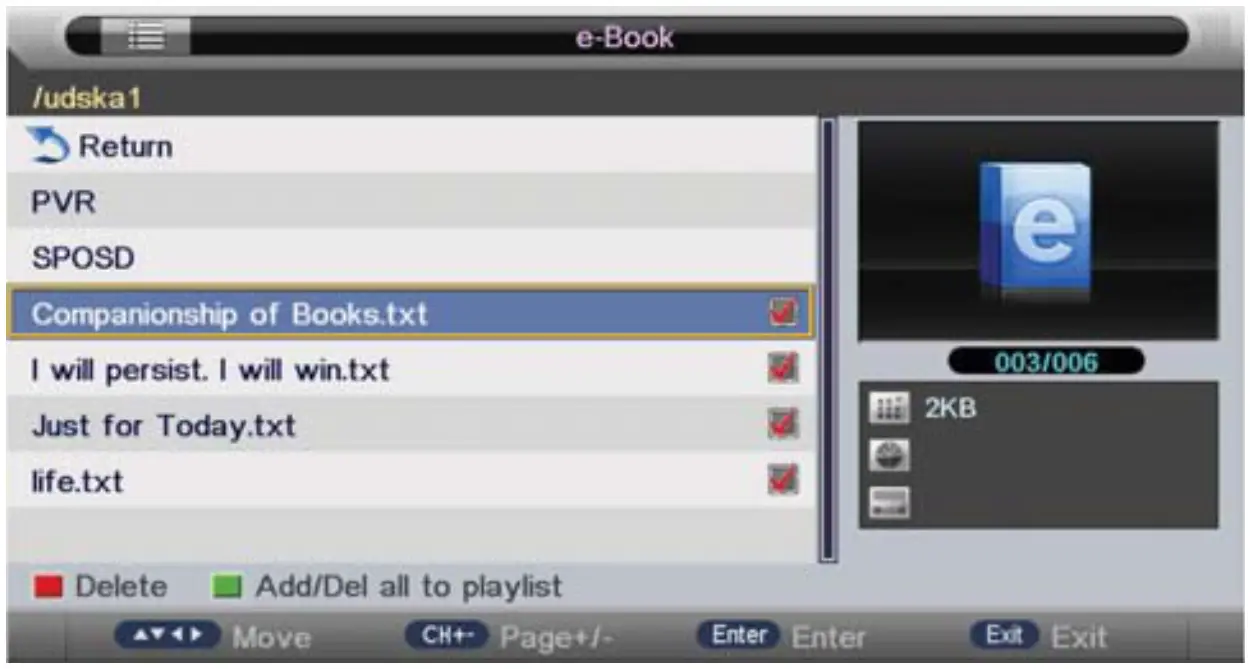
Key Operation
- RED: Delete the highlighted folder/file.
- GREEN: Add/Delete all the photo files to/from the playlist.
- ENTER: Add/Delete highlighted files to/from the playlist.
- CH+/-: Page up/Page down.
- PLAY: Play the files in the playlist.
Playback
Press PLAY to start playback.

Key Operation
“RED”: To add/del bookmark.
“GREEN”: To input the page number directly.
“YELLOW”: To enter the “Bookmark list” page.
“BLUE”: To enter the “Play list” page.
“<<” [ “>>”: To page down/page up.
“EXIT”: To close the file and return to the file browser.
OTHER
Specifications
| Screen Size | 80cm (32″ Diagonal) | |
| Aspect Ratio | 16:09 | |
| Power Supply | 100-240V-50/60Hz | |
| Power Consumption | 60W | |
| TV System | PAL B/G D/K I,SECAM B/G D/K DVB-T/C/T2 (There is no DVB-C signal in some Countries or Areas.) | |
| Audio Output Power (Internal) | 8Wx2 | |
| Input Terminal | ||
| Antenna Input | x 1 | |
| USE Input | x2 | |
| HDMI Input | x 3 | |
| VGA Input | x 1 | |
| PC Audio Input | x 1 | |
| AV Input | x 1 | |
| YPbPr Input | x 1 | |
| Output Terminal | Earphone | x 1 |
| Coaxial out | x1 | |
| Working Temperature | 0°C-40°C | |
| Working Humidity | 20% – 80% Non-condensing | |
Please note: The specifications shown above may change without notice for quality improvement .
Cleaning
- Important:
– Make sure that the power cable is removed from the AC outlet before cleaning the product.
– Do not use volatile solvents (such as toluene, rosin and alcohol) to clean the display as such chemicals may damage the housing, screen glass and remote control and cause the paint to peel. - Cleaning of Housing and Remote Control:
– Use a soft cotton cloth for cleaning.
– If the housing or remote control are very dirty, use a soft cloth moistened with diluted neutral cleaner to clean them. Wring water out of the cloth before cleaning to prevent water from penetrating into the housing. Wipe with a dry cloth after cleaning. - Cleaning of Screen:
– Use a soft cotton cloth to clean the screen gently.
– The screen glass is very fragile; so do not scrape it with any sharp object. Do not press or tap the screen as this may autocratically. When the screen is very dirty, use a soft cloth moistened with diluted neutral cleaner to clean it. Wring water out of the cloth before cleaning to prevent water from penetrating in to the housing. Wipe the display with a dry cloth after cleaning.
Troubleshooting
If the display fails or the performance changes dramatically, check the display in accordance with the table below. Remember to check the peripherals to pinpoint the source of the failure. If the display still fails to perform as expected, contact the dealer for assistance.
| Symptom | Solution |
| Power cannot be turned on(Power indicator does not light up). | -Check that both ends of the power cable are plugged into the socket appropriately and the wall socket is operational. |
| No Input Signal message appears. | -Check that the signal line is connected properly. -Check that the power of the relevant peripherals is turned on. -Check that the input option that has been selected matches with the input signal. |
| The remote control does not function properly. | -Check the batteries are not drained (replace with new batteries.) -Check that the remote control is within the operating range. -Check that the remote control is pointed to the remote control window on the display. -Check that there are no obstacles between the remote control and the remote control window. |
| Flashing spots or stripes appear on the screen. | -Check that there are no emission (car, HV cable or neon lamps) or other possible interference sources. |
| Image colour or quality deteriorates. | -Check that all the video settings are adjusted appropriately, such as brightness, contrast, colour etc. |
| Screen position and size are incorrect. | -Check that the screen position and size are adjusted appropriately. |
| Image or colour is incorrect. | -Check that the signal line is connected properly. -When connecting to a PC, you can change the resolution of the PC to acquire the correct image. The discrepancy of the PC output signal may affect the display of the image. |
| Displays a warning message. | -Check that the input signal line is properly fixed. -Select the correct input signal. |
1 YEAR LIMITED WARRANTY
The Manufacturer hereby provides a warranty to the original purchaser of this product (‘the consumer’) that this product will be free of manufacturing defects in materials and workmanship which under normal, personal, family or household use (commercial use expressly excluded) manifest themselves within the 1 year from the date of purchase.
EXCLUSIONS
- The warranty does not include and will not be construed to cover products damaged as a result of disaster, misuse, commercial use, not in accordance within the written instructions included with the product, abuse and/or any non-authorised modification of the product, incorrect installation of the product or normal wear and tear.
- Remote Controls do not fall under warranty.
- Insect infestation of the electrical or motor makes the claim invalid.
- Broken Glass or Customer abuse do not fall under the warranty.
WAIVER
The warranty and the obligations of the Manufacturer provided herein are in lieu of, and the consumer, waives all other warranties, guarantees, conditions or liabilities, express or implied, arising by law or otherwise, including without limitation, any obligation of the manufacturer in respect of any injury, loss or damage (direct, indirect or consequential) arising out of the use of, or inability to use this product and whether or not occasioned by the manufacturer’s negligence or any act or omission on its part.
PROOF OF PURCHASE
Any claim in terms of the warranty must be supported by a proof of purchase. If such proof is not available, then not withstanding anything to the contrary herein, the service agent’s prevailing charges for services/repairs and/or spares will be payable by the Consumer upon collection of the repaired product. The Consumer should call the Pick n Pay CUSTOMER CARE number on 0860 30 30 30 (only in South Africa). Customers residing outside South Africa can return the product back to a Pick n Pay store. During the warranty period the product may only be serviced and/or repaired by the Manufacturer’s duly authorised agent(s).
![]()
If this product proves to be faulty during normal use due to defective materials or workmanship. Refer to our website for terms and conditions.
REPAIRS PROCEDURE
Should you experience any faults on your Aim product, please adhere to the following procedure to have the fault rectified speedily and professionally. You can return the product to the store. Call the Pick n Pay CUSTOMER CARE number on 0860 30 30 30 (only in South Africa) to report the fault and make arrangements for the next steps.
Note: Should you live in an outlying area or outside South Africa, it may be necessary to return the product to the store nearest to you.
COST OF REPAIRS
UNDER WARRANTY
Any items still under warranty will be repaired free of charge, as long as it complies with the terms and conditions of the warranty (refer to “warranties” section in this manual). Any items that need to be repaired that are NOT covered in the warranty will be for the consumer’s expense. A quote for the repair/replacement of these items will be provided to the consumer for approval prior to repairs being conducted.
OUT OF WARRANTY
Any items that need to be repaired once the warranty has expired will be for the consumer’s expense including call out fees. A quote for the repair/replacement of these items will be provided to the consumer for approval prior to repairs being conducted.
We are confident about the quality of our products. If you are not 100% satisfied with our product we will gladly exchange or give you your money back.
Raymond Aclerman
Founder of Pick Ray
![]() Specially packed for
Specially packed for
Pick n Pay Retailers (Pty) Ltd.
Pick n Pay Office Park
101 Rosmead Avenue,
Kenilworth, Cape Town, 7708
www.pkknpay.co.za
CUSTOMER CARE
Sharecall: 0860 30 30 30
ONLY IN SOUTH AFRICA
[email protected]
Product of China


