![]()
InstructionManual
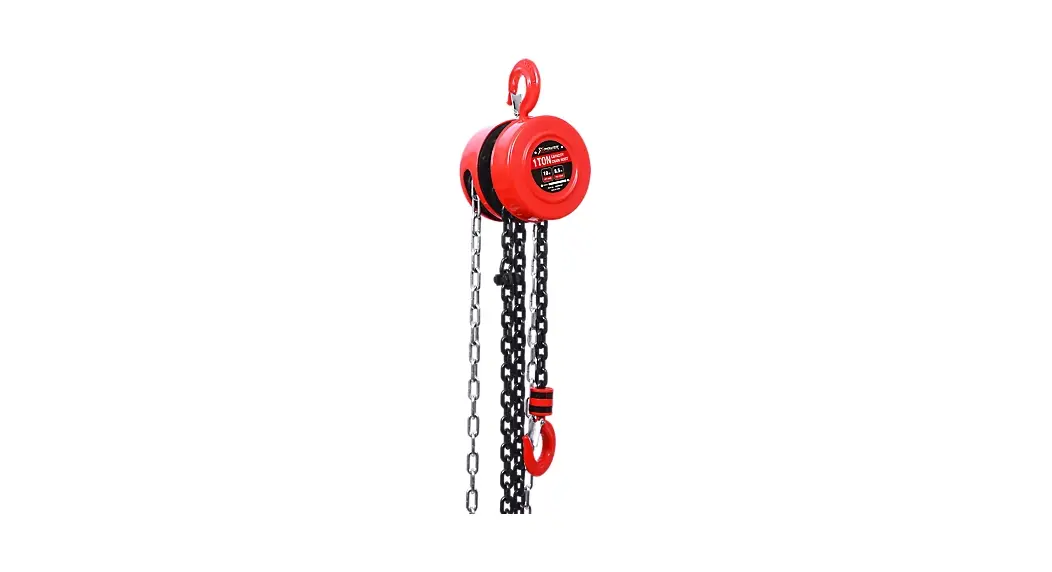
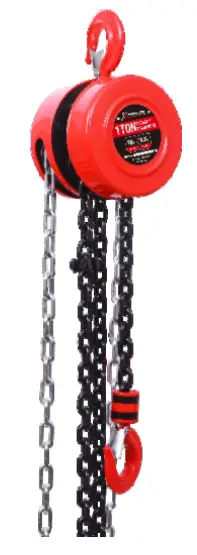
ChainHoist
Capacity:1t
ITEM# 20902101
NOTE: Before start using this hoist, read carefully the instructions of this operation manual
THANK YOU VERY MUCH FOR SELECTING OUR MANUAL HOIST
This instruction manual describes correct operating method to ensure prolonged service life. Please read and completely understand this manual before operating the Manual Hoist. Always keep this manual at an appropriate place. If the manual or warning decal is missing. please contact your vender.
NOTE: All information reported herein is based on the data available at the time of printing. The factory reserves the right to modify its own products at any time without notice or incurring in any sanction. Please verify with the factory for possible updates.
1.PREFACE
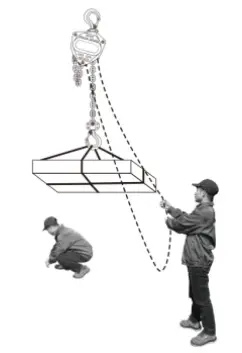
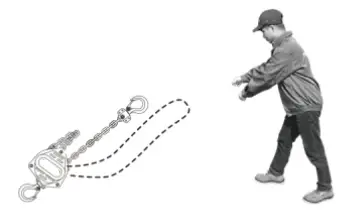
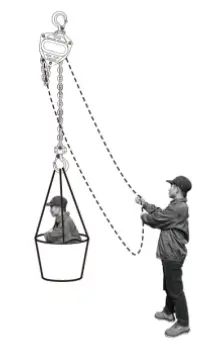
This manual hoist is a portable lifting devices easily operated by hand chain. It’s suitable for use in factories, mines, farms, construction sites, wharves, docks and warehouses for installation of equipment, as well as for loading and unloading goods. It’s specially advantageous for lifting work in open air grounds and places where no power supply is available.
The manual hoist can be attached to a trolley of any type as traveling chain block. It is suitable to monorail overhead conveying system, hand traveling crane and jib crane.
![]() WARNING
WARNING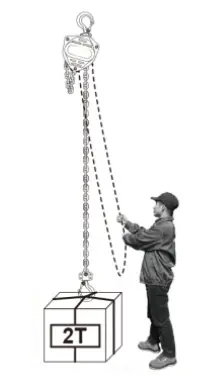
- Never lift more than rated load.

- Never use the hoist with twisted, kinked.

- Never use load chain as a sling or wrap chain around the load.

- Never lift or transport loads over or near people.

- Never lift a load unless chain is properly seated in chain wheel(s).

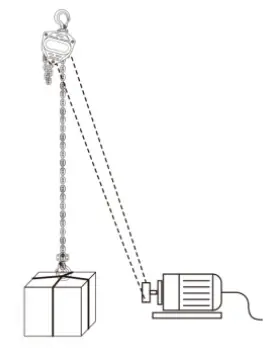
- Never operate a hoist with other than manual power.

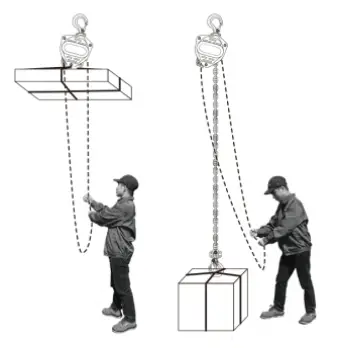
- Never pull up too high or too low.

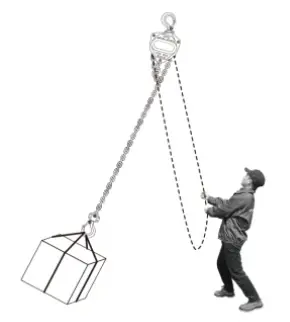
- Never pull at an angle,be sure hoist and load are in a straight line.

- Never permit more than one operator to pull on a single hand chain at one time.

- Never throw the chain block.

- Never use hoist to lift, support or transport people.


SAFETY INSTRUCTION
![]() WARNING Be sure each person reads and understands this manual before operating or maintaining the hoist. The manual hoist must be properly operated and maintained at all times.
WARNING Be sure each person reads and understands this manual before operating or maintaining the hoist. The manual hoist must be properly operated and maintained at all times.
Do not operate this hoist with any power devices.
DO
- DO read the operation and maintenance instructions.
- DO be familiar with hoist operation controls procedures and warnings.
- DO make sure that the unit is securely attached to a suitable support before applying load.
- DO maintain firm footing or be secured when operating unit.
- DO make sure that load slings or other approved sling attachments are properly sized and seated in the hook saddle.
- DO make sure the hook safety latches are closed and not supporting and part of the load.
- DO make sure load is free to move and will clear all obstructions.
- DO take up slack carefully, check load balance, move the load a few inches, and check load holding action before continuing.
- DO make sure all persons stay clear of the supported load.
- DO avoid swinging of load or load hook.
- DO protect load chain from weld spatter or other damaging contaminants.
- DO promptly report any malfunction, unusual performance, or damage of the unit.
- DO inspect unit regularly, replace damaged or worn parts, and keep appropriate records of maintenance.
- DO use the recommended parts when repairing unit.
- DO apply lubricant to load chain as recommended parts.
DO NOT
- DO NOT allow the hook to pass over the heads of people below, whether loaded or not.
- DO NOT attempt to move a load greater than the maximum safe load indicated on the equipment.
- DO NOT remove the safety clips on the hooks.
- DO NOT jam, adjust or remove the end stops in order to increase left or right travel to more than would otherwise be possible.
- DO NOT use the equipment for extracting or unjammed purposes or for lateral pulling etc.
- DO NOT use the equipment to transport people.
- DO NOT touch any moving parts.
- DO NOT use the equipment if it is in bad condition(worn,bent etc.).
- DO NOT use spare parts of unknown or doubtful origin.
- DO NOT intentionally allow the load to tip over.
- DO NOT provoke violent impacts with the equipment.
- DO NOT constantly use the end stops as a means of stopping.
- DO NOT use the lifting chain as a sling.
- DO NOT attach a sling on the point of the hook(risk of hook being damaged and load falling).
- DO NOT use the hook in a slanting position.
- DO NOT twist the lifting chain(risk of pulley block turning over, etc.)
- DO NOT leave a load suspended unless absolutely necessary.
- DO NOT use the equipment as an earth for welding.
- DO NOT use the equipment for a purpose or in a situation for which it is not designed (corrosive atmosphere,…).
- DO NOT use the safety devices as a means of measuring laden weight.
- DO NOT operate jerkily as this provokes deterioration of the equipment.
- DO NOT pull the load sideways, bring the equipment to a position above the load before moving it.
- DO NOT reach the lowest point.
INSPECTION
In order to maintain quality operation of the product, a regular inspection schedule should be set up by each operator. All inspections should be reported and maintained in a dated record log. These records should be available to all personnel involved with the product, and should be available when a warranty issue is in question.
Definitions
The following definitions are from the EN13157 and will be used in the inspections procedure that follows.
Inspection Class ifications
“Initial inspection should be done on all new, modified, and repaired products in accordance with Table 1. Thereafter, items to be inspected are indicated in Table 1 by F (Frequent) or P (Periodic).
For hoists exposed to more severe environmental condition sinspections should be more frequent. ”
Frequent Inspections
“The operator or other designated person performs frequent inspections by doing a visual examination and by listening for unusual sounds while product is operating. Frequent inspections are usually performed on the following schedule: Normal Service- Monthly inspections Heavy Service- Weekly to monthly inspections Severe Service- Daily or before each use to weekly inspections “
Periodic Inspections
“Designated person performs periodic inspections, which are more detailed inspections, by doing visual examinations of external and internal conditions. These inspections are done on the following schedule: Normal Service- Yearly inspection Heavy Service- Semi-annually inspections Severe Service- Quarterly inspections “
TABLE 1-INSPECTION CHART
In chart, F indicates Frequent Inspection, P indicates Periodic Inspection
| LOCATION | CHECK FOR | F | P | |
| Braking mechanism | Slipping under load | |||
| Hard to release | ||||
| Brake parts | Brake Discs | Glazing | ||
| Oil contamination | ||||
| Pawl:Ratchet | Excessive wear | |||
| Pawl:Spring | Corrosion:Stretch | |||
| Hook | Chemical damage | |||
| Operation | ||||
| Deformation | ||||
| Crakes(dye penetrant, magnetic particle, or other suitable detection method) | ||||
| Hook retaining members not tight or secure (Pins. Bolts. Nuts) | Not tight Secure or damaged | |||
| Hook Latch | Damaged: does not close | |||
| Suspension Members (Sheaves. Hand-wheels. Chain attachments. Suspension bolts or pins) | Excessive wear | |||
| Crakes | ||||
| Gears | Distortion | |||
| Broken or wom teeth | ||||
| Crakes | ||||
| Inadequate lubrication | ||||
| Load Block:Suspension housing | Distortion | |||
| Crake | ||||
| Trolley:Supporting structure | Possible inability to continue supporting loads or damaged | |||
| Bolts. Nuts. Rivets | Not tight or secure | |||
| WARNING Labels | Removed or not legible | |||
| Proper operation | Unusual sounds | |||
Table1
MAINTENANCE
Lubrication
Proper lubrication with machine oil is necessary to increase the life of the chain. Lubrication should be done based on usage and on a regular basis. It may be necessary on a weekly basis for heavy use or monthly if used less often.
- Clean the chain with an acid free cleaning solution to remove debris.
- Apply oil to chain focusing on bearing surfaces such as interlink areas.
- Do not apply oil to braking surfaces.
- Gears and shafts run on roller bearings and do require lubrication.
BRAKE & TOP HOOK INSPECTION & REPLACEMENT
Disassembly
- Remove the cover using a standard socket wrench.
- Remove the hand chain from the wheel.
- Use needle nose-pliers to straighten the cotter pin.
- Remove nut.
- Remove secondary cover (protects the brake).
- Remove brake
- To disassemble the top hook remove the pin and the hook comes off.
Assembly
- Chain should be well seated in the wheel.
- Put the hand wheel back on.
- Should hear a click, indicating the brake is set.
- Hand tighten the nut.
- Push the cotter pin back in.
- Use pliers to flare the ears so it stays in place.
- Reattach the hand chain; making sure the weld is out.
- Attach cover and tighten locknuts.
Storage of Hoist
- Store the hoist in a clean dry area.
- Maintain proper lubrication of the hoist while it is being stored.
- If the hoist is malfunctioning clearly mark it before placing it in storage.
Outdoor Hoist Usage
- Store hoist indoors when not in use.
- Frequently inspect the hoist for signs of corrosion due to environmental factors.
The methods for maintenance and inspection
Do not use parts and the chain hoist over the limit of use. If any wearing parts are found in excess of the standard limit of use as stated below in carrying out the daily and periodic voluntary inspections, they should be replaced for sure. Daily and periodic voluntary inspections, they should be replaced for use.
When replacing load chains, be sure to use the load chain manufactured by us. Load chains manufactured by any others are not applicable.
Checking the load chain and its lifetime
The load chain begins to be broken from even one pieces of weak chain links and thus it is important to carefully inspect the whole chain. For checking the elongation, measure the inner length of 5 links with a vernier caliper as the above sketch shows. It is normally sufficient to check the links in a distance of approx. Every 50cm but check them by making the measuring distance shorter when the elongation of the chain is close to the limitation for use started in Table 2 so that none of them will exceed the limitation for use.
Exchange the load chain with a new one which is found by visual check to be clearly deformed. Furthermore, do not weld a load chain to the original one by users themselves.
Limitation of the deformed load chain for use(Table 2)
| Rated load(kg) | Link diameter-P×5mm (new chain) | Limitation of P×5 (mm) for use |
| 500 | φ6*80 | 81.6 |
| 1,000 | φ6*80 | 81.6 |
| 1,500 | φ8*120 | 122 |
| 2,000 | φ8*120 | 122 |
| 2,000 | φ6*80 | 81.6 |
| 3,000 | φ8*120 | 122 |
| 5,000 | φ10*150 | 152 |
| 10,000 | ||
| 20,000 |
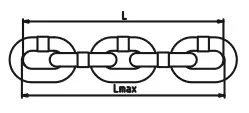
Table 2
Criteria for use
- Make sure that the class of the chain hoist is fit for condition of it’s use.
- The chain hoist should not be used to lift a load exceeding the rated load except for testing purpose.
- Do not use a bottom hook which is not equipped with a safety latch or of which latch has no safety effect.
- Do not use chain block on which chain stoppers are missing.
- Do not wind the load chain directly around a load.
- Do not quickly pull the hand chain on lifting and lowering operation.
- Do not perform over-lifting and over-lowering.
- Avoid an operation of so-called earth lifting.
- Before operation check the load chain for twisting or tangling.
- Can be used only after such twisting and tangling are corrected.
- When the chain hoist is used in special conditions such as lower or higher temperatures, or corrosive atmosphere, etc.,consult us before use.
- The chain hoist should not be modified by the users.
- Do not leave the chain hoist for many hours with a load suspended.
- Make a routine inspection before use.
- Immediately stop operation the chain hoist when an abnormally big pulling for the hand chain is required.
- Apply a lubricant to the load chain before use.
- Use the chain hoist, applying lubricants to its gears, bearings, which are liable to wear.
- Consult us whenever special usage of the chain hoist is required.
TROUBLESHOOTING
| Trouble | Cause | Remedy |
| Hoist will not lift load | Hosit is overload. | towithin hoist rated cap |
| Slip caused by ineffective braking | Worn-out friction discs. | Replace with new friction discs. |
| Excessive oil on the braking surface. | Disassemble and clean. | |
| Incorrect assembly of the braking system. | Assemble correctly. | |
| Load rapped while lowering | Damaged friction discs. | Replace with new friction discs. |
| Foreign matters in the braking system. | Disassemble and clean. | |
| Load chain binds | Damaged load chain or internal parts. | Disassemble hoist, inspect and repair or replace damaged components. |
| Load chain not installed properly (twisted or kinked). | Untwist load chain if possible, or uninstall load chain and re-install. | |
| Hand chain binds | Damaged hand chain, hand chain wheel, or internal parts. | Disassemble hoist, inspect and D repair or replace damaged components. |
| Hand chain not installed properly (twisted or kinked). | Untwist load chain if possible, or uninstall load chain and re-install. | |
| Noises during hoisting and lowering operation | Wear or deformation of the load chain and load sheave. | Replace with new parts. |
| Load hook latch does not work | Latch broken. | Replace hook latch. |
| Load hook bent or twisted. | Inspect load hook | |
| Load will not go down | The hoist was left under load for extended period. | For non-overload protection chain hoists pulling harder on the chain may loosen brake. |
| Over tightened brake. | If load cannot be moved, use another lifting device to remove the load from the affected hoist and replace brake components and perform hoist maintenance. | |
| Shock loaded during operation. | ||
| Brake rusted tight. |
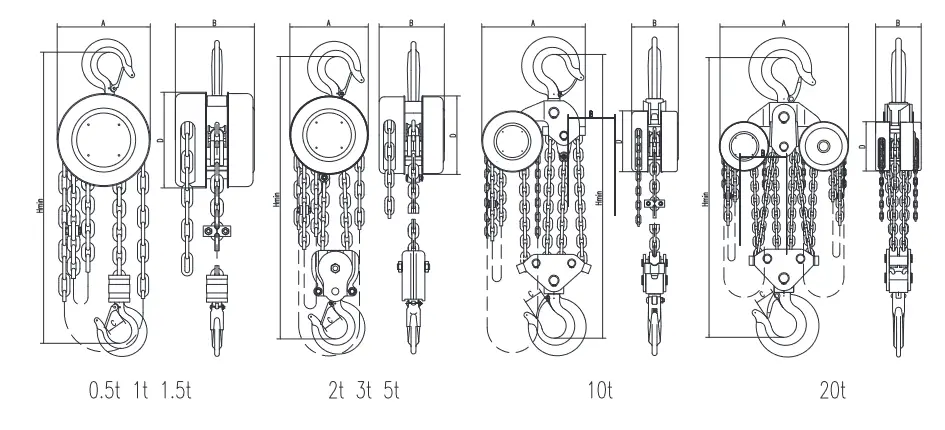
SPECIFICATIONS
| Capacity t | 0.5 | 1 | 2. | 2 | 3 | 5 | :0 | 20 | |
| Standard Lift a | 3. | 3. | 3. | 3. | 3 | 3 | 3 | 3 | |
| Test Load t | 0.75 | 2. | 2. | 3 | 5. | 6. | :2.5 | 25 | |
| Headroom.. mm | 240 | 270 | 350 | 380 | 470 | 600 | 0 | 1000 | |
| Effort to lifting sax. load N | 221 | 304 | 343 | 314 | 343 | 38: | 392 | 392 | |
| Load Chain Palls | 1 | 1 | 1 | 2 | 2 | 2 | 4 | 8 | |
| Dia. of Load Chain | 6 | 6 | S | 6 | 8 | 10 | 10 | 10 | |
| Di—ensions | A | 120 | 142 | 176 | 142 | 178 | 21C | 358 | 580 |
| B | 108 | 122 | 139 | 122 | 139 | 162 | :62 | 189 | |
| C | 24 | 28 | 34 | 34 | 38 | 48 | 64 | 82 | |
| D | 120 | 142 | 178 | 142 | 178 | 21C | 210 | 210 | |
| Net Weight kg | 8 | 10 | 16 | 14 | 24 | 36 | 68 | 156 | |
| Gross Weight kg | 10 | 13 | 20 | 17 | 28 | 45 | 83 | 194 | |
| Packing Dimensions or | 28×21 x17 | 30×24 xis | 34×29 x20 | 33×25 x19 | 38×30 x20 | 45 x 35 x24 | 55×52 x28 | 72×46 x85 | |
| Extra Weight per Meter of Extra Lift kg | 1.7 | 1.7 | 2.3 | 2.5 | 3.7 | 5.3 | 9.7 | 19.4 | |
LIMITED WARRANTY
Forcome Co., Ltd. (“We” or “Us”) warrants to the original purchaser only (“You” or “Your”) that the X-Power product purchased will be free from material defects in both materials and workmanship, normal wear and tear excepted, for a period of 90 days from date of purchase. The foregoing warranty is valid only if the installation and use of the product is strictly in accordance with product instructions. There are no other warranties, express or implied, including the warranty of merchantability or fitness for a particular purpose. If the product does not comply with this limited warranty, Your sole and exclusive remedy is that We will, at our sole option and within a commercially reasonable time, either replace the product or product component without charge to You or refund the purchase price (less shipping). This limited warranty is not transferable.
Limitations on the Warranty
This limited warranty does not cover: (a) normal wear and tear; (b) damage through abuse, neglect, misuse, or as a result of any accident or in any other manner; (c) damage from misapplication, overloading, or improper installation; (d) improper maintenance and repair; and (e) product alteration in any manner by anyone other than Us, with the sole exception of alterations made pursuant to product instructions and in a workmanlike manner.
Obligations of Purchaser
You must retain Your product purchase receipt to verify date of purchase and that You are the original purchaser. To make a warranty claim, contact Us at 1888-380-7428,
identify the product by make and model number, and follow the claim instructions that will be provided. The product and the purchase receipt must be provided to Us in order
to process Your warranty claim. Any returned product that is replaced or refunded by Us becomes our property. You will be responsible for return shipping costs or costs related
to Your return visit to a retail store.
Remedy Limits
Product replacement or a refund of the purchase price is Your sole remedy under this limited warranty or any other warranty related to the product. We shall not be liable for: service or labor charges or damage to Your property incurred in removing or replacing the product; any damages, including, without limitation, damages to tangible personal property or personal injury, related to Your improper use, installation, or maintenance of the product or product component; or any indirect, incidental or consequential damages of any kind for any reason.
Assumption of Risk
You acknowledge and agree that any use of the product for any purpose other than the specified use(s) stated in the product instructions is at Your own risk.
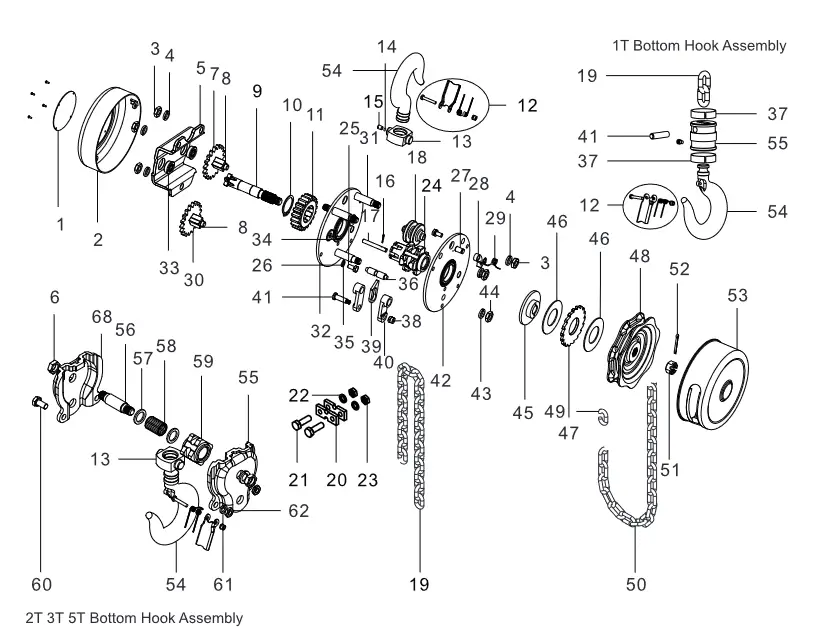
SPARE PART LIST
| 1 | Name Plate | 17 | Pin | 33 | Bearing Race | 49 | Connecting Link |
| 2 | Sheet Cover | 18 | Chain Guide | 34 | Bearing Race | 50 | Hand Chain |
| 3 | Nut | 19 | Load Chain | 35 | Stay Bolt A | 51 | Stotted Nut |
| 4 | Washer | 20 | Chain Stop | 36 | Stripper Pin | 52 | Cotter Pin |
| 5 | Gear Cover | 21 | Bolt | 37 | Anchor Ring | 53 | Wheel Cover |
| 6 | Nut | 22 | Washer | 38 | Slotted Nut | 54 | Hook |
| 7 | Disc Gear A | 23 | Nut | 39 | Stripper | 55 | Bottom Hook Block |
| 8 | Pinion Shaft | 24 | Load Sheave | 40 | Chain Anchor Plate | 56 | Sheave Shaft |
| 9 | Driving Shaft | 25 | Bolt | 41 | Chain Pin | 57 | Retaining Ring |
| 10 | Circle | 26 | Washer | 42 | Wheel Side Plate | 58 | Needle |
| 11 | Splined Gear | 27 | Pawl Pin | 43 | Washer | 59 | Idle Sheave |
| 12 | Safety Latch | 28 | Pawl | 44 | Nut | 60 | Bolt |
| 13 | Hook Holder | 29 | Pawl Spring | 45 | Brake Seat | 61 | Washer |
| 14 | Steel Ball | 30 | Disc Gear B | 46 | Friction Disc | 62 | Nut |
| 15 | Screw | 31 | Stay Bolt B | 47 | Ratchet | ||
| 16 | Cotter Pin | 32 | Gear Side Plate | 48 | Hand wheel |
![]()
Distributed by:
For come Co.,Ltd
MADE IN CHINA


