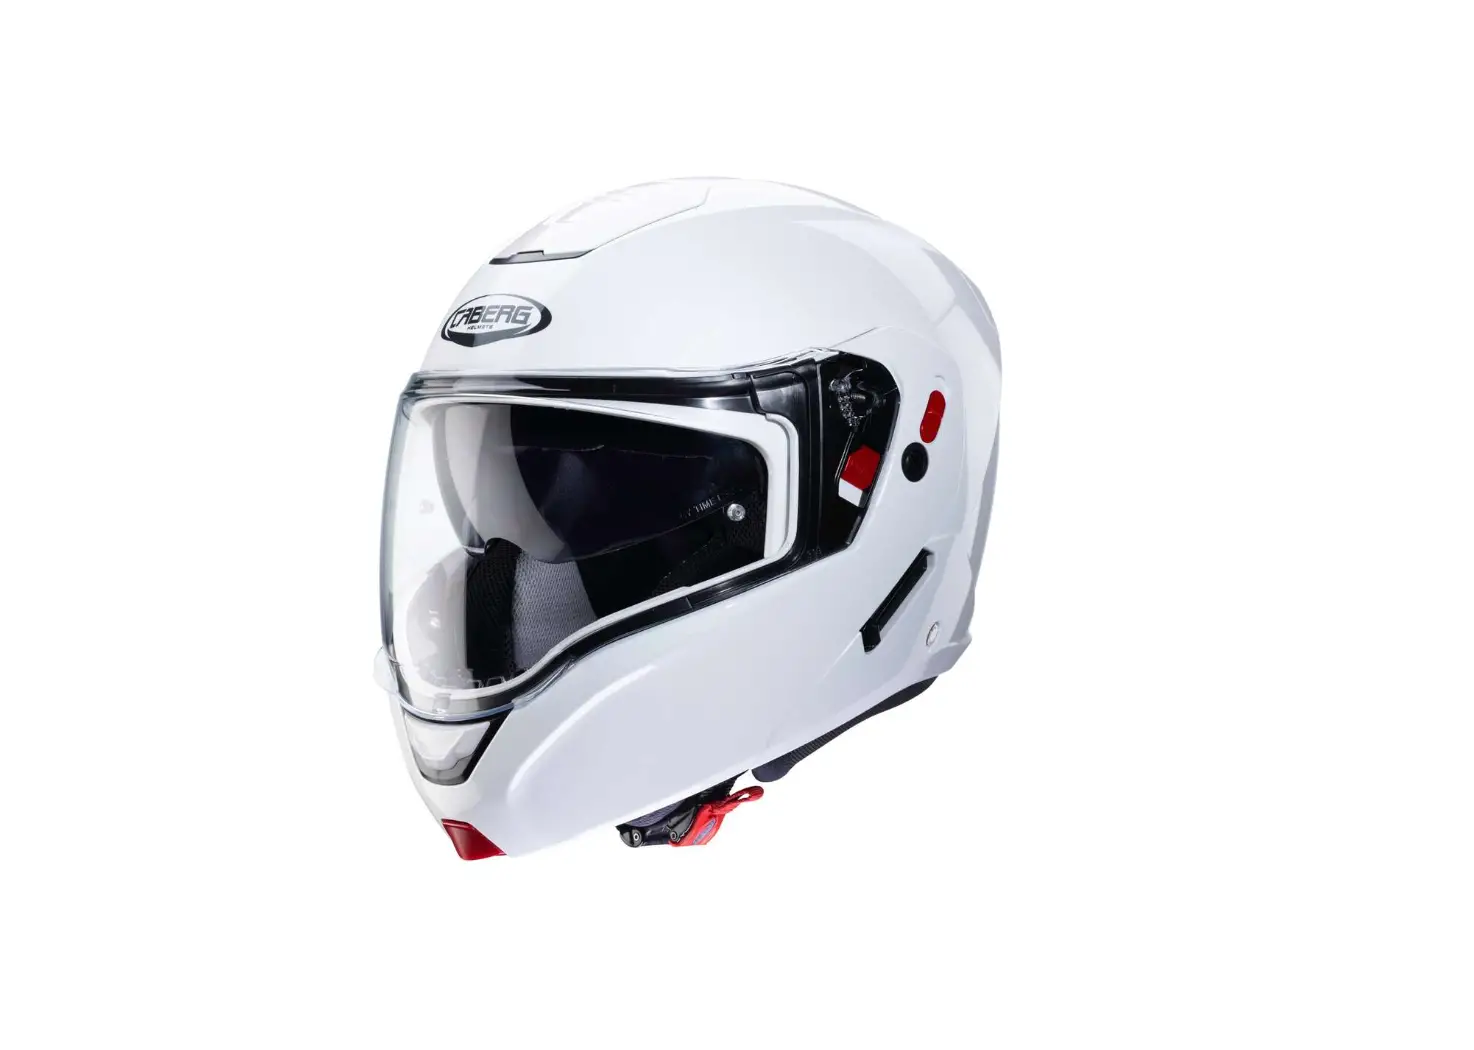
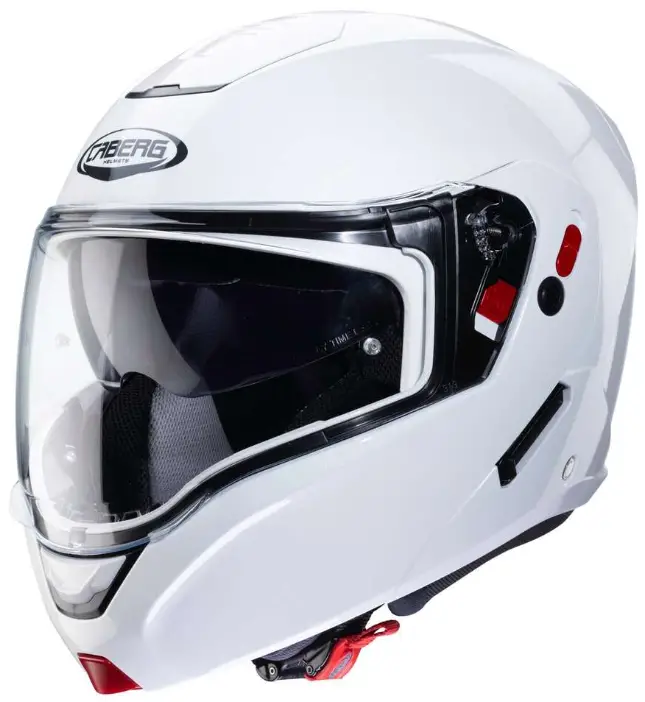
CABERG D1724 HORUS X Flip-Up-Modular Helmet
GENERAL INSTRUCTIONS FOR COMMUNICATION DEVICES SPECIFIC TO HORUS X MODEL.
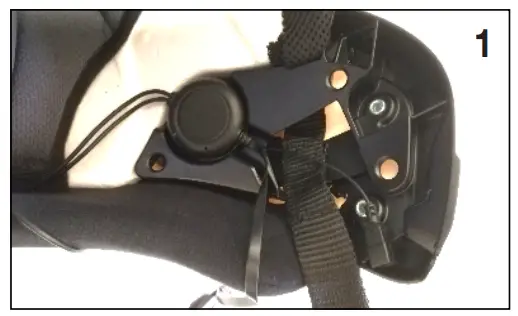
CABERG JUST SPEAK EVO (A8596) – CABERG PRO SPEAK EVO (A9235)
Removing Instruction
- Remove the cheek pads and any noise reduction inserts from the helmet. Place the speakers in the designated ear pockets, after having applied the velcro pads.

- Place the base of the microphone underneath the cheek pad, place the microphone stem in its housing.

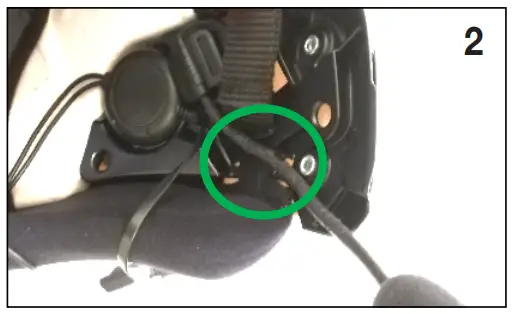
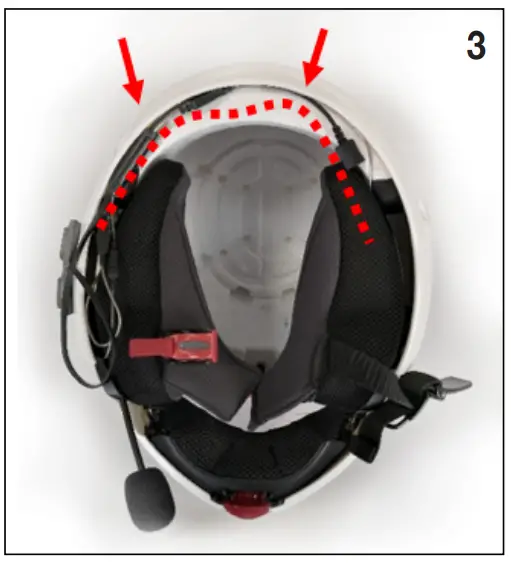
- Remove the inner liner. Place the cables in the gap between the inner and outer shell.

- If your COM has a separate BT controller, place it in the designated slot on the back of the inner shell.

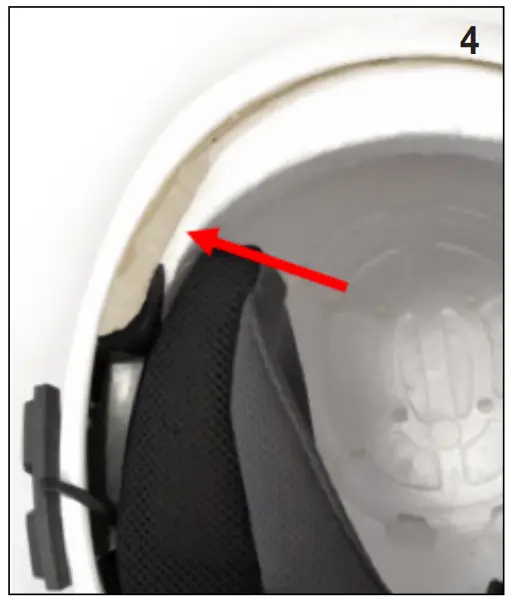
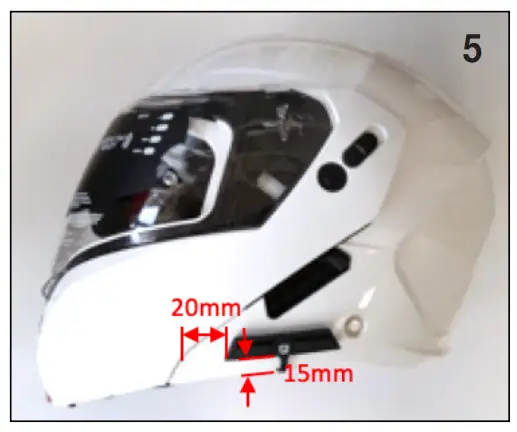
- Fit the keypad on the left side (helmet on), approximately 15 mm from the lower edge of the shell using the provided adhesive. Make sure that there is no interference with the chin guard and full contact surface between the adhesive keypad and the outer shell.

HORUS X
Your helmet HORUS X thanks to the double homologation P/J can be used in 2 configurations (chinguard closed “P” and chinguard open “J”).
Lever P/J
When the P/J lever is positioned on “J” it is possible to block the chinguard in the open position ( Pic.1).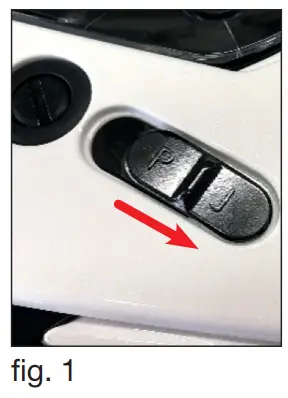
WARNING ! When in “J” position it is not possible to close the chinguard. Do not force the closure, as this, could cause damages to the closing mechanism of the helmet.
To be able to close the chinguard it is necessary to move the P/J lever to the “P” position.
When the lever P/J is positioned on “P” the chinguard can be opened and closed (Pic.2)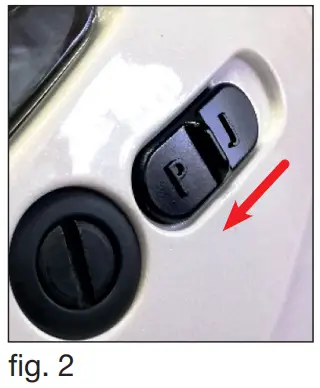
WARNING
- The level of protection of this helmet is in function of the configuration adopted by the user: full protection with the chinguard closed and partial protection when the chinguard is open.
- Whilst on the move do not ride with the chinguard in the open postion if the P/J lever is not positioned in the configuration “J”.
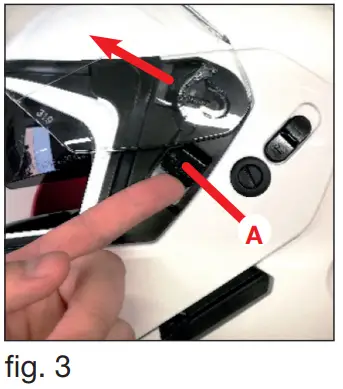
HOW TO FIX AND REMOVE THE CLEAR VISOR
- With the chin-guard closed, open the visor; Raise lever A and then release the visor (Pic. 3)

- Repeat the same process on the other side and remove completely the visor.
To re-install the clear visor, place the pivot on the visor mechanism and slide it until it is hooked. (Pic. 4)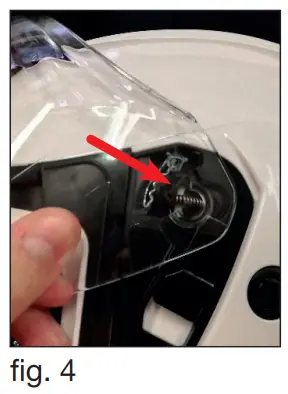
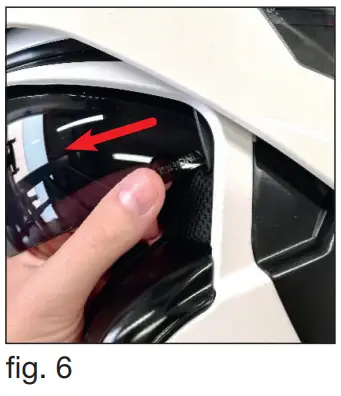
HOW TO REMOVE THE SMOKE SUNVISOR
- Move the smoke sun visor lever towards the front of the helmet (Pic.5)

- Release and remove the smoke sun visor by pulling gently outwards on both sides (Pic.6).

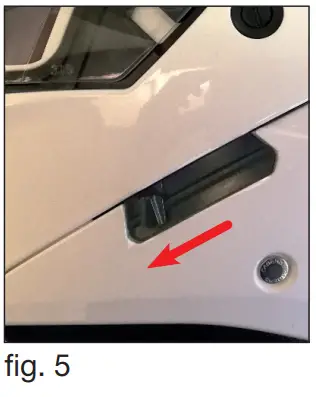
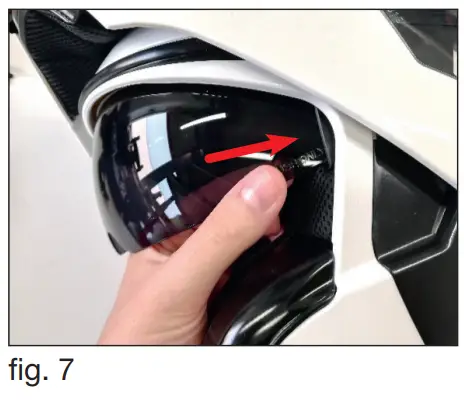
HOW TO FIX THE SMOKE SUNVISOR
- Move the smoke sun visor lever towards the front of the helmet (Pic.5)
- Insert and hook the visor to its seating by pressing gently on both lateral sides (Pic.7)

WARNING: never use the smoke sun visor during the night or with scarce visibility condition.
WARNING: any adjustments to the smoke sun visor must be done with the two-wheeler in still position.
REMOVING AND MOUNTING THE CHIN GUARD
The chin guard of this helmet can be removed to ease the cleaning of the various mechanisms.
- Repeat steps 1.1.
- Loosen the screw B (Pic. 8).

- Remove the chin guard.
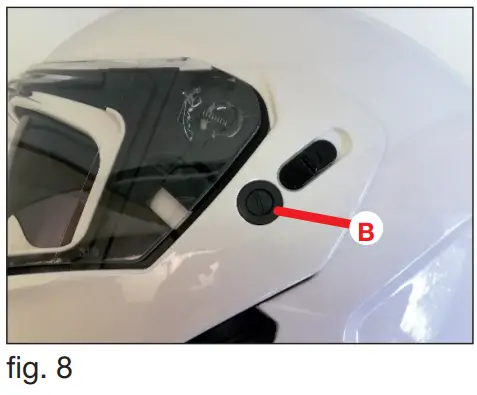
Repeat the above steps in the reverse order to mount the chinguard back to its original position.
CAUTION! Never use the helmet without the chinguard.
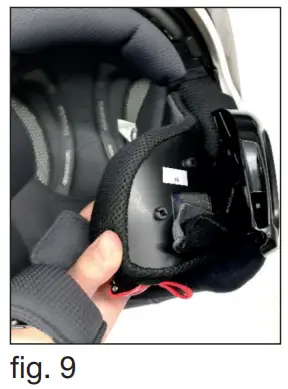
HOW TO REMOVE THE WASHABLE INNER LINER
You can start to remove the internal padding from either the right or left cheek.
- With the chin guard raised, remove the cheek pad by releasing the snap fasteners on the back. Then repeat for the other side (Pic. 9).

- Extract the cheek pad by pulling it from the chin strap through the slot. Then repeat for the other side.
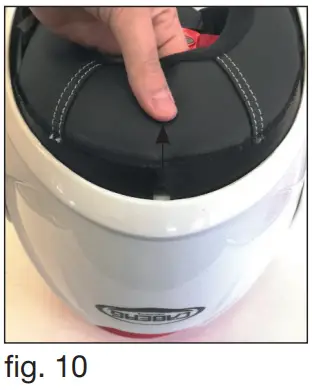
- Starting from the neck protection, release the lining by pulling slightly towards the inside of the helmet (Pic. 10).

Still pulling slightly, detach the front fixing strips from the support fixed to the shell. - Remove completely the liner.
CLEANING THE WASHABLE LINING:
- Scrub by hand with neutral soap and water (max 30° C).
- Rinse with cold water. Do not wring. Dry at room temperature.
CAUTION! Never wash the lining in the washing machine. Never use petrol or other solvents to clean the lining.
HOW TO FIT THE WASHABLE INNER LINER
- Place the main inner padding inside the helmet.
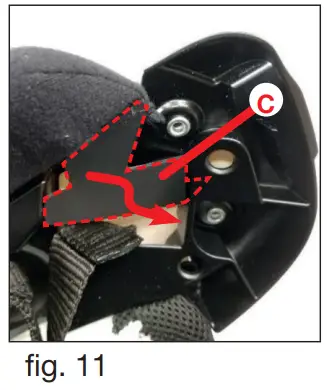
- Insert the left fixing flap C in the support seating right below the chinstrap (Pic. 11). Repeat the operation for the right-hand fixing strip.

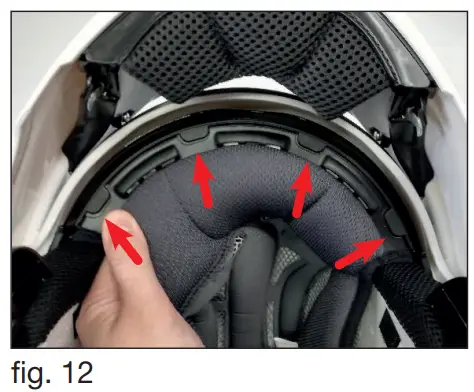
- Insert and attach the front strips into the seat on the support fixed to the polystyrene inner shell (Pic. 12).

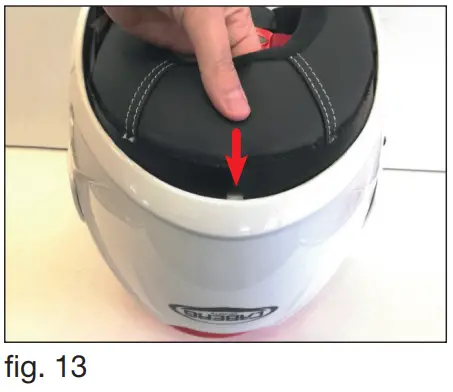
- Insert the strips in the neck area between the polystyrene inner shell and the outer shell (Pic. 13).

- Insert the chin strap in the slot of the cheek pad. Repeat for the other cheek.
- Attach the cheek pads by pressing the snap fasteners on the back (Pic. 9).
CAUTION! You must always stop your bike before opening/closing the chin guard.
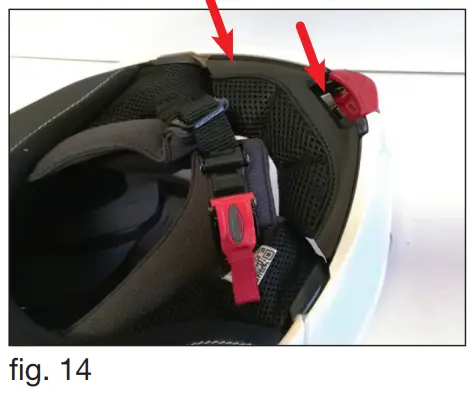
STOP WIND
The wind deflector limits the inflow of cold air from below.
STOP WIND ASSEMBLY INSTRUCTIONS
- Insert and press the wind deflector fastening frame into the centre position, making sure that all the anchoring pins are inserted correctly into their respective slots. (Fig.14).

STOP WIND REMOVAL INSTRUCTIONS
The wind deflector is removed by pulling it upwards. (Fig.15)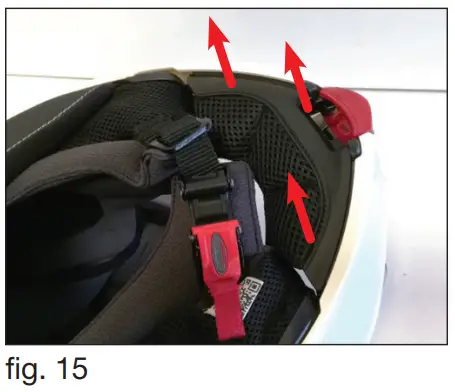
Customer Support
|  |  |
Caberg Helmet | caberghelmet |

CABERG SPA
via Emilia,11 24052
Azzano S.Paolo (BG) ITALY

Made in ITALY