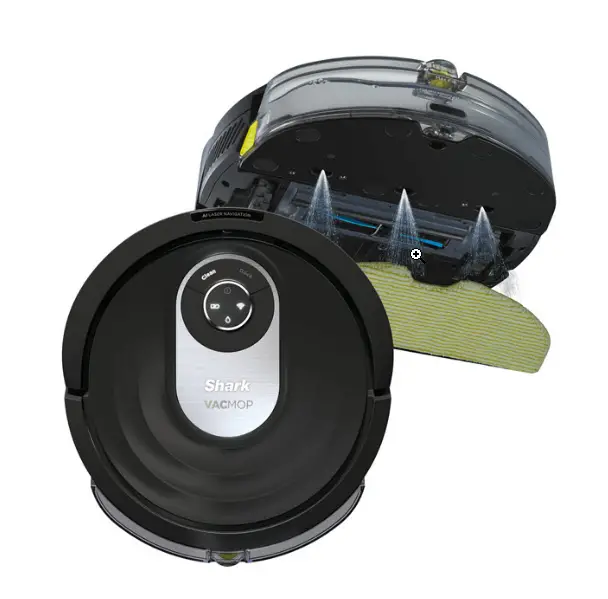
This article contains the FAQs for the RV2001WD Series Shark® AI VACMOP™ Robot Vacuum & Mop. This supports the following product SKUs RV2001WD, RV2001WDBRN, AV2001WD, AV2001WRUS, RV2000WRUS, RV2001WDCA and RV2001WRUS.
FAQs
Maintenance Questions:
Clean as needed. Gently dust off the cliff sensors and charging pads on the bottom of the dock with a clean, dry cloth.
Before performing any maintenance, turn off your robot’s power switch. We recommend cleaning the filter every other week and replacing it
every 12 months. You can purchase a replacement filter from sharkaccessories.com
1. Remove the dust bin from the back of your robot. Press the dust bin release button and slide out the bin.
2. Pull the filter out of the back of the dust bin, using the tabs on the filter.
3. Tap the filter to remove debris.
4. Rinse the filter with water only. Do not use soap, detergent, or brushes, as they may damage the material. Allow the filter to air-dry completely for 24 hours before reinstalling it.
5. Reinsert the filter into the dust bin.
Empty the Dust Bin after each use:
1. To remove the dust bin from the back of your robot, press the release button and slide out the bin.
2. Hold the dust bin over a trash receptacle.
3. Press and hold the release button again and lift open the dust bin lid.
4. Empty debris into the trash.
5. Clean the area between the filter and the plastic shield.
6. If a wash is desired, first remove the filter. Rinse the dust bin with water only and allow it to air-dry before reinstalling.
We recommend cleaning the brushroll whenever hair or debris is visible. As well, replacing it every 6-12 months ensures optimal performance.
Before performing any maintenance, turn off your robot by moving your robot off it’s dock and holding down the “DOCK” button for 5-7 seconds. Next, gently flip the robot upside down.
1. To access the brushroll, push up on the tabs on the brushroll access door on the bottom of your robot, then lift off the door.
2. Remove the brushroll, and clean off any hair or debris buildup.
3. To reinstall the brushroll, insert the brightly colored end first, then the end with a rotating lever, pressing until it sits symmetrically in the robot’s
nozzle.
4. Close the brushroll access door and press down until it clicks into place.
The side brushes need regular cleaning. Before performing any maintenance, turn off your robot by moving your robot off it’s dock and holding down the “DOCK” button for 5-7 seconds.
Next, gently flip the robot upside down and wipe the debris, dust, and hair off the side brushes with a damp cloth.
Replace side brushes when they are visibly worn.
To remove a side brush, pull it off the peg.
To install a new side brush, align the hole in the center of the brush over the peg and press it down until it clicks into place.
For Apple:
1. Tap on the App Store icon – Link here to App Store
2. Search the Apple App Store for “SharkClean”.
3. Tap on the SharkClean app.
4. Tap Install on the next page. Installation should begin.
For Android:
1. Tap on the Play Store icon in the Play Store – Link here to Play Store
2. Search for “SharkClean.”
3. Tap on the SharkClean app.
4. Tap install on the Shark app page. Installation should begin.
1. Open the Amazon Alexa app, go to the menu, and select Skills.
Or go to the Alexa Skills store on the Amazon website.
2. Search for “Shark Skill”.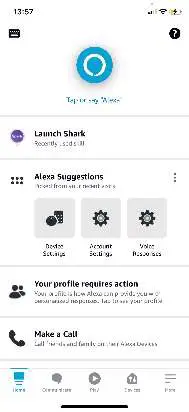

3. Select the Shark Skill to open the detail page, then select the EnableSkill option.
4. Once enabled, you can ask Alexa to control your robot (i.e. “Alexa, tell
Shark to start cleaning”)
To set up your robot with the Google Assistant on an Apple device:
1. Download the Google Assistant. Open it, and sign in.
2. Click the “Explore” icon.
3. Search for the “Shark” action and select “Try it”.
4. Allow Google to link to your SharkClean account.
5. Sign in to your SharkClean account. This is the same account you used
when setting up your Shark robot in the SharkClean app.
6. Click Authorize to link your SharkClean account to the Google
Assistant. This allows the Google Assistant to work with your Shark robot.
Congratulations! Your accounts are now linked. Use the voice command
“OK Google, tell Shark to start cleaning” to send your robot into action.
To set up your robot with the Google Assistant on Android:
1. Download the Google Assistant. Open it, and sign in.
2. Click the “Explore” icon.
3. Search for the “Shark” action and select “Link”.
4. Sign into your SharkClean account. This is the same account you used
when setting up your Shark robot in the SharkClean app.
Congratulations! Your accounts are now linked. Use the voice command
“OK Google, tell Shark to start cleaning” to send your robot into action.
Here are the voice commands you can use with your Shark Robot:
Amazon Alexa:
“Alexa, tell Shark to start cleaning.”
“Alexa, tell Shark to pause my robot.”
“Alexa, tell Shark to pause my bot.”
“Alexa, tell Shark to send my robot to the dock.”
“Alexa, tell Shark to send my bot to the dock.”
“Alexa, tell Shark to find my robot.”
Google Assistant:
“OK Google, tell Shark to start cleaning.”
“OK Google, tell Shark to pause my robot.”
“OK Google, tell Shark to send my robot to the dock.”
“OK Google, tell Shark to pause my bot.”
“OK Google, tell Shark to send my robot to the dock.”
“OK Google, tell Shark to send my bot to the dock.”
“OK Google, tell Shark to find my robot.”
If you don’t connect to the app, you will not be able to use important features such as Interactive Home, No-Go Zones, Carpet Verification, Room Select, and Scheduling.
Mopping Questions:
Yes.
Use water or use a mixture of water and Shark VACMOP surface cleaner for the best and safest results.
When the Fluid Reservoir is properly attached, the “CLEAN” LED on the top of the robot will flash blue briefly. As well, hearing an audible click and visually ensuring the top of the fluid reservoir is flush with the robot’s diameter means it is properly attached.
If Carpet Verification is set up in the app, it will prevent your robot from mopping over your carpets and rugs.
Make sure that Carpet Verification is set up in the app to prevent your robot from mopping over carpets and rugs.
To set up Carpet Verification, make sure to follow these steps in the app:
1. Your robot must complete an Explore Run without the fluid reservoir attached.
2. When your robot returns to the dock, you can review the map in the app. If you are satisfied with the map, you can add carpet zones.
3. After you set up carpet zones, you can run Carpet Verification to verify whether the robot is honoring the carpet zones you manually placed. If you’d like to update the map at any time, you can delete the map and have the robot redo an Explore Run. The app will then ask if you want to send your robot on a Carpet Verification Run.
4. After the Carpet Verification Run, you can confirm or edit the carpet zones on the interactive map in the app.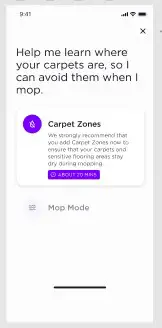
Flip the robot and with a damp towel, wipe down the caster wheels and the motorized wheels completely and turn the wheels to ensure all surfaces are cleaned. As well, rinse and drain the fluid reservoir with water 2-3 times. Finally, put on a new mopping pad and fill the tank with only water for increased wet traction.
If new rugs have been placed on the floor after your robot conducted its Carpet Verification Run, then your robot will not avoid them. Use the app to create no-go zones around rugs and carpets that you do not want to mop.
Make sure that Carpet Verification is set up in the app to prevent your robot from mopping over carpets and rugs.
To set up Carpet Verification, make sure to follow these steps in the app:
1. Your robot must complete an Explore Run without the fluid reservoir attached.
2. When your robot returns to the dock, you can review the map in the app. If you are satisfied with the map, you can add carpet zones.
3. After you set up carpet zones, you can run Carpet Verification to verify whether the robot is honoring the carpet zones you manually placed. If you’d like to update the map at any time, you can delete the map and have the robot redo an Explore Run. The app will then ask if you want to send your robot on a Carpet Verification Run.
4. After the Carpet Verification Run, you can confirm or edit the carpet zones on the interactive map in the app.
If Carpet Verification is set up in the app, check to see if a carpet is too close to the dock’s location. If this is the case, your robot will not be able to freely dock. Consider moving your dock to a new location that is free from carpets or move your carpet to give your robot the proper clearance to dock.
General Questions:
1. Open interior doors in rooms you want your robot to clean.
2. Remove obstacles such as cords and other small items that are less than 4.5 inches tall.
3. When mopping with Carpet Zones in your robot map, you may need to move carpets and rugs if they are blocking your robot from accessing
another room.
The LED indicator lights can communicate what the robot’s status is as well as errors. Please reference the Owner’s Manual for the full details.
Yes. Shark AI Laser Vision is not dependent on ambient lighting and can navigate your home at night or in low lighting conditions.
Your robot’s cliff sensors will prevent it from falling off ledges. For the cliff sensors to work properly in any mode, all runners, rugs, or carpets must be at least 16 inches from any steps or must extend over the edge of the stairs.
Press the Dock button on your robot or in the SharkClean app and your robot will immediately start searching for the dock.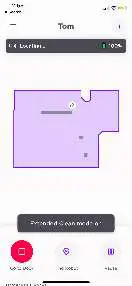
NOTE: Do not pick up your robot if it is running. Only manually place your robot on the dock if it has low charge or no charge (one flashing red battery indicator or no indicator lights).
A typical cleaning cycle lasts about an hour. (This varies depending on the power and cleaning mode you are using and the floor type of your home). Your robot can take up to six hours to fully charge from an empty battery.
You can create no-go zones in the SharkClean app to block off problem areas.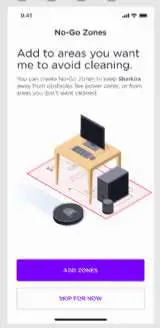
Before your robot’s next cleaning run, remove any cords or cables from the floor. If cords can’t be moved, block them off by creating a no-go zone in the SharkClean app.
Yes. Delete the robot’s map in the app and re-explore your home to increase map accuracy.
UltraClean Mode™ allows your robot to perform targeted cleaning missions around your home in areas that need a deeper clean.
In this mode, your robot will go over areas of your home multiple times, in a multi-directional pattern, for a more concentrated clean than in normal mode. Use UltraClean Mode™ in Room Select or Spot Clean.
To enable UltraClean Mode™: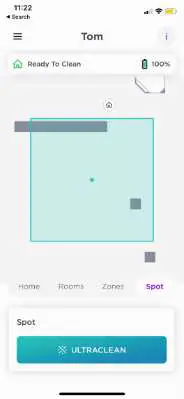
1. Open your SharkClean™ app.
2. Select the area you want cleaned—a room, a zone, or a spot.
3. Click “ULTRACLEAN” and your robot will begin.
When finished cleaning your home, your robot may have battery power remaining. Extended Clean uses this extra battery power so your robot can continue cleaning.
1. To activate Extended Clean, select the menu in the top left corner of your home screen.
2. Go to Settings.
3. Select your robot.
4. Toggle the Extended Clean feature to the “ON” position.
When Extended Clean and Recharge and Resume are both enabled, Extended Clean will commence only if battery power remains after the robot resumes and completes the cleaning task.
An Explore Run is a mandatory run your robot must complete in order for you to be able to use any app features such as Home Mapping, Carpet Verification, using No-Go Zones, or Scheduling.
This is the first run your robot will do in your home when you take it out of the box.
To start the Explore Run, turn on your robot, connect to the app, and follow the instructions on the app screen.
During the Explore Run, your robot will meander around your rooms while it creates a map of your home’s floor plan. With IQ Navigation, your robot does not need to travel over every square inch of your home to create the map that will be displayed in the app.
When your robot returns to the dock, you can review the map in the app. If you are satisfied with the map, you can add carpet zones.
After you set up carpet zones, you can run Carpet Verification to verify whether the robot is honoring the carpet zones you manually placed.
If you’d like to update the map at any time, you can delete the map and have the robot complete a new Explore Run.
To delete your map, go to the Home Map screen. Select More then select Delete.
For best results, map your home before using VACMOP mode.
To map effectively, your robot must conduct an Explore Run. Next, you are prompted in the app to set up carpet zones so that your robot will avoid those areas in mopping mode. After the carpet zones are set up, the app will prompt for a Carpet Verification Run to be conducted.
To set up Carpet Verification, make sure to follow these steps in the app:
1. Your robot must complete an Explore Run without the fluid reservoir attached.
2. When your robot returns to the dock, you can review the map in the app. If you are satisfied with the map, you can add carpet zones.
3. After you set up carpet zones, you can run Carpet Verification to verify whether the robot is honoring the carpet zones you manually placed. If you’d like to update the map at any time, you can delete the map and have the robot redo an Explore Run. The app will then ask if you want to send your robot on a Carpet Verification Run.
4. After the Carpet Verification Run, you can confirm or edit the carpet zones on the interactive map in the app.
If you can’t wait, fill the reservoir with fluid, attach the pad, and insert the reservoir into your robot to begin mopping. Please note if you do not connect to the app, your robot will NOT avoid carpets in wet mode if carpet zones are not marked in the app map.
Those shapes are zones created in the map to represent either No-Go-Zones or carpet zones. You can edit, resize, rotate, add, or delete these areas in the app.
With recharge and resume, your robot will return to its base, recharge, and can pick up cleaning from where it left off.


