
acer Chromebook Spin 514 Laptop
Important
This manual contains proprietary information that is protected by copyright laws. The information contained in this manual is subject to change without notice. Images provided herein are for reference only and may contain information or features that do not apply to your computer. Acer Group shall not be liable for technical or editorial errors or omissions contained in this manual.
GETTING STARTED
Turn on your Chromebook
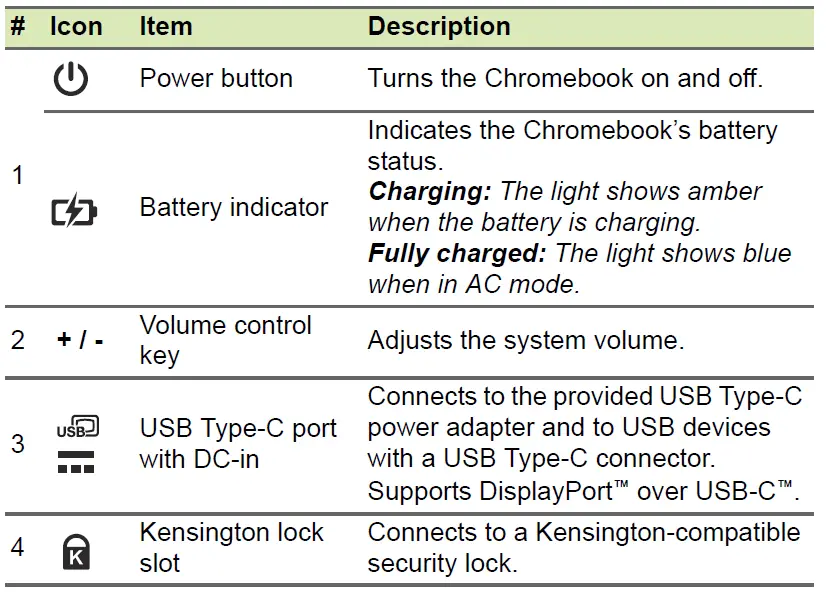
On the Chromebook, press the power button. A “Welcome” screen will appear when the Chromebook first boots up.
Select your language settings
Use the “Language” drop-down list to choose your default language setting. If there is more than one way to type in your language, you may be prompted to select a keyboard input method as well.
Connect to a network
Select a network from the “Connect to network” list to connect to the Internet. If network access is protected, you will need an access password to connect to it.
Accept the Terms of Service
Once connected to a network, accept the Terms of Service. Your Chromebook will then download any available system updates, so you automatically get the latest Chrome OS features.
First-time sign-in
Create a new Google Account
You can create a new Google Account if you don’t already have one. Select Create a Google Account to set up a new account. A Google Account gives you access to useful web services developed by Google, such as Gmail, Google Drive, and Google Calendar.
Browse as a guest
You can also use the Chromebook without a Google Account by selecting Browse as a Guest.
YOUR ACER CHROMEBOOK TOUR
Front view
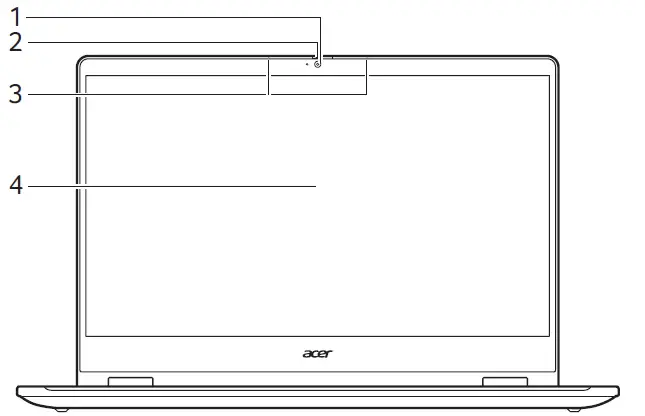
| # | Icon | Item | Description |
| 1 | Webcam | Web camera for video communication. A light next to the webcam indicates that the webcam is active. | |
| 2 | Webcam shutter | Slide the shutter to the left to cover the webcam. Slide right to open it. | |
| 3 | Microphones | Internal microphones for sound recording. | |
| 4 | Touchscreen | Displays Chromebook output, supports multi-touch input. |
Keyboard view
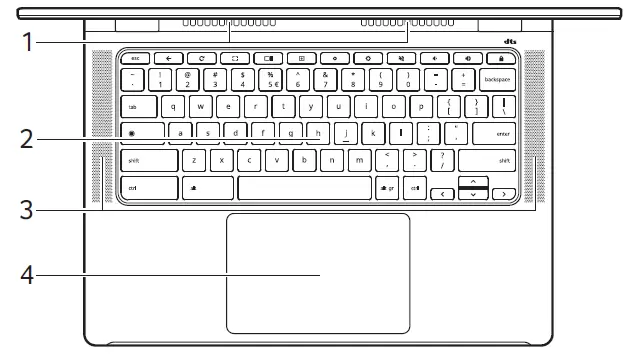
| # | Icon | Item | Description |
| 1 | Ventilation and cooling fan | Allows the Chromebook to stay cool. Do not cover or obstruct the openings. | |
| 2 | Keyboard | For entering data into your Chromebook. | |
| 3 | Speakers | Deliver stereo audio output. | |
|
4 |
Touchpad / click button | Touch-sensitive pointing device which functions like a Chromebook mouse. Pressing down anywhere on the pad functions like the left button of a mouse. Pressing down anywhere with two fingers functions like the right button of a mouse. |
Function keys
The Chromebook uses function keys or key combinations to access some hardware and software controls, such as screen brightness and volume. The dedicated function keys each have a specific function.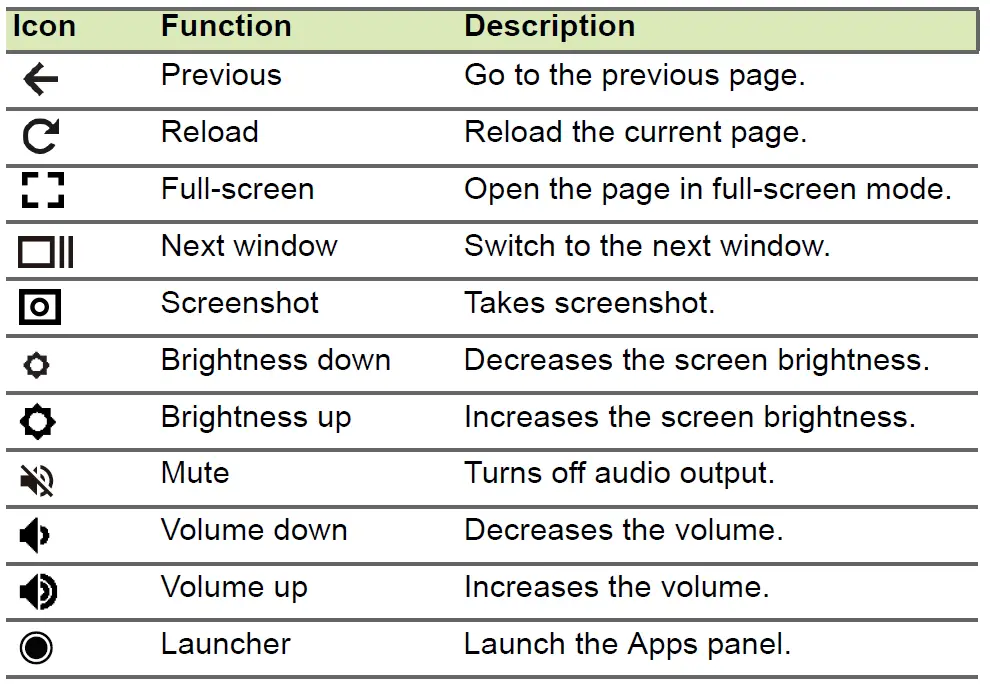
Common keyboard shortcuts
You can use shortcuts to complete some tasks more quickly. Note: For a complete list of keyboard shortcuts, press Ctrl + Alt + /
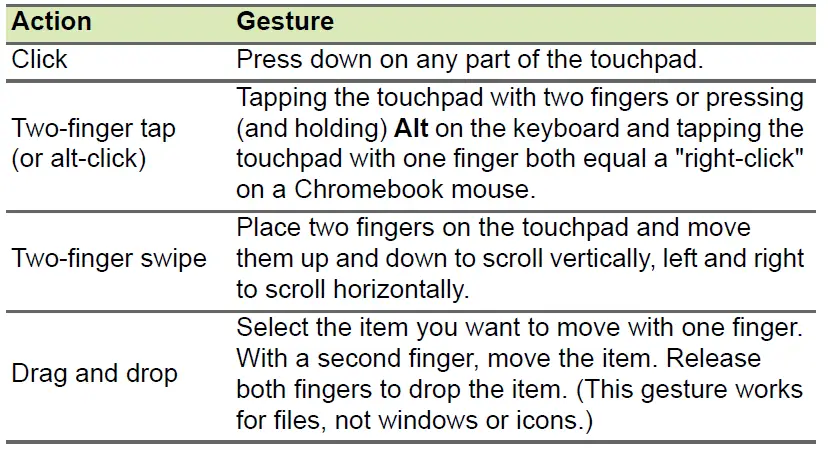
Touchpad
The built-in touchpad is a pointing device that senses movement on its surface. This means the cursor responds as you move your fingers across the surface of the touchpad.
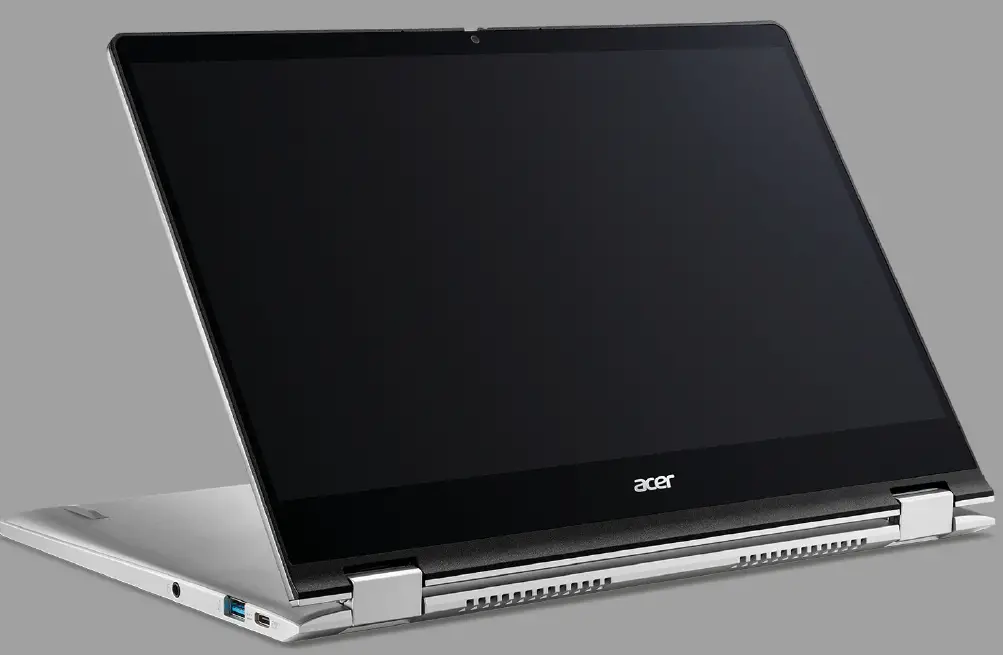
Left view
CP514-3HCP514-3HH / CP514-3WH
 USB 3.2 Gen 2 information
- USB 3.2 Gen 2 compatible ports are blue.
- Compatible with USB 3.2 Gen 2 and earlier devices.
- For optimal performance, use USB 3.2 Gen 2-certified devices.
- Defined by the USB 3.2 Gen 2 specification (SuperSpeed USB).
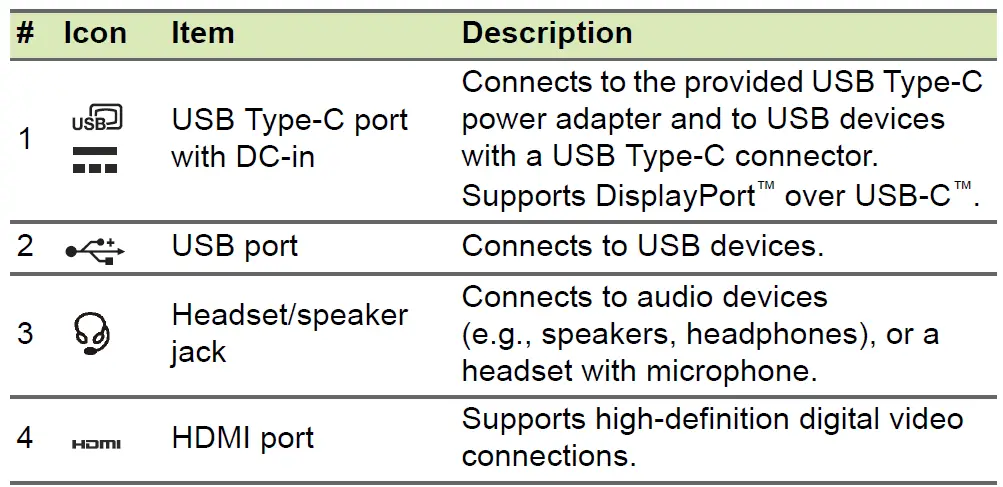
USB Type-C information
- Supports DisplayPort™ audio/video output.
- Delivers up to 3 A at 5 V DC for USB charging.
- DC-in: requires power adapter or power source providing 45 W at 5~20 V.
For optimal performance, please use a certified Acer power adapter or USB Power Delivery device.
Right view

Bottom view

| # | Icon | Item | Description |
| 1 | Ventilation and cooling fan | Allows the Chromebook to stay cool. Do not cover or obstruct the openings. |
USAGE MODES
Your Chromebook features the following modes. You can choose a mode to fit your needs.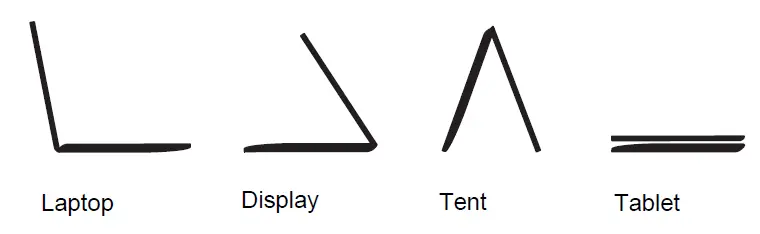
FREQUENTLY ASKED QUESTIONS


Get help or more information
| For information on: | Refer to: |
| Chromebook Help | Open the Explore app |
| Chrome OS | google.com/support/chromebook/ |
Register your Acer product
Go to www.acer.com/register-product, and sign in or sign up your Acer ID to register your product.
Once it is done, you can review it under “My Products” page.
Model number: ________________________________
Serial number: _________________________________
Date of purchase: ______________________________
Place of purchase: ______________________________
Google and Google Play are trademarks of Google LLC.
 The terms HDMI and HDMI High-Definition Multimedia Interface, and the HDMI Logo are trademarks or registered trademarks of HDMI Licensing Administrator, Inc. in the United States and other countries.


