WIFIVCR001CBK Wi-Fi Smart 3-in-1 Robot Vacuum Cleaner
User Manual
Preface
Product description
Intended use
Specifications
Product | Wi-Fi Smart 3-in-1 Robot Vacuum Cleaner |
Article number | WIFIVCR001CBK |
Dimensions (l x w x h) | 300 x 300 x 74 mm |
Weight | 2.5 kg |
Power input | 19 VDC ; 0.6 A |
Voltage | 14.4 V |
Maximum power | 28 W |
Noise level | ≤ 65 dB |
Filter type | HEPA filter |
Battery | 2500 mAh Li-ion battery |
Operating time | Up to 100 minutes |
Charging time | Up to 5 hours |
Operating temperature | 0 – 40 °C |
Suction power | 1400 Pa |
Floor brush | Rotating side brushes |
Dust bin capacity | 200 ml |
Water reservoir capacity | 230 ml |
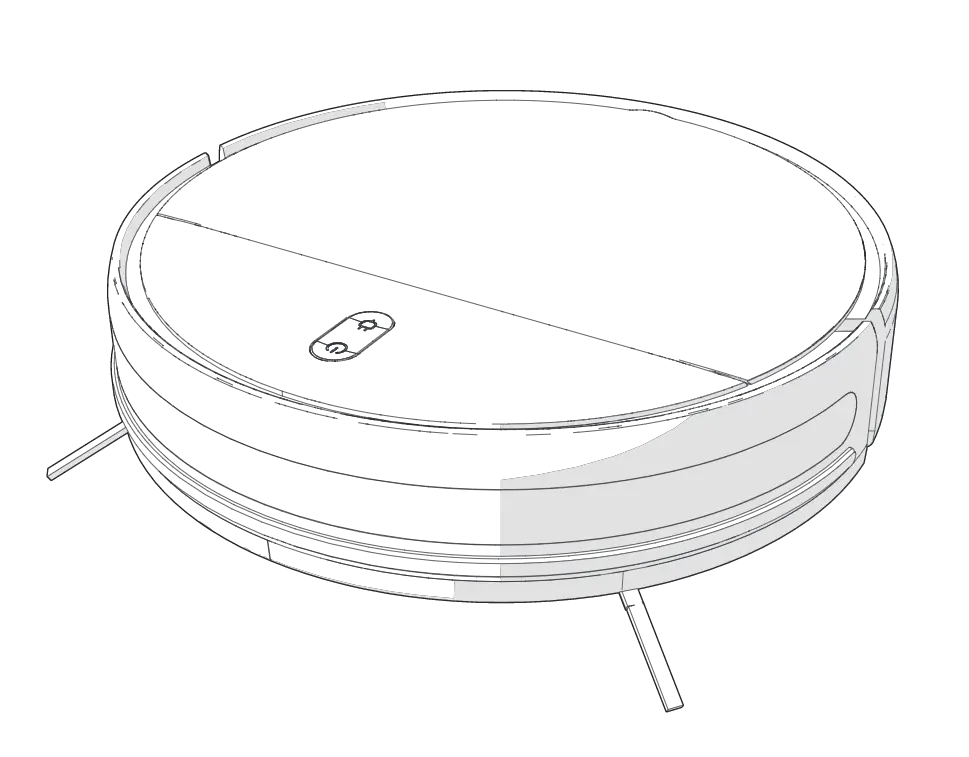
Main parts (image A)
 |
Vacuum kit (image B)
 |
Mopping kit (image C)
 |
Remote control (image D)
 |
- Vacuum kit (image B): for dry cleaning carpets, laminate floors and tile floors.
- Mopping kit (Image C): for mopping laminate floors and tile floors.
Icon | Description |
 | Set up a map of the rooms. |
 | Set up cleaning zones on the map. |
 | Set up a target point on the map. |
 | Select the cleaning zones that require cleaning. |
 | Set up a restricted zone for the robot to avoid while cleaning. |
 | Return the robot to the charging station. |
 | Set up schedules for the robot to start cleaning at a desired time. |
Safety instructions
- Ensure you have fully read and understood the instructions in this document before you install or use the product. Keep the packaging and this document for future reference.
- Only use the product as described in this document.
- Check if the voltage is consistent with the product before charging.
- Only charge the product if the plug is compatible with the power outlet. Do not use adapters. Do not change the plug.
- Only use attachments specified by the manufacturer.
- Do not recharge non-rechargeable batteries.
- Do not use the product if a part is damaged or defective. Replace a damaged or defective product immediately.
- Do not drop the product and avoid bumping.
- This product may only be serviced by a qualified technician for maintenance to reduce the risk of electric shock.
- Do not expose the product to water or moisture.
- Do not plug or unplug the power cable with wet hands.
- Disconnect the product from the power source before service and when replacing parts.
- This product may not be used by persons (including children) whose physical, sensory or mental capabilities or lack of experience and knowledge prevents them from using the product safely without supervision or instruction.
- Children should be supervised to ensure that they do not play with the product.
- Do not immerse the product, the power cable or plug in water or other liquids.
- Do not use the product to collect water or other liquids.
- In the event of a leaking battery, do not allow the liquid to come in contact with the skin or eyes. If contact has been made, wash the affected area with copious amounts of water and seek medical advice.
- The product is delivered with a partially charged battery. For optimal battery life, fully charge the battery before first use.
- Do not use any charger other than that specifically provided for use with the equipment.
- The charger must only be plugged into an earthed socket-outlet.
- Stop the charging process if the product gets too warm.
- Only power the product with the voltage corresponding to the markings on the product.
- Children of less than 8 years should be kept away.
- Cleaning and user maintenance shall not be done by children without supervision.
- Keep hair, loose clothing, fingers and all body parts away from openings and moving parts.
- Keep the product away from heat sources. Do not place the product on hot surfaces or near open flames.
- Do not let the power cable touch hot surfaces.
- Do not let the power cable hang over the edge of a table or counter.
- Do not pull the power cable over sharp edges.
- Do not sit on the product.
- Make sure to remove all loose and fragile objects, cables, wires and cords from the floor to avoid them being damaged by the product.
- Do not place the product in a place where it can easily fall off.
- Check if the power cable is properly connected to the product and the power outlet.
- Make sure to inform other members of the house when the product is in use to prevent tripping over the product.
- Do not exceed the maximum operating temperature of the product.
- Do not vacuum flammable or combustible materials (lighter fluid, gasoline, etc.) or use in the presence of explosive liquids or vapor.
- Do not vacuum toxic material (chlorine bleach, ammonia, drain cleaner, etc.)
- Do not vacuum hot coals, cigarettes, matches or any hot smoking or burning objects.
- Do not use in an enclosed space filled with vapors given off by oil-based paints, paint thinner, moth proofing, flammable dust, or other explosive or toxic vapors.
- Do not vacuum hard or sharp objects such as glass nails, screws, coins etc.
- Do not put any objects into openings. Do not use with any opening blocked.
- Do not disconnect the product by pulling on the cable. Always grasp the connector and pull.
- Do not close a door on the power cable.
- Do not use without filters in place.
- Do not open the battery pack or the motor area. There are no user serviceable parts inside.
- Do not use the product in a highly reflective environment. For example an environment exposed to direct sunlight, or with mirrors nearby.
Icon | Description |
 | Indication to explain that the product should not be used in a bathtub, shower, or water-filled reservoir. |
Icon | Description |
 | Electronic equipment needs to bear the CE mark in order to be marketed in the EU. CE marking shows that a product is assessed before being placed on the market and that it meets EU safety, health and environmental protection requirements. CE marking is also sometimes accepted as a means of compliance with type-approval requirements; for example, electronic components that require type-approval and also CE marking for electromagnetic compatibility (EMC) or low-voltage equipment. |
 | Indication to explain the product is suitable for indoor use only. |
 | Indication to explain that the product needs to be collected separately when disposed. Do not throw in the trash bin. |
Installation
- Check the contents of the package
- Check that all parts are present and that no damage is visible on the parts. If parts are missing or damaged, contact the Nedis B.V. service desk via the website: www.nedis.com.
Installing the charging station
- Do not use the product in a highly reflective environment. For example an environment exposed to direct sunlight, or with mirrors nearby.
- Do not place any objects within 1.5 m in front of the charging station A13 and 0.5 m of the left and right side of A13.
- Make sure that the robot vacuum cleaner A1 has a clear path for return at the end of a cleaning cycle.
Installing the Nedis SmartLife app
Adding the product to the SmartLife app (image E)
 |
- Make sure you connect the product to a 2.4 GHz Wi-Fi network.
Placing the batteries in the remote control
Use
First use
- Remove all packaging before use.
- Make sure to remove all loose and fragile objects, cables, wires and cords from the floor to avoid them being damaged by the product.
Before first use
- Remove protective strips
- The robot is protected with two protection strips that has to be removed before use.
- The product is now ready for use.
Placing the side brushes (image F)
 |
Charging the product
- Remove the mopping kit A17 from A1 before returning the robot to A13, to ensure safe charging and to prevent the damp mopping pad C4 from damaging the floor.
- If the charging indicator LED A12 does not switch off after a reasonable time in which the battery should be fully charged, the battery may have a leakage current. In this case, replace the battery with a new one.
- When the connected battery is fully charged, the current will be reduced to prevent overcharging and gas development. This allows the battery to stay connected to the charger for a longer period without damaging the battery.
- It is still recommended to disconnect the charger when the battery is fully charged.
- Due the automatic voltage and current control the connected battery will always stay fully charged.
- The product is delivered with a partially charged battery. For optimal battery life, fully charge the battery before first use.
- A12 blinks to indicate that the robot is charging.
- When charging is complete, A12 lights up continuously.
Using the product
Cleaning mode | Description |
Random cleaning | Press the automatic cleaning button D2. The robot switches on and randomly cleans the room for 90 minutes. |
Edge cleaning | Press the edge cleaning button D8. The robot switches on and cleans the area at a 2 cm distance alongside the walls. |
Spot cleaning | Place or steer the robot to the spot that needs cleaning. Press the spot cleaning button D7. The robot switches on and cleans the spot in a circular motion with a diameter of approximately 1,2 meter. |
Zig-zag cleaning | Press the zig-zag cleaning button D4. The robot switches on and cleans the room in a zig-zag pattern |
After cleaning, the robot returns to A13 automatically.
Pausing the robot
1. Press D9 to pause the cleaning task.
2. Press D9 again to resume the cleaning task.
When you press D6 while the robot is paused, the robot will return to A13 and cancel the current cleaning task.
Sleep mode
When the robot is not operated for 10 minutes, the robot automatically enters sleep mode.
A4 switches off.
1. Press A4 or D1 to switch the robot to active mode.
When the robot is in sleep mode for more than 12 hours, the robot automatically switches off.
Sending the robot to the charging station
1. Press A3 or D6.
The robot automatically returns to A13.
Switching off the robot
1. Press and hold A4 or D1 to switch off the robot.
The robot switches off.
If the robot was working on a cleaning task, the current cleaning task is cancelled.
Scheduling cleaning
You can schedule cleaning times via the Nedis SmartLife app to start cleaning at the desired start time. The robot starts cleaning at the selected time.
Using the mopping kit
Do not use A17 on carpet.
1. Switch off the robot.
2. Carefully place A1 upside down on a soft surface.
3. Place the mopping pad C4 on the bottom of A1 (image F).
4. Place A1 upright on a stable and flat surface.
5. Press and hold the water reservoir locking button C1 while sliding the water reservoir C3 out of A1.
6. Lift the rubber lid C2 from C3.
7. Fill C3 with clean water.
8. Close C2.
9. Press and hold C1 while sliding C3 into A1.
10 .Release C1 to lock C3 in place.
Empty and clean A17 after each use. See chapter Cleaning the vacuum kit.
Troubleshooting
Problem | Possible cause | Possible solution |
The robot does not switch on. | The battery power is too low. | Charge the robot. |
The battery temperature is too low or too high. | Allow the robot battery to cool down. | |
The robot is not charging. | The charging station A13 is not connected to the power outlet. | Connect the charging station with the power cable to a power outlet. |
The robot is not in contact with the charging station A13. | Connect the robot properly to the charging station. | |
The robot is charging slow. | The charging contacts A8y are dirty. | Clean the charging contacts. |
The robot does not return to the charging station. | There are too many objects on the floor. | Remove all loose and fragile objects, cables, wires and cords from the floor. |
The robot is too far away from the charging station A13. | Move the robot closer to the charging station. | |
Manually place the robot on the charging station. | ||
The robot makes abnormal noises. | The side brushes A10 or wheels A69 are entangled. | Clean the part(s). |
The wheels A69 are dirty. | Clean the part(s). | |
The robot does not clean properly. | The vacuum kit Au is full. | Clean the part(s). |
The HEPA filter B1 is blocked. | Clean the part(s). | |
The cliff sensor A7 is dirty. | Clean the part(s). | |
The robot could not connect to the Wi-Fi network. | The Wi-Fi function is not activated. | Reset the Wi-Fi settings. |
The Wi-Fi signal is weak. | Move the robot to a place where the Wi-Fi signal is stronger. | |
The Wi-Fi signal is not found. | Reset the Wi-Fi settings. | |
Download the latest version of the app. | ||
The router settings are incorrect. | Contact customer service for help. | |
The robot is not moving. | The robot is stuck. | Remove the blockage |
The robot is on uneven ground. | Move the robot to a safe place. | |
The robot does not start cleaning according to schedule. | The battery power is low. | Charge the robot. |
The robot does not continue cleaning after returning to the charging station. | The robot is manually put back on the charging station A13. | Start a new cleaning task. |
The mopping kit does not produce water. | The water reservoir C3 is empty. | Fill the water reservoir with enough water. |
The water output is set to a minimum. | Use the app to set the water output to maximum. | |
The mopping kit Ai is not properly placed. | Install the mopping pad and water reservoir according to the chapter Using the mopping kit. |
Maintenance
- Do not use aggressive chemical cleaning agents such as ammonia, acid or acetone when cleaning the product.
- Do not immerse the product in water for cleaning.
- Disconnect the product from the power source before cleaning.
- Allow the product to cool down before cleaning it.
- Do not clean the inside of the product.
- Clean the product regularly with a soft, clean, dry cloth. Avoid abrasives that can damage the surface.
- Wipe the cell or battery terminals with a clean dry cloth if they become dirty.
Maintenance schedule
Parts | Cleaning frequency | Replacement frequency |
Vacuum kit Au | After each use | – |
Mopping kit Ai | After each use | – |
HEPA filter B1 | – | Every 2 months |
Side brushes Aq | Monthly | Every 3 months |
Cliff sensors A7 | Monthly | – |
Charging contacts A8y | Monthly | – |
Wheels A69 | Monthly | – |
Cleaning the vacuum kit
- Do not dry in direct sunlight.
- Allow all parts to dry completely before reassembling the product.
Cleaning the mopping kit
Warranty
Disclaimer
Disposal
 | This symbol indicates that this product should not be thrown away with other household waste throughout the EU. To prevent possible harm to the environment or human health by uncontrolled waste disposal, you are responsible for recycling it so that it can promote the sustainable reuse of raw materials. To return your used product, you can use the regular return and collection systems or contact the store where the product was purchased. They can recycle this product for the environment. |


