
SHERPA 2003-2009 4Runner 4th Gen 4Runner Roof Rack Instruction Manual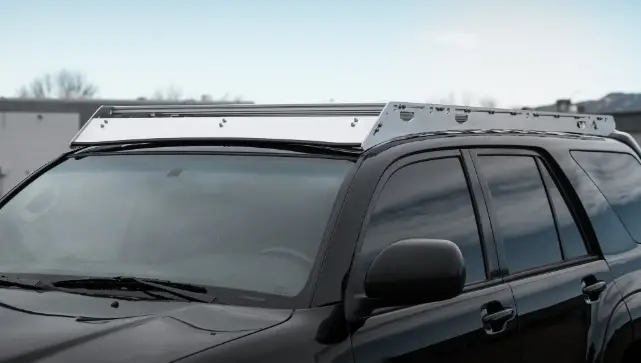
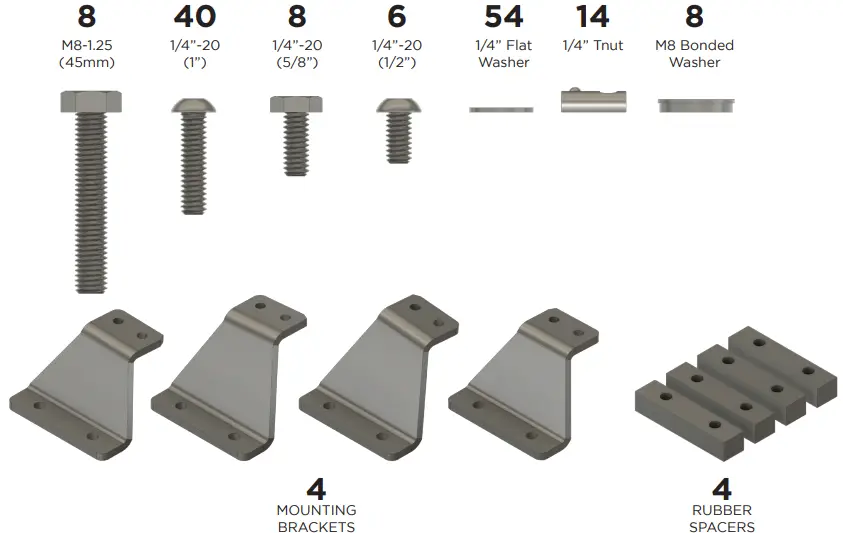
HARDWARE CHECKLIST
Exact hardware color counts may vary based on the options selected at checkout.
PRE-ASSEMBLY
Required Components:
6x 1/4”-20 x 1/2”
6x 1/4” Flat Washers
6x Tnuts
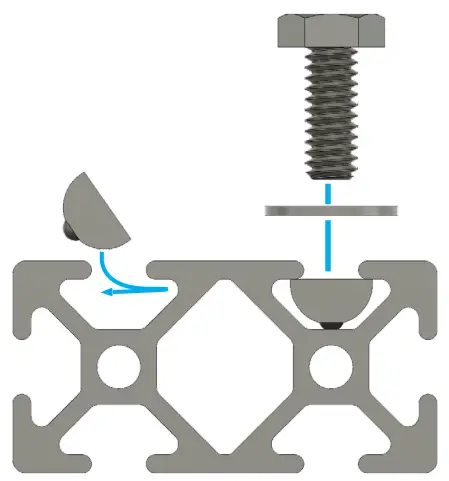
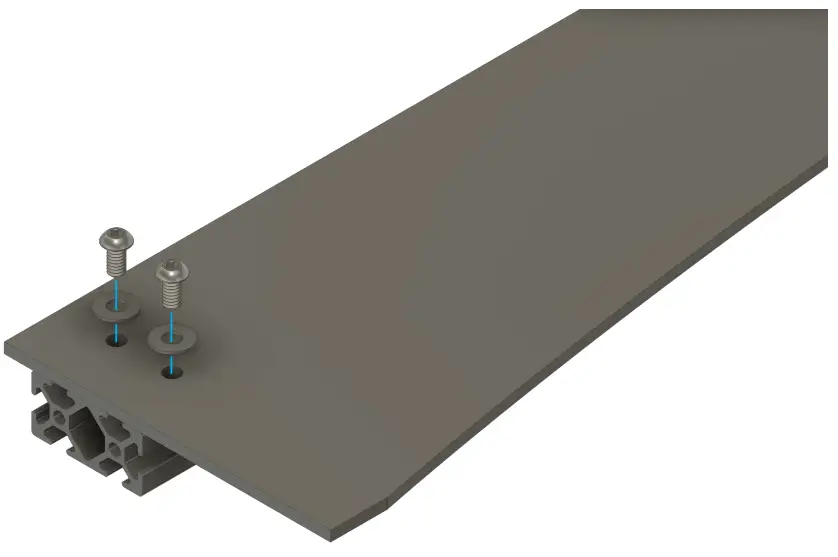
Drop 6 tnuts into the slots on the cross member and line them up with the holes in the fairing. Secure with 6 bolts and washers.
PRE-ASSEMB
Required Components:
8x 1/4”-20 x 5/8”
8x 1/4” Flat Washers
8x 1/4” Tnuts
Secure the front pair of mounting brackets to one of the supplied cross members. The front set is taller than the rear set for the Princeton rack. Each mount will be side-specific. Note the notch in the bottom corner of the mount – this signifies the forward-facing direction of the mount in relation to the vehicle. Repeat this step for the rear set of mounts. At the end of this step, you should have two cross members, each with either the front or rear pair of mounting brackets attached.
Leave the hardware in the mount loose so that it can be adjusted during a later step.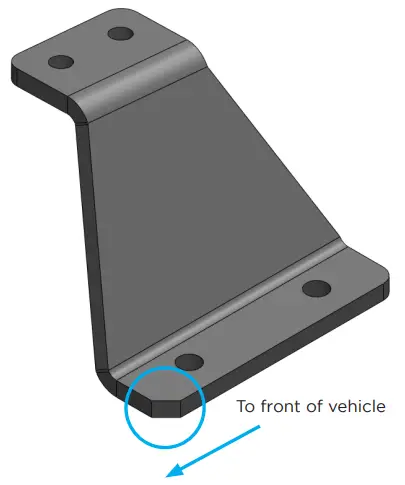
Required Components:
8x M8 Bolts
8x M8 Bonded Washers
Align the rubber spacers with the factory holes in your roof gutter. The metal sleeves should slide over theOEM white plastic tubes. Note that the holes in the rubber are not centered – the thinner side of the rubber should be positioned towards the center of the vehicle,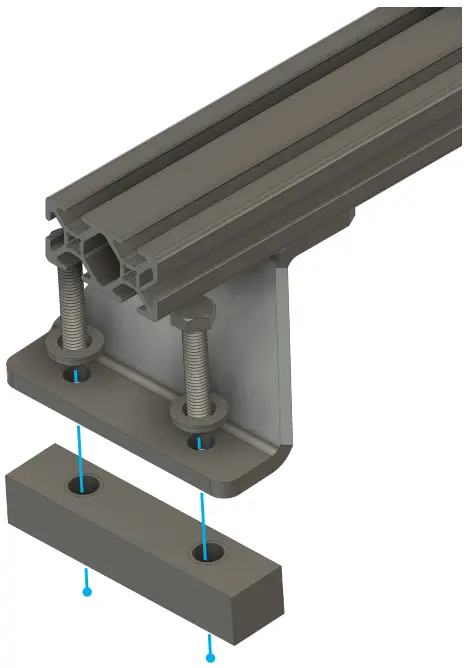
Position the mounting bracket over the rubber spacer and secure it with 2 bolts and bonded washers passed through the bracket, rubber, and into the holes in the roof. Repeat this step for each of the four mounting brackets.
The bonded washers should compress and become flat, but not concave. Do not over tighten these mount TORQUE SPEC: 22in-lb
Required Components:
8x 1/4”-20 x 1”
8x 1/4” Flat Washers
After the main support cross membershave been secured to the vehicle, you can use a tape measure and center them to the vehicle. We recommend measuring from the inside edge of the mount to the outside face of the cross member, and matching this distance on either end of the cross member. Note that the front cross member will have a different measurement than the rear as the roof tapers.
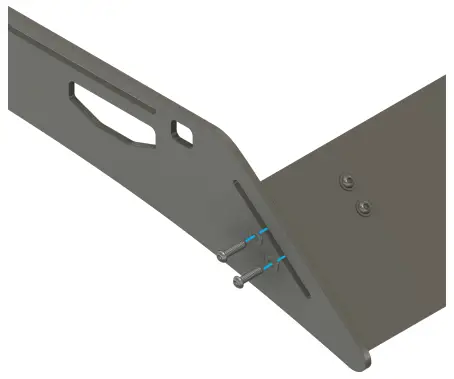
Once all the bars are centered, install the side plates. Align the small slots in the rack side with the ends of the main support crossmembers. Secureit using the supplied 1/4”-20×1” socket buttons and washers. Leave the bolts loose enough to move the sideplate to the position that matches the curve of the roof best.
Once the rack is positioned correctly, tighten down all of the hardware for the rack sides, mounting hardware and roof track bolts.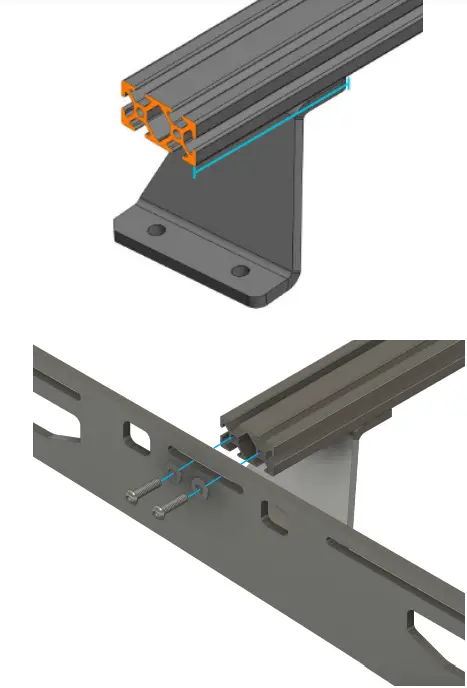
THE NEXT TWO STEPS CAN BE COMPLETED IN ANY ORDER
Required Components:
4x 1/4”-20 x 1”
4x 1/4” Flat Washers
Position the wind fairing in line with the diagonal slot at the front of the rack. Align the bottom of the fairing with the bottom tip of the roof rack and secure it using 4x 1/4”-20×1” socket buttons and washers.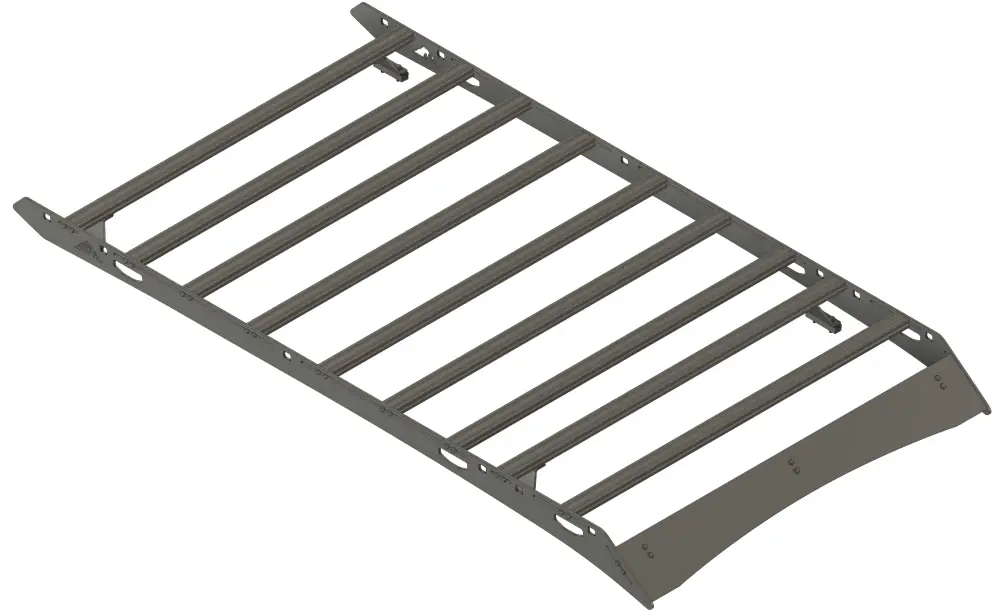
Required Components:
28x 1/4”-20 x 1”
28x 1/4” Flat Washers
Secure all of the remaining cross members to the rack system. Position according to your load requirements.
All products built and designed by Sherpa Equipment Company are intended for off-road use and should be assembled, installed, and used according to Sherpa Equipment Company’s recommendations. Sherpa Equipmen Companies products should be used safely with good judgment towards others and surroundings.
By installing Sherpa Equipment Companies products on your vehicle you assume all liability. Sherpa Equipment Company will not be held liable for damages or loss associated with the installation or use of its products. It is recommended that you inspect your roof rack within the first 100 miles of installation and every 500 miles after.


