
![]()
Quick Start Guide
Navimow
Choose Life Without Boundaries
Package Contents
![]()
User materials: welcome card, quick start guide, important information
 | 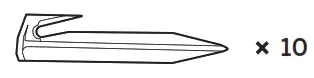 | |
| Power supply | The extension cable | Pegs to secure the extension cable |
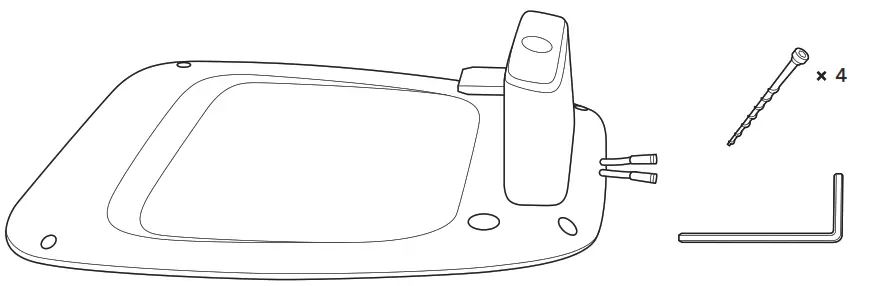
Charging Station and the installation kit

![]() WARNING
WARNING
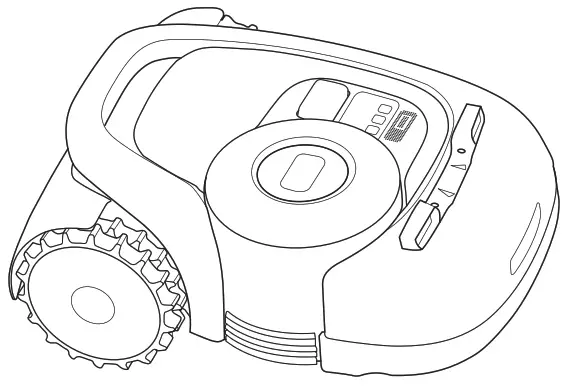
- Sharp edges. Do not point at people.

Ultrasonic sensor (for H3000E and above)![]() STEP 1
STEP 1
App Installation
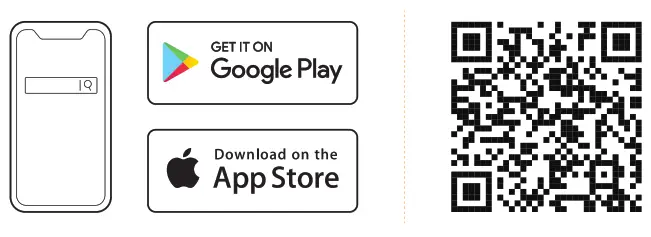
![]() To ensure a successful setup, please install the Navimow app. You can scan the QR code, or search “Navimow” in the Google Play Store (Android) or the Apple App Store.
To ensure a successful setup, please install the Navimow app. You can scan the QR code, or search “Navimow” in the Google Play Store (Android) or the Apple App Store.
![]() STEP 2
STEP 2
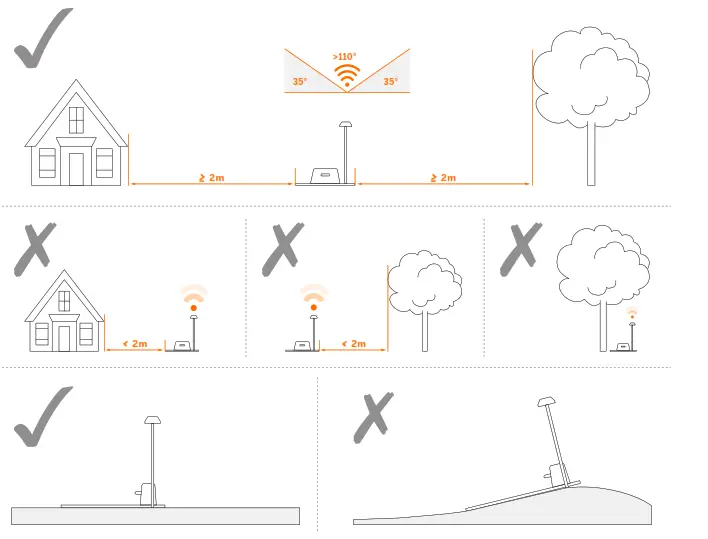
Install the Charging Station
![]() WARNING
WARNING
- To get strong signal from GNSS, please install the charging station in an open space with no obstacles blocking the GNSS antenna.
![]() STEP 3
STEP 3
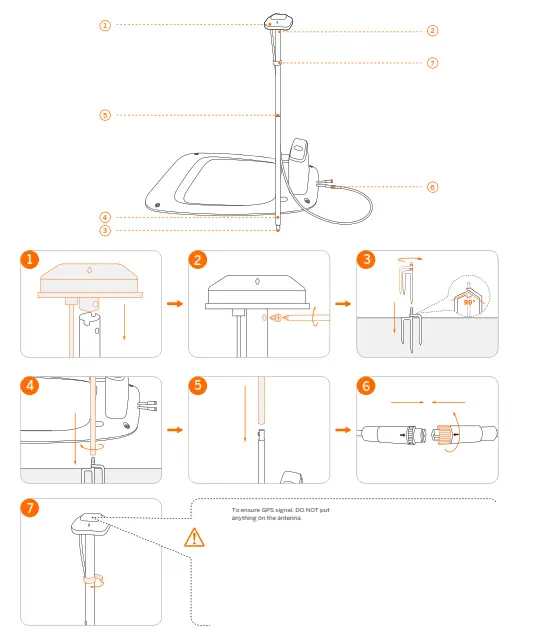
Install the GNSS Antenna
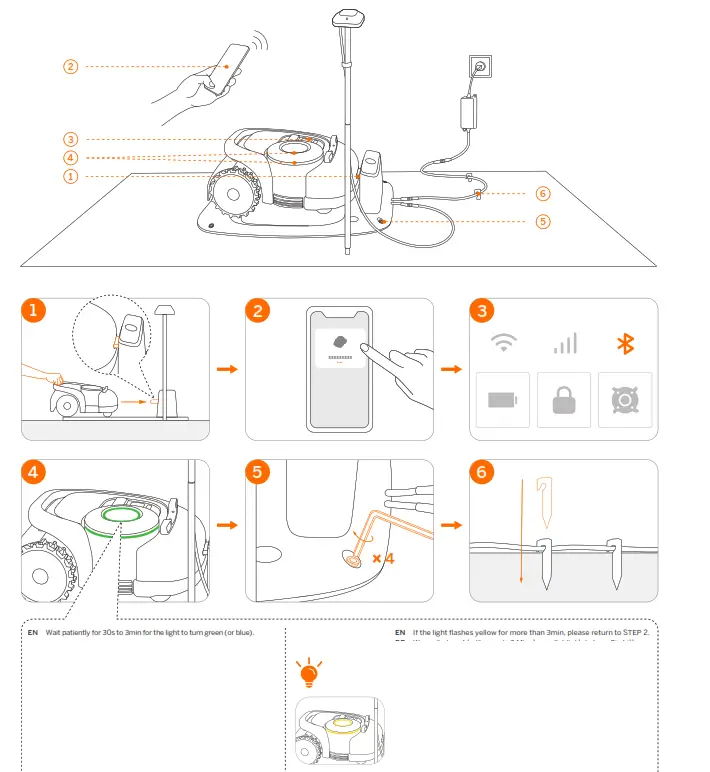
![]() STEP 4
STEP 4
Connect to the Power Supply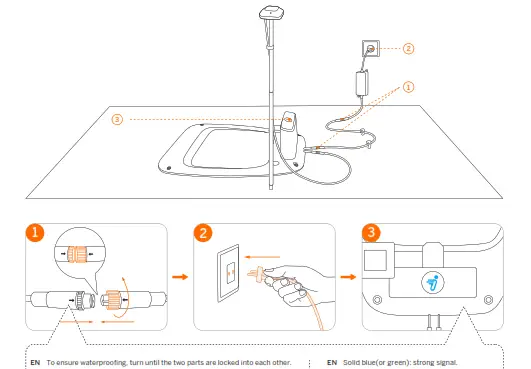
![]() Flashing yellow:
Flashing yellow:
- Poor signal, relocate the charging station to an open space (see STEP 2).
- The GNSS antenna is not connected to the charging station (see ⑥ in STEP 3).
Flashing red: malfunction. Please contact after-sales service.
![]() STEP 5
STEP 5
Activate the Mowe
 STEP 6
Set up the Boundary
A. Map out the Boundary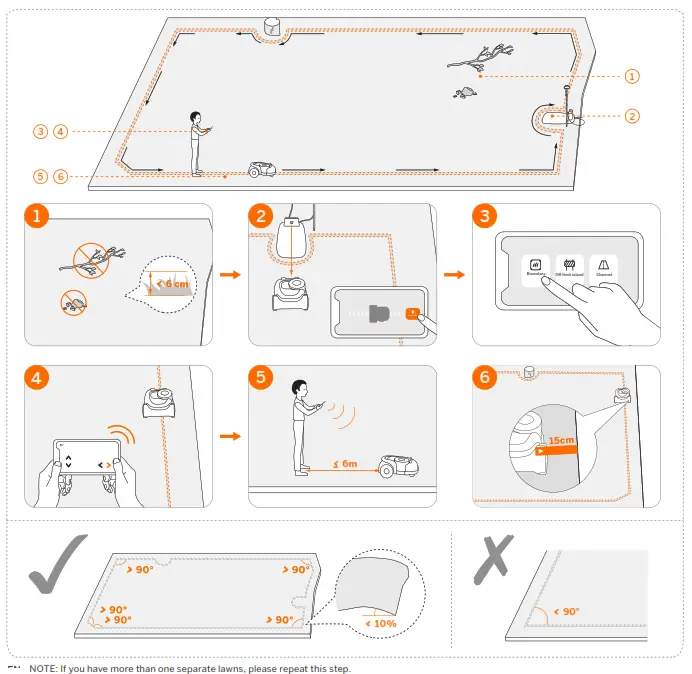
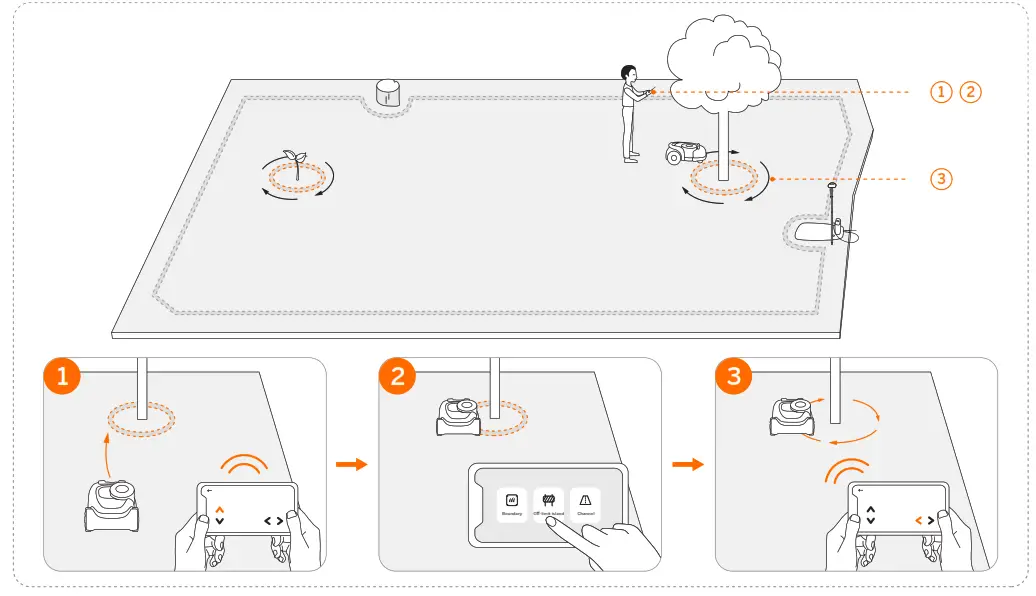
B. Set up O½-limit Island
C. Create a Passage to Link Separate Zones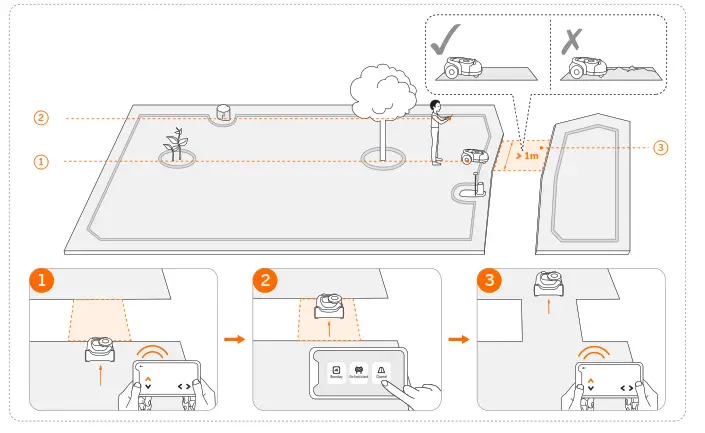
![]() STEP 7
STEP 7
Test Drive
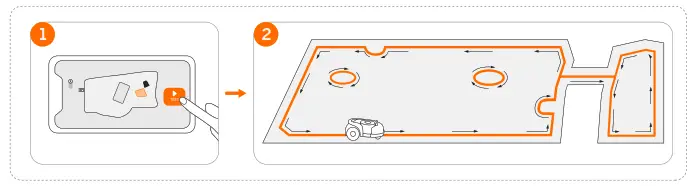
NOTE: If the mower does not run within the boundary during the test, please follow the instructions in the app or return to STEP 6.![]() WARNING
WARNING
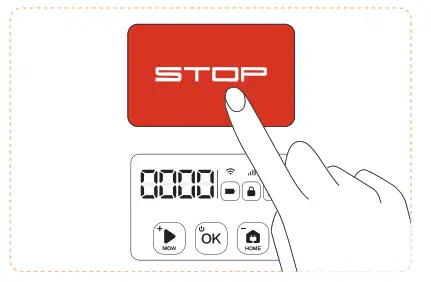
- If there is possible danger, press the STOP button immediately.
![]() STEP 8
STEP 8
Start Mowing
Navimow can start mowing by manual operation, via the app, or following the schedule.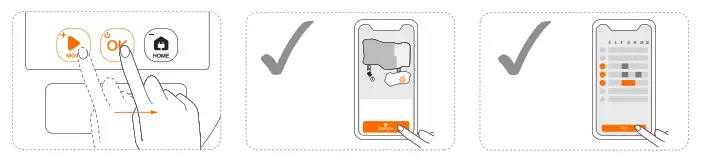
![]() Enter the PIN code before operating the mower. The default code is 0000. Press MOW or HOME to change the number and press OK to confirm the code.
Enter the PIN code before operating the mower. The default code is 0000. Press MOW or HOME to change the number and press OK to confirm the code.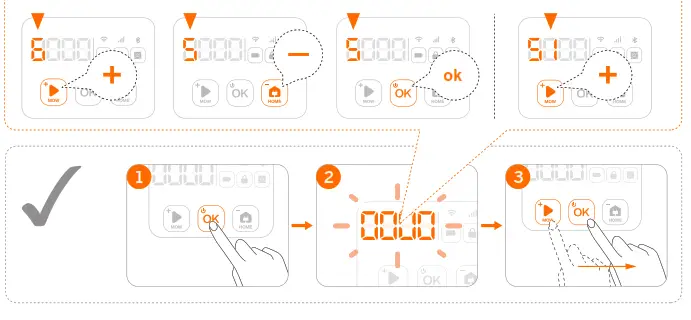 Read the Quick Start Guide and the Important Information carefully before use and keep for future reference.
Illustrations of the product, accessories, and app interface are for reference purposes only. Actual product and functions may vary.
Go to navimow.segway.com for the complete User Manual and other user materials.
![]()
Raccolta Carta
Original Instructions
CE.04.00.0523.01-A


