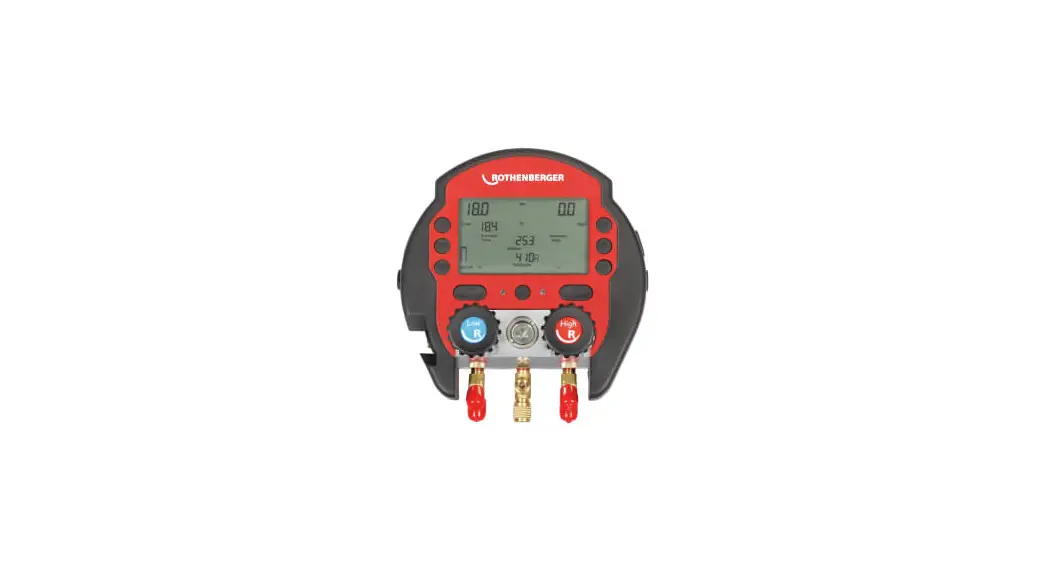
![]() ROCOOL 600 Digital Manifold and Rocase
ROCOOL 600 Digital Manifold and Rocase
Instruction Manual
 rothenberger.com
Overview
Please read and retain these directions for use. Do not throw them away! The warranty does not cover damage caused by incorrect use of the equipment! Subject to technical modifications!
Marking in this document
| Danger This sign warns against the danger of personal injuries. | |
| Caution This sign warns against the danger of property damage and damage to the environment. | |
| Call for action |
General safety instructions
The ROCOOL 600 must be used only by expert personnel certified according to country-specific standards.
Before first use, read this operating manual thoroughly to prevent improper use.
The ROCOOL 600 must be used only with the refrigerants indicated below. Other gases or fluids must never be used with the ROCOOL 600.
Do not use or store the unit in environments that are not within the working temperature range.
Protect the ROCOOL 600 from rain or other external liquids.![]() Never exceed the manifold’s maximum pressure of 60 bar. This could irreparably damage the sensors. There is also a danger of the sight glass breaking, which may injure the user.
Never exceed the manifold’s maximum pressure of 60 bar. This could irreparably damage the sensors. There is also a danger of the sight glass breaking, which may injure the user.
During all work, make sure to wear personal protection gear that includes safety gloves and safety glasses.
Avoid dropping the ROCOOL 600 from big heights
Do not overtighten the valves. This permanently reduces the valves‘ seal.
Connect only original Rothenberger accessories (external vacuum probe, Red Box) to the ROCOOL 600.
Technical data
Pressure display:——————————-bar, psi, KPa, MPa
Temperature display:——————————-°C, °F
Vacuum display:——————————-microns, mbar, mmHg, Pa, mTorr
Power source:——————————-9V battery, 550 MAh
Monitor (diagonal):——————————-4 1/3“ / 11cm
Pressure measurement range:——————————–1 to 60 bar
Precision (at 22°C):——————————-+/- 0.5% fs
Temperature measurement range:——————————–50°C – 200°C
Working temperature:——————————–10°C – 50°C
Connections:——————————-4x ¼“ SAE (7/16“ UNF)
Max. recording time:——————————-8h in device, 96h with Red Box
Coolants:——————————-R11, R113, R114, R115, R116, R12, R1234yf, R123A, R124, R125, R13, R134a, R141B, R142B, R143, R143A, R152A, R21, R218, R22, R227ea, R23, R290, R32, R401A, R401B, R401C, R402A, R402B, R403A, R403B, R404A, R405A, R406A, R407A, R407B, R407C, R407D, R408A, R409A, R410A, R410B, R411A, R411B, R412A, R413A, R414A, R414B, R415A, R416A, R417A, R420A, R421A, R421B, R422A, R422B, R422C, R422D, R424A, R427A, R434A, R437A, R438A, R500, R502, R503, R504, R507A, R508A, R508B, R509A, R600, R600A, R601, R601A, R718, R744 (subcritical).
ROCOOL 600 basic functions
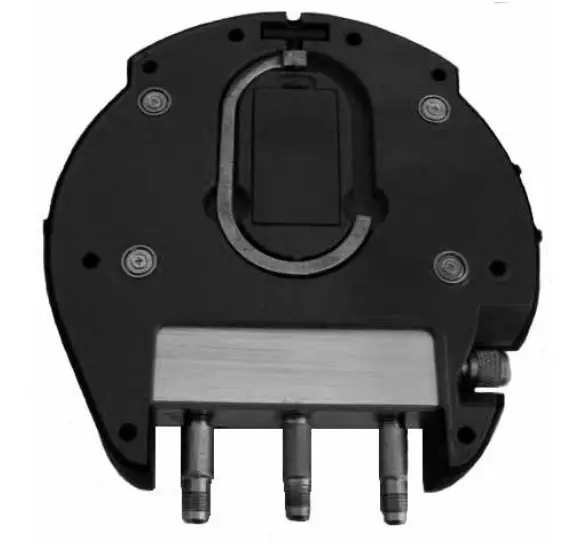
- Open the battery compartment and connect the 9V battery.
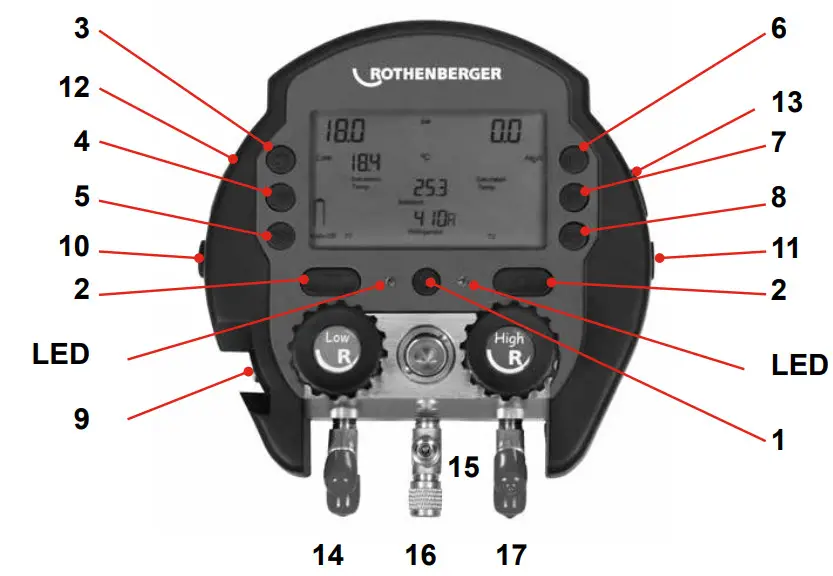
- To turn on the ROCOOL 600, press the power button (1) for 3 seconds. When it starts up, RO COOL 600 automatically calibrates the sensors to the current zero point.
- To turn on the backlighting, press the backlight button (3) for 3 seconds. More current is required when backlighting is on.
- To change the settings on the ROCOOL 600, press the set button (4).
• Navigate the settings menu with the up and down arrow keys (2), the set button (4) for confirmation, and the Delete key (7) to go to the previous step.
• Not pressing any key for 5 seconds automatically takes you back to the overview screen.
• From the settings menu, you can change the following parameters:
• Refrigerants
• Pressure display
• Temperature display
• Interval of recording
• Ambient temperature display or T2-T1
• T1 / T2 or overheating / undercooling display
• Auto-Off The device turns itself off after 10 minutes to save the battery
• Date format settings MM.DD or DD.MM
• Hour and minute settings
• Month and day settings
• Year setting - If the sensors need recalibrating, hold down the Mode (5) and Play (8) keys for 10 seconds.
- During operation, you can use the up and down arrow keys (2) to jump back and forth between the views for ambient temperature / T1 / T2 and T2-T1 / overheating / undercooling.
Using the ROCOOL 600 (e.g. evacuation and filling)
4.1 Evacuation and filling
- Press the Start button for 3 seconds and make the desired basic settings (refrigerants etc.).
- Use a charging hose to connect the system‘s low-pressure port to the low-pressure port (14) of the ROCOOL 600. In the same way, if possible, connect the two high- pressure sides with a charging hose.
- At the middle T connector (16), you can connect the vacuum pump and the refrigerant tank (15). So as not to create any overpressure on the vacuum pump during filling, Rothenberger recommends using charging hoses with shut-off valves.
- Now turn on the vacuum pump and open the route from the vacuum pump to the system to begin evacuation.
- As soon as a sufficient vacuum level of -0.95 is reached, the green LED starts to blink.
- Turn the vacuum pump off.
- If the vacuum pump is kept below -0.95 bar for 30 minutes, the green LED stays on continuously.
- Start the filling process by opening the route from the refrigerant tank to the system. The route to the vacuum pump must be closed off at the charging hose. If the maximum allo wable pressure is exceeded during filling, the red LED starts to blink.
- Connect the plug of the T1 temperature terminal to the connector (12) provided for the purpose on the ROCOOL 600, and clamp the temperature terminal to the system‘s suction line to measure superheating.
- Connect the plug of the T2 temperature terminal to the connector (13) provided for the purpose on the ROCOOL 600, and clamp the temperature terminal to the system‘s heating gas line to measure subcooling. If both temperature terminals are connected, superheating and subcooling are shown in parallel.
- Before finishing the filling process, make sure that there is no more refrigerant in the ROCOOL 600 or in the charging hoses.
- If necessary, rinse the ROCOOL 600 with nitrogen and evacuate the ROCOOL 600 before using it again.
4.2 Heat Pump Mode
The Heat Pump mode ensures the automatical switch of the low-pressure and the high-pressure port when heating with inverter units.
- Press the up and down arrow buttons at the same time for 5 seconds to activate the heat pump modeThe
 turns into a
  Symbol.
Disposal
Parts of your device can be recycled. Approved, certified recyclers are available for this. Ask your waste authority about environmentally sound disposal of non-recyclable materials (e.g., electronic waste). Never throw used replacement batteries in fire or household refuse. Your dealer can dispose of used batteries in an environmentally sound manner.
For EU countries only:![]() Do not discard power tools with household waste! According to European Directive 2012/19/EC on discarded electrical and electronic devices, and its implementation innational law, power tools that can no longer be used must be collected and handed over for environmentally sound recycling.
Do not discard power tools with household waste! According to European Directive 2012/19/EC on discarded electrical and electronic devices, and its implementation innational law, power tools that can no longer be used must be collected and handed over for environmentally sound recycling.
![]() ROTHENBERGER Werkzeuge GmbH Industriestraße 7
ROTHENBERGER Werkzeuge GmbH Industriestraße 7
D- 65779 Kelkheim / Germany
Telefon + 49 61 95 / 800 – 0
Telefax + 49 6195 / 800 – 3500
[email protected]


