Maxxima MRL-104005C 10 Inch Commercial Downlight
WARNING/ATTENTION
- Read all product labels and instructions before installing fixture.
- Risk of fire or electric shock. LED Retrofit Kit installation requires knowledge of luminaires electrical systems.
- Installation should be performed only by a qualified electrician in accordance with the National Electrical Code and relevant local code.
- Risk of fire or electric shock. Install this kit only in the luminaires that have the construction features and dimensions shown in the photographs and/or drawings.
- To prevent wiring damage or abrasion, do not expose wiring to edges of sheet metal or other sharp objects.
- Do not make or alter any open holes in an enclosure of wiring or electrical components during kit installation.
- The recessed luminaire is intended for mounting only in a covered ceiling where only the led side of the luminaire will
be exposed to damp or dry locations. - INSTALLATION SHOULD ONLY BE PERFORMED AFTER POWER TO THE FIXTURE HAS BEEN DISCONNECTED
COMMERCIAL DOWNLIGHT HOUSING COMPATIBILITY

RETROFIT INSTALLATION
- Make sure the POVWER IS TURNED OFF at the source to the recessed housing in which you are installing the product.
- Remove the existing fixture and trim (fig. 1).
- Open the J-box and cut away all wires connected to the fixture.
- Attach the carabiner safety clip from the new fixture to the existing fixture housing (fig. 2).
- Insert lamp conduit into the J-box and wire to power source (black to hot, white to neutral, green to ground) (fig. 3). If a
dimmer is used connect the purple wire to the “+” (typically purple wire) and the gray wire to the “-” (typically gray wire).
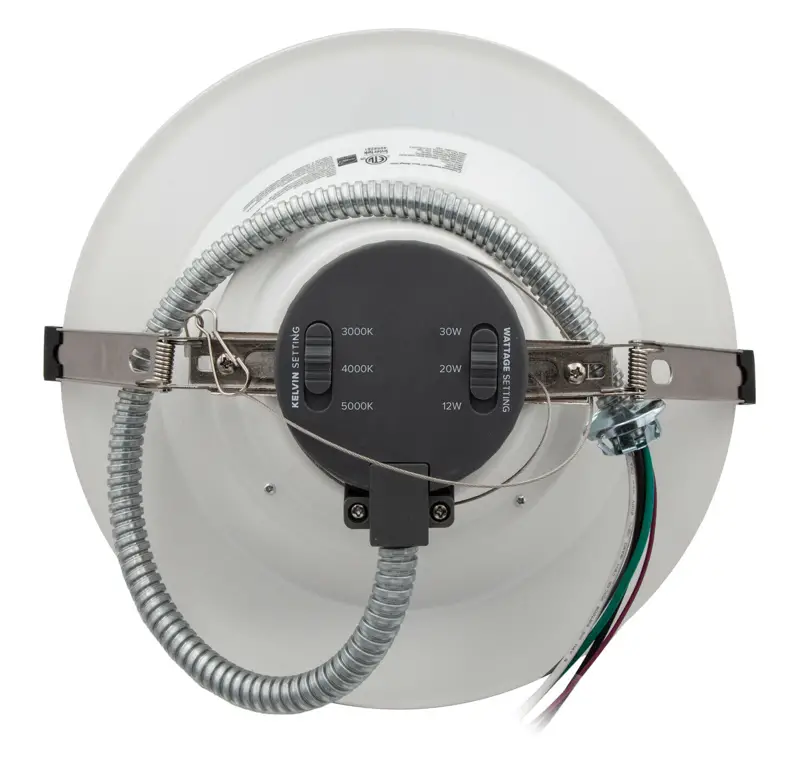
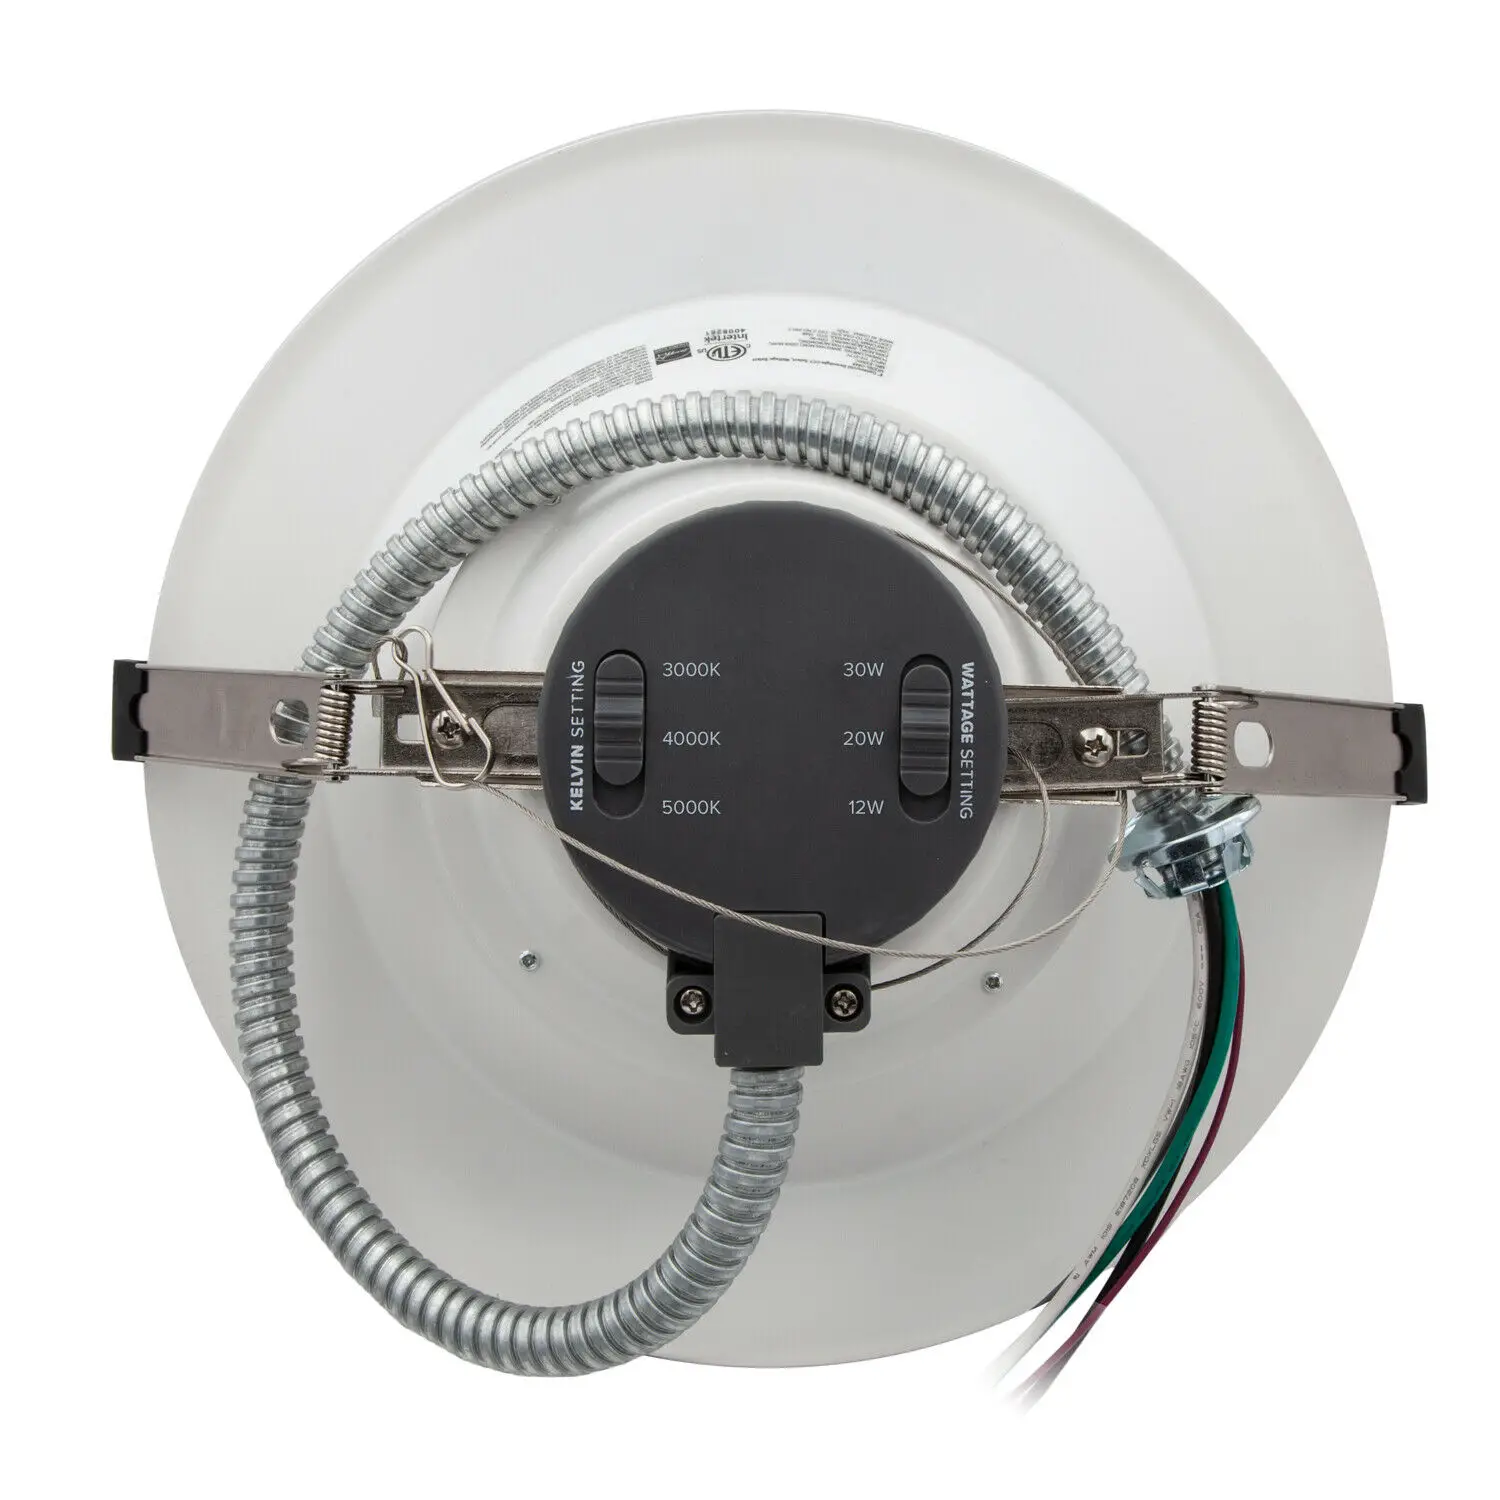
Reattach J-box cover when done - Adjust the lamp power to desired lumen output and CCT by sliding the selector switches on top of fixture housing (fig. 4).
- Squeeze the two housing clíips so they are in an upright position and insert lamp into housing (fig. 5).
- Once lamp is inside the housing, release the housing clips and continue pushing lamp into housing until securely fixed
and flush with ceiling (fig. 6).
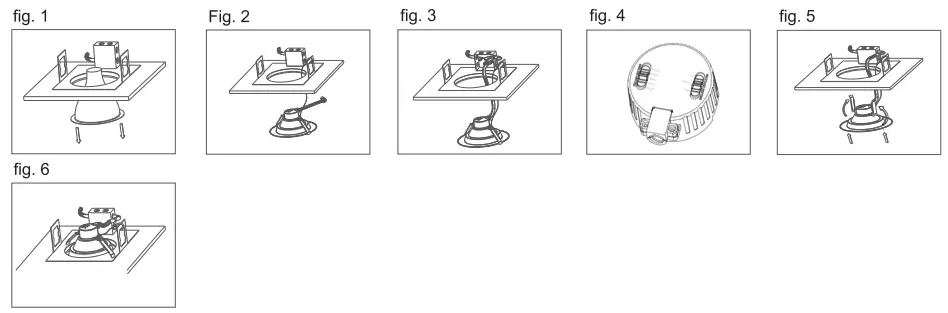
NEW CONSTRUCTION INSTALLATION
- Make sure the POWER IS TURNED OFF at the souroe to the location in which you are installing the product.
- Determine the location for installation and cut a ceiling hole with an approximate “A” diameter as stated in the commercial down light housing compatibility table.
- Attach the carabiner safety clip to a secure place inside the ceiling (fig. 1).
- Insert lamp conduit into the J-box and wire to power source (black to hot, white to neutral, green to ground) (fig. 2). lf a dimmer is used connect the purple wire to the “+” (ypically purple wire) and the gray wire to the “” (typically gray wire). Reattach J-box cover when done.
- Adjust the lamp power to desired lumen output and CCT by sliding the selector switches on top of fixture housing (Fig3.)
- Squeeze the two housing clips so they are in an upright position and insert lamp into the ceiling (fig. 4).
- Once lamp is inside the ceiling, release the housing clips and continue pushing lamp into ceiling until securely fixed and flush (fig. 5)


APPROVED DIMMERS
- Leviton: IP710-FZ
- Lutron: DVSTV-WH
- Maxxima: MEW-DM600LV, MEW-DM650LV
WARRANTY
Five Year Warranty:
Maxxima extends a 5 year limited warranty to the original purchase that the products listed are free from defects in material and/or workmanship only. MaxXxima will replace any warrantied product to the original consumer/purchaser if the product fails because of defects due to workmanship and/or materials within the limited warranty period. Limited warranty is not transferable and applies to the original installation of the Maxima product. This offer does not constitute in any way a product guarantee and MaxXima does not hereby assume any obligation whatsoever beyond sending a free replacement product.
[email protected]
B66-MAXXIMA (629-9462)
www.maxXimastvle.com
125 Cabot Court Hauppauge, NY 11788


