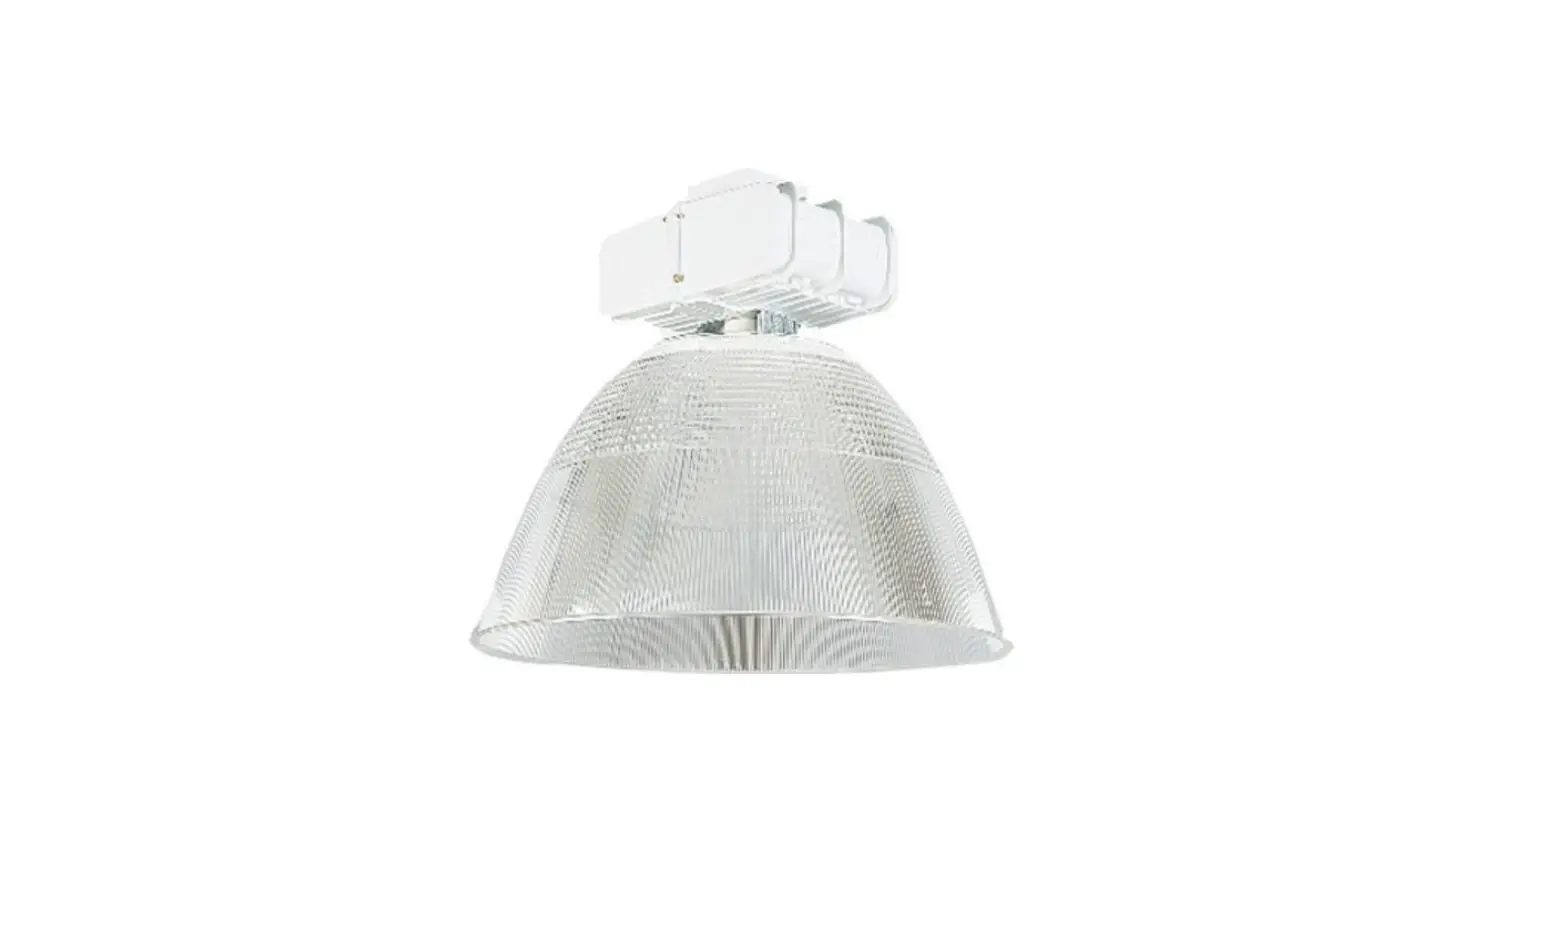
LITHONIA LIGHTING TH PA25 TH Series Optical Assemblies Instruction Manual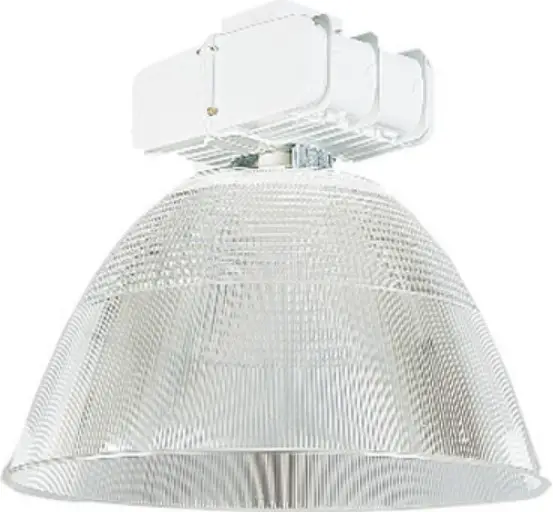
IMPORTANT SAFETY INSTRUCTIONS
![]() WARNING
WARNING
To reduce the risk of death, injury or property damage from fire, electric shock, cuts, abrasions, falling parts, and other hazards:
- Service of the equipment must be performed by qualified service personnel.
- Installation and maintenance must be performed by a person familiar with the construction and operation of this product and any hazards involved. All applicable codes and ordinances must be followed.
- Read this document before installing, servicing, or maintaining this equipment or installing a lamp. These instructions do not cover all installation, service, and maintenance situations. If your situation is not covered, or if you do not understand these instructions or additional information is required, contact Lithonia Lighting or your local Lithonia Lighting Distributor.
- Read and follow all warnings and instructions provided by the lamp manufacturer.
![]() WARNING
WARNING
Before installing, servicing, or maintaining this equipment, follow these general precautions.
To reduce the risk of electrocution:
- Make sure the equipment is properly grounded.
- Always de-energize the circuit and/or equipment before connecting to, disconnecting from, or servicing the equipment.
To reduce the risk of fire:
- Keep material away that can burn from hot lamp.
- Make sure lamps are correctly installed.
- Use supply conductors with a minimum installation temperature rating as specified on equipment.
To reduce the risk of personal injury from cuts, abrasions, or falling parts:
- Wear gloves to prevent cuts or abrasions from sharp edges when removing from carton, handling and maintaining this equipment.
- Do not use abrasive materials, glass cleaners or other solvents on reflector or lens. These substances may damage equipment and cause parts to eventually break and fall.
- Do not install a damaged fixture.
![]() CAUTION: Observe lamp manufacturer’s recommendations and restrictions on lamp operation, including but not limited to ballast type, burning position, replacement and cycling. Use only lamps that comply with applicable ANSI standards.
CAUTION: Observe lamp manufacturer’s recommendations and restrictions on lamp operation, including but not limited to ballast type, burning position, replacement and cycling. Use only lamps that comply with applicable ANSI standards.
NOTICE: If lamp is marked it contains mercury. Follow disposal laws. See www.lamprecycle.org
Lithonia Lighting, a division of Acuity Brands Lighting, Inc., assumes no responsibility for claims arising out of improper or careless installation or handling of this product.
SAVE THESE INSTRUCTIONS
TROUBLESHOOTING
If this fixture fails to operate properly, check to make sure:
- The correct lamp is properly installed.
- The fixture is wired correctly.
- The lamp is not faulty.
- The fixture is grounded correctly.
- The line voltage at the fixture is correct
FOR ACRYLIC APPLICATIONS: Consult the Acrylic Environmental Compatibility Chart (page 5) also available at www.lithonia.com to verify compatibility with environmental conditions.
Do not use acrylic reflectors or lenses in any location where they will be exposed to environmental contaminants that may diminish their integrity. Maximum ambient temperature limit:
- 55°C – PA22, PA22N, PA22L
- 40°C – PA16, PA22E, PA25
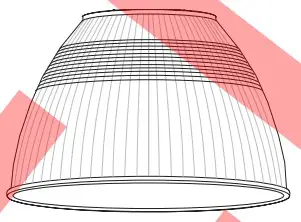
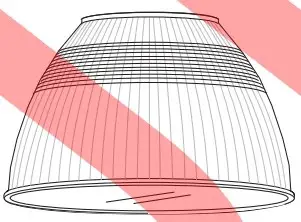
The TH series ballast housing is shipped with the adjustable reflector brackets collapsed in the “0” position. Use the bracket positioning chart on page 2 to determine the correct bracket setting for the desired distribution.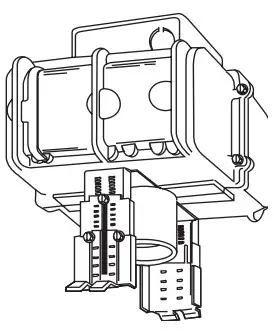
HiTek® Aluminum Reflectors
- A14

- A15

- A16

- A17

- A22

- PA16

- PA22/PA22N
- PA22E/ PA22
- PA25


Bracket Positioning
INSTALLATION INSTRUCTIONS
Do not install damaged product. Upon receipt of fixture and accessories (packed separately) thoroughly inspect for any freight damage that should be brought to the attention of the delivery carrier. Damaged product must be repaired or replaced.
Compare the catalog description listed on the packing slip with the fixture label on the inside of the housing to be sure you have received the correct merchandise.
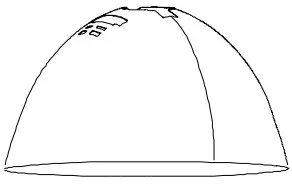
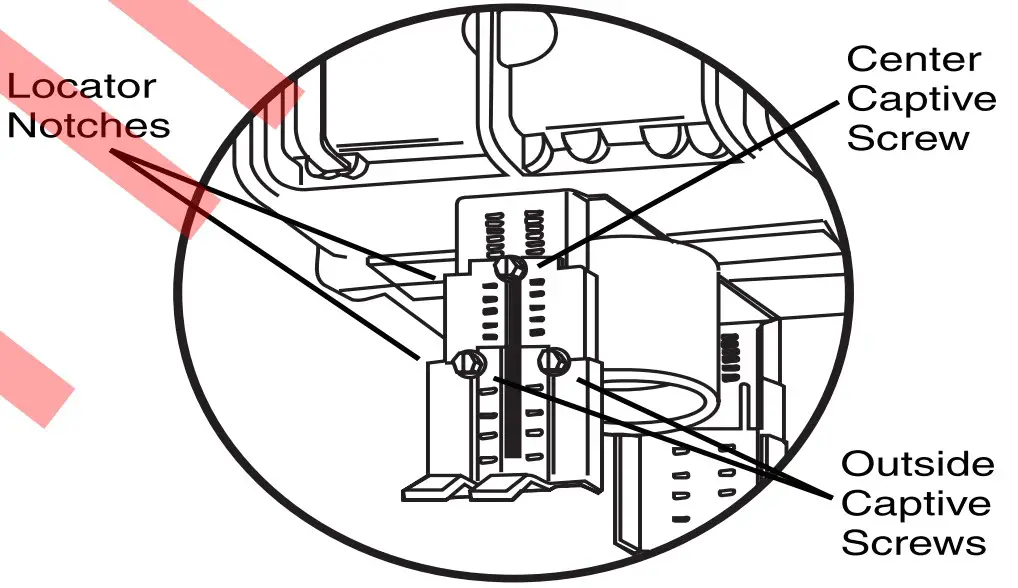
- To attach reflector, determine the correct bracket setting from the bracket positioning chart (page 3). Set the brackets at the desired position for attaching the reflector. For positions 00 – 6, adjust the reflector bracket by loosening the center captive screw so the bracket moves freely to the desired position. The bracket is in the right location when the desired position number appears in the locator notch at the top of the bracket section. Be sure the embossments on the brackets engage at the correct position. Position 00 is obtained by adjusting the brackets so the 0 position mark is covered by the bracket. For positions 7 – 12, set the first extension bracket at position 6, as described above, and tighten the center screw. Loosen the two outside captive screws and adjust the bottom sections of the bracket so the proper position appears within the locator notch of the lowermost bracket.
- Attach the reflector by removing one of the lower reflector brackets. Loosen the center captive screw and pass the screw head through the hole in the adjustment slot. Insert the tabs of the detached bracket into the slots on the top of the reflector. Tilt the reflector and insert the opposite bracket tabs into the corresponding reflector slots. Swing the reflector up into position and reinsert the captive screw head through the adjustment slot of the reflector bracket. Tighten screw
NOTE: Align fixture with A14 reflector as indicated by aisle direction label on reflector
| Source | Wattage (Envelope) | Reflector | N | C | M | S | W |
| Metal Halide | 175W, 250W,320W (BT28/ED28) | A14 | 6 | 5 | 4 | 3 | 2 |
| A15 | 4 | 3 | 2 | 1 | 0 | ||
| A16GL | 10 | 7 | 5 | 2 | 00 | ||
| 350W, 400W (BT37/ED37) | A14 | 12 | 11 | 10 | 9 | – | |
| A15 | 12 | 11 | 10 | 9 | 8 | ||
| A16 | – | 10 | 9 | 7 | 6 | ||
| A16GL | – | – | 8 | – | 3 | ||
| A17 | – | – | 9 | 8 | 6 | ||
| A22 | 4 | 3 | – | – | – | ||
| 1000W (BT56) | A22 | – | 12 | 11 | 10 | 8 | |
| Coated Metal | 175W, 250W, 320W (BT28/ED28) | A16 | 6 | 3 | 1 | 00 | – |
| Halide | A17 | – | 1 | 2 | – | – | |
| PA22E | – | – | 9 | 5 | 2 | ||
| 350W, 400W (BT37/ED37) | A16 | – | 10 | 7 | 5 | 3 | |
| A17 | – | – | 6 | 2 | 0 | ||
| A22 | 8 | 4 | – | – | – | ||
| PA22 | – | 12 | 8 | 6 | 3 | ||
| PA22L | – | 12 | 8 | 6 | 2 | ||
| PA22N | 8 | 3 | 0 | – | – | ||
| 1000W (BT56) | A22 | – | 12 | 8 | 4 | – | |
| PA25 | – | – | 11 | 8 | 0 | ||
| High Pressure | 200W (ET18) | A16 | – | 7 | 6 | 3 | – |
| Sodium | A17 | 8 | 5 | 4 | 1 | – | |
| 250W (ET18) | A15 | – | 4 | 3 | 2 | 0 | |
| A16 | – | 7 | 6 | 3 | – | ||
| A16GL | – | – | 6 | 4 | – | ||
| A17 | 8 | 5 | 4 | 1 | – | ||
| 400W (ET18) | A14 | – | 5 | 4 | 3 | 2 | |
| A15 | 4 | 3 | 2 | 1 | 0 | ||
| A16 | – | 7 | 6 | 5 | 3 | ||
| A16GL | – | – | 2 | 0 | – | ||
| A17 | – | 5 | 4 | 3 | 1 | ||
| A22 | – | 00 | – | – | – | ||
| 1000W (E25) | A22 | 12 | 9 | 5 | 3 | – | |
| Diffuse High | 250W (ET18) | PA16 | – | – | 3 | 0 | 0 |
| Pressure Sodium | PA22N | 6 | – | – | – | – | |
| 400W (ET18) | PA22 | – | – | 11 | 5 | 2 | |
| PA22L | – | – | 11 | 5 | 0 | ||
| PA22N | 8 | – | – | – | – | ||
| 1000W (E25) | PA25 | – | – | – | – | 1 |
Note: Positioning for PA16, PA22, PA22E, PA22L, and PA25 are for coated lamps. Use of clear lamps will dramatically alter performance
LAMP INSTALLATION
Be certain power supply is not engaged when installing or replacing lamps. Prior to installing the lamp in the fixture, check fixture markings to be certain the lamp is the correct type and wattage. Screw the lamp securely into the socket, back it out one or two turns, then screw lamp back in, making sure it is secure. This procedure properly seats lamp in the socket. For QRS and EC options, be certain quartz lamp wattage does not exceed wattage rating of fixture. Push lamp into socket and depress, twist clockwise and release.
CAUTION: The use of lubricants on lamp bases or sockets can cause pre- mature lamp failure and voids fixture warranty.
CAUTION: Replace failed lamp promptly. Failure to do so can shorten the life of electrical components.
EMERGENCYCIRCUIT OPTION: Emergency circuit quartz socket leads are wired to an auxiliary power circuit. Be certain that auxiliary power supply is not engaged when installing or replacing quartz lamps.
REFLECTOR /LENS MAINTENANCE: Periodically clean to maintain optimum performance and to promote maximum optic life. For acrylic optics, use a water dampened cloth only because cleaner ingredients may diminish acrylic integrity. For aluminum optics, clean with a mild, nonabrasive cleaner.
IMPORTANT METAL HALIDE LAMP INFORMATION
Certain metal halide lamps require the use of a suitably enclosed luminaire and/or must be operated in accordance with specific guidelines that have been established by the lamp manufacturer. NFPA 70B, “Recommended Practice for\ Electrical Equipment Maintenance,” Section 15-5.2, states, “Metal halide lamps are constructed of an outer bulb with an internal arc tube made of quartz. The arc tube operates under high pressure at very high temperatures – as high as approximately 1,100 degrees Celsius. The arc tube and outer bulb can unexpectedly rupture if the lamp is misapplied. In continuously operating systems (24 hours a day, 7 days a week), lamps should be turned off once per week for at least 15 minutes. Failure to do this increases the risk of rupture.” Refer to lamp manufacturer for specific warnings and recommendations.
Reference Standards – “American National Standard for Electric Lamps – High Intensity Discharge Lamps, Methods of Designation,” ANSI C78.380, Annex B, defines E, S and O type lamps.
Lamps classified as E type are to be used only in suitably rated enclosed luminaires.
Lamps classified as S type may be used in open luminaires in certain applications, when operated in the specified near vertical position. This category of lamps is limited only to certain lamps in the 350 to 1000 watt range.
Lamps classified as O type, with quartz arc tubes, comply with “American National Standard for Electric Lamps –
High Intensity Discharge, Methods of Measuring Characteristics,” ANSI Standard C78.389, for containment testing and may be used in open luminaires.
To determine the appropriate selection of a metal halide lamp, refer to all of the lamp manufacturer’s warning and cautionary statements regarding the use of the lamp in your specific application.
| Compound | Rating | Compound | Rating Compound | Rating | ||
| 2-Ethylhexyl Sebacate | A | Caustic Potash | A Hydrogen Peroxide, 30% | N | ||
| Acetandehyde, 100% | N | Cellulose Paints | N Iron Perchloride | N | ||
| Acetates | N | Chlorinated Hydrocarbons | N Isoctane | N | ||
| Acetic Acid, 5% | A | Chlorinated Solvents | N Isopropyl alcohol | N | ||
| Acetic Acid, Glacial, 100% | N | Chlorine Based Cleaners | A Kerosene | A | ||
| Acetic Anhydride | N | Chlorine Gas | N Lacquer Thinner | N | ||
| Acetone | N | Chlorine, Aqueous, 2% | A Lactic Acid | A | ||
| Acetonitrile | N | Chlorophenol | N Lactic Acid Butyl Ester | N | ||
| Acetophenone | N | Chromic Acid, 40% N | Mercury Chloride | N | ||
| Acohol, Benzyl | N | Citric Acid, 10% | A Meta-Cresol | N | ||
| Acrylic paints | N | Cloves | N Metal Carbonates | A | ||
| Alcohol, Allyl | N | Coffee | N Metal Chlorides | A | ||
| Alcohol, Amyl | N | Cooking Oil | A Metal Sulfates | A | ||
| Alcohol, Ethyl, 100% | N | Cosmoline Removers | N Methane gas | A | ||
| Alcohol, Ethyl, 50%N | Cottonseed Oil | A | Methanol, 15% | N | ||
| Alcohol, Isopropyl, 100% | N | Cresol | N Methanol, Concentrated | N | ||
| Alcohol, Methyl, 10% | N | Cyclohexane | N Methyl Benzoate | N | ||
| Alcohol, Methyl, 100% | N | Cyclohexanone | N Methyl Chloride | N | ||
| Alcohol, Methyl, 50% | N | Cyclohexene | N Methyl Cycohexanol | N | ||
| Alcohol, n-butyl | N | Detergent SolutionN | Methyl Ethyl Ketone | N | ||
| Ammonia-based Cleaners | A | Diacetone Alcohol N | Methyl Naphthalene | N | ||
| Ammonia Gas | A | Diamyl Phthalate | N Methyl Salicyclate | N | ||
| Ammonium Hydroxide, 28% | A | Dibutyl Phthalate | N Methylamine | N | ||
| Ammonium Nitrate A Dibutyl Sebacate N Methylene Dichloride N | ||||||
| Ammonium Phosphate | A | Diethyl Ether | N | Milk | A | |
| Amyl Acetate | N | Diethylene Glycol | A | Milk, Chocolate | A | |
| Aniline | N | Dimethyl Formannicle | N Motor Fuel Mixture, with Benene | N | ||
| Aniseed, Bay leaves, Nutmeg | A | Dioctyl Sebacate | N Motor Fuel Mixture, without Benene | A | ||
| Anti-freeze | A | Dioxane | N Nail Polish | N | ||
| Aviation Fuel (100 Octane) | N | Epoxy Adhesives | A Naphtha | N | ||
| Bathroom Cleaners | N | Ether | N Natural Gas | A | ||
| Beer | A | Ethyl Acetate | N n-butyric Acid, 100% | N | ||
| Benzaldehyde | N | Ethyl Alcohol, 15% | A Nitric Acid, 10% | A | ||
| Benzene | N | Ethyl Alcohol, Concentrated | N Nitric Acid, 40% | N | ||
| Benzoic Aldehyde N | Ethyl Bromide | N | Nitric Acid, 70% N | |||
| Bleaching Powder Paste | A | Ethyl Butyrate | N | |||
| Bleaching Powder Solution, 2% | A | Ethylene Bromide | N | |||
| Brake Fluid | N | Ethylene Dibromide | N | |||
| Bromine Gas | N | Ethylene Glycol E | A | |||
| Butanol | N | Ethylene Oxide (Dry) | A | |||
| Butraldehyde | N | Ethylene Oxide (Moist) | N | |||
| Butyl Acetyl Ricinoleate | N | Ferric Chloride, Aqueous, 10% | A | |||
| Butyl Stearate | N | Formaldehyde, Aqueous, 40% | A | |||
| Calcium Hypochlorite | A | Fruit Juice | A | |||
| Car Wash Detergent | A | Glass Cleaners | N | |||
| Carbolic Acid | N | Glycerol | A | |||
| Carbon Dioxide Gas | A | Glycol | N | |||
| Carbon Disulfide Carbon Disulphide N Carbon Disultide | NHexaneN | HeptaneAHydrochloric Acid, 38% | A A | |||
| Carbon Monoxide Gas | A | Hydrogen Peroxide, 28% | N | |||
Rating is based on visual appearance at ambient temperature 68°F, 50% humdity.
LEGEND: A – Acceptable N – NOT RECOMMENDED Consult Factory where applicable
Lithonia Lighting
Industrial HID
One Lithonia Way, Conyers, GA 30012
Phone: 800-315-4963 Fax: 770-981-8141
www.lithonia.com
© Lithonia Lighting, Rev. 10/07
RJ5210007
TH-OPT


 Instruction Manual")


