LIVEVIEWSPORTS LVPRO 2 User Manual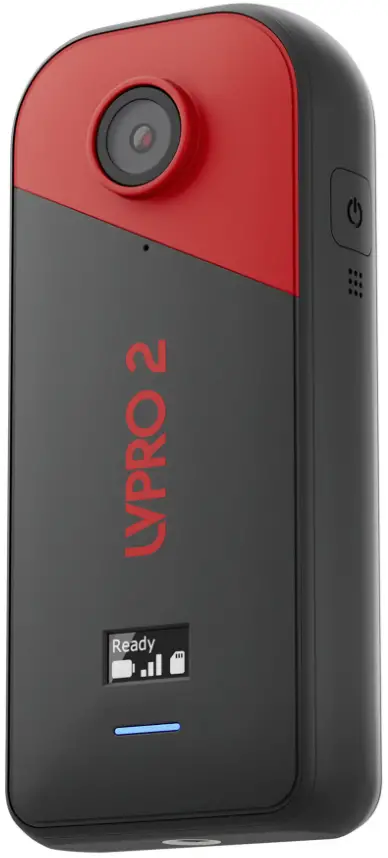
What’s In The Box
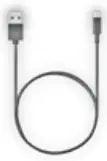
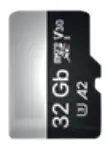
LVPro2 Contents
- USB-C Charge Cable

- MicroSD Card

- LVPro2

- Li Polymer Battery

- LVPro2 User Manual

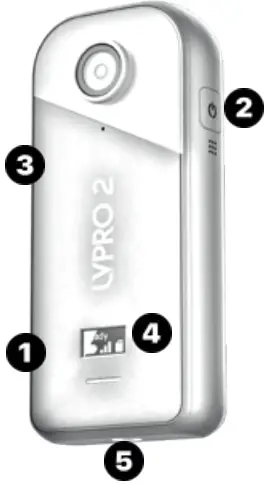

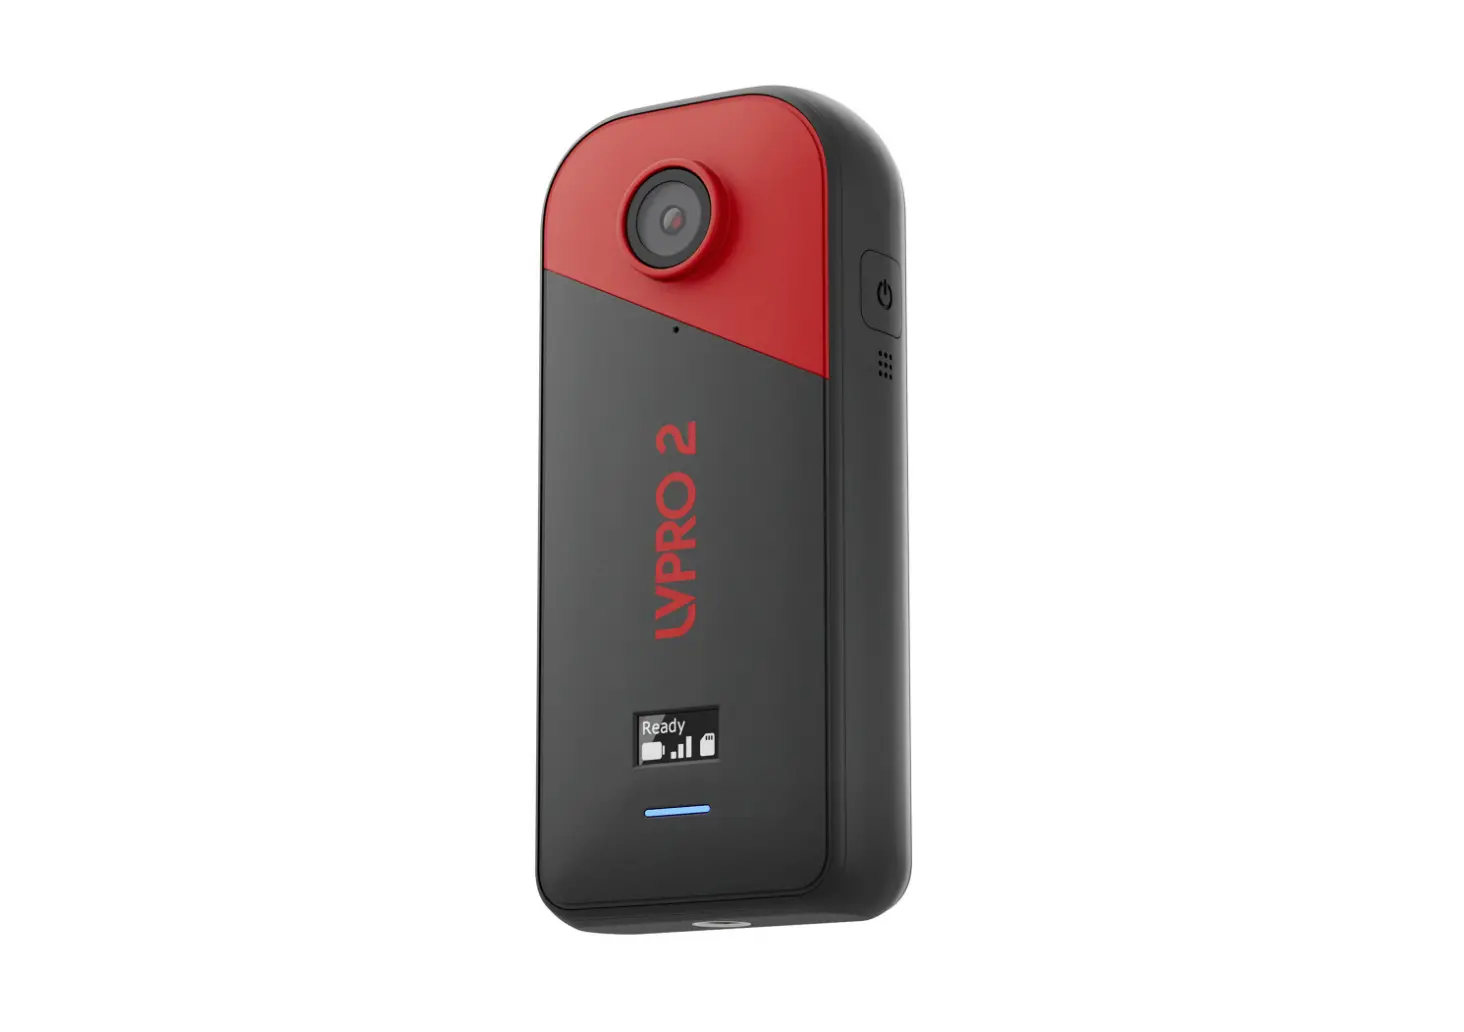
Getting to Know the LVPro2
- Battery & SD Card

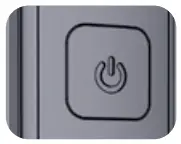
- Power Button

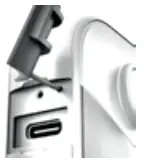
- USB Charge Port & Reset Switch

- Multi Function Display (MFD)

- Tripod Mounting Screw

Getting Started
System Requirements
LVPro2 works with your phone or tablet.
To be compatible the viewer must meet the following specs:
| Apple iOS 14+ |
| Android 9.0 |
| Amazon Fire 7.0 |


LVPro2 is not compatible with Windows PC devices.
Charging
To charge, open the rubber port cover on the camera left side and insert the USB-C charge cable. Make sure other end is plugged into a power source.
- During Charging the Multi Function LED will light up RED.

- LED will turn OFF when charging is complete.


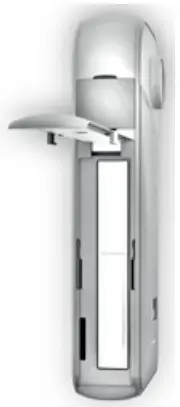
Insert + Remove SD Card
The MicroSD card is used for temporary video storage during live streaming and must remain inside the LVPro2 during operation.
If the SD Card needs to be removed during service, the card slot is located under the battery cover on the left side of the camera.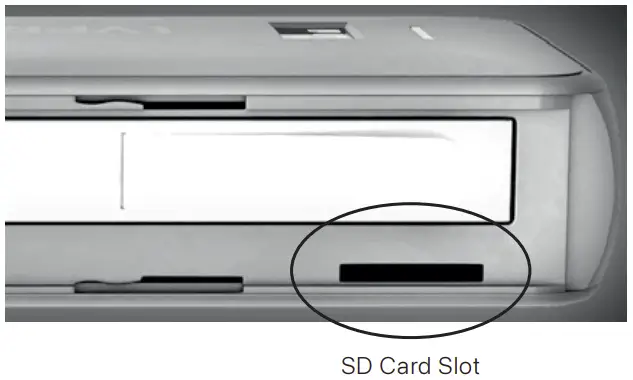
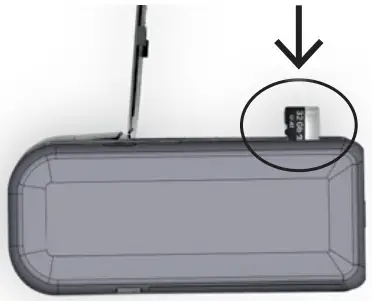
Insert SD card with camera facing away and logo facing towards you.
Push card in firmly until it clicks into place.
To remove, push down on the SD card until the spring mechanism releases the card.
Power On + Off
To turn the camera ON, press and hold the power button for 3 seconds. You will hear 3 quick beeps when the LVPro2 turns on. The MFD should also light up along with a blue LED.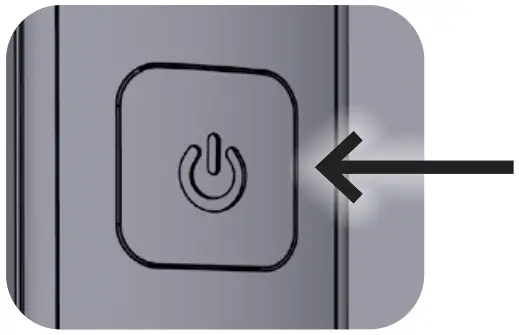
To turn the camera OFF, press and hold for 3 seconds.
Automatic OFF – the camera will turn off automatically after 10 minutes of inactivity and no active WiFi connection.
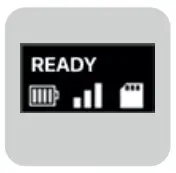
Multi Function Display
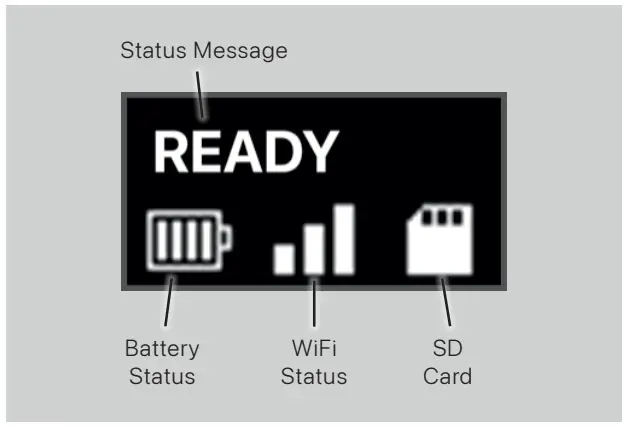
| Status Message | Action |
| MSDC | File Host mode for direct file transfer from SD Card . |
| Waiting | Waiting for WiFi. Connect App to LVPro2 to begin session. |
| Ready | App connection successful. Video ready for streaming. |
| Insert SDC | Insert SD Card into camera to enter App Streaming mode. Please note that camera will not function without SD Card. |
| FW ISP | Firmware upgrade in progress.DO NOT turn off camera during this process. Camera will turn off automatically when FW upgrade is complete. |
Downloading the App
LV Studio
The free companion App for your LVPro2 is LVStudio. LVStudio is available on iOS, Android and Amazon FireOS. Download and install the app for your device.
Scan QR Code:
| Apple App Store | Android Google Play Store | Amazon App Store |
|
|
|


Connecting the Camera
Step 1: Power On LVPro2 ![]()
Step 2: Connect to LVPro2 WiFi
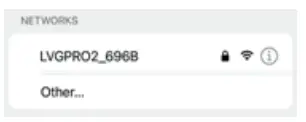
Using Apple iOS:
- Open Settings

- Choose WiFi Settings

- Select LVGPro2 WiFi Password is “1234567890


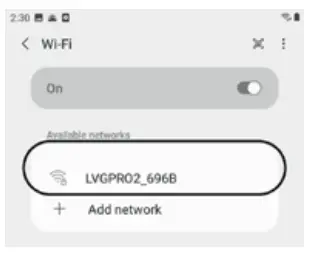
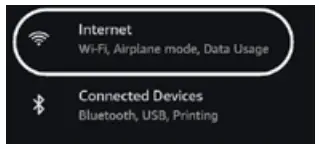
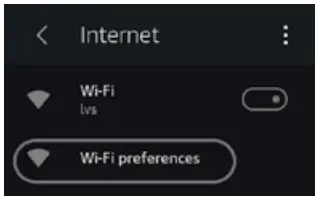
Using Android 9+:
- Open Android Settings

- Open “Connections” for WiFi Options

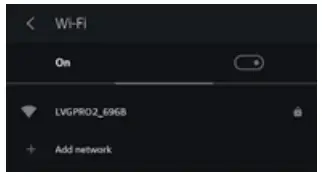
- Select LVGPro2 WiFi
The WiFi password is “1234567890”
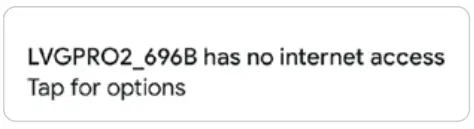
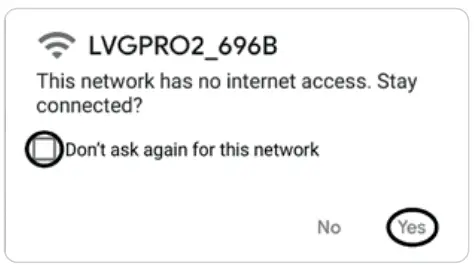
LVPRO2 Network will show “No Internet”. This is normal. - You may see the following message:

- You MUST tap on the message and choose “YES” or else Android will disconnect the LVPRO2 camera. You should also select “Don’t ask again for this Network


Using Amazon Fire Tablet, FireOS 7+:
- Open Fire Tablet Settings

- Select “Internet”

- Select “WiFi preferences”

- Choose “LVGPRO2”
Use password “1234567890”

App Functions
Mirroring
The basic function of LVPro2 is to provide live mirroring to create real time awareness of your movements.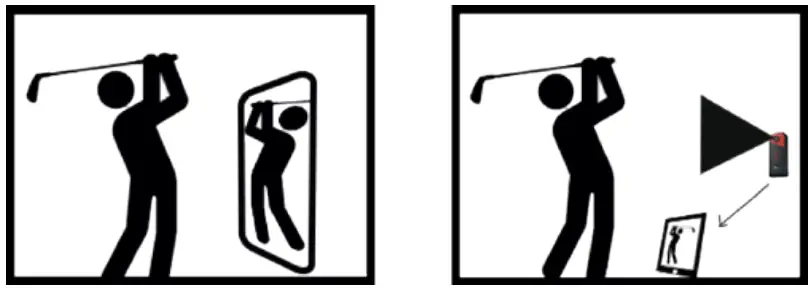
Once connected, the LVStudio App will show the camera view in real time.
Use the mirror button to flip the video to match your movements when using LVPro2 from front facing mode.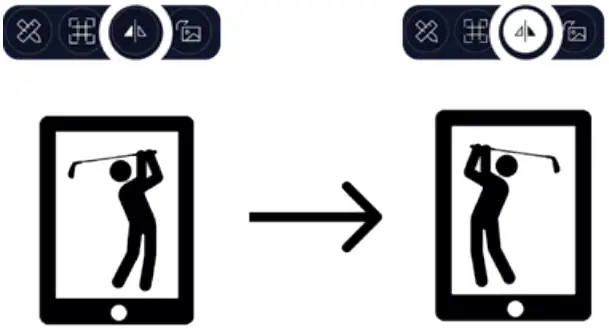
Instant Replay
Instant replay allows recording of every swing with automatic trimming and slow motion replay. To activate “Instant Replay” put your tablet into either “Ball Strike Trigger” mode or “AI Trigger” mode. For more information please see the LVStudio Manual:”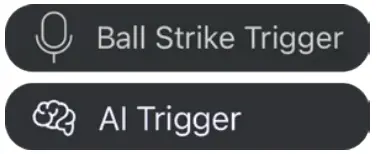
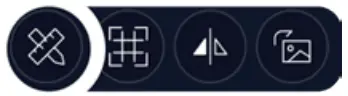
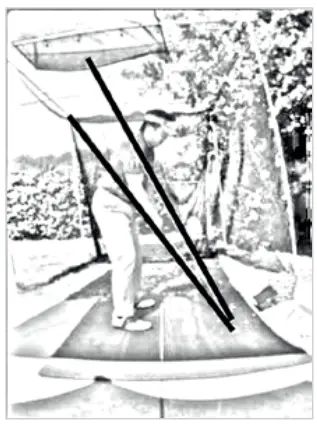
Drawing Lines
- Draw lines and objects on any video in “Live Camera” or “Replay” mode

- Lines drawn on recorded videos transfer to “Live Camera”

My Practice (saved videos)
Swing videos are saved automatically and can be accessed under “My Practice”.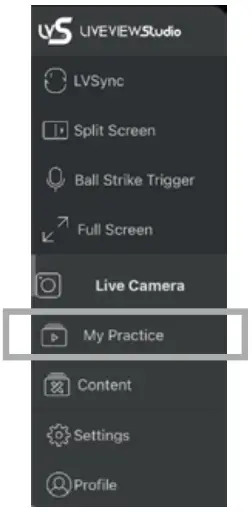
The LVStudio App is very dynamic and constantly evolving. As a result we are only providing broad usage tips on what to do with the LVPro2. For the latest detailed guides on how to use the LVStudio App please go online to:
”www.liveviewsports.com/lvstudio”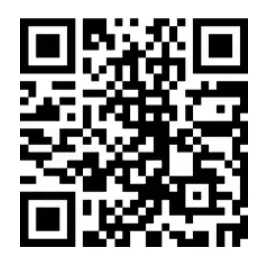
Tips
Camera Alignment
For best results on down-the line video, place the camera waist height, directly behind your hands and pointing at your target.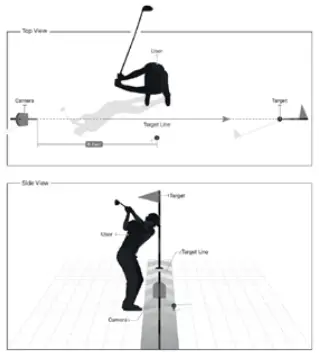
Lagging Video
If your Live Camera video is lagging your movements or if video file transfer takes more than 5-10 seconds per swing, you are probably getting interference from other WiFi or radio signals.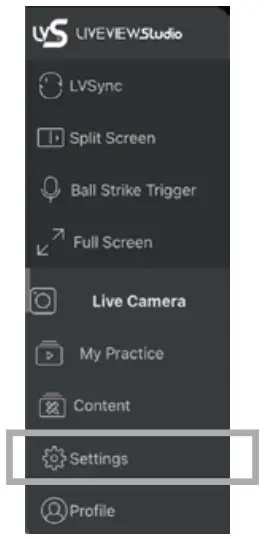
You can improve the signal by going to App “Settings” and switching the camera to a different channel.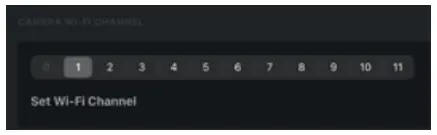
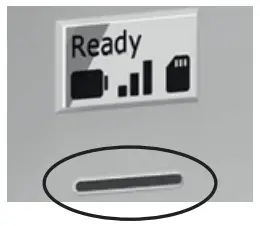
Camera Reset
If you forgot your camera settings or password, you can reset the camera using the factory “RESET” button located above the charge port.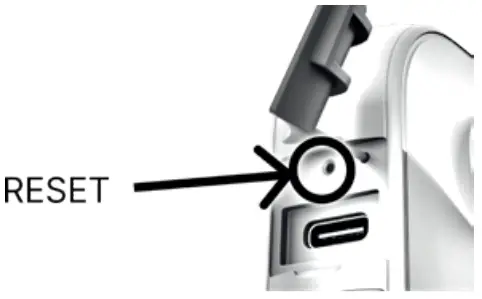
Use a safety pin to push and hold for 8 seconds to reset the camera its default settings.
Support Info
For additional support you can go to our website under “guides”. You can also reach us as follows:
Phone: +1 (408) 213 2030
M-F: 9-5 PM (GMT+8) pm
Pacific Standard Time
Email:
[email protected]
System Specifications
- Aperture: F 2.0
Bright Lens – F2.0 lens provides enhanced imaging in lower light environments such as golf simulators. - EV: ±2EV
Variable Exposure Control – improve image quality by controlling exposure settings to prevent too bright/too dark videos. - ISO: Auto
- WB: Auto, 2700K, 4000K, 5000K, 6500K, 7500K
- Video Resolution: 720p@120fps
- Video Format: MOV
- Video Coding: H.264
- Video Bitrate: 28 Mbps (Super Fine), 17 Mbps (Fine), 12 Mbps (Normal)
- Gyroscope: 6-axis gyroscope
- Bluetooth: 4.2
- WiFi: 802.11 N. 2.4 Ghz
- USB: Type-C
Note: It does not support wired connections to iOS devices. Full wireless support is available for both iOS and Android. - Micro SD Card: UHS-I V30 speed class, exFAT format SD cards with a max storage of 512GB are recommended.
- Battery Capacity: 1700mAh
Replaceable Batteries – LVPro2 accepts swappable batteries. Maximize your use time whether you are practicing or teaching. (Charger and additional batteries sold separately). - Charging Method: Type-C
- Charging Time: 90 minutes
- Weight: 3.5 oz (100g)
- Dimensions (W x H x D): 2” x 4.7” x 1.2” in (5.2 x 12 x 3 cm)
- Run Time: 720p@120fps – 90 minutes
FCC/CE
FCC statement (class B)
“Federal Communications Commission (FCC) Statement” This Equipment has been tested and found to comply with the limits for a class B digital device, pursuant to Part 15 of the FCC rules. These limits are designed to provide reasonable protection against harmful interference in a residential installation. This equipment generates, uses and can radiate radio frequency energy and, if not installed and used in accordance with the instructions, may cause harmful interference to radio communications. However, there is no guarantee that interference will not occur in a particular installation. If this equipment does cause harmful interference to radio or television reception, which can be determined by turning the equipment off and on, the user is encouraged to try to correct the interference by one or more of the following measures:
- Reorient or relocate the receiving antenna.
- Increase the separation between the equipment and receiver.
- Connect the equipment into an outlet on a circuit different from that to which the receiver is connected.
- Consult the dealer or an experienced radio/TV technician for help
FCC Caution:
- This device complies with Part 15 of the FCC rules. Operation is subject to the following two conditions:
- This device may not cause harmful interference, and
- This device must accept any interference received, including interference that may cause undesired operation.
- This device and its antenna(s) must not be co-located or operating in conjunction with any other antenna or transmitter.
- Changes or modifications to this unit not expressly approved by the party responsible for compliance could void the user authority to operate the equipment.
IMPORTANT NOTE :
FCC Radiation Exposure Statement: This equipment complies with FCC radiation exposure limits set forth for an uncontrolled environment. This equipment should be installed and operated with minimum distance 20 cm between the radiator & your body.
Industry Canada (IC) Statement: This device complies with Industry Canada licence-exempt RSS standard(s). Operation is subject to the following two conditions:
- This device may not cause interference, and
- This device must accept any interference, including interference that may cause undesired operation of the device.
Caution: Exposure to Radio Frequency Radiation.
To comply with RSS 102 RF exposure compliance requirements, a separation distance of at least 20 cm must be maintained between the antenna of this device and all persons.


