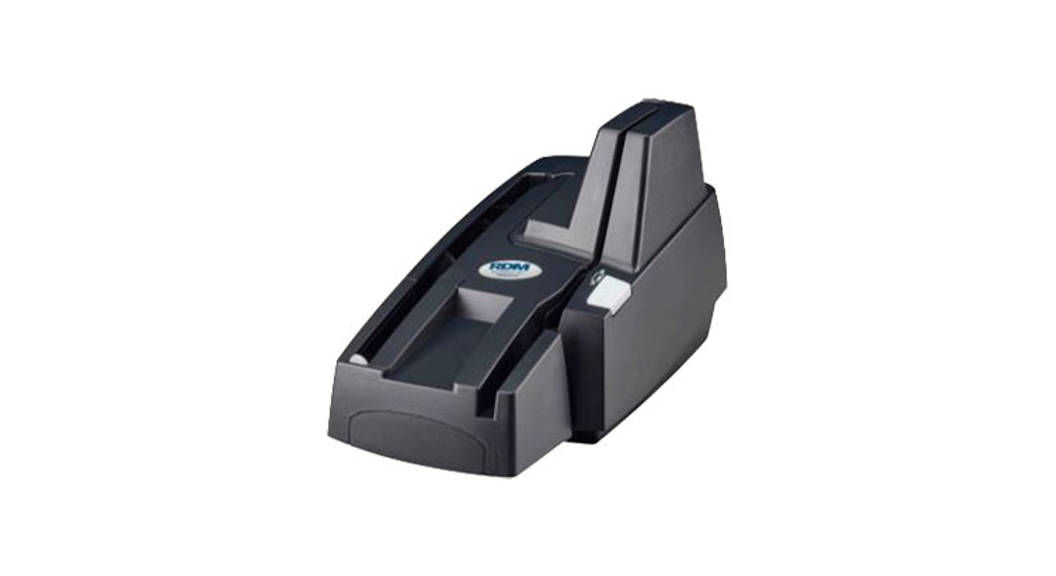
![]() EC9100i ® Scanner
EC9100i ® Scanner
Quick Start Guide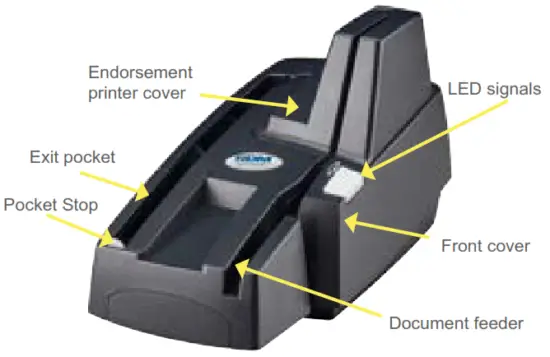
What’s in the box?
- Quick start guide
- EC9100i scanner
- USB cable
- Power supply and cable
- 5-pack inkjet blotter (inkjet models only)
- 3” thermal receipt paper roll (printer models only)
- Cleaning card sample
Getting your scanner ready
Choose location
- Flat surface
- Adequate ventilation
- Protection from elements
- Near electrical outlet
- Away from electromagnetic sources
(e.g. fans, power supplies)
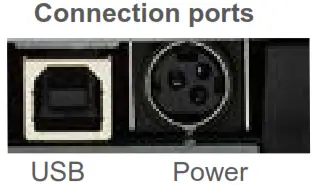
Connecting your scanner
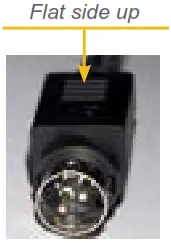
- Power up your scanner
• To connect the power cord, insert the round power connector into the power port on the back of the scanner with the flat side facing up. • Make sure the power switch is in the on position.
- Wait for your application to instruct you BEFORE connecting the USB cable to your computer and scanner.
- Drivers for the EC9100i scanners are installed on your computer during your payment application setup.
- Please refer to your payment application requirements for complete setup information.

 • Make sure the power switch is in the on position.
Understanding LED signals
The scanner’s status is shown through a single multistate LED signal. The table below describes typical status signals/meanings.
| Status/Signals | Meaning |
| Booting: Varying green/red flashing cycles | The scanner is being configured by the scanning application. |
| Idle: Green solid | The scanner is ready and idle. |
| Scan Prompt: Green flashing | The scanner is waiting for the user to insert a document into the feeder. |
| Scanning: Green and red flashing cycle | The scanner is processing the documents. Wait for the scanner to finish. |
| Scanning: Red flashing | Error during document processing. Check your application for instructions, or contact your application provider. |
Identifying your scanner
There is a label on your scanner that includes the following details:
- Scanner model number
- Scanner serial number
- Speed of your scanner
- If the scanner is licensed for OCR A/B (optical character recognition)
You can locate the label on the bottom or back of your scanner, depending on the model.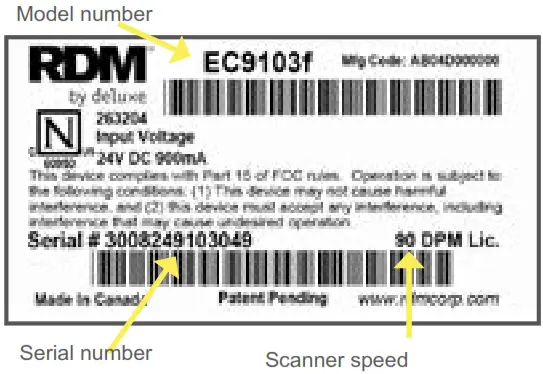
Installing optional accessories
 |  |  |
| Franker (optional – franker models only) • Pull up to remove the front cover • Lift the blue latch on the back of the scanner and insert the franker cartridge • Make sure the top of the metal plate fits into a slot in the franker cartridge (as pictured) • Secure franker cartridge by lowering blue latch over the cartridge Note: Franking cartridges are available separately | Inkjet endorser (optional – inkjet models only) • Remove the endorsement printer cover • Pull the inkjet latch back and place the inkjet cartridge into the holder • Push down to snap into place (Cartridge needs to be at an angle so that the back is lower than the front) Note: Endorsement inkjet printer cartridge available separately | Paper Roll (thermal receipt printer models) • Press the printer cover release button • Insert paper roll into the compartment, with the end of paper rolling from the top (as pictured) • Pull 1” of paper to feed through the compartment • Close printer cover |
Preparing documents
In order to reduce the possibility of errors and damage to the unit, you should:
- Smooth all folds and creases in the document
- Remove any paper clips and staples from the document
- Verify that documents are not stuck together
- Ensure that documents are dry
- Ensure documents are all facing the same direction
- Align documents on the bottom and leading-edge
Feeding documents
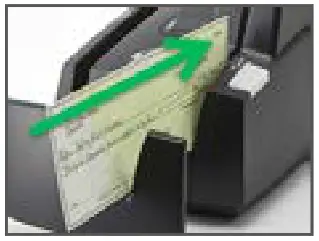 | 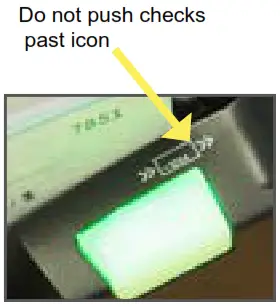 |
| Single-feed (SF) models • Click Scan on your application to initiate the scanning process • Insert the document into the feeder (as shown) until the scanner pulls the document into the transport | Auto-feed (AF) models • Place up to 30 documents into the feeder (as shown) without pushing documents past the check the icon displayed on the side of the feeder • Click Scan on your application to initiate the scanning process |
Adjust the insertion and exit extension (SF models) or pocket stop (AF models) according to document length.
For more information, please contact your application provider.
Visit www.rdmcorp.com/support to download an electronic copy of this quick start guide, EC9100i user guide, and to view our how-to videos.
![]() © RDM Corporation 2020. All rights reserved. DI6-US_2020-07-22
© RDM Corporation 2020. All rights reserved. DI6-US_2020-07-22


