ATEN US3342 2-Port USB-C Gen 2 Sharing Switch with Power Pass-Through
Overview
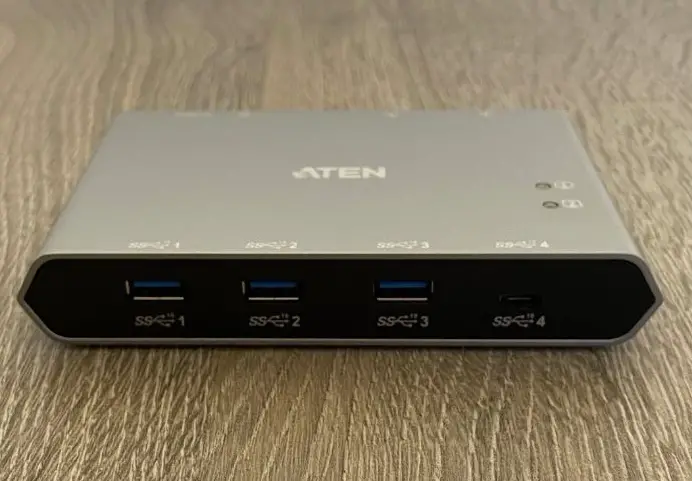
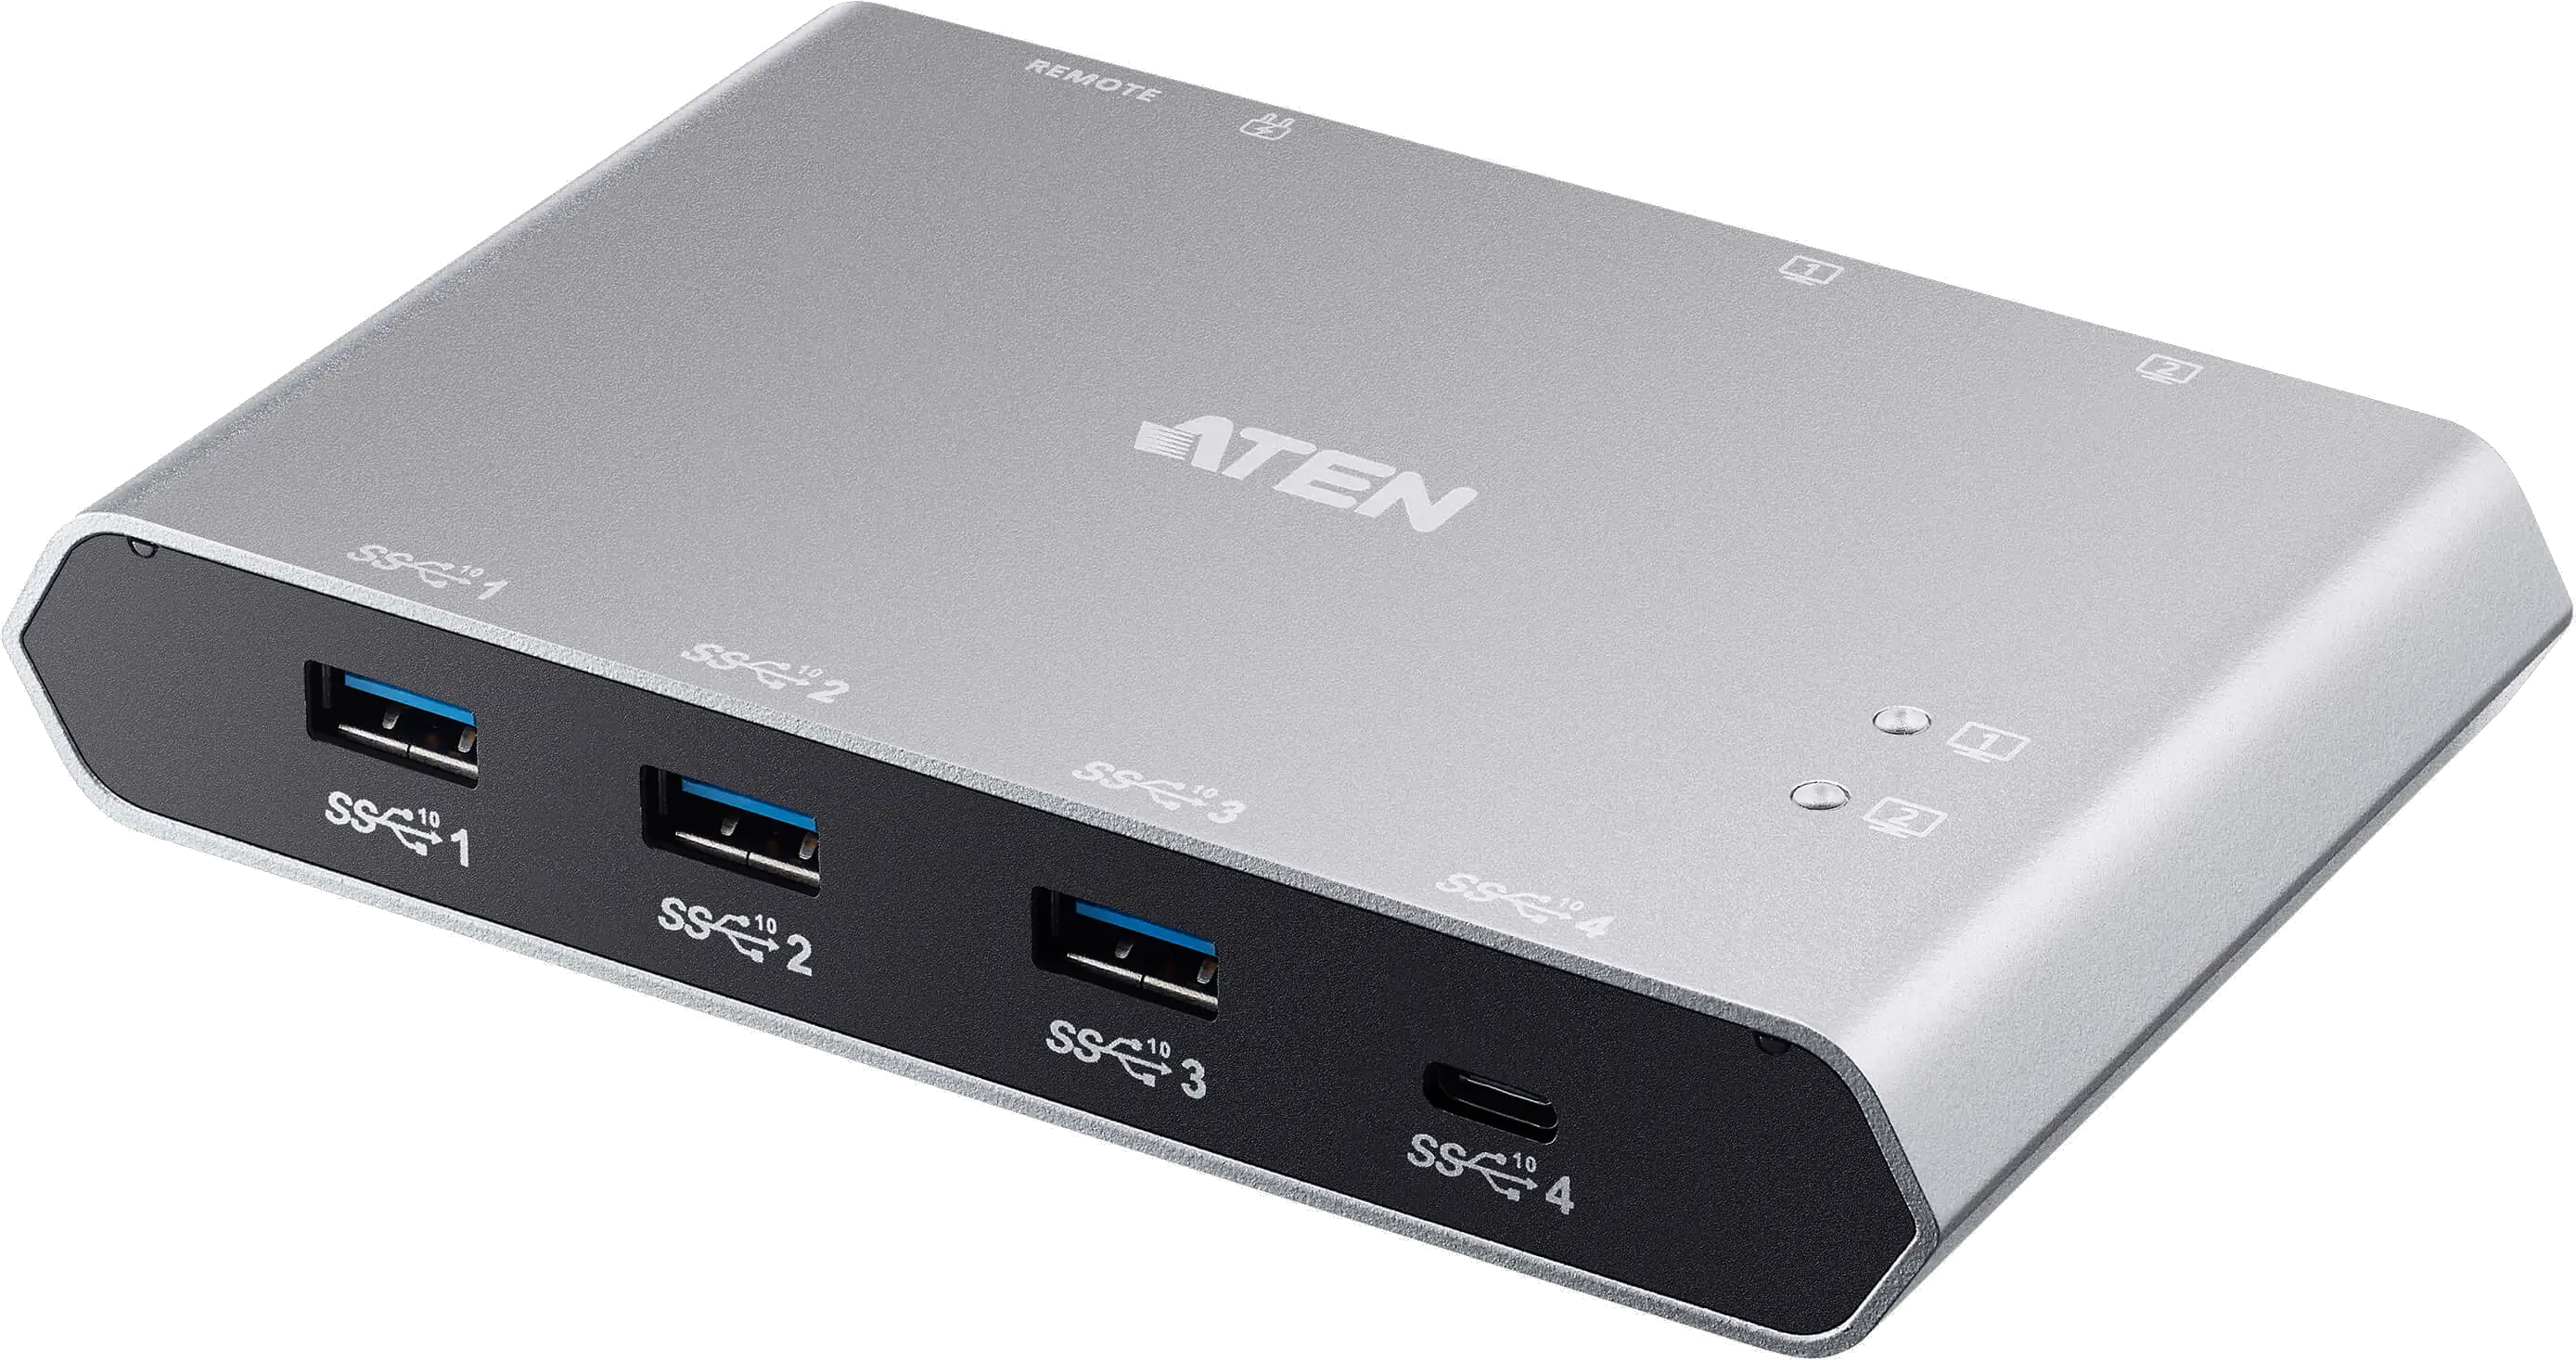
ATEN US3342 is a 4-port USB 3.2 Gen 2 peripheral sharing device that allows users to share data between four USB devices in two different USB-C enabled laptops. The US3342 is USB 3.2 Gen 2 compliant, which can support data transfer rate up to 10Gps, and also compatible with USB 3.1 Gen 1, USB 2.0 and USB1.1.
With the US3342, you can quickly and effortlessly switch computers by using a convenient remote port selector pushbutton with LED that indicates which computer is being active. It provides the power that matched to USB-C Windows or Mac laptops with PD Profile specifications of 5V, 9V, 15V, and 20V.
Featuring exclusive function by BEZEL X software, the US3342 allows two laptops to share files and data across two different platforms – Window and Mac, by dragging the mouse from one screen to another. The BEZEL X software makes it easier to control and transfer files in a fingertip.
The connecting cables are bundled to save the extra cost of purchasing more USB cables. The additional USB-C cable included in the US3342 package, which allows the users to connect it to the USB-C laptops for flexible installation. The US3342 is the most cost-effective solution for USB-C equipped laptops.
In conclusion, the US3342 with its compact and all-in-one design is an ideal solution for users that seeks to save desk space and keep the desk well-organized in an efficient manner.
Features
- Enables two computers to share 4 USB 3.2 Gen 2 peripheral devices with data transfer rate up to 10Gps
- Supports USB-C Power Delivery 3.0 for laptop charging up to 85W (Additional USB-C Power Adapter is needed)
- BEZEL X – Enables file transfer function and mouse control across two platforms Windows and Mac
- Supports power profiles 5V, 9V, 15V, and 20V power specification
- Switch device via Remote Port Selector by pressing a button
- LEDs Console Indicator – Allows users to know which computer is active
- Plug and play – No drivers or external power adapter needed
- Supports Over-current protection
System Requirement
- 2 x PC system (with Windows 10 or above) or Mac system (with Mac OS X 10.12 or later)
- 2 x USB-C Gen 2 cable with 20V, 5A support (package included)
- USB-C interface (USB3.2 Gen 2 is recommended)
- USB-C PD power adapter
Note: For PD charge on port 1, system with USB-C PD support is required.
Components
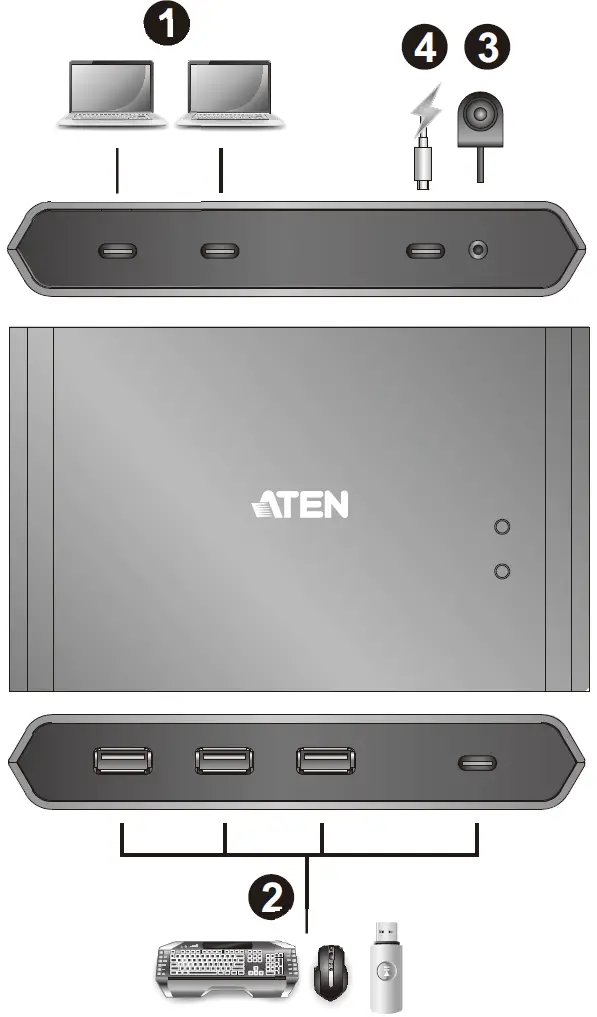
Front View
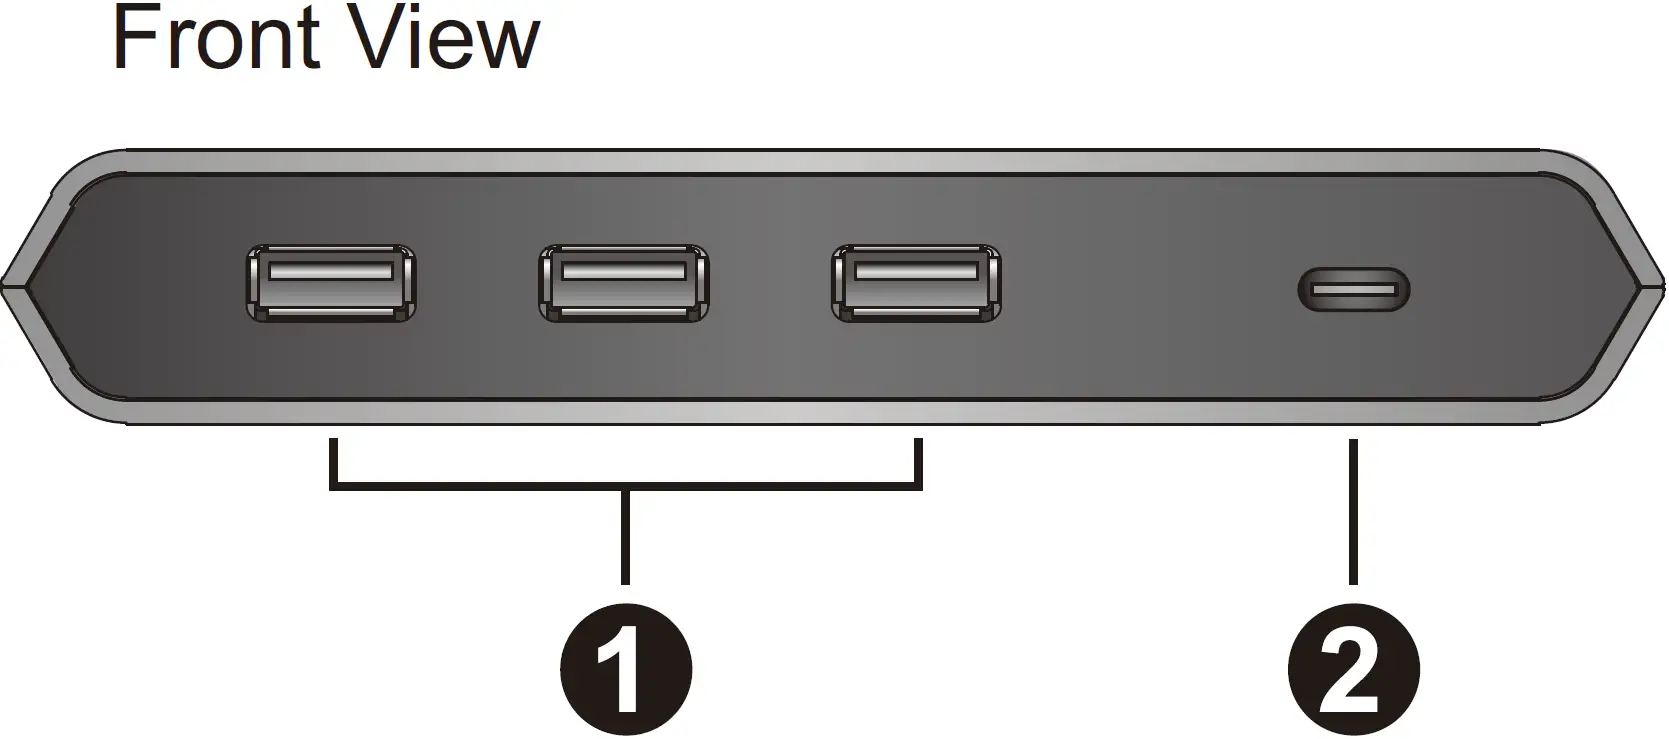
No. | Component | Description |
1 | USB 3.2 Gen 2 | Connects your USB peripheral devices into the US3342 using a Type-A connector. |
2 | USB 3.2 Gen 2 | Connects your USB peripheral devices into the US3342 using a USB-C connector. |
Note: Total output power is 10W share by all the USB downstream ports.
Rear View
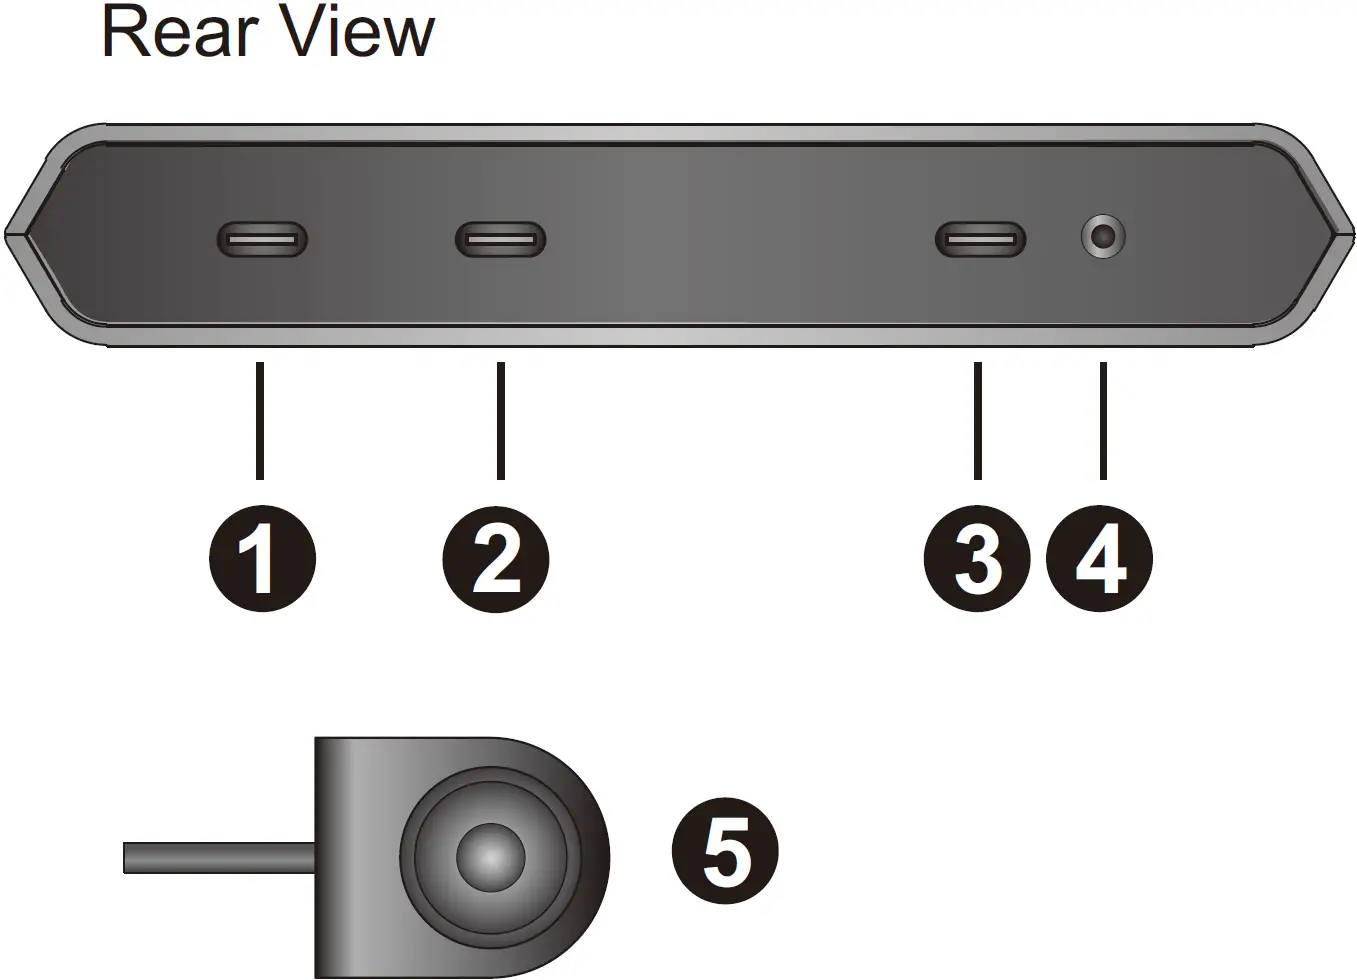
No. | Component | Description |
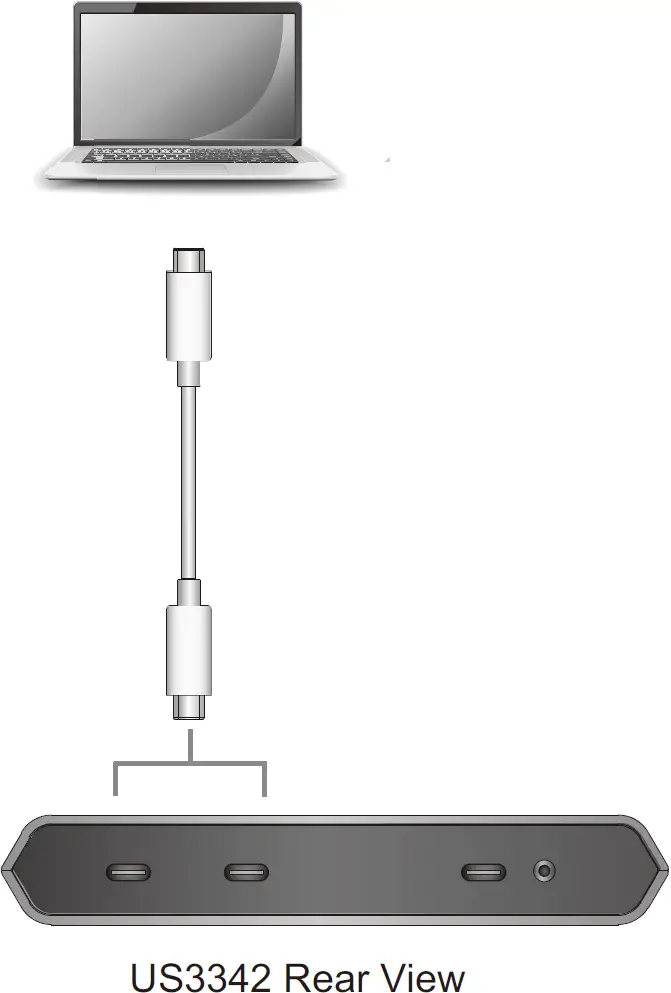
1 | USB 3.2 Gen 2 Type-C port 2 | Connects a computer with an USB-C cable into the back of the US3342. |
2 | USB 3.2 Gen 2 Type-C port 1 (w/USB PD charge)1 | Connects a computer with an USB-C cable into the back of the US3342. If you need PD laptop charging, connect your computer to this port 1. |
3 | USB-C DC-in port | Connects an USB-C power source to power the unit. |
4 | 2.5mm jack for remote port selector | Connects with the remote port selector. |
5 | Remote port selector | When connected to the unit, click the button to switch to the next port. |
Note:
- Supports USB-C PD laptop charging at 5V, 9V, 15V, and 20V output*.
* For device charging, a Limited Power Source (LPS) certified single-port USB-C PD Power Adapter over 65Watt is recommended. The minimum system power requirement for the basic USB functions should be at least 5V, 3A.
Top View
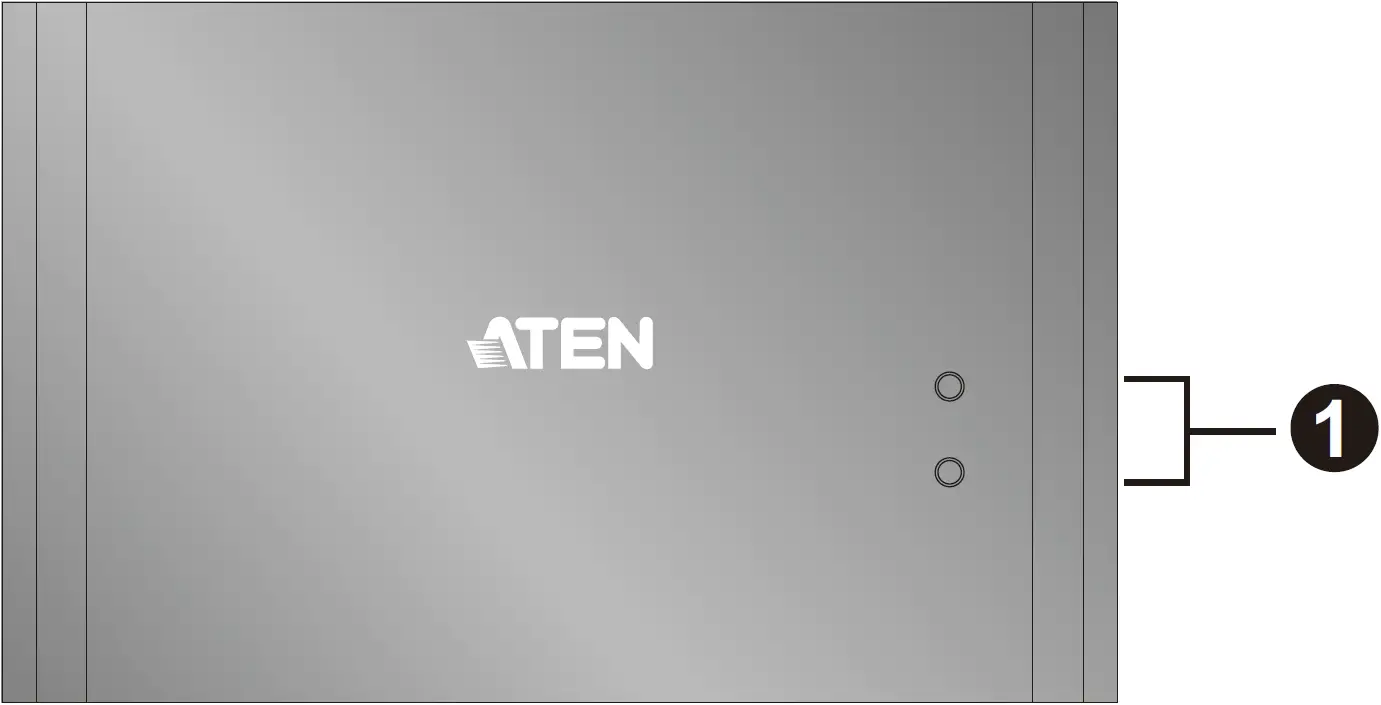
No. | Component | Description |
1 | console indicators (port 1 / port 2 LED) | The LEDs correspond to the consoles. When the console is switched, the corresponding LED will light. |
Hardware Setup
Connecting the Unit
Follow the steps below to connect the US3342 unit.
- Plug the USB-C cable between your computers and into the back of the US3342.
Note: If you need PD laptop charging, please plug your computer to the USB-C Port 1. - Plug your USB peripheral devices into the US3342.
- Plug the remote port selector into the 2.5mm jack on the US3342.
- Plug USB-C power source as recommended.
Note: For USB connector, we do not support USB Type-C to USB Type-A connector.
Operation
Port Selection
Click the Port Selector (connected to the US3342) to switch between the two connected computers.
The Console Indicator LED will light up to indicate which port is currently selected.
When the LED starts flashing, please check the power consumption of your USB peripheral device, there may be insufficient power for US3342. When this happened, connects the USB-C power adapter.
Hotkey Port Switching
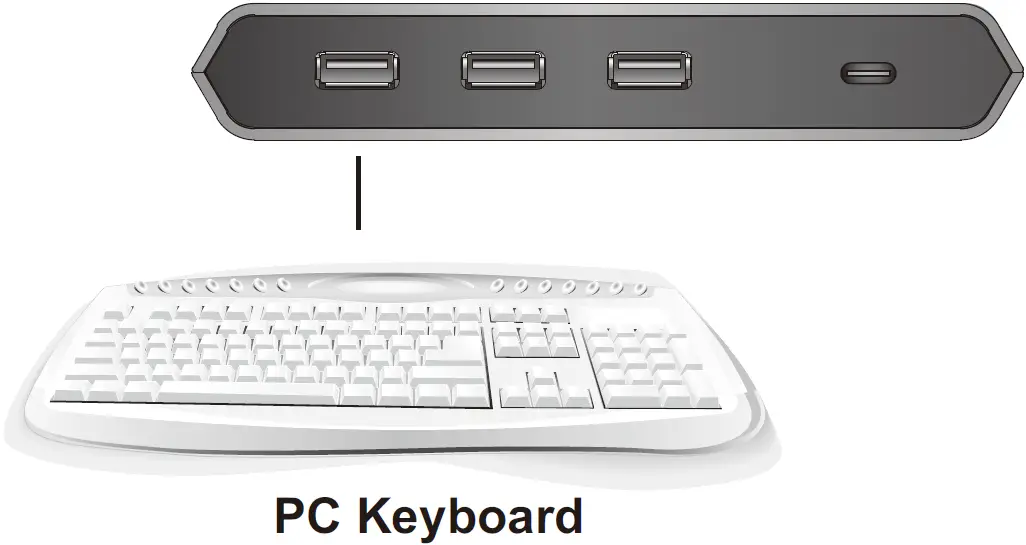
Hotkey port switching allows you to switch keyboard, mouse, and USB focus between the two connected USB-C enabled PC or Laptops. The hotkey port switching function can be enabled and controlled when a PC keyboard is connected to the USB 3.2 Gen 2 Type-A port (labeled 1).
Key | Function |
[Right Shift] + [Right Shift] | Enables or disables the hotkey port switching operation. |
[Left Shift] + [Left Shift] | Switches keyboard, mouse, and USB focus. |
Software BEZEL X (Bezel Cross)
- BEZEL X (Bezel cross)
For file sharing function by a cursor move across two desktops, please download the latest “BEZEL X” software installation package from the US3342 product page at www.aten.com/download (search for US3342 and go to the download tab). - Execute the file and follow the on-screen instructions to configure detailed software settings.
Software BEZEL X Installation
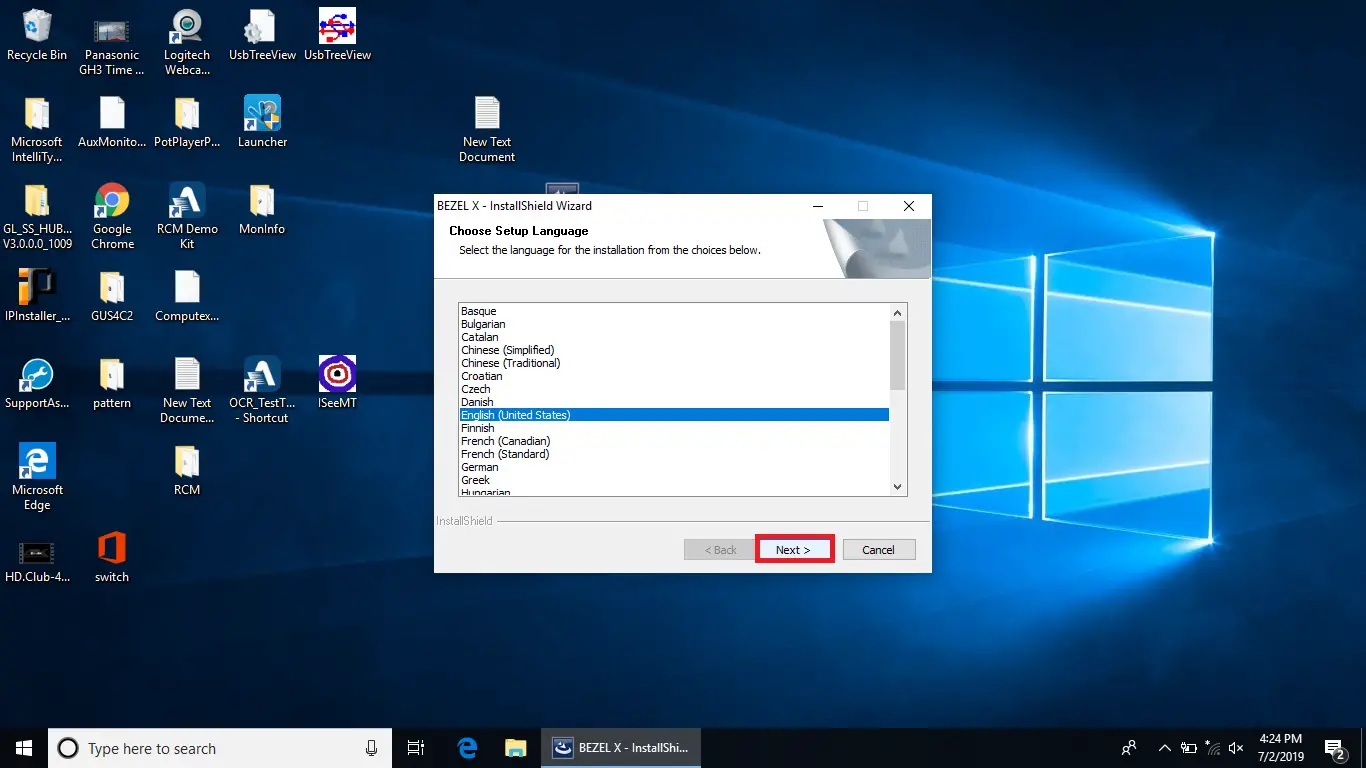
Installation for Windows Operation System:
To install BEZEL X in a Windows Operation System, follow below steps:
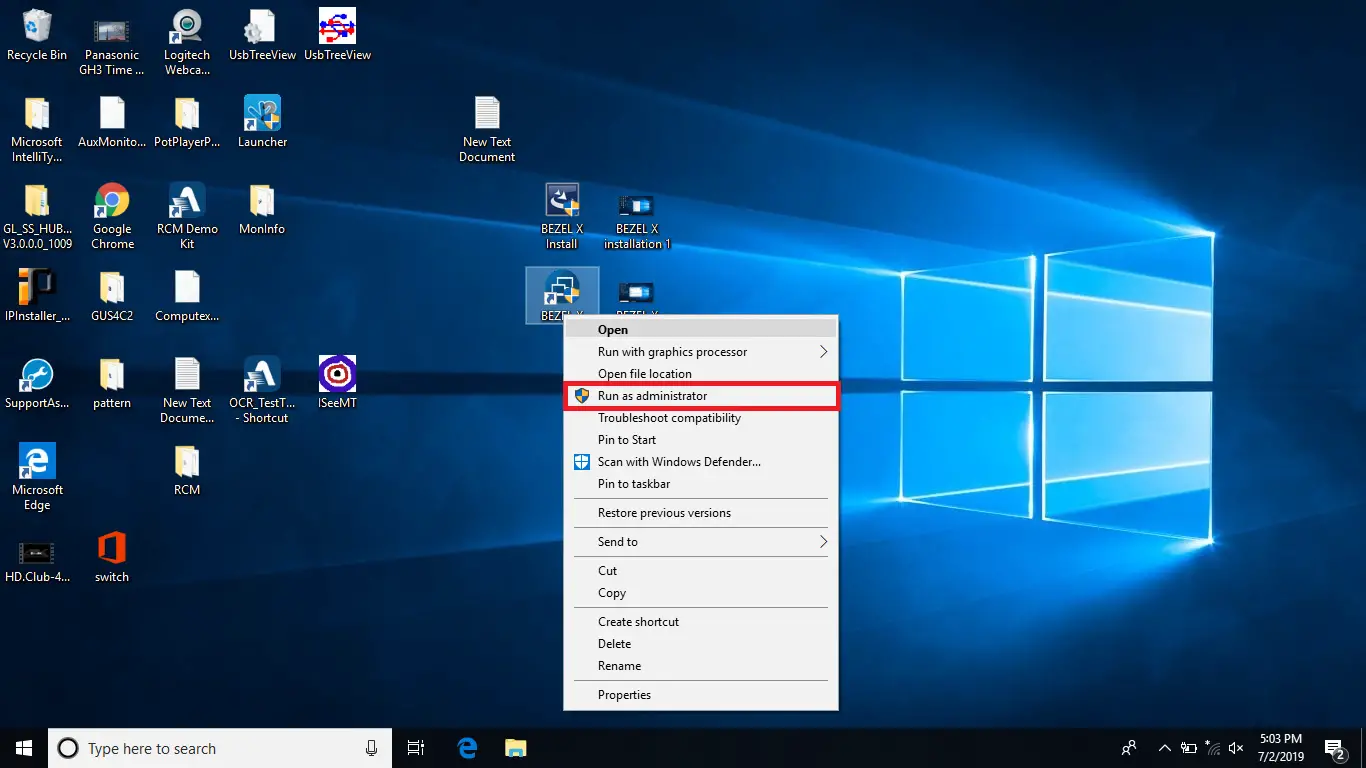
- Right click on the BEZEL X Install icon and select Run as administrator as shown in the picture. If your Windows system does not have Run as administrator, you can select Open.
Note: If you are running in a Windows system that has User Account Control (UAC), please select “Run as administrator” as suggested.
- Choose your desired Language and click Next.
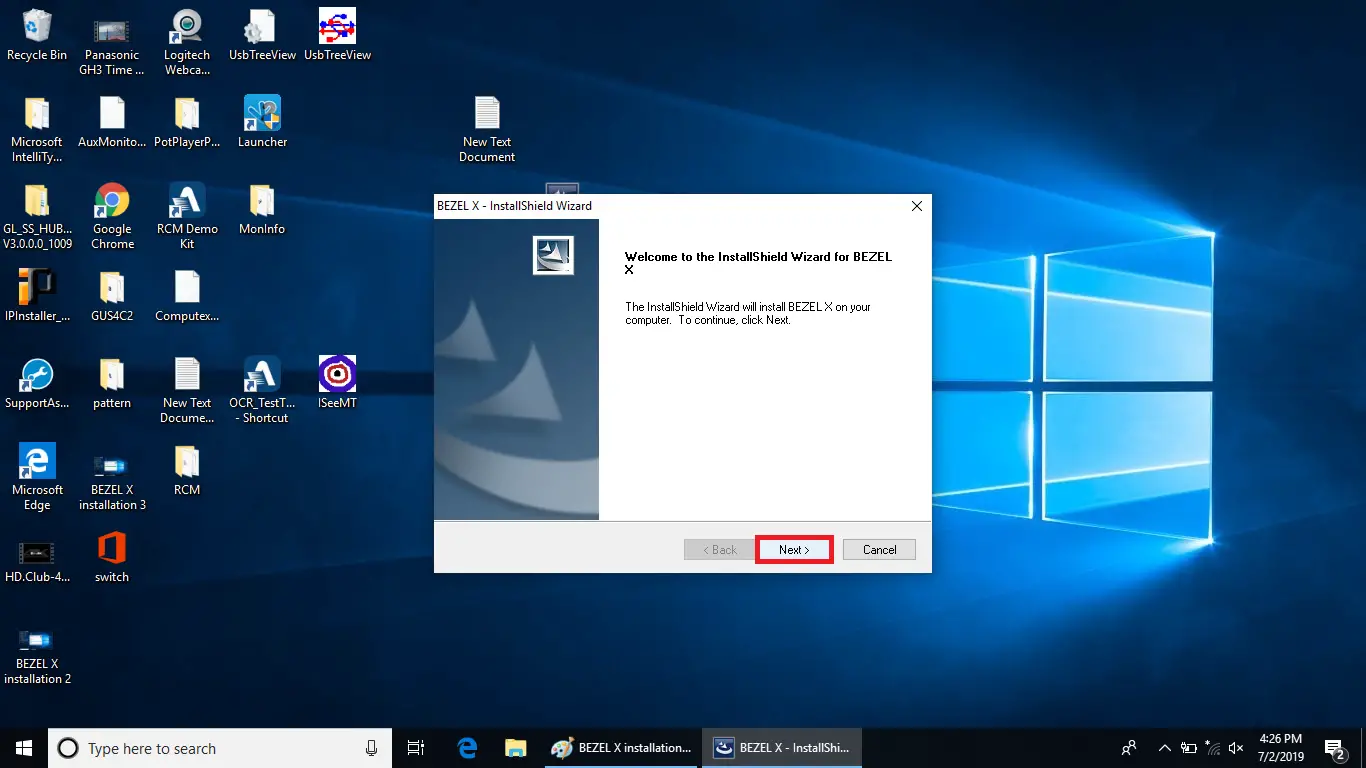
- Wait for the BEZEL X Setup preparation to finish and the BEZEL X Installation Wizard page will show up. Click Next to continue.
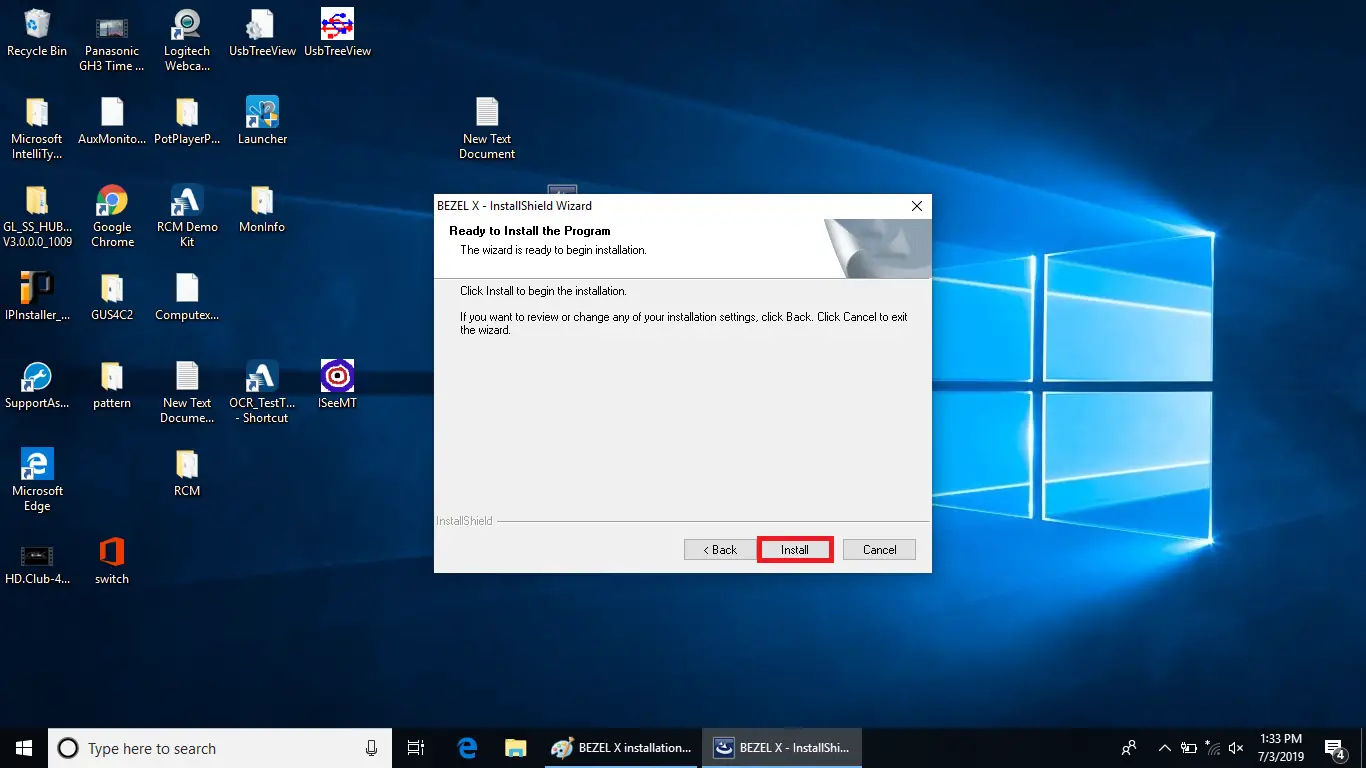
- Click Install to begin the installation.
- Click Finish when the installation is complete.
- Go to your desktop and run the BEZEL X software. Right click on the BEZEL X icon and select Run as administrator. If your Windows system does not have Run as administrator, you can select Open.
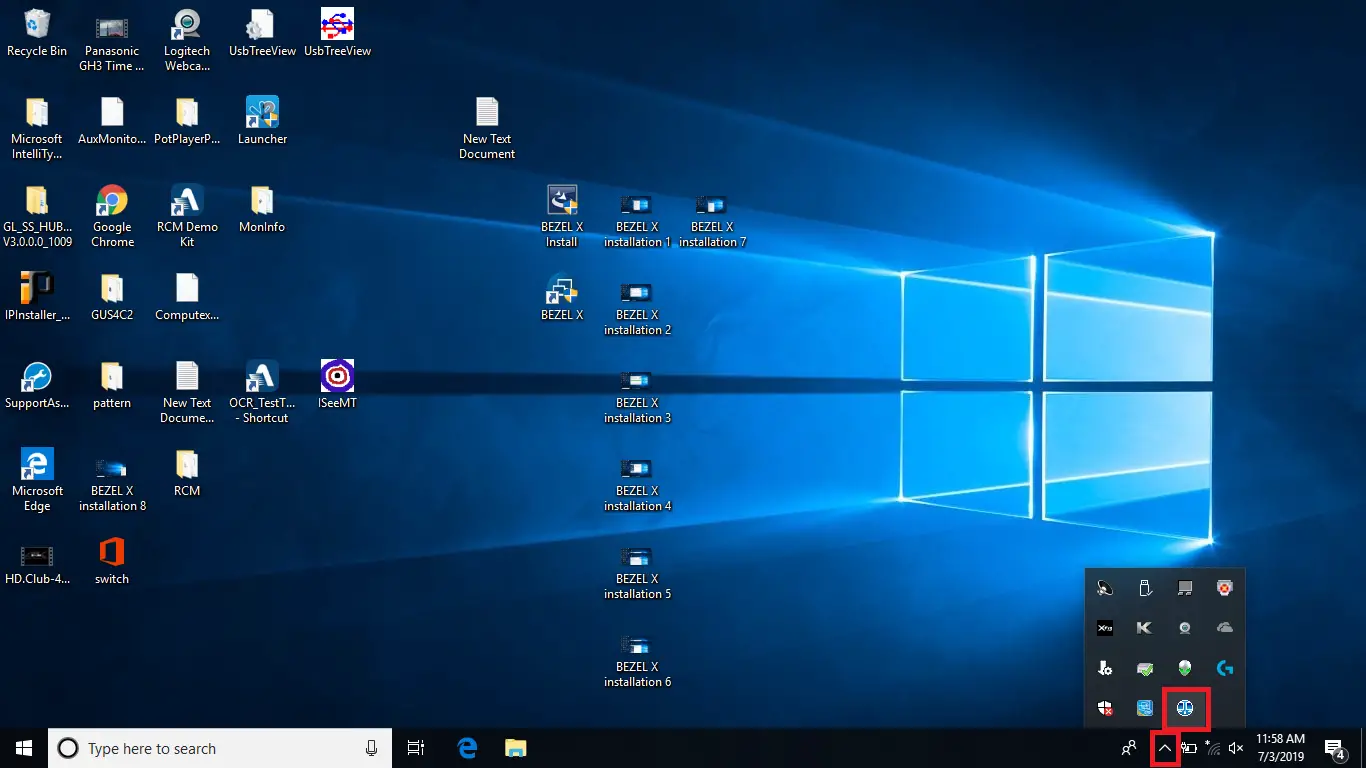
Note: If you are running in a Windows system that has User Account Control (UAC), please select “Run as administrator” as suggested. - Click on the Show hidden icons and wait for our BEZEL X icon to turn blue.
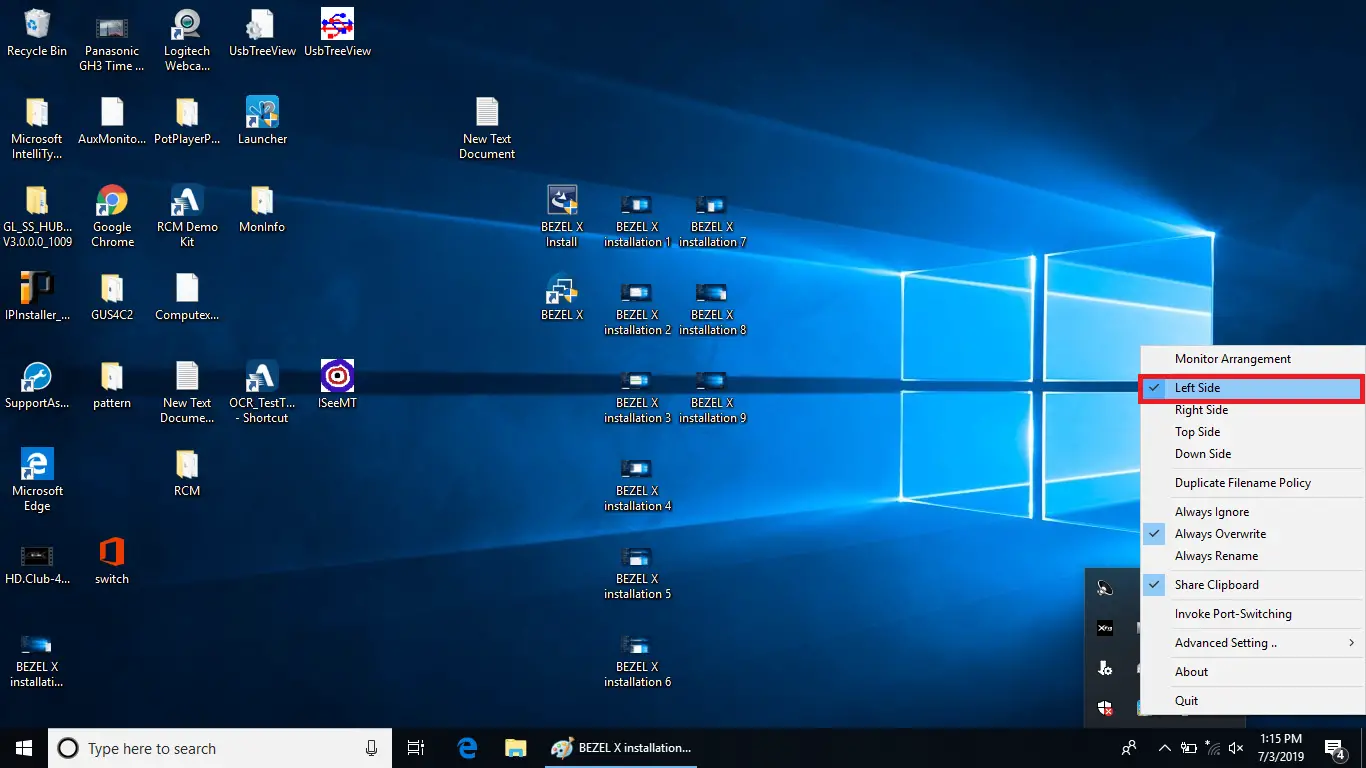
- Double click on the BEZEL X icon to set your current monitor’s position.
- Perform steps 1 to 8 on your second Windows desktop/laptop.
- When both BEZEL X icons are light up blue on your desktops/laptops, you can now move your cursor and files across two sources.

Installation for Mac Operation System:
To install BEZEL X in a Mac Operation System, follow below steps:
- Right click on the BEZEL X Install icon and select Open With Installer (default).

- Click Continue to install the BEZEL X software.
- Click Install to start the installation.

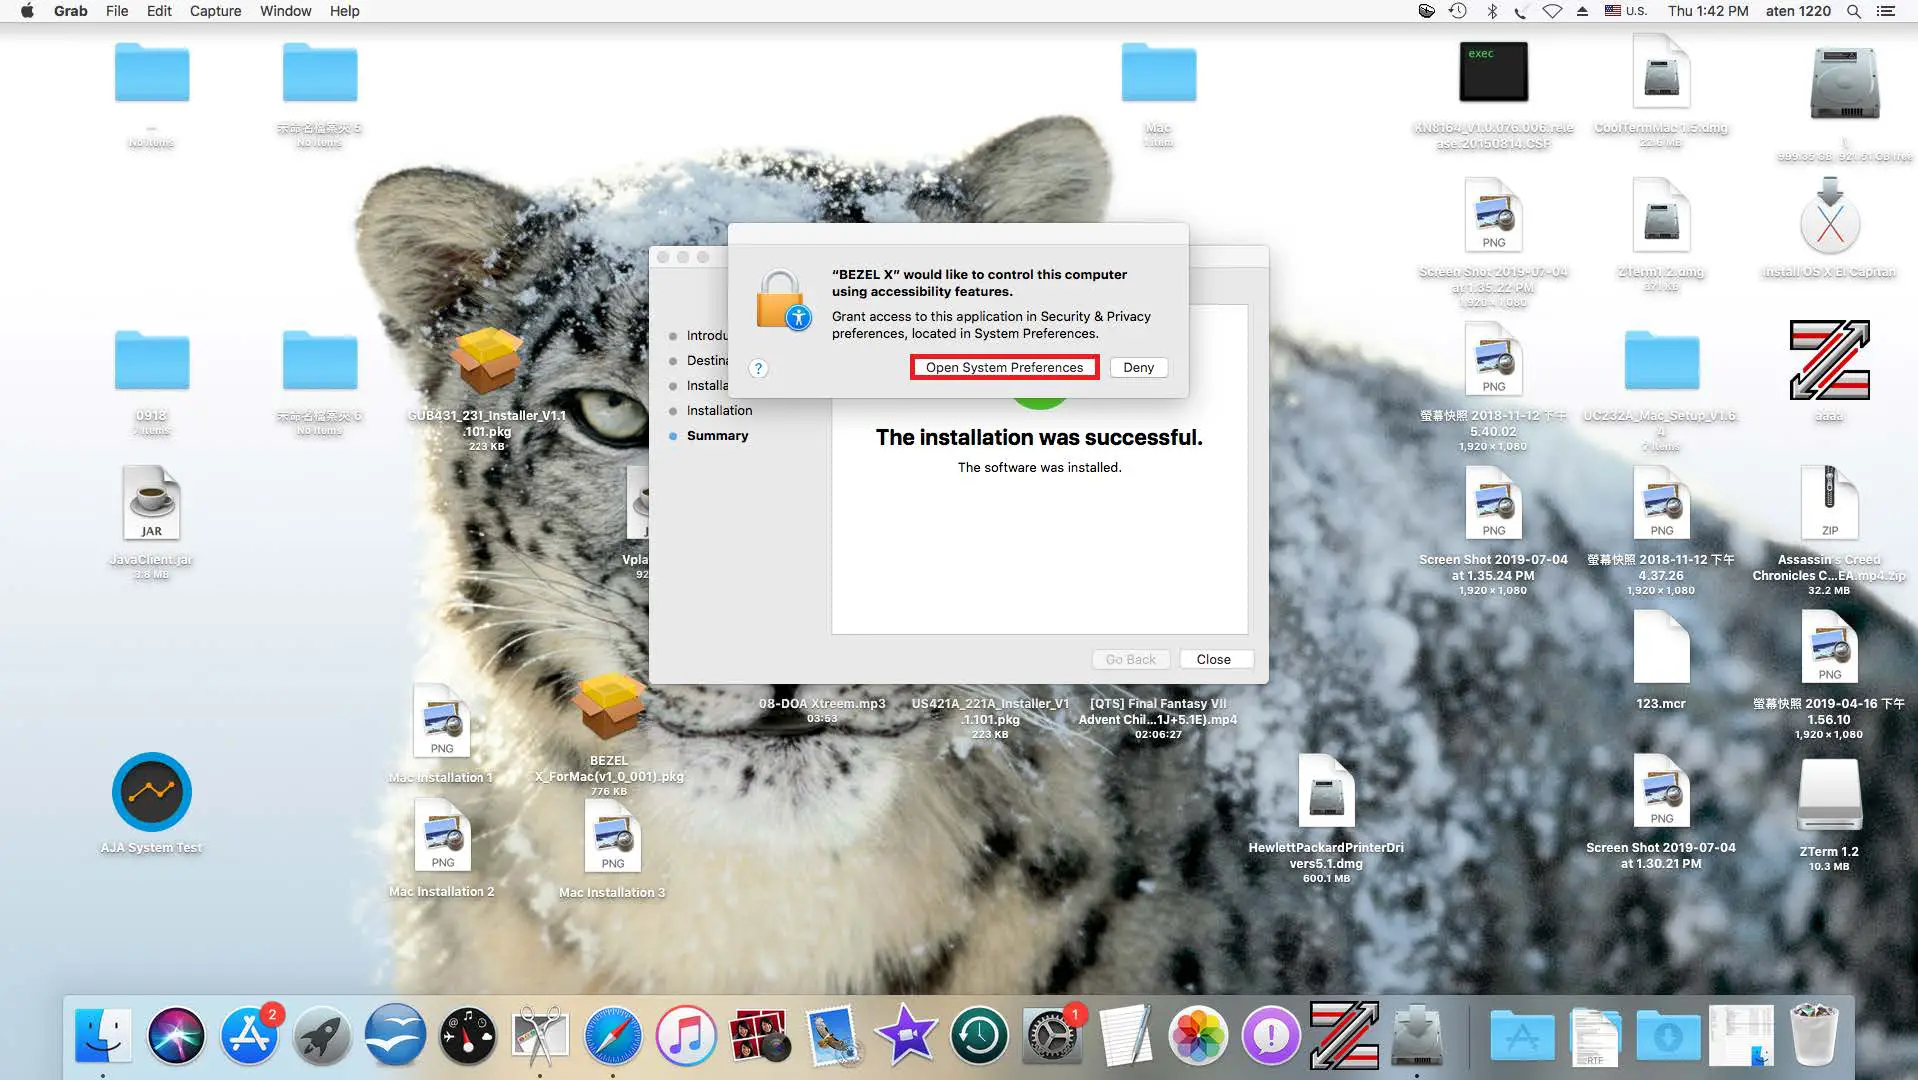
- A prompt will pop out when the installation is complete. Click Open System Preferences if you wish to grant access to BEZEL X. Or click Deny and Close to finish the installation.

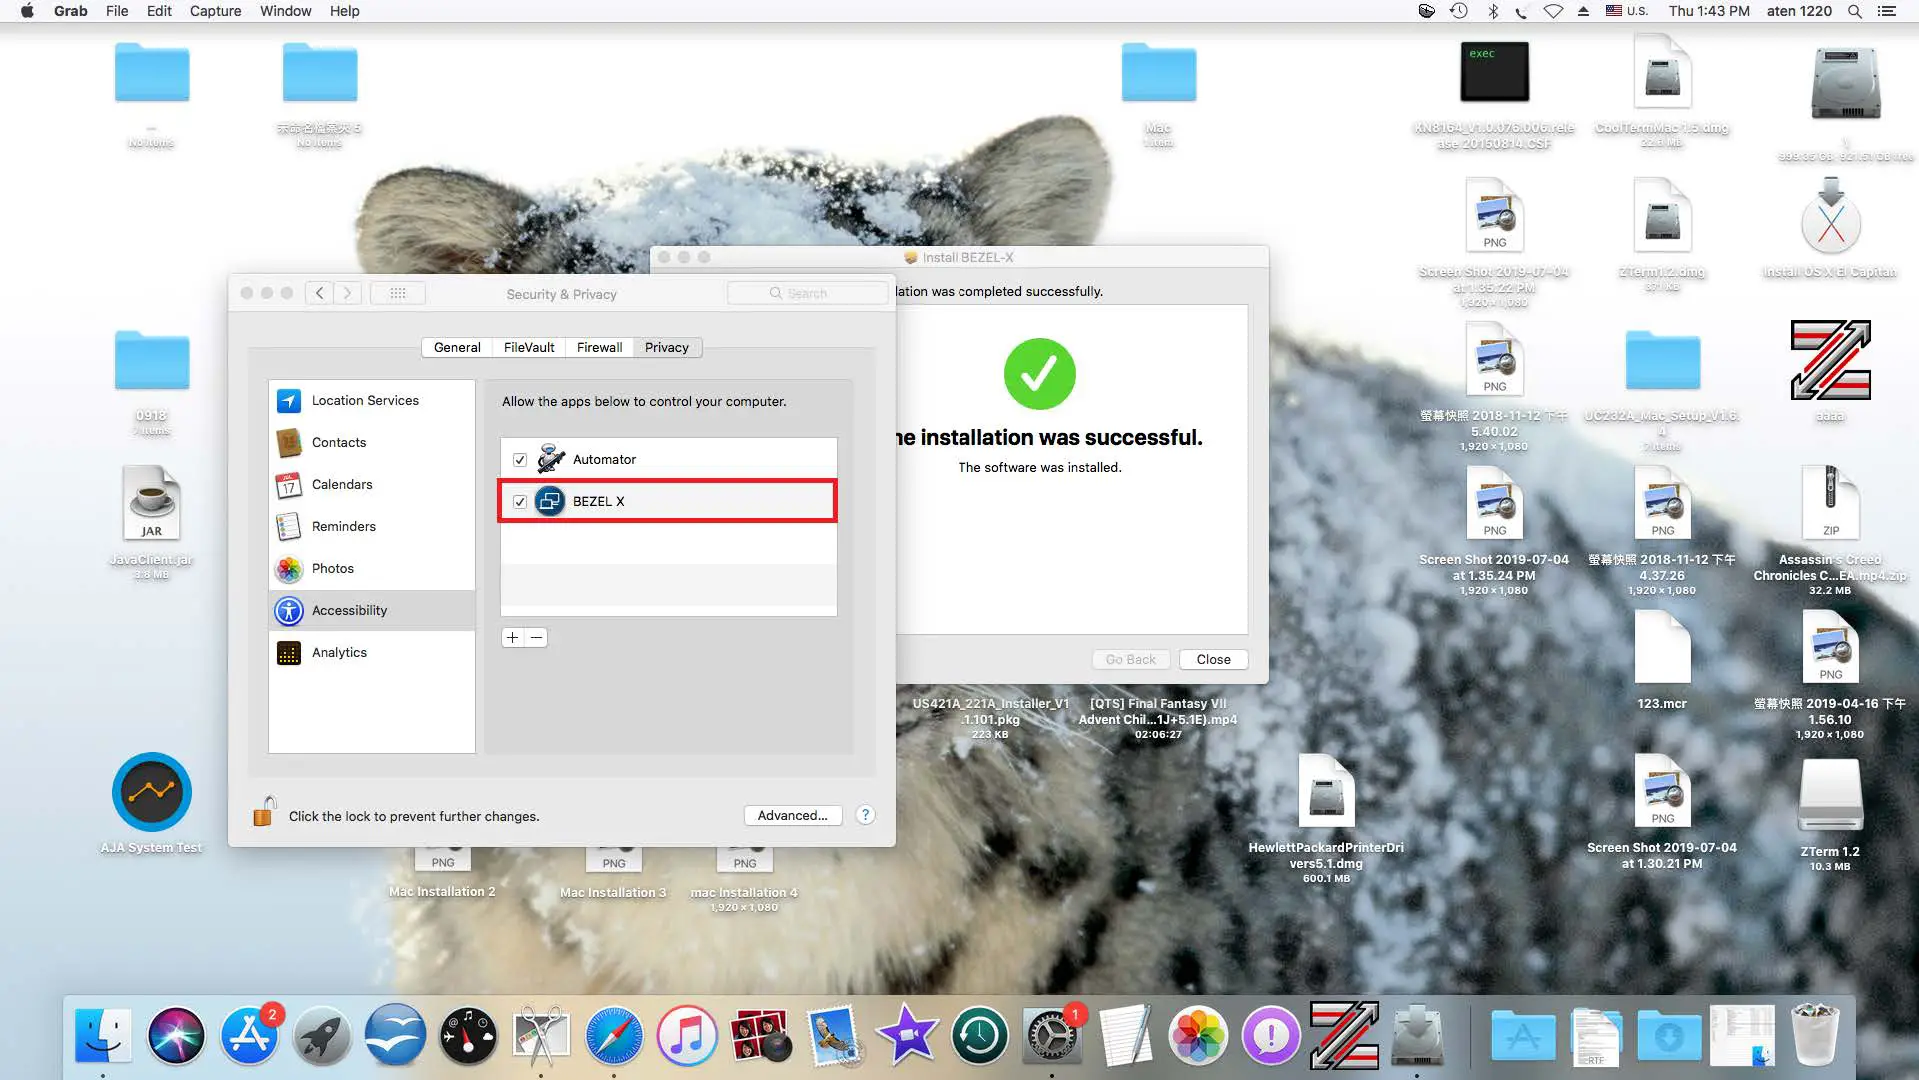
- Put a check in front of the BEZEL X icon as shown in the picture below.

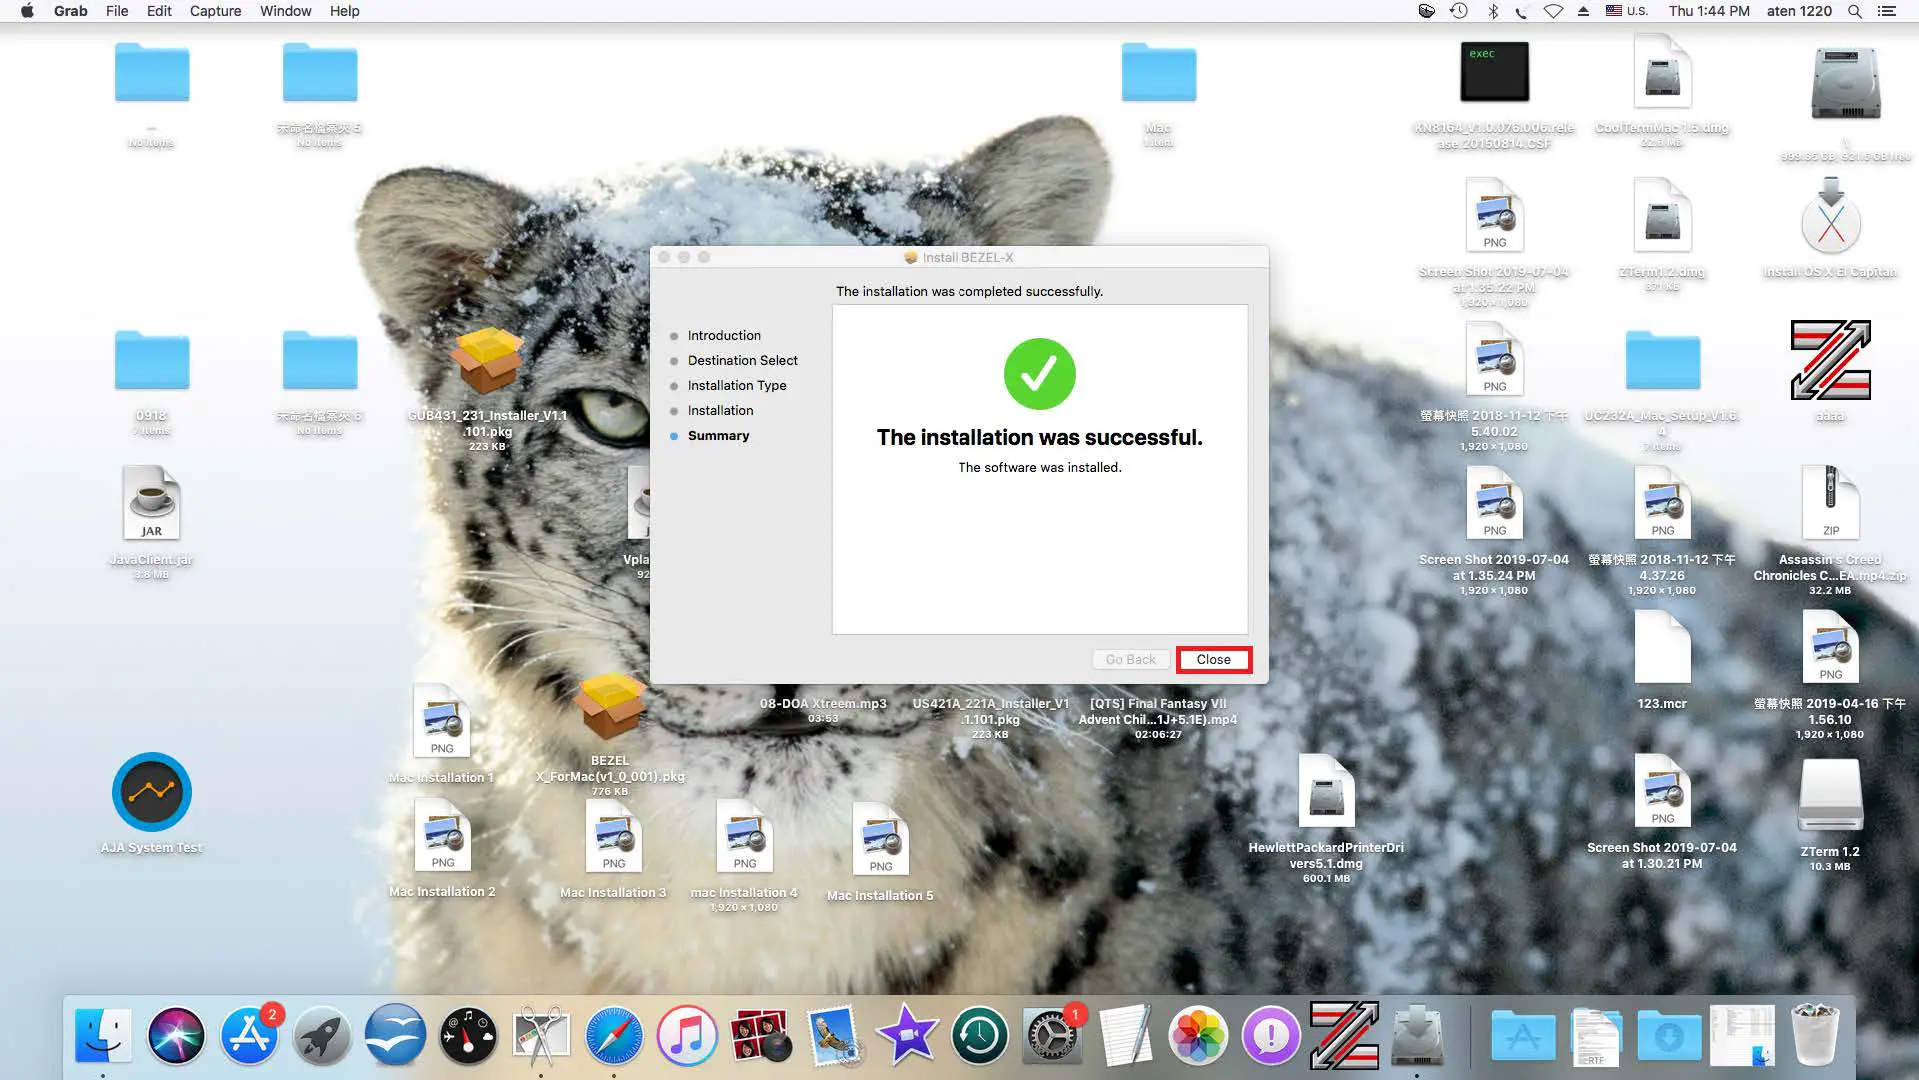
- The installation is now complete, click Close.
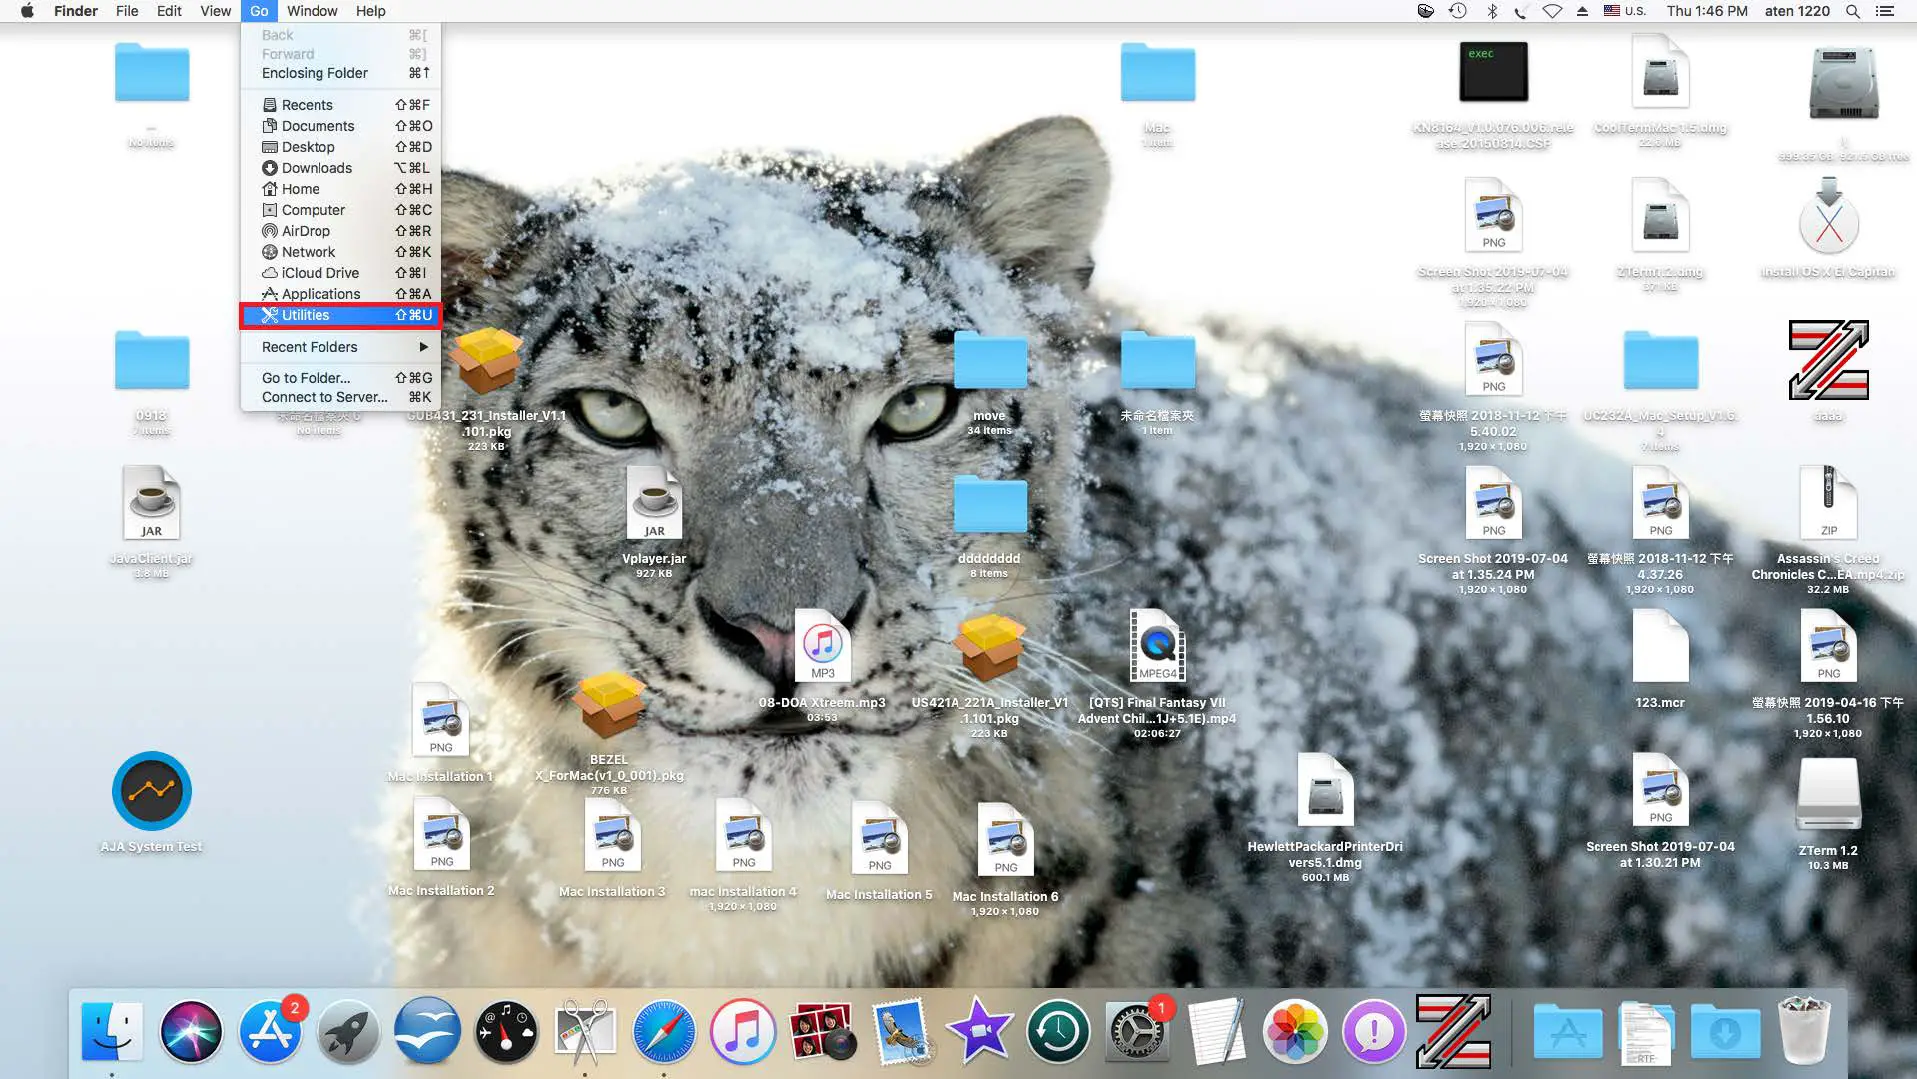
- To enable BEZEL X utility, go to Menu and select Go and click on Utilities.
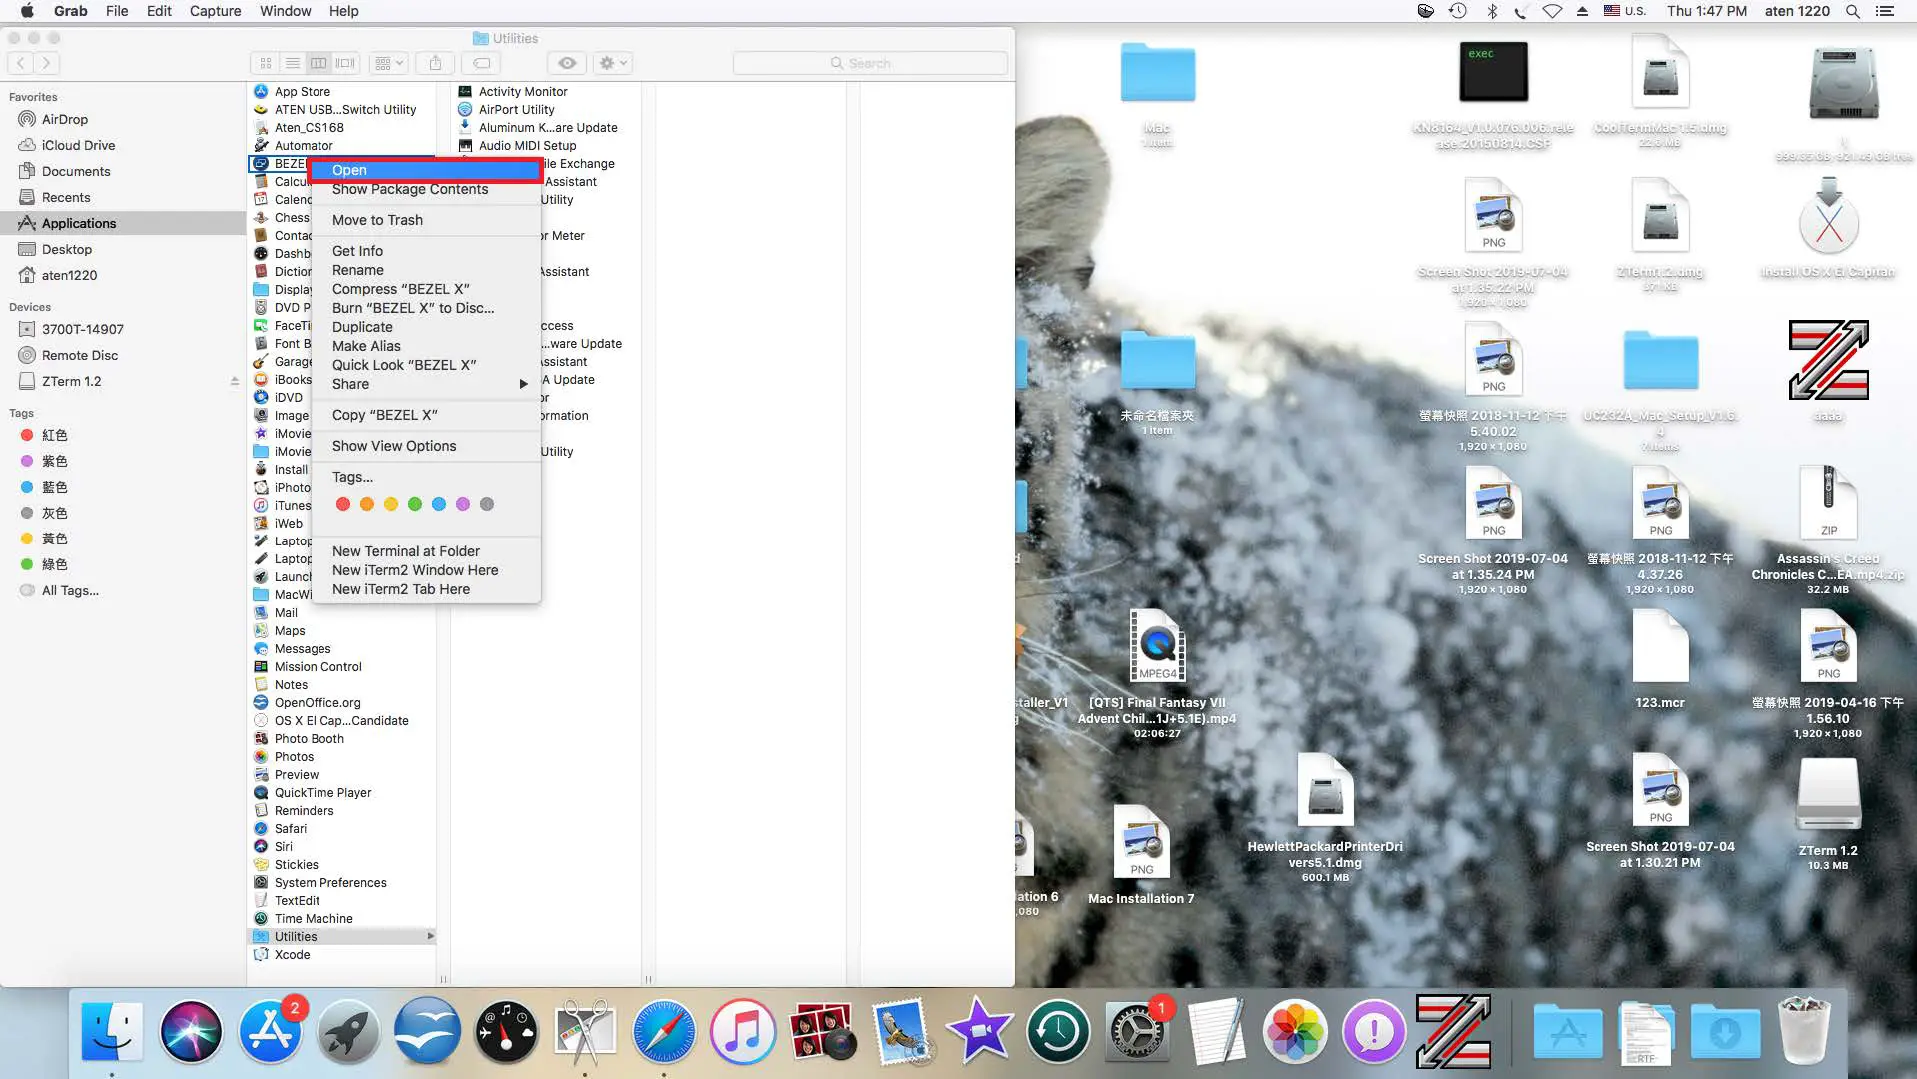
- Find BEZEL X in the Applications, right click and select Open.
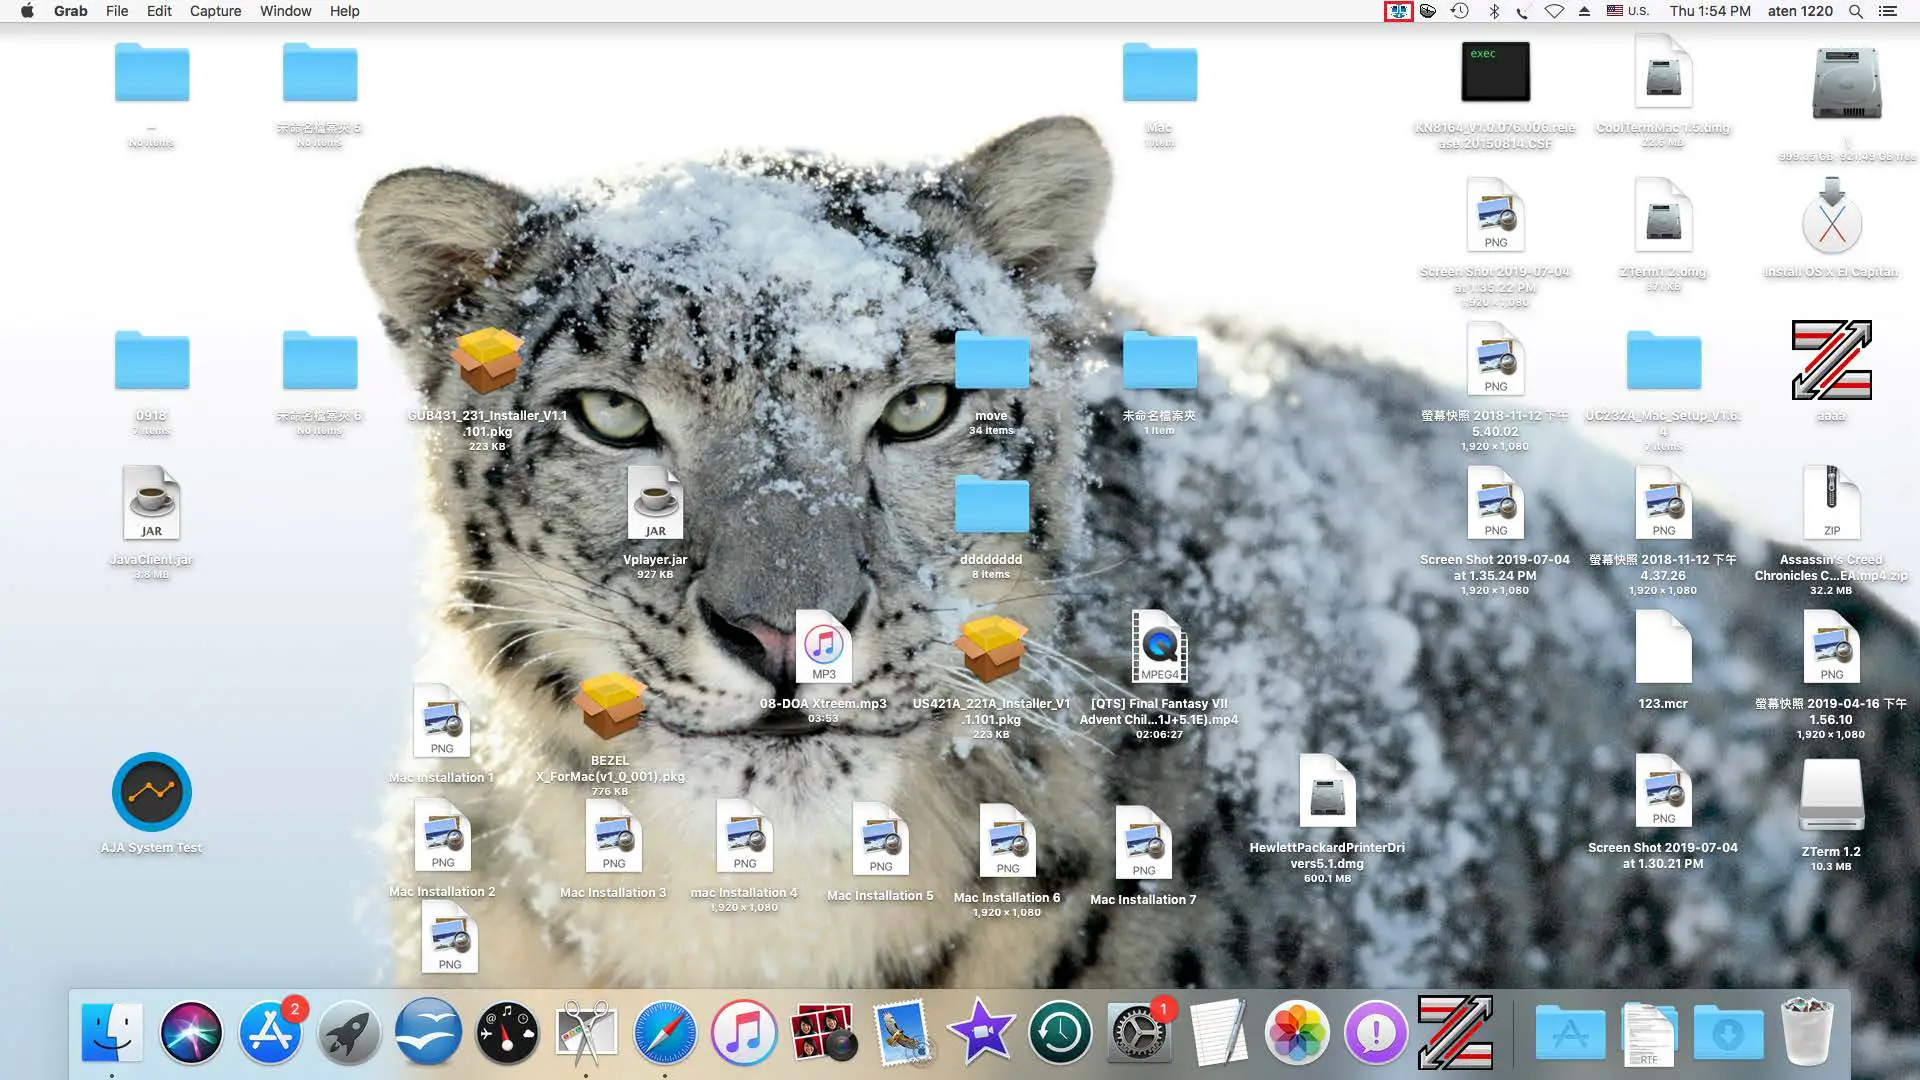
- Now you will find the BEZEL X icon on the top right corner of your screen as shown in the picture below and wait for it to turn blue.

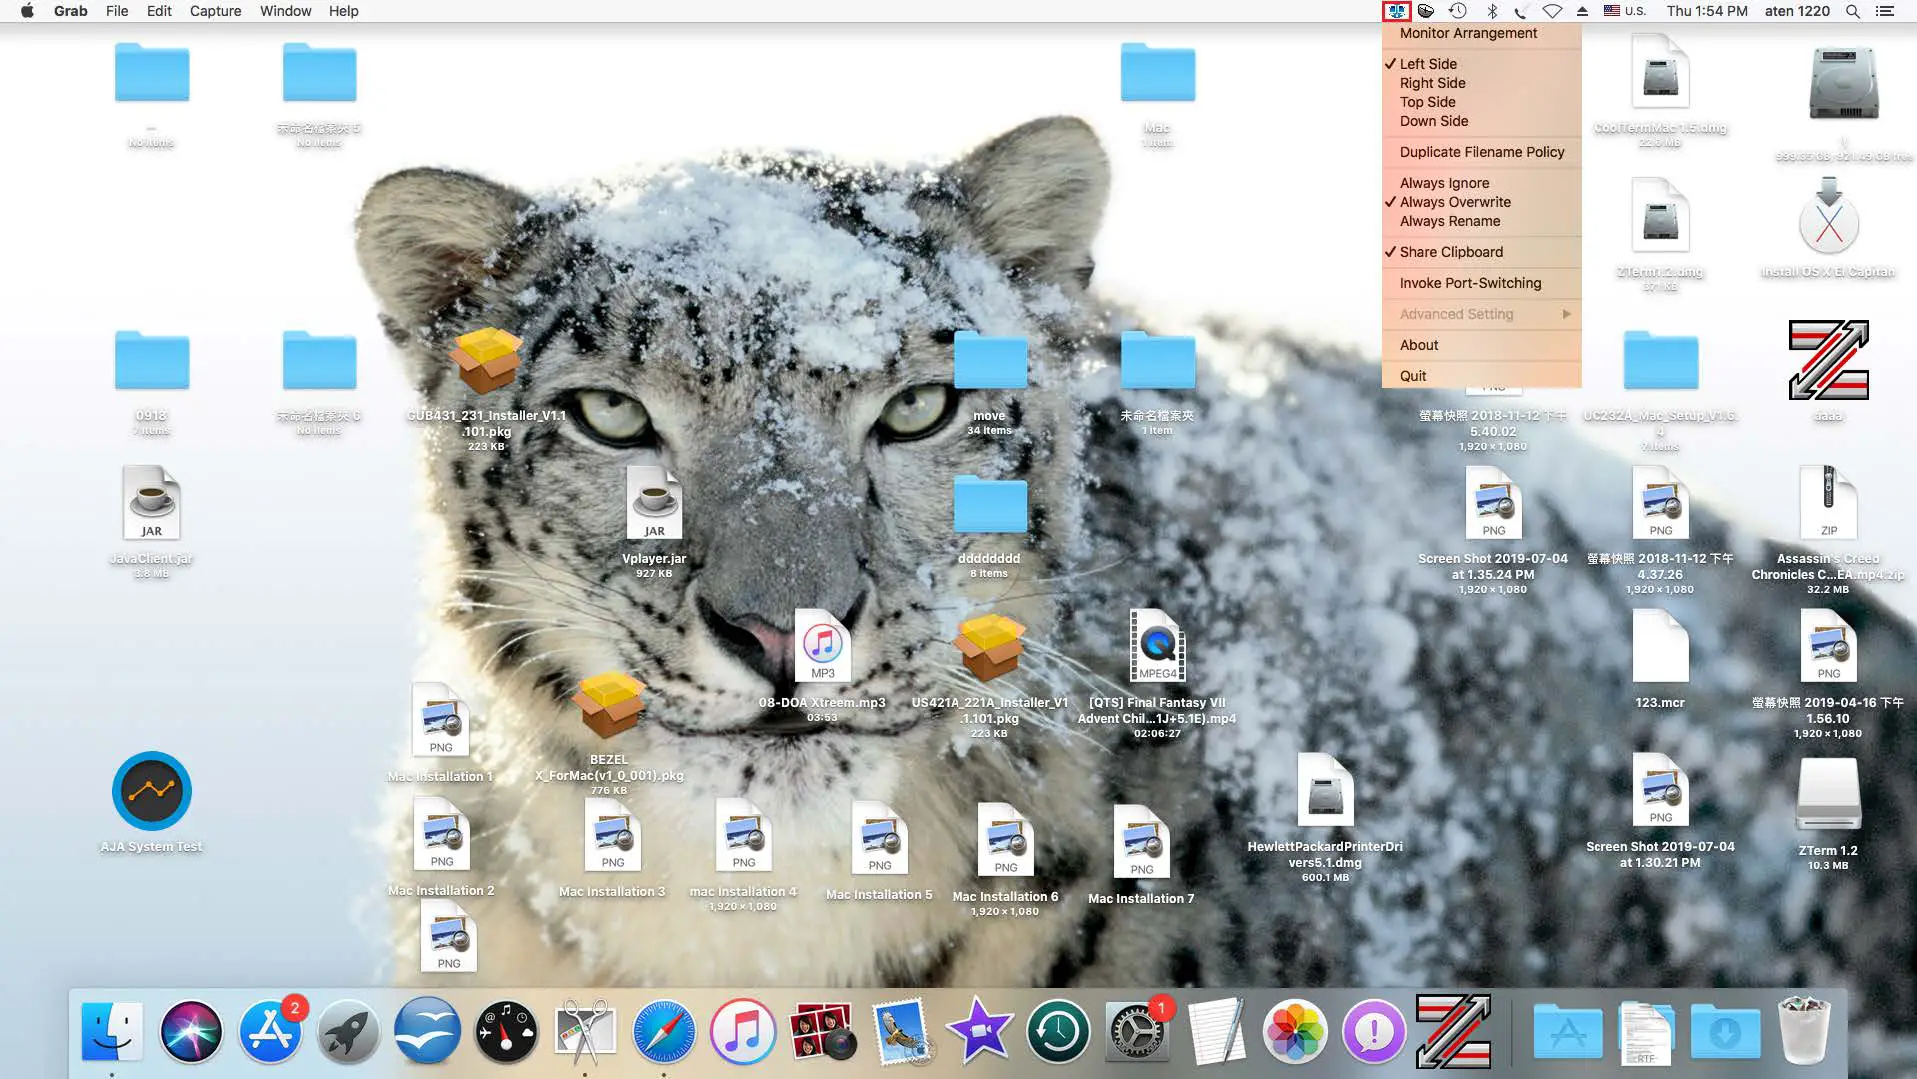
- Click on the BEZEL X icon to set your current monitor’s position.
- Perform steps 1 to 10 on your second Mac desktop/laptop.
- When both BEZEL X icons are light up blue on your desktops/laptops, you can now move your cursor and files across two sources.


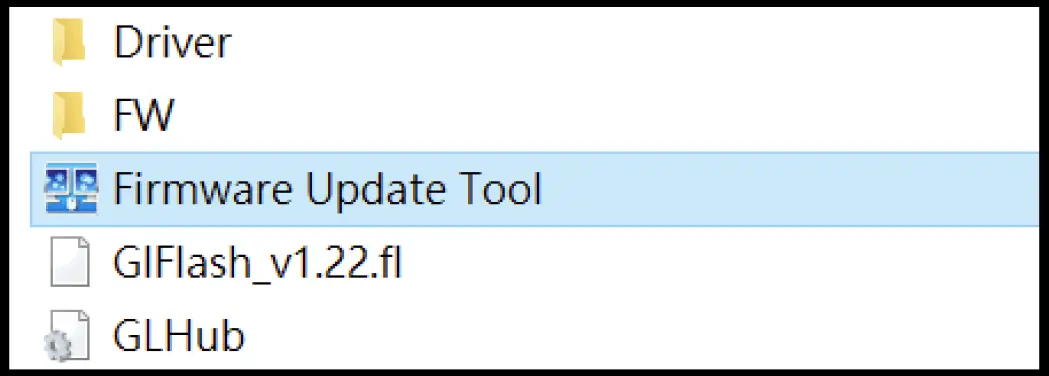
The Firmware Upgrade Utility
As new firmware versions become available firmware upgrade packages are posted on the ATEN web site. The Windows-based Firmware Upgrade Utility (FWUpgrade.exe) provides a smooth automated process for upgrading the US3342’s firmware. Check the web site regularly to find the latest firmware packages and information relating to them.
Downloading the Firmware Upgrade Package
To download the firmware upgrade package:
- On our Website, go to Support Center – Download and choose the device model, or from the US3342 product page, click on the Support and Downloads tab, and go to Software & Drivers. A list of available firmware upgrade packages appears.
- Choose the firmware upgrade package that you wish to install (usually the most recent) and download it to your computer.
Starting the Upgrade
To upgrade the US3342, follow the steps below:
- Connect the supplied USB-C 3.2 Gen 2 cable between your computers and into the back of the US3342. Either USB 3.2 Gen 2 Type-C port 1 or USB 3.2 Gen 2 Type-C port 2 can be used for the firmware upgrades.
Note: Please do not connect USB-C power source to the USB-C DC-in port.
- Run the downloaded Firmware Upgrade Package file by double clicking the file icon, and follow the firmware upgrade procedures.

Safety Instructions
General
- This product is for indoor use only.
- Read all of these instructions. Save them for future reference.
- Follow all warnings and instructions marked on the device.
- Do not place the device on any unstable surface (cart, stand, table, etc.). If the device falls, serious damage will result.
- Do not use the device near water.
- Do not place the device near, or over, radiators or heat registers.
- The device cabinet is provided with slots and openings to allow for adequate ventilation. To ensure reliable operation, and to protect against overheating, these openings must never be blocked or covered.
- The device should never be placed on a soft surface (bed, sofa, rug, etc.) as this will block its ventilation openings. Likewise, the device should not be placed in a built in enclosure unless adequate ventilation has been provided.
- Never spill liquid of any kind on the device.
- Unplug the device from the wall outlet before cleaning. Do not use liquid or aerosol cleaners. Use a damp cloth for cleaning.
- The device should be operated from the type of power source indicated on the marking label. If you are not sure of the type of power available, consult your dealer or local power company.
- To prevent damage to your installation it is important that all devices are properly grounded.
- Do not allow anything to rest on the power cord or cables. Route the power cord and cables so that they cannot be stepped on or tripped over.
- Position system cables and power cables carefully; Be sure that nothing rests on any cables.
- Never push objects of any kind into or through cabinet slots. They may touch dangerous voltage points or short out parts resulting in a risk of fire or electrical shock.
- Do not attempt to service the device yourself. Refer all servicing to qualified service personnel.
- If the following conditions occur, unplug the device from the wall outlet and bring it to qualified service personnel for repair.
- The power cord or plug has become damaged or frayed.
- Liquid has been spilled into the device.
- The device has been exposed to rain or water.
- The device has been dropped, or the cabinet has been damaged.
- The device exhibits a distinct change in performance, indicating a need for service.
- The device does not operate normally when the operating instructions are followed.
- Only adjust those controls that are covered in the operating instructions. Improper adjustment of other controls may result in damage that will require extensive work by a qualified technician to repair.
Technical Support
International
- For online technical support – including troubleshooting, documentation, and software updates: http://support.aten.com
- For telephone support, see Telephone Support above.
North America
Email Support | ||
Online Technical Support | Troubleshooting Documentation Software Updates | |
Telephone Support | 1-888-999-ATEN | |
When you contact us, please have the following information ready beforehand:
- Product model number, serial number, and date of purchase.
- Your computer configuration, including operating system, revision level, expansion cards, and software.
- Any error messages displayed at the time the error occurred.
- The sequence of operations that led up to the error.
- Any other information you feel may be of help.
Specifications
Function | US3342 |
| Computer Connections | 2 |
Connectors | |
| Computer | 2 x USB 3.2 Gen 2 Type-C Female (Black) |
| Device | 3 x USB 3.2 Gen 2 Type-A Female (Blue) |
| USB PD Pass-through input (optional) | 1 x USB Type-C PD Female |
| Remote | 1 x 2.5mm connector |
| Power | 1 x USB Type-C PD Female |
| Power Consumption | DC 5V:0.43W:428BTU |
| Port Selection | Remote port selector / SW AP switch |
LED | |
| Selected | 2 (White) |
Cable Length | |
| USB Cable | 2 x USB-C 3.2 Gen 2 Cable 1 m (Black) |
| Remote Port Selector | 1 x Remote Selection Button |
Environmental | |
| Humidity | 0 – 80% RH, Non-Condensing |
| Operating Temperature | 0 – 40ºC |
| Storage Temperature | -20 – 60ºC |
Physical Properties | |
| Housing | Aluminum |
| Weight | 0.26 kg (0.57 lb) |
| Dimensions (L x W x H) | 14.30 x 9.00 x 2.35 cm (5.63 x 3.54 x 0.93 in) |
Limited Warranty
ATEN warrants its hardware in the country of purchase against flaws in materials and workmanship for a Warranty Period of two (2) years (warranty period may vary in certain regions/countries) commencing on the date of original purchase. This warranty period includes the LCD panel of ATEN LCD KVM switches. Select products are warranted for an additional year (see A+ Warranty for further details). Cables and accessories are not covered by the Standard Warranty.
What is covered by the Limited Hardware Warranty
ATEN will provide a repair service, without charge, during the Warranty Period. If a product is detective, ATEN will, at its discretion, have the option to (1) repair said product with new or repaired components, or (2) replace the entire product with an identical product or with a similar product which fulfills the same function as the defective product. Replaced products assume the warranty of the original product for the remaining period or a period of 90 days, whichever is longer. When the products or components are replaced, the replacing articles shall become customer property and the replaced articles shall become the property of ATEN.
To learn more about our warranty policies, please visit our website:
http://www.aten.com/global/en/legal/policies/warranty-policy/


