![]() Climate Smile Digital Thermometer
Climate Smile Digital Thermometer
Instruction Manual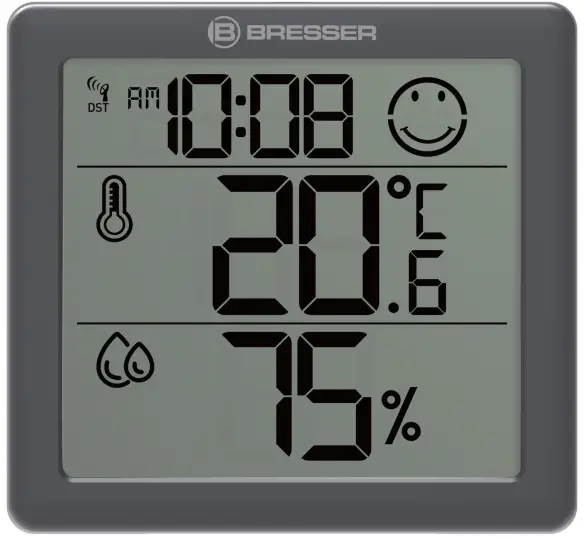 Digital thermometer
Climate Smile
Instruction manual
Climate Smile Digital Thermometer
Visit our website via the following QR Code or web link to find further information on this product or the available translations of these instructions.  www.bresser.de/P7000017
WARRANTY www.bresser.de/warranty_terms
Imprint
Bresser GmbH Gutenbergstr. 2
46414 Rhede Germany
www.bresser.de
For any warranty claims or service inquiries, please refer to the information on “Warranty” and “Service” in this documentation. We ask for your understanding that unsolicited returns cannot be processed.
Errors and technical changes excepted.
© 2022 Bresser GmbH All rights reserved.
The reproduction of this documentation – even in extracts in any form (e.g. photocopy, print, etc.) as well as the use and distribution by means of electronic systems (e.g. image file, website, etc.) without the prior written permission of the manufacturer is prohibited.
The designations and brand names of the respective companies used in this documentation are generally protected by trade, trademark and/or patent law in Germany, the European Union and/or other countries.
Validity note
This documentation is valid for the products with the following article numbers: 7000017
Manual version: 0123
Manual designation:
Manual_7000017_Climate-Smile_en-de_BRESSER_v012023a
Always provide information when requesting service.
About this Instruction Manual
NOTICE![]() These operating instructions are to be considered a component of the device.
These operating instructions are to be considered a component of the device.
Read the safety instructions and the instruction manual carefully before using this device.
Keep these instruction manual in a safe place for future reference. If the device is sold or passed on, the instruction manual must be passed on to any subsequent owner/user
of the product.
General safety instructions
![]() DANGER
DANGER
Danger of suffocation!![]() Improper use of this product may result in suffocation, especially for children. It is therefore imperative that you observe the following safety information.
Improper use of this product may result in suffocation, especially for children. It is therefore imperative that you observe the following safety information.
- Keep packaging materials (plastic bags, rubber bands, etc.) away from children! There is a danger of choking!
- This product contains small parts that can be swallowed by children! Choking hazard!
![]() DANGER
DANGER![]() Risk of an electric shock!
Risk of an electric shock!
This device contains electronic parts that are powered by a power source (AC adapter and/or batteries). Improper use of this product may result in electric shock. Electric shock can cause serious or fatal injuries. It is therefore imperative that you observe the following safety information.
Never leave children unattended when handling the device! Follow the instructions carefully and do not attempt to power this device with anything other than power sources recommended in this instruction manual, otherwise there is a danger of an electric shock!![]() DANGER
DANGER![]() Explosion hazard!
Explosion hazard!
Improper use of this product may result in fire. It is essential that you observe the following safety information in order to avoid fires.
Do not expose the device to high temperatures. Use only the recommended batteries. Do not short-circuit the device or batteries, or throw them into a fire! Excessive heat or improper handling could trigger a short-circuit, a fire or an explosion!
NOTICE![]() Danger of material damage!
Danger of material damage!
Improper handling may result in damage to the unit and/or accessories. Therefore, use the device only in accordance with the following safety information.
- Do not disassemble the device! In the event of a defect, please contact your dealer. They will contact the Service Center and can arrange the return of this device for repair if necessary.
- Do not immerse the unit in water!
- Do not expose the device to impacts, vibrations, dust, constant high temperatures or excessive humidity. This can result in malfunctions, short-circuits or damage to the batteries and components.
- Use only the recommended batteries. Always replace weak or empty batteries with a new, complete set of batteries at full capacity. Do not use batteries from different brands or types or with different capacities. Remove batteries from the device if it is not to be used for a longer period of time!
- Do not use rechargeable batteries (accumulators).
NOTICE![]() Risk of voltage damage!
Risk of voltage damage!
The manufacturer is not liable for damage related to improperly installed batteries!
Parts overview and scope of delivery
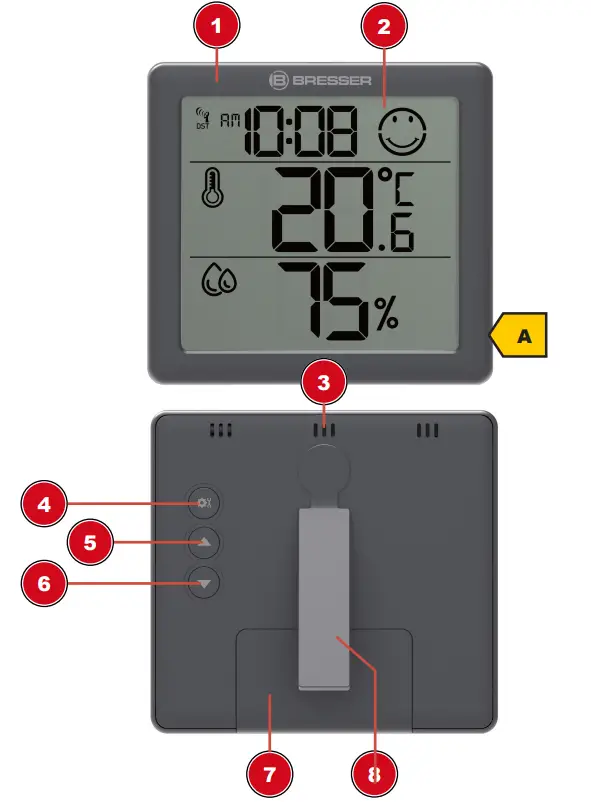 Illustration 1: All parts of the thermo-hygro sensor
- Housing
- Display
- Ventilation slots
- SET button
- UP button
- DOWN buttons
- Battery compartment with cover
- Stand, removable
Scope of delivery:
2x Thermo-hygro sensor (A), 4x Button cell type CR2032
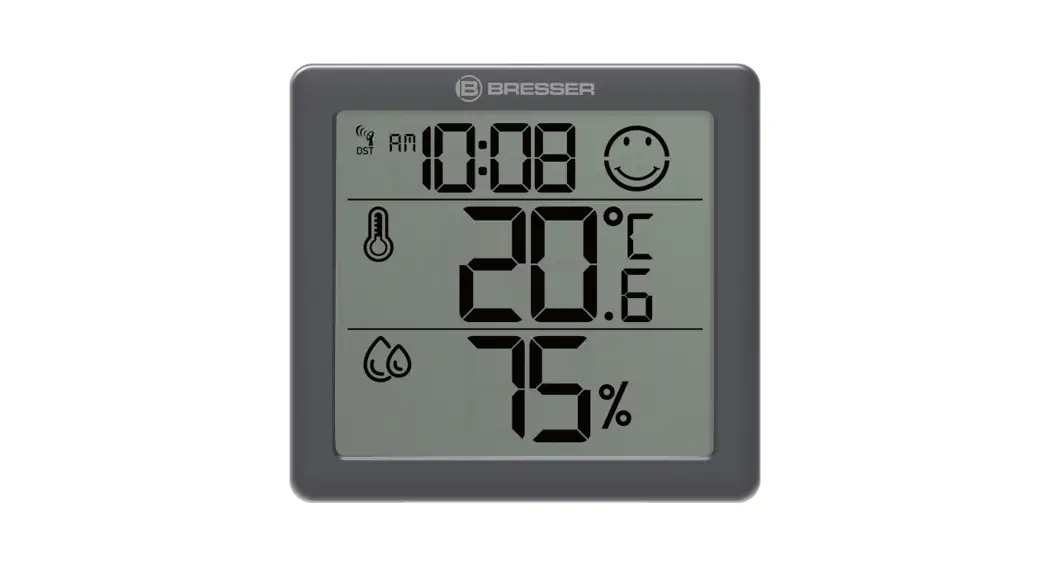
Screen displays
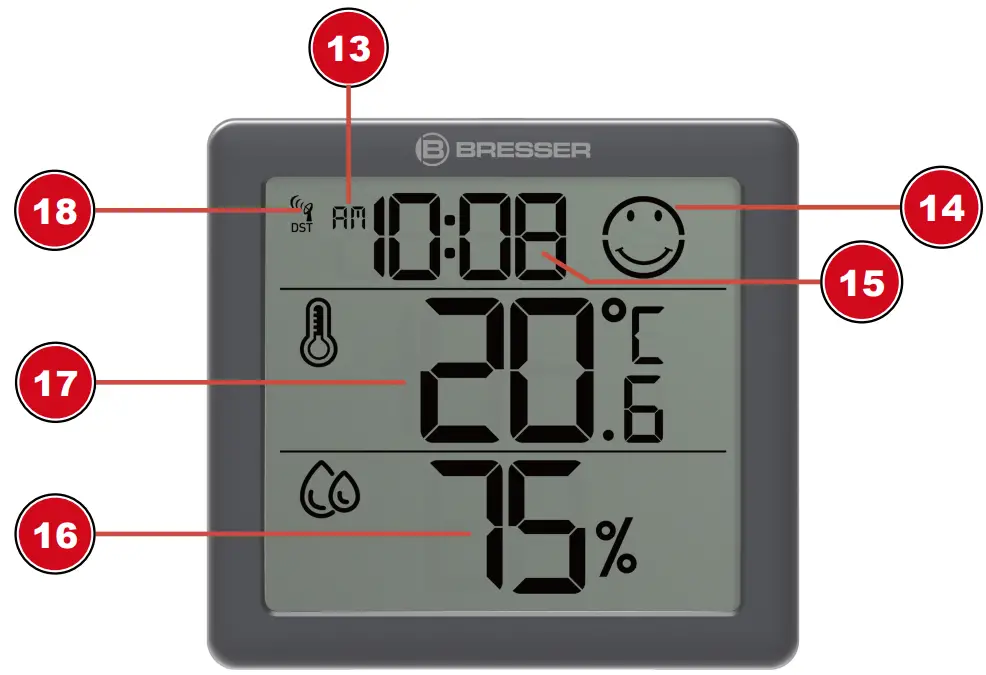 Illustration 2: Display indications of the thermometer/hygrometer
13. AM/PM information in 12-hour time mode
14. Climate Indicator Icon
15. Time (hours:minutes
16. Air humidity ( in % )
17. Temperature (selectable in °C/°F)
18. Radio-controlled clock status display with info ‘DST’ (only when daylight saving time is active)
Setting up power supply
- Remove the battery compartment cover.
- First use: Remove the transparent plastic tab.
Battery change: Insert battery(ies) into the battery compartment. Ensure that the battery polarity (+/-) is correct. - Replace the battery compartment cover.
Automatic time setting
After the power has been restored, the unit automatically searches for the radio signal. It takes approximately 3-8 minutes for this process to be completed.
If the radio signal is received correctly, the date and time are set automatically and the reception symbol is displayed.
If no radio signal has been received, proceed as follows:
- Press the DOWN button for approx. 2 seconds to initiate the reception of the radio signal again.
- Press the DOWN button once again for approx. 2 seconds to stop the reception of the radio signal.
- If still no radio signal is received, the time must be set manually.
Manual time adjustment
- In normal display mode, press the SET button for about 3 seconds to enter the time settings mode.
- Digits to be set are flashing.
- Press UP or DOWN button to change the value.
- Press the SET button to confirm and switch to the next setting.
- Sequence of the settings: Time offset > Hours > Minutes > Year > Month > Day
- Finally, press the SET button to save the settings and exit settings mode.
NOTICE! For more information on the time display in 12- or 24-hour mode, see the chapter “Changing the display”.
Automatic measurement display
Once the power is established, the readings for the current environment are displayed on the unit.
Clima indicator
| dry (left symbol) Humidity <40%, temperature >20 to <27° C | |
| optimal (centered symbol) Humidity 40% to 70%, temperature 21° C to 26° C | |
| humid (right symbol) Humidity >70%, temperature <20° C or >27° C |
The climate indicator is a visual display based on air temperature and humidity to determine the level of comfort.
Note:
- The comfort display may vary at the same temperature, depending on the humidity.
Display change
- In normal display mode, press the SET button to switch between time and date.
- In normal display mode, press the DOWN button to toggle between °C and °F when displaying the temperature unit.
- In the normal display mode, press the UP key to switch between the 12-hour and 24-hour time display.
Disposal
![]() Dispose of the packaging materials according to its type. Information on proper disposal can be obtained from the municipal waste disposal service provider or environmental agency.
Dispose of the packaging materials according to its type. Information on proper disposal can be obtained from the municipal waste disposal service provider or environmental agency.![]() Do not dispose of electronic devices in the household garbage!
Do not dispose of electronic devices in the household garbage!
According to the European Directive 2012/19/EU on Waste Electrical and Electronic Equipment and its transposition into national law, used electrical equipment must be collected separately and recycled in an environmentally sound manner.![]() Batteries and rechargeable batteries must not be disposed of with household waste. You are legally obliged to return used batteries and accumulators and can return them after use either at our sales outlet or in the immediate vicinity (e.g. in the trade or in municipal collection points) free of charge.
Batteries and rechargeable batteries must not be disposed of with household waste. You are legally obliged to return used batteries and accumulators and can return them after use either at our sales outlet or in the immediate vicinity (e.g. in the trade or in municipal collection points) free of charge.
Batteries and accumulators are marked with a crossed-out dustbin and the chemical symbol of the pollutant, “Cd” stands for cadmium, “Hg” stands for mercury and “Pb” stands for lead.![]()
Warranty
The regular warranty period is 2 years and starts on the day of purchase. To benefit from an extended voluntary warranty period as indicated on the gift box, registration on our website is required.
You can consult the full guarantee terms as well as information on extending the guarantee period and details of our services at www.bresser.de/warranty_terms.
EC declaration of conformity
![]() Bresser GmbH hereby declares that the radio equipment type with item number 7000017 is in compliance with Directive 2014/53/EU. The full text of the EC Declaration of Conformity is available at the following web address: www.bresser.de/download/7000017/CE/7000017_CE.pdf
Bresser GmbH hereby declares that the radio equipment type with item number 7000017 is in compliance with Directive 2014/53/EU. The full text of the EC Declaration of Conformity is available at the following web address: www.bresser.de/download/7000017/CE/7000017_CE.pdf
UKCA declaration of conformity
![]() A “Declaration of Conformity” in accordance with the applicable directives and relevant standards has been issued by Bresser GmbH The full text of the UKCA Declaration of Conformity is available at the following web address: www.bresser.de/download/7000017/UKCA/7000017_UKCA.pdf
A “Declaration of Conformity” in accordance with the applicable directives and relevant standards has been issued by Bresser GmbH The full text of the UKCA Declaration of Conformity is available at the following web address: www.bresser.de/download/7000017/UKCA/7000017_UKCA.pdf
Bresser UK Ltd. • Suite 3G, Eden House, Enterprise Way,
Edenbridge, Kent TN8 6HF, Great Britain
Technical data
Power supply: 2x CR2032 button cell (per station)
Temperature unit: °C or °F selectable
Temperature display range: -9.9°C to +50°C
Humidity display range: rH 1% to 99%
Please contact the service centre first for any questions regarding the product or claims, preferably by e-mail.
E-Mail: [email protected]
Telephone*: +44 1342 837 098
BRESSER UK Ltd.
Suite 3G, Eden House
Enterprise Way
Edenbridge, Kent TN8 6HF
Great Britain
*Number charged at local rates in the UK (the amount you will be charged per phone call will depend on the tariff of your phone provider); calls from abroad will involve higher costs.
![]() Bresser GmbH
Bresser GmbH
Gutenbergstraße 2
46414 Rhede · Germany
www.bresser.de
@BresserEurope![]()


