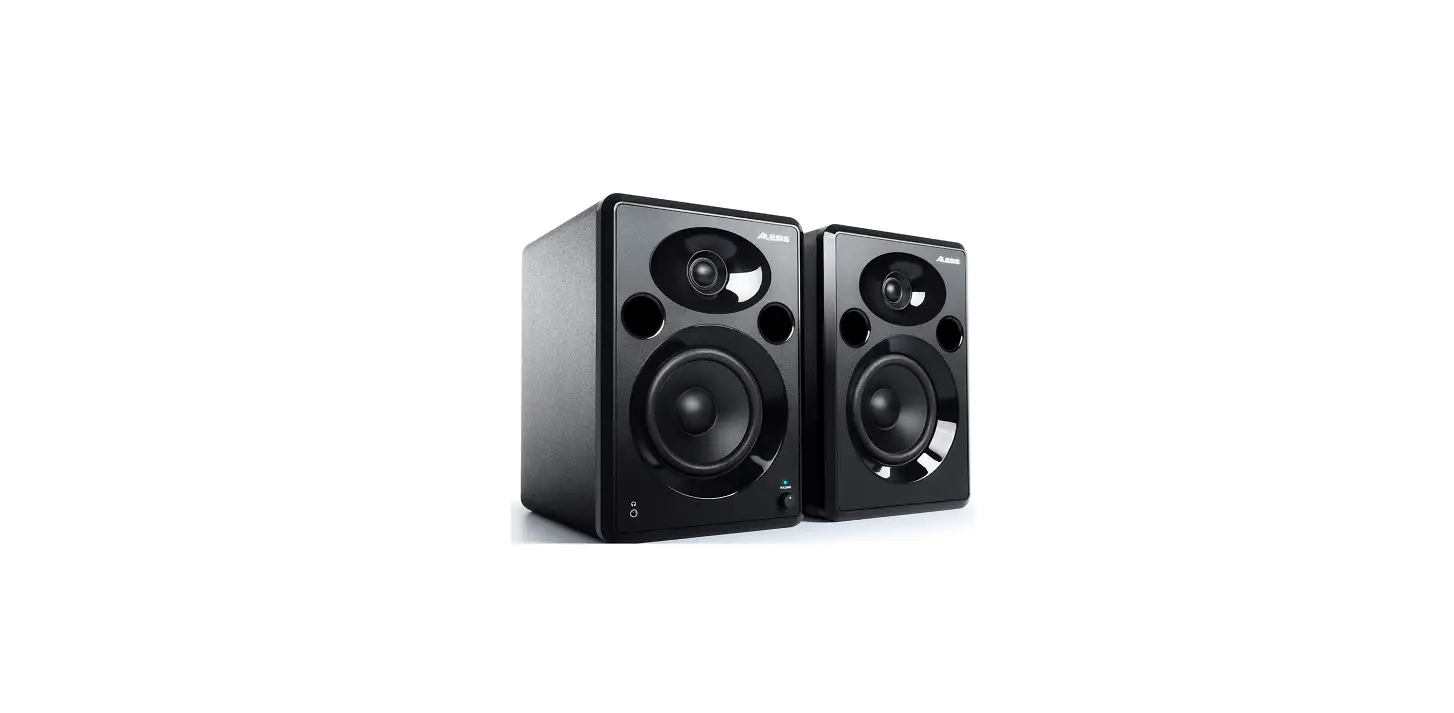
Alesis ELEVATE 5 MKII Powered Desktop Studio Speakers
INTRODUCTION
- Make sure all items listed in Introduction > Box Contents are included.
- Read the safety instruction booklet before using the product.
- Place the product in an appropriate location for operation.
- Ensure high quality, shielded audio cables are used away from sources of electromagnetic interference.
BOX CONTENTS
- Elevate 5 MKII Speakers (Stereo Pair)
- RCA-to-1/8” (3.5 mm) Audio Cable
- 1/4” (6.35 mm) Interconnection Cable Power Cable
- User Guide
- Safety & Warranty Manual
SUPPORT
For the latest information about this product (system requirements, compatibility information, etc.) and product registration, visit alesis.com.
For additional product support, visit alesis.com/support.
SETUP
Items not listed in Introduction > Box Contents are sold separately.
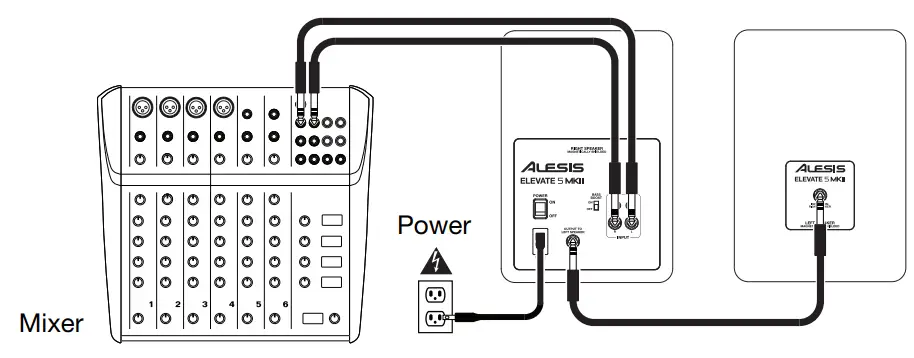
Before turning on the right speaker of Elevate 5’s power, do the following:
- Ensure the volume control on Elevate 5’s right speaker is turned down.
- Connect Elevate 5’s left and right speakers with the included 1/4” (6.35 mm) interconnection cable.
- Connect any audio sources (such as an audio interface, mixer, etc.) to the inputs on Elevate 5’s right speaker. Power on the audio sources.
- Connect the included power cable to the power connector on Elevate 5’s right speaker, and then plug the other end of the power cable into an outlet.
- Flip the power switch on Elevate 5’s right speaker to the “on” position.
- Adjust the volume control on the front panel of Elevate 5’s right speaker.
SPEAKER PLACEMENT
The placement of your speakers has a huge impact on how well they will perform in your studio. Although nearfield studio monitors are designed to be more forgiving when it comes to placement, you should do your best to make sure they form an equilateral triangle relative to your head. In other words, make sure that each speaker is equally distant from both your head as well as the other speaker. Once each speaker has been placed, rotate the speakers slightly so that the drivers are pointing toward the listener.
Take a look at the diagram on the right. Notice that the distance from the listener’s head to each speaker is the same as the distance between the left and right speakers. Also note that the speakers are turned slightly so that the drivers are facing the listener. This is an ideal setup but if it is not practical (or possible) to do this, try to match this setup as closely as possible.
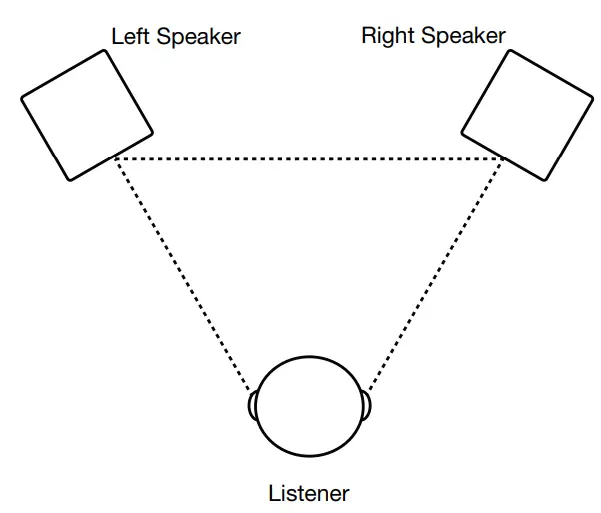
The speakers and listener should be at the three corners of a triangle having equal length sides.
SPEAKER HEIGHT
The ideal height for Elevate 5 is so that the speaker is parallel to the ground and that the midpoint of the woofer and tweeter is at ear-height.
The diagram to the right demonstrates the ideal placement height of the speakers relative to the listener. Notice that the listener’s ears are directly between the woofer and tweeter.

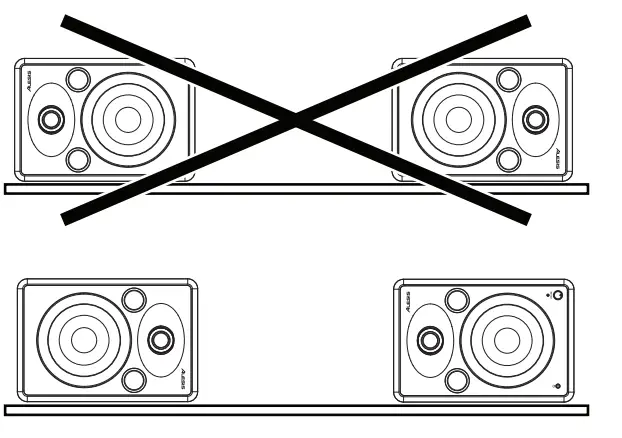
SPEAKER ORIENTATION
If possible, place the Elevate 5 monitors in their upright position and avoid laying the speakers on their sides. The Elevate 5 woofer and tweeter are vertically aligned and will provide the best performance when the speakers are placed upright. Placing them on their sides may create strong reflections from nearby surfaces resulting in spectrally unbalanced sound.
If your Elevate 5 monitors must be oriented horizontally due to space or line-of-sight considerations, place the speakers so that their tweeter is on the “inside” to improve imaging.
FEATURES
REAR PANEL
- RCA Inputs: Use the included audio cable or other RCA cables (sold separately) to connect external sound sources to these inputs.
- 1/4” Inputs: Use 1/4” (6.35 mm) cables (sold separately) to connect an external sound source to these inputs.
- Bass Boost: This 2-position switch allows you to boost the speakers’ bass frequencies.
- Output to Left Speaker: This is the audio connection to the left speaker. Use the included 1/4” (6.35 mm) interconnection cable to connect the right speaker to the left speaker.
- Input from the Right Speaker: This is the audio connection to the right speaker. Use the included 1/4” (6.35 mm) interconnection cable to connect the left speaker to the right speaker.
- Power On/Off Switch: Turns Elevate 5 on or off. To save energy, Elevate 5 will automatically power off after 30 minutes of not receiving an audio signal from its inputs. Once Elevate 5 detects an audio signal from its inputs, it will automatically power on again.
- Power Connector: Plug the included power cable here.

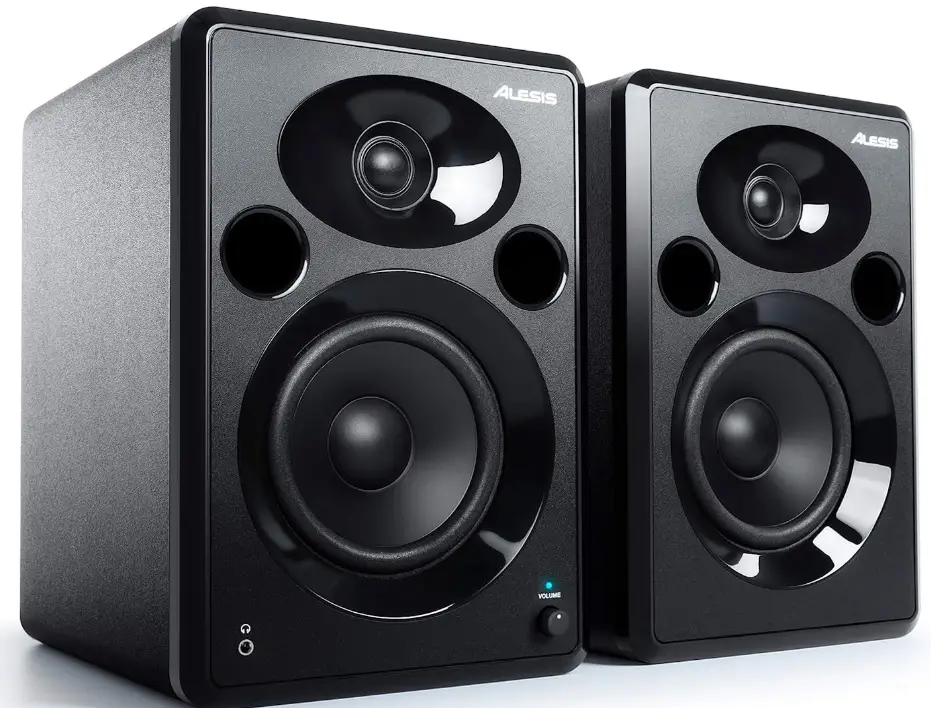
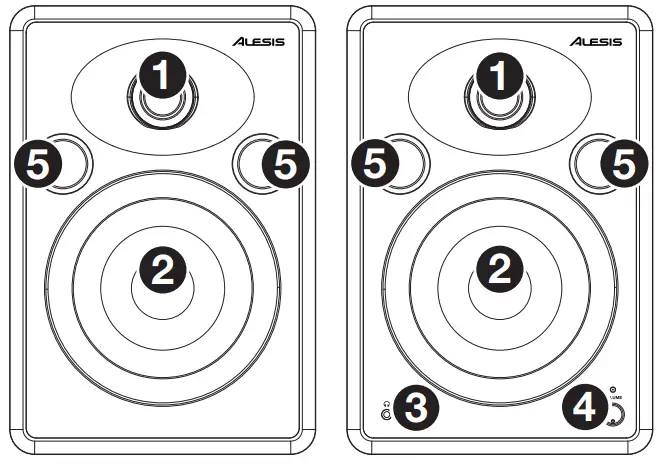
FRONT PANEL
- Tweeter: This outputs the high frequencies.
- Woofer: This outputs the low frequencies.
- Headphones: Connect your 1/8” (3.5 mm) headphones to this output to hear the mix through your headphones. Note that while headphones are connected to Elevate 5, you will not be able to hear sound out of your speakers until the headphones are disconnected.
- Volume: This knob is used to adjust the volume of the speakers.
- Bass Port: The bass port augments the bass generated by the woofer to increase the low-frequency SPL over that of non-ported speakers. Make sure this hole is not obstructed since this will adversely affect bass response.
Frequently Asked Questions
Your powered speakers should be turned off after usage and should not be left on. There are a number of causes for this. This is what? Particularly, leaving your powered speakers on can degrade and harm its parts over time, perhaps posing a safety risk.
Studio monitors are “active” or “powered” speakers, meaning the power amplifier is directly integrated into the speaker cabinet, in contrast to home stereo or hi-fi speakers, which are frequently referred to as “passive” speakers because they need an external amplifier.
Studio monitors are loudspeakers in speaker enclosures created especially for professional audio production applications like recording studios, movie, television, radio, and project or home studios, where correct audio reproduction is essential.
If you want to avoid your living room being covered with extension cords, make sure the active speaker is close enough to a wall outlet to be plugged into AC power.
To connect powered or active speakers to your receiver, it must have pre-outs or Zone 2 lines. Simply attach your speakers to the zone 2 outputs or pre-outs. The speakers WILL be harmed if powered or active speakers are connected to a receiver’s standard speaker connectors.
When speakers are turned on but not in use, power is used. However, it just uses a small amount of power. When playing audio, speakers use more power, and when the volume is turned up, they need even more power.
The purpose of powered speakers is for use without an amplifier. Never connect a powered speaker’s speaker terminals to the power output (speaker terminal) on your amplifier.
Powered speakers have a better sound quality than standard speakers and are also referred to as self-powered speakers or active speakers. You do not require an external amplification system because they have an internal amplifier. Despite being costly in the past, they are now becoming more inexpensive.
Use of studio monitors is often recommended whether recording, mixing, or mastering. You merely get a more accurate sound, as was already mentioned. Regular speakers may cause you to overlook some audio detail, which could result in an unbalanced mix.
Regular speakers may be used as studio monitors, but the sound would be distorted. Studio monitors add almost nothing to the source signal, faithfully reproducing the recorded sound.
A solid starting point for your home studio is typically 50 watts. It’s vital to keep in mind that studio monitors, unlike conventional speakers, aren’t made to make your audio sound better as it plays back; rather the opposite, in fact.
Researchers discovered that the majority of studio monitors perform best when the space between the tweeters is 67 1/2 inches. Maintain Even Spacing. If you are standing closer to one speaker than the other, music may seem twisted or over accentuated. It’s crucial to position both speakers at an equal distance from you because of this.
The best listening position and monitor placements for stereo imaging are three points of an equilateral triangle, with the monitors rotated inward to point in the direction of the ears at about a 30-degree angle to the centre line.
Your studio monitors should often be positioned vertically. Turning your head reveals stereo image problems, phasing, and comb-filtering that are brought on by sideways monitor placement. Keep your studio speakers upright because that is how they were intended to be used for the best results.
To reduce bass buildup from the front wall, place the speakers at least 6 to 10 inches away from the wall, ideally 2-3 feet.
The size of your room will be important for having decent sound quality; the larger the monitor, the bigger the space needs to be for it to work correctly. You can get by with 8″ monitors if your space is bigger than 4x4x2. 5 metres. The ideal room size for 8″ monitors is 5x5x3 m.


