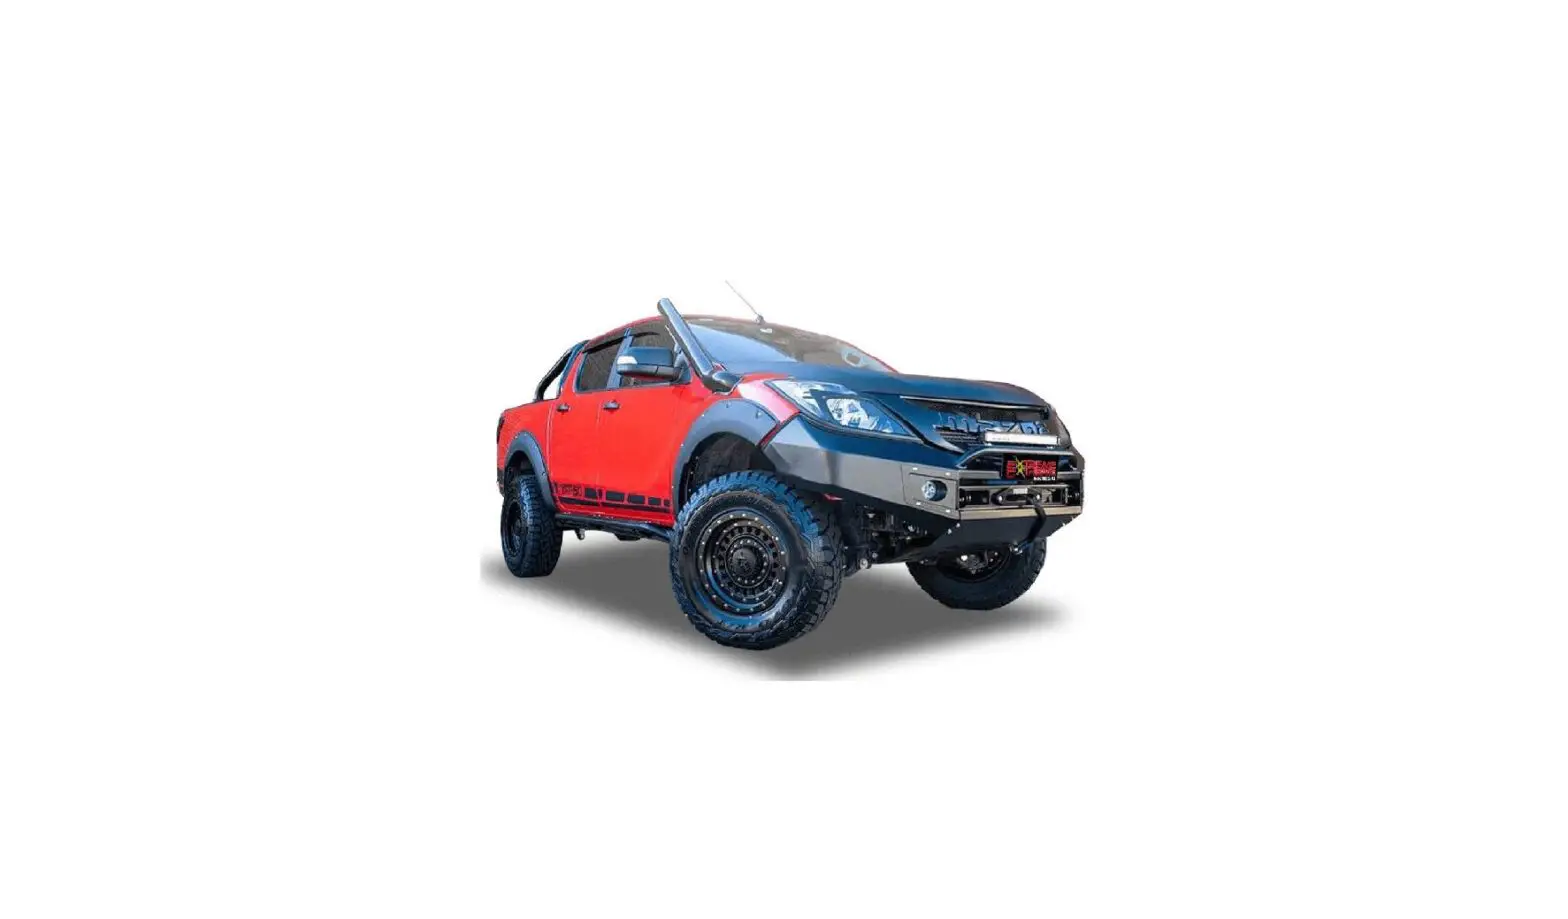
shoreline 4×4 Extreme Series Bullbar X-1 for Mazda BT50
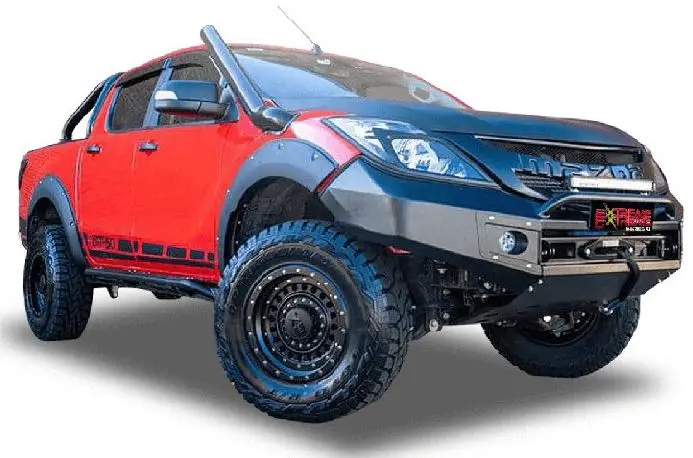
Shoreline 4×4 Extreme Series Bullbar X-1
The Shoreline 4×4 Extreme Series Bullbar X-1 is a heavy-duty bullbar designed for the Mazda BT50. The bullbar is rated to 3.75T and is equipped with front TOW points. The product is not suitable for snatchings. The inner guard cut partially exposes the air intake. Therefore, it is crucial to secure the guard and take care during water crossing. Turn the intake upwards or get a snorkel for water crossings.
Fitting Instructions for Mazda BT50
- Congratulations on purchasing your very own Shoreline 4×4 Extreme Series Bullbar. Clear an area around the front of your car and unwrap the bar.
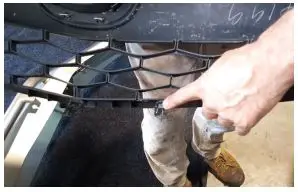
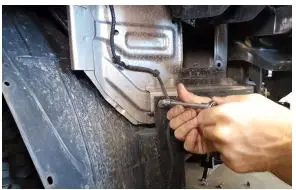
- Remove the four clips either side holding the inner wheel lining to the bumper.
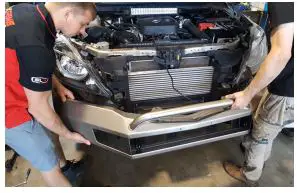
- Pull the edges of the bumper away from the car. The clips will pop away, and this is completely normal.
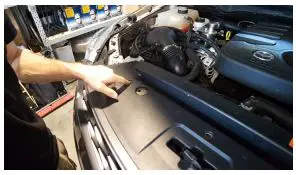
- Remove the clips holding the top of the grill.
- Pull the grill away from the bumper, there are tabs shown that may need to be pried away with a flat head screwdriver.
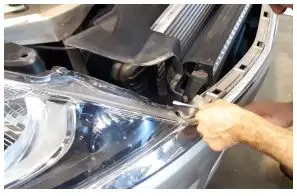
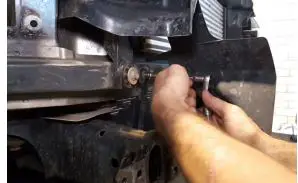
- Undo the bolts next to the headlights that were hidden behind the grill.
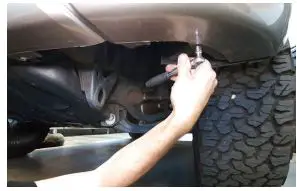
- Undo the bolts holding the bottom of the bumper to the car.
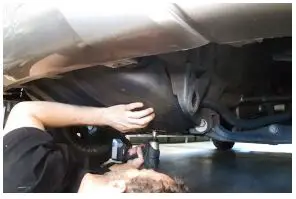
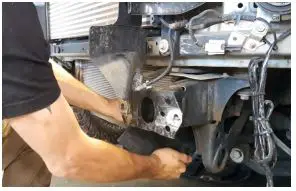
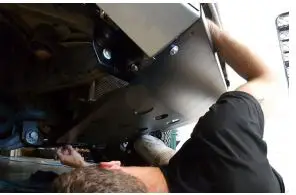
- Remove the factory bash plate, making sure you keep the two rear bolts to use later.
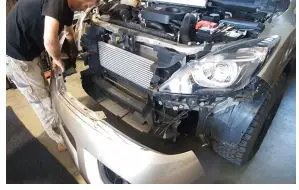
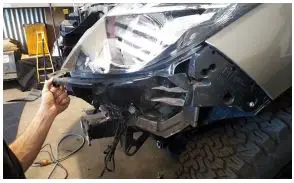
- Pull the bumper away from the car, taking care to disconnect the fog lights.
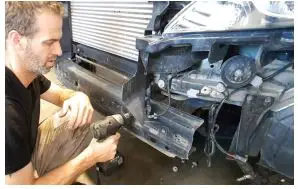
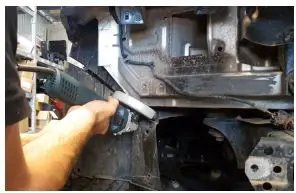
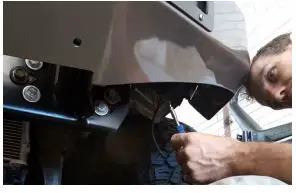
- Tear away the plastic air dam on the impact bar.
- Unbolt the crash bar and dispose, this will be replaced by the bullbar mounts.
- Unbolt the lower air dam mount.
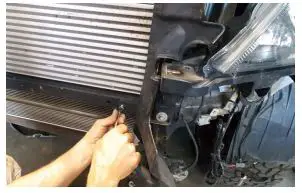
- Remove the L shaped metal bracket mounted behind the air dam either side.
- Tear away the plastic moulding that is between the chassis rail and the condenser.
- Refit the lower air dam mount.
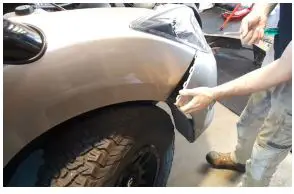
- Trim the factory air dam as shown, cutting diagonally up.
- Remove and dispose of the bracket that secures the inner wheel liner to the body.
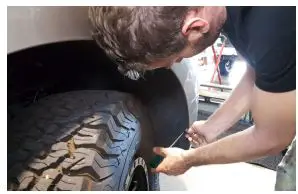
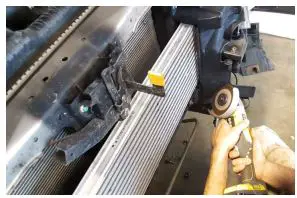
- Trim the inner wheel liner as shown, following the angle of the metal.
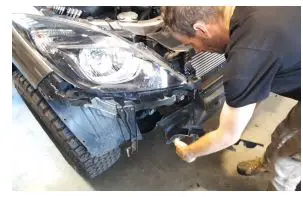
- Remove the two-piece plastic molding below the headlights.
- Strip the factory fog light wiring ready to solder on the new LED fog lights.
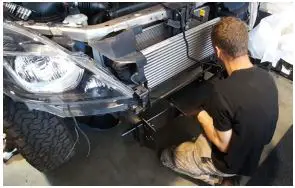
- Mount the bar bracket using the four factory bolts as well as eight of the supplied stainless nuts, washers, and bolts.
- With help, mount the bar to the bracket with the supplied stainless steel hardware.
- Solder on the new LED fog lights and test.
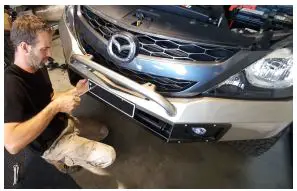
- Using the two factory bolts for the rear and the supplied hardware for the front, mount your Extreme Series bash plate.
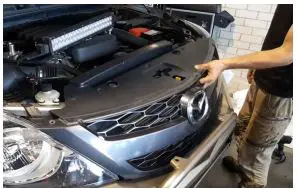
- Refit the grill in reverse order.
- Mount your license plate, and you’re ready to hit the track!
Contact information:
- Website: www.slx4x4.com.au
- Phone: (08) 9444 2946
- Address: 126 Hector St W – OSBOURNE PARK W.A. 6017
INSTALLATION
- Congratulations on purchasing your very own Shoreline 4×4 Extreme Series Bullbar. To start, clear an area around the front of your car and unwrap the bar.

- With the bar unwrapped, you’re ready to remove the bumper. Start by removing the four clips either side holding the inner wheel lining to the bumper.

- Now pull the edges of the bumper away from the car. The clips will pop away and this is completely normal.

- Remove the clips holding the top of the grill.

- Next, pull the grill away from the bumper, there are tabs shown that may need to be pried away with a flat head screwdriver.

- Undo the bolts next to the headlights that were hidden behind the grill.

- Undo the bolts holding the bottom of the bumper to the car.

- While you’re down below, remove the factory bash plate, making sure you keep the two rear bolts to use later.

- Carefully pull the bumper away from the car, taking care to disconnect the fog lights.

- Tear away the plastic air dam on the impact bar.

CAUTION : INNER GAURD CUT PARTIALLY EXPOSES AIR INTAKE. SECURE GAURD & TAKE CARE DURING WATER
CROSSING. TURN INTAKE UPWARDS OR GET A SNORKEL FOR WATER CROSSINGS - Unbolt the crash bar and dispose, this will be replaced by the bullbar mounts.

- Unbolt the lower air dam mount.

- Remove the “L” shaped metal bracket mounted behind the air dam on either side.

- Tear away the plastic moulding that is between the chassis rail and the condensor.

- Refit the lower air dam mount.

- Trim the factory air dam as shown, cutting diagonaly up.

- Remove and dispose of the bracket that secures the inner wheel liner to the body.

- Trim the inner wheel liner as shown, following the angle of the metal.

- Remove the two piece plastic moulding below the headlights.

- Strip the factory fog light wiring ready to solder on the new LED fog lights.

- Now mount the bar bracket using the four factory bolts as well as eight of the supplied stainless nuts, washers and bolts.

- With help, mount the bar to the bracket with the supplied stainless steel hardware.

- Solder on the new LED fog lights and test.
- Using the two factory bolts for the rear and the supplied hardware for the front, mount your Extreme Series bash plate.

- Refit the grill in the reverse order.
- Mount your license plate and you’re ready to hit the track!


- www.slx4x4.com.au (08) 9444 2946
- 126 Hector St W – OSBOURNE PARK W.A. 6017


