![]()
6X24 OLED LASER RANGEFINDER
Art. No.: 9625800 Instruction manual
9625800 6X24 Oled Laser Rangefinder

SAFETY INSTRUCTIONS
CLASS 1 LASER PRODUCT
This device is classified as a CLASS 1 LASER PRODUCT according to EN/IEC 60825-1-2014. The accessible laser radiation is safe under reasonably foreseeable conditions, and under normal conditions of use.
Do not open the housing. The device does not contain any parts that can be serviced by the user. Leave maintenance work to qualified service professionals.
INTENDED USE
- The device is intended for measuring distances.
- The device is intended for private use only.
- Suitable for one-hand operation indoors and outdoors.
- The device can only be used with one eye.
![]() DANGER!
DANGER!
Risk of serious physical injury!
- Never look through this device directly at or near the sun. There is a RISK OF BLINDNESS!
- This device contains electronic parts which are powered by a power source (AC adapter and/or batteries). Never leave children unattended when handling the device! Only use the device as described in the manual. Otherwise, you run the DANGER of an ELECTRIC
SHOCK.
- Batteries do not belong in children’s hands! Leaking or damaged batteries will cause chemical burns if they come into contact with the skin. Use suitable protective gloves if necessary.
- Keep packaging materials (plastic bags, rubber bands, etc.) away from children! There is a DANGER OF CHOKING!
![]() WARNING!
WARNING!
Fire/Explosion hazard!
- Do not short-circuit the device or batteries or throw them into a fire! Excessive heat and improper handling can cause short circuits, fires and even explosions!
- Do not expose this device – especially the lenses – to direct sunlight! Focusing of sunlight could cause fires.
! ATTENTION!
Material damage due to improper handling!
- Do not disassemble the device! In the event of a defect, please contact the after sales support number listed below.
- Do not subject the device to excessive vibrations.
- Use only the recommended batteries. Replace weak or used batteries. Remove the battery from the unit if it is not to be used for a long time! Do not subject the device to temperatures exceeding 60° C!
Privacy PROTECTION!
The device is only intended for private use. Respect the privacy of your fellow human beings – do not look into flats with this device, for example!
2. EC DECLARATION OF CONFORMITY![]() A “Declaration of conformity” in accordance with the applicable directives and corresponding standards has been prepared by Bresser GmbH. The full text of the EU declaration of conformity is available at the following internet address: www.bresser.de/download/9625800/CE/9625800_CE.pdf
A “Declaration of conformity” in accordance with the applicable directives and corresponding standards has been prepared by Bresser GmbH. The full text of the EU declaration of conformity is available at the following internet address: www.bresser.de/download/9625800/CE/9625800_CE.pdf
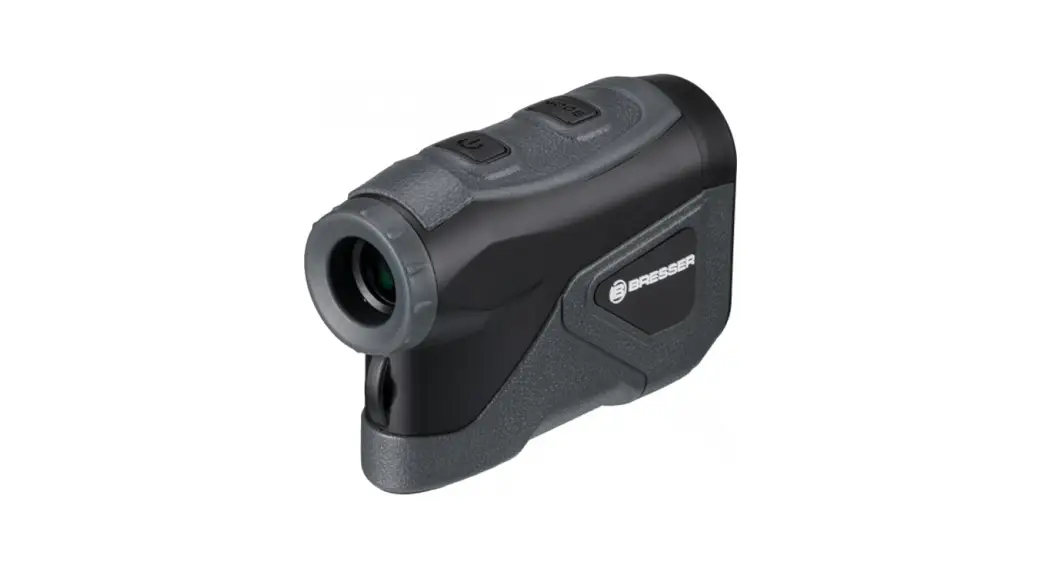
SCOPE OF DELIVERY (Fig. 1)
A. Laser Rangefinder
B. Fanny pack
C. CR2 battery (3V) ![]()
D. Instruction manual
PARTS OVERVIEW (Fig. 1)
- Eyepiece with diopter compensation ring
- POWER button
- MODE button
- Laser output / objective lens
- Laser receiving lens
- Battery compartment (bottom side)
- Fanny pack
OLED DISPLAY (Fig. 2)
Upper display area: - Mode Display:
- Target / Crosshair
Lower display area: - Unit of measurement (M= meter)
- Distance / Speed
- Laser indicator
START-UP

- Open the battery compartment (Fig. 1, 6).
- Insert the battery observing the correct pole orientation (+/-).
- Close the battery compartment (Fig. 1, 6).
- Press the POWER button (Fig. 1, 2) to switch on the device.
- Look through the eyepiece (Fig. 1, 1). The OLED display (Fig. 3) appears.
Note: This device has an automatic shutdown function. If no action is performed for 30 seconds, the device switches off.
DIOPTER ADJUSTMENT/FOCUSING
When the image viewed through the eyepiece (Fig. 1, 1) is out of focus, the image sharpness can be adjusted by turning the diopter compensation ring (Fig. 1, 1)
DISPLAY BRIGHTNESS
The brightness of the display can be adjusted individually depending on the respective lighting conditions.
- Switch on the device.
- Press and hold the POWER button (Fig. 1, 2) and MODE button (Fig. 1, 3) together until “SE” is displayed in the upper display area.
- Press the POWER button (Fig. 1, 2) or MODE button (Fig. 1, 3) briefly one at a time until the desired display brightness is set. POWER = darker / MODE = brighter (32 brightness levels in total)
- Press and hold the POWER button (Fig. 1, 2) and MODE button (Fig. 1, 3) together for approx. 3 seconds to return to the normal display mode.
Note: This device stores the last set brightness level and automatically resets it after it is turned off and on again.
OPERATING MODE


This device can be used either as a distance meter or as a speedometer.
- Switch on the device.
- Press the MODE button (Fig. 1, 3) briefly several times if necessary until the desired mode is displayed in the upper display area:
RF = Rangefinder / SP = Speedometer
DISTANCE MEASUREMENT
10.1 NORMAL DISTANCE MEASUREMENT
- Switch on the device and switch to “RF” mode (Fig. 4).
- Aim at the desired object so that the target/crosshair (Fig. 2, 9) can be seen above the object.
- Press the POWER button (Fig. 1, 2) briefly to perform a measurement. The laser indicator (Fig. 2, 12) flashes during the measurement.
- After successful measurement, the laser indicator symbol (Fig. 2, 12) is no longer displayed and the result is shown in the lower display area (Fig. 2, 11.
Note: If the value “0000.0” is displayed after the measurement, the measurement was not successful and must be repeated.
10.2 MOVING DISTANCE MEASUREMENT (SCAN)
- Switch on the device and switch to “RF” mode (Fig. 4).
- Press and hold the POWER button (Fig. 1, 2) for approx. 3 seconds to switch to “Scan” mode. The laser indicator (Fig. 2, 12) flashes permanently.
- Follow the desired moving object so that the target/crosshair (Fig. 2, 9) can be seen above the object.
- After successful measurement, the laser indicator symbol (Fig. 2, 12) is no longer displayed and the result is shown in the lower display area (Fig. 2, 11.
- Press the POWER button (Fig. 1, 2) briefly to exit the “Scan” mode. The laser indicator (Fig. 2, 12) is no longer displayed.
Note: If the value “0000.0” is displayed after the measurement, the measurement was not successful and must be repeated.
SPEED MEASUREMENT
- Switch on the device and enter the “SP” mode (Fig. 5).
- Aim at the desired moving object so that the target/crosshair (Fig. 2, 9) can be seen above the object.
- Press the POWER button (Fig. 1, 2) briefly to perform a measurement. The laser indicator (Fig. 2, 12) flashes during the measurement.
- After successful measurement, the laser indicator symbol (Fig. 2, 12) is no longer displayed and the result is shown in the lower display area (Fig. 2, 11. The displayed value corresponds to the speed in km/h.
Note: If the value “0000.0” is displayed after the measurement, the measurement was not successful and must be repeated.
BATTERY REPLACEMENT
- Wait until the device has switched off automatically.
- Open the battery compartment (Fig. 1, 6) open.
- Insert the battery observing the correct pole orientation (+/-).
- Close the battery compartment (Fig. 1, 6).
TROUBLESHOOTING
| “0000.0″ is shown in the display | Measurement not successful – measurement accuracy is influenced by type and surface property of the target object, angle of the laser beam as well as weather conditions | Observe requirements for successful measurement and repeat measurement |
| No display | Empty battery | Replace battery |
CLEANING AND MAINTENANCE
Disconnect the device from the power source (remove batteries) before cleaning!
Clean the lenses (eyepieces and/or objective lenses) only with a soft and lint-free cloth (e.g. microfibre cloth). To avoid scratching the lenses, use only gentle pressure with the
cleaning cloth. To remove more stubborn dirt, moisten the cleaning cloth with an eyeglass-cleaning solution and wipe the lenses gently. Protect the device from dust and
moisture! Keep it in the supplied bag or transport packaging. Remove batteries from the device if it is not to be used for a longer period of time!
DISPOSAL
 Dispose of the packaging materials properly, according to their type, such as paper or cardboard.
Contact your local waste-disposal service or environmental authority for information on the proper disposal.
PACKING![]() Your device is packaged to protect it from damage in transit. Packaging is made of materials that can be disposed of in an environmentally friendly manner and recycled properly.
Your device is packaged to protect it from damage in transit. Packaging is made of materials that can be disposed of in an environmentally friendly manner and recycled properly.![]() Separation Note Packaging: Other cardboard
Separation Note Packaging: Other cardboard
ELECTRONICS/BATTERIES
Do not dispose of electronic devices in the household garbage!![]() The adjacent symbol of a crossed-out dustbin means that the device is subject to Directive 2012/19/EU. Old devices must not be disposed of in normal household waste. In accordance with Directive 2012/19/EU, the device must be disposed of in an orderly manner at the end of its service life. In the process, recyclable materials contained in the device are recycled and the burden on the environment is avoided. Hand in the old device at a collection point for electrical waste or at a recycling centre. Remove the batteries from the device beforehand and return them separately to a collection point for used batteries. Contact your local waste disposal company or your municipal administration for more information.
The adjacent symbol of a crossed-out dustbin means that the device is subject to Directive 2012/19/EU. Old devices must not be disposed of in normal household waste. In accordance with Directive 2012/19/EU, the device must be disposed of in an orderly manner at the end of its service life. In the process, recyclable materials contained in the device are recycled and the burden on the environment is avoided. Hand in the old device at a collection point for electrical waste or at a recycling centre. Remove the batteries from the device beforehand and return them separately to a collection point for used batteries. Contact your local waste disposal company or your municipal administration for more information. Batteries and rechargeable batteries must not be disposed of with household waste. You are legally obliged to return used batteries and accumulators and can return the batteries after use either at our sales outlet or in the immediate vicinity (e.g. in the trade or in municipal collection points) free of charge. Batteries that contain toxins are marked with a sign and a chemical symbol.
 1 battery contains cadmium
2 battery contains mercury
3 battery contains lead
WARRANTY
The regular warranty period is 5 years and begins on the date of purchase. For complete warranty terms and services, please visit www.bresser.de/warranty_terms.
SERVICE
In case of warranty/damage, please always contact our customer service first (preferably by e-mail). Here our competent employees are at your disposal. In many cases, small
problems can already be solved in this way. However, if in individual cases a repair or replacement of the device is necessary, the customer service will arrange for an appropriate return.
CONTACT DETAILS:
e-mail: [email protected]
Service hotline*: +49 28 72 80 74 210
*Monday-Friday, 9 a.m.-4 p.m. Call number in the German fixed network, charges for calls depend on the tariff of your telecommunication provider, calls from abroad may be more expensive
Bresser GmbH
Gutenbergstr. 2
46414 Rhede · Germany
www.bresser.de![]() @BresserEurope
@BresserEurope
Errors and technical changes reserved.
Manual_9625800_Rangefinder-Speedmeter-6x24_en_BRESSER_v052022a


