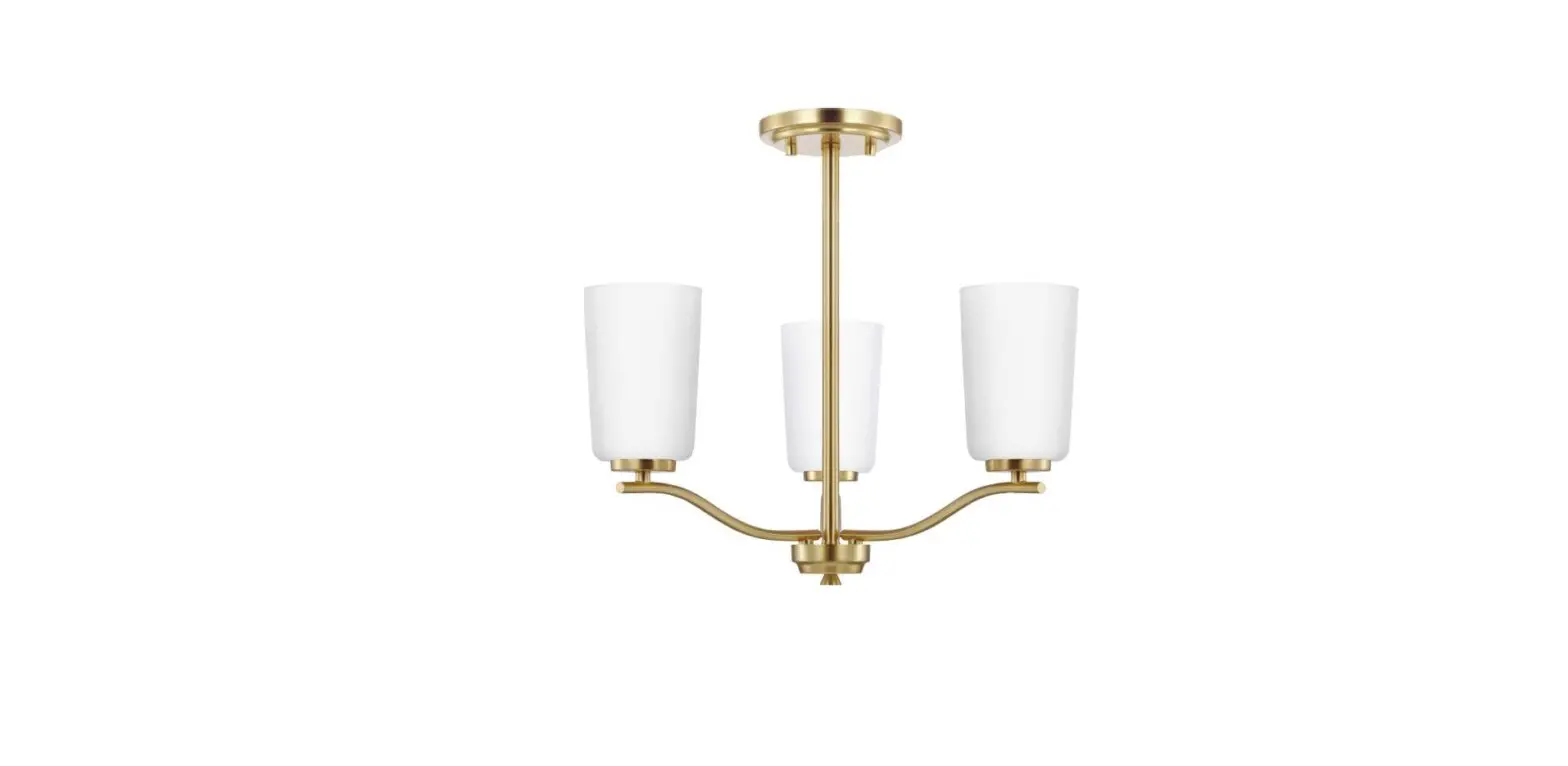
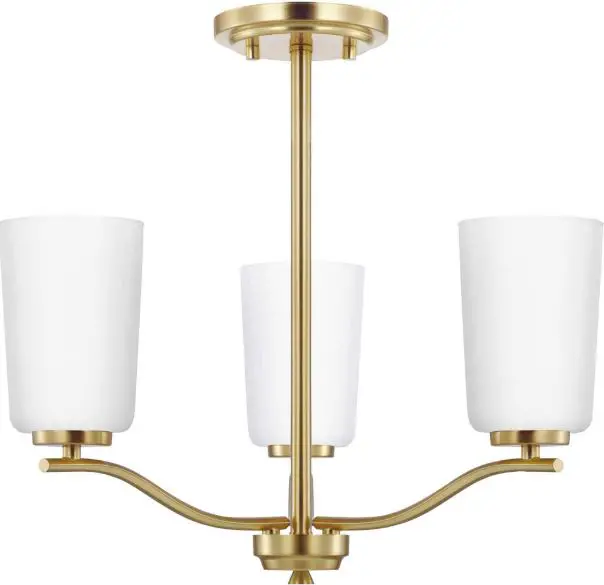
PROGRESS LIGHTING P400349 Adley 3 Light Matte Black Semi-Flush Convertible Ceiling Light
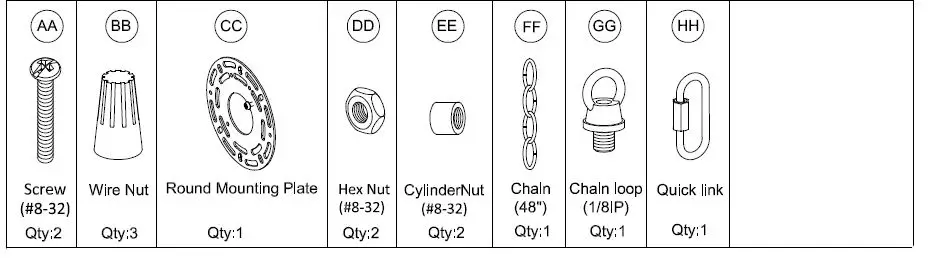
PACKAGE CONTENTS
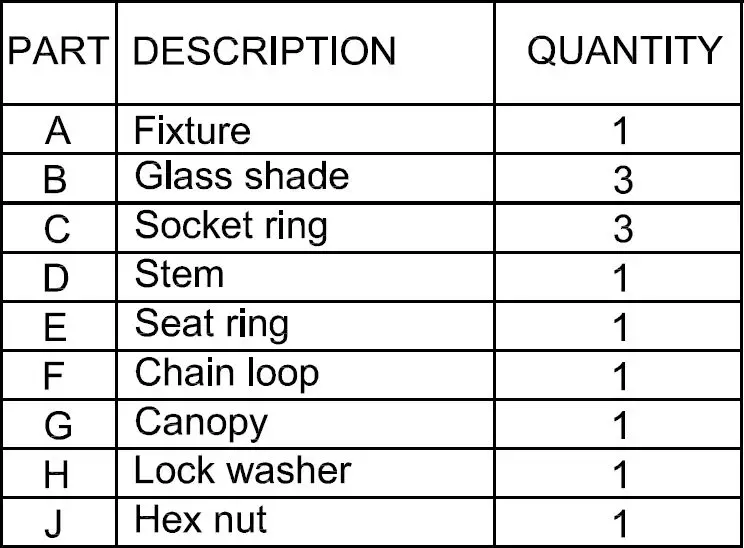
HARDWARE CONTENTS (not actual size)
Safety Information
Please read and understand this entire manual before attempting to assemble, operate or install the product.
CAUTION: Read instructions carefully and turn electricity off at main circuit breaker panel before beginning installation.
CAUTION: Risk of fire. Min. 90°C supply conductors. Consult a qualified electrician to ensure correct branch circuit conductor.
WARNING: If any Special Control Devices are used with this fixture, follow instructions carefully to assure full compliance with N.E.C. requirements. If there are any questions, contact a qualified electrical contractor.
CAUTION: All glass is fragile. Use care when handling glass shades and bulbs.
Preparation
- Before beginning installation, make sure all parts are included using the contents diagrams from page 1. If any part is missing or damaged, do not attempt to assemble, install or operate the product.
- Estimated assembly time: 30 minutes.
- Tools required for assembly (not included): Phillips screwdriver, pliers, wire stripper, safety glasses, electrical tape, ladder.
Care and Maintenance
- Shut off main power supply before cleaning product or changing light bulbs. To clean, wipe with damp cloth. Do not use abrasive cleaners or cleaners that contain alcohol.
Assembly Instructions
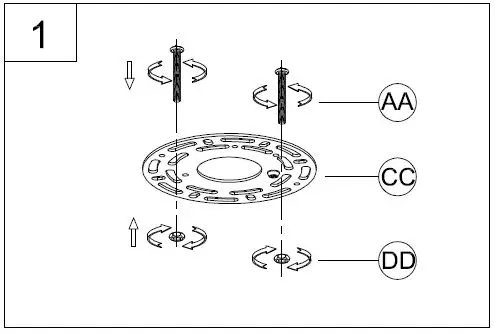
- Loosely thread the screws (AA) and the hex nuts (DD) onto the round mounting plate (CC) as shown. You now need to adjust the screw length according to the fixture canopy depth.

- Attach this assembly to the outlet box using the mounting screws supplied with the outlet box (not provided). Tighten securely.
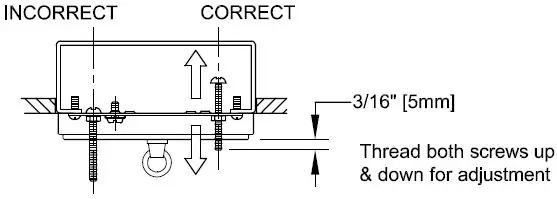
- Lift up the fixture and pass the screws (AA) through the two mounting hole in the fixture canopy. While holding the fixture with one hand, thread the screws (AA) in or out of the round mounting plate (CC) until 3/1611 of threads are showing. That should be enough to mount the fixture as instructed in ceiling step 7 & hanging step 8.

- Next, take the fixture down and go back and tighten the hex nuts (DD) up against the mounting plate (CC). You now should have the correct length of threads for mounting the fixture.

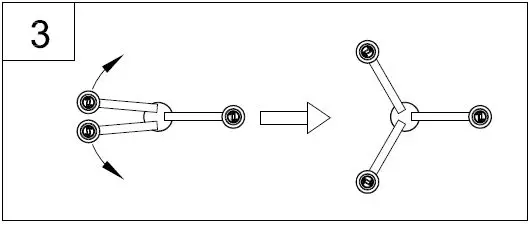
- Equally adjust the arms by carefully turning them out from the center.

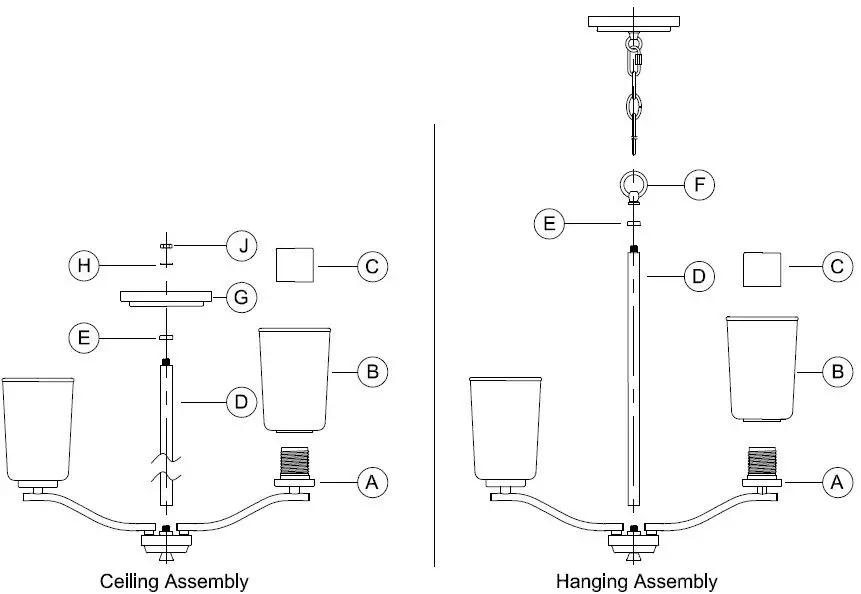
- Slip the fixture (A) wires through stem (D) and seat ring (E), thread stem (D) into fixture (A).
- Attach the seat ring (E) into the stem (D).

CEILING ASSEMBLY INSTRUCTIONS
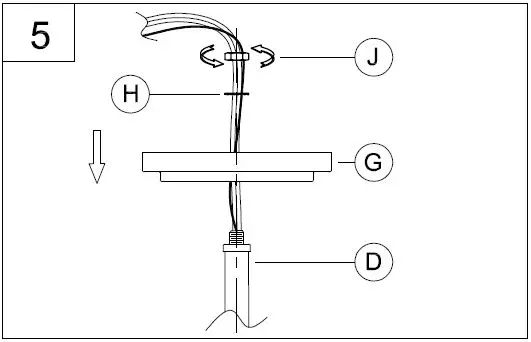
- Slip the fixture (A) wires through canopy (G), lock washer (H) and hex nut (J).

- Place canopy (G) and lock washer (H) down over nipple of stem (D) and secure in place with hex nut (J).
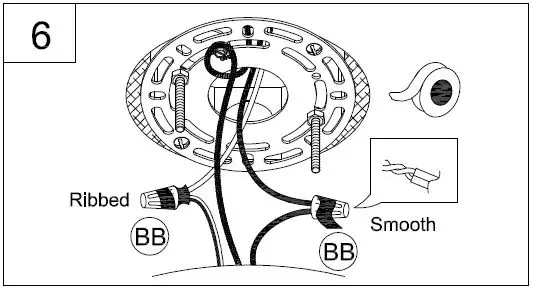
- Strip 3/8″ of insulation from the electrical wire ends. Using wire nuts (BB), connect RIBBED fixture wire to the WHITE supply wire from the outlet box; connect the SMOOTH fixture wire to the BLACK supply wire.
- Connect the fixture ground wire and supply ground wire using a wire nut or by fastening to the ground screw on the round mounting plate.
Push all wire connections into the outlet box.
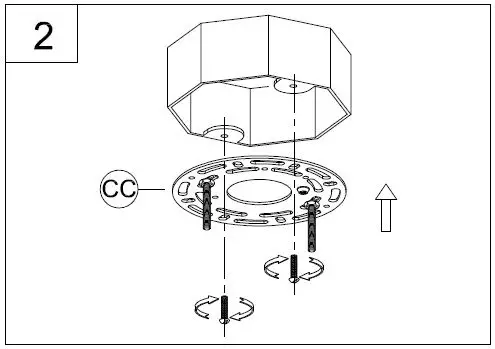
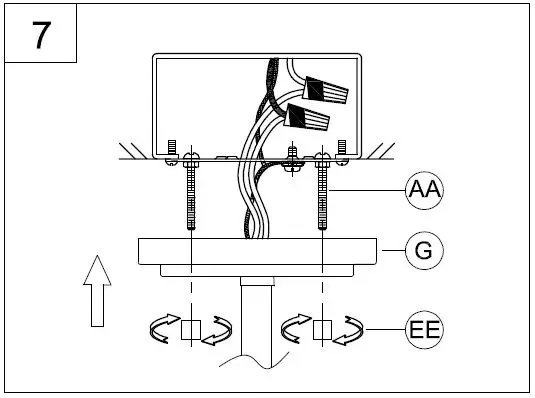
- 7. Pass the screws (AA) through the two holes in the canopy (G).
- Secure the fixture to the screws (AA) using the two cylinder nuts (EE). Tighten securely.

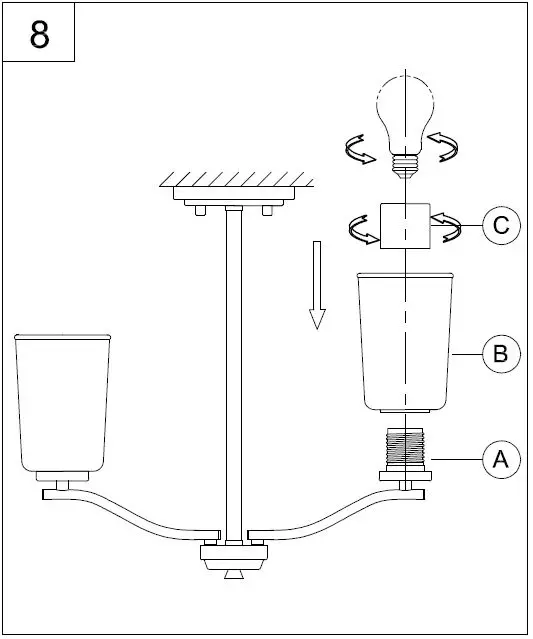
- 8. Attach the glass shade (B) to the fixture (A) using the socket ring (C) to secure it tightly.
- Thread the lamps (not included) into the fixture sockets. Use 60-watt MAX incandescent medium base, SBCFL or SBLED.

HANGING ASSEMBLY INSTRUCTIONS
5. Slip the fixture (A) wires through chain loop (F). Thread the chain loop (F) into stem (D).
Slide the canopy (G) and lock washer (H) down over nipple of chain loop (GG) and secure in place with hex nut (J).


