![]()
Powered by AUTEL
Web: www.otofixtech.com
Quick Reference Guide
OTOFIX IM1
Thank you for purchasing OTOFIX key programming tool. This tool is manufactured to a high standard and will provide years of trouble-free performance when used in accordance with these instructions and properly maintained.
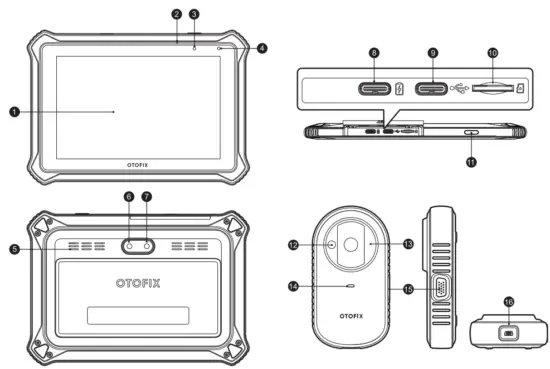
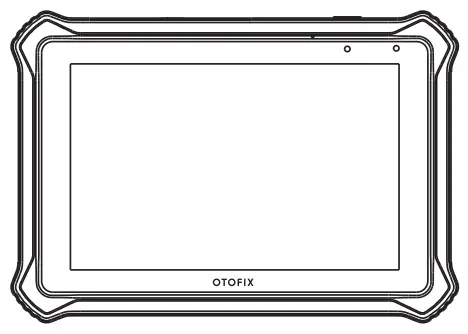
OTOFIX IM1
- 7-inch Touchscreen
- Microphone
- Power LED
- Ambient Light Sensor
- Loudspeaker
- Camera
- Camera Flash
- USB OTG/Charging Port
- USB Port
- Micro SD Card Slot
- Power/Lock Button
OTOFIX XP1 - Vehicle Key Chip Slot — holds the vehicle key chip.
- Vehicle Key Slot — holds the vehicle key.
- Status LED Light — indicates the current operating status.
- DB15-Pin Port — connects EEPROM Adapter and EEPROM Clamp Integrated MC9S12 Cable.
- Mini USB Port — provides data communication and power supply.

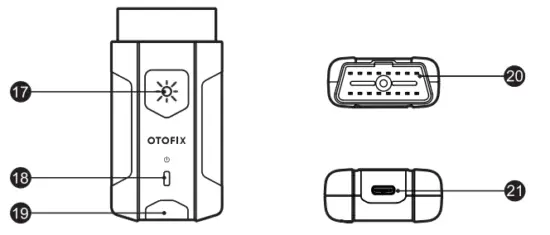
OTOFIX Val - Flashlight Power Button
- Power LED
- Vehicle/Connection LED
- Vehicle Data Connector (16-pin)
- USB Port
OTOFIX VI Description
| LED | Color | Description |
| Power LED | Yellow | VCI is powered on and performing self-check. |
| Green | VCI is ready for use. | |
| Flashing Red | Firmware is updating. | |
| Vehicle/Connection LED | Green | • Solid Green: VCI is connected via USB cable. • Flashing Green: VCI is communicating via USB cable. |
| Blue | • Solid Blue: VCI is connected via Bluetooth. • Flashing Blue: VCI is communicating via Bluetooth. |
Getting Started
![]() IMPORTANT: Before operating or maintaining this unit, please read this Quick Reference Guide and the User Manual carefully, and pay extra attention to the safety warnings and precautions. Use this unit correctly and properly. Failure to do so may cause damage and/or personal injury and will void the product warranty.
IMPORTANT: Before operating or maintaining this unit, please read this Quick Reference Guide and the User Manual carefully, and pay extra attention to the safety warnings and precautions. Use this unit correctly and properly. Failure to do so may cause damage and/or personal injury and will void the product warranty.
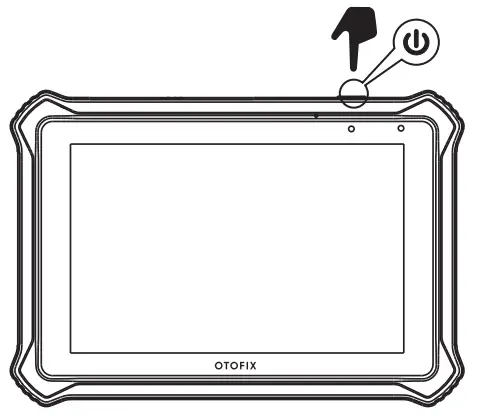 • Long press the Lock/Power button to turn on the key programming tool.
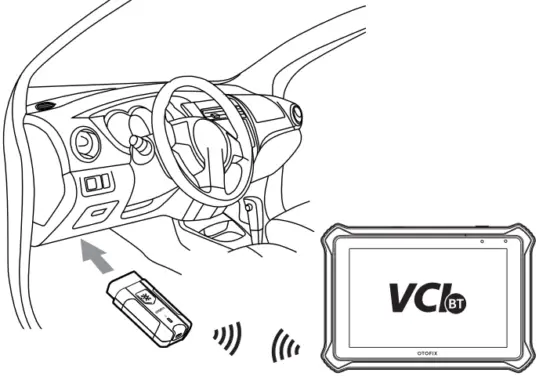
• Connect the VCI to the vehicle’s DLC (OBD II port), which is generally located under the vehicle dashboard. Follow the on-screen instructions to connect the VCI to the OTOFIX IM1 key programming tool via Bluetooth.
• Software Update: ensure the tablet is connected to the Internet and tap Update on the home screen to view all the available updates.
Immobilizer Function
This function requires a connection between the vehicle, the OTOFIX IM1 key programming tool, and the XP1.
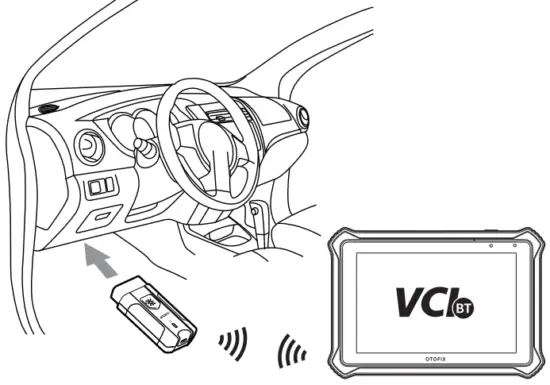
• Connect the vehicle and the key programming tool via Bluetooth or USB cable.
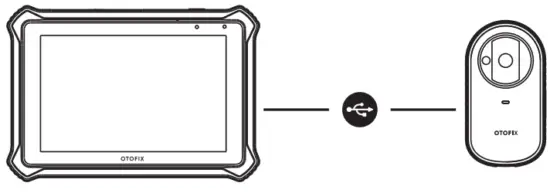
• Connect the key programming tool and the XP1 with the supplied USB cable.
• Select the Immobilizer function on the main menu, and follow the onscreen instructions to continue.
Programming Function
This function requires a connection between the OTOFIX IM1 key programming tool and the XP1.


