QQr Q02 Tire Pressure Monitoring System
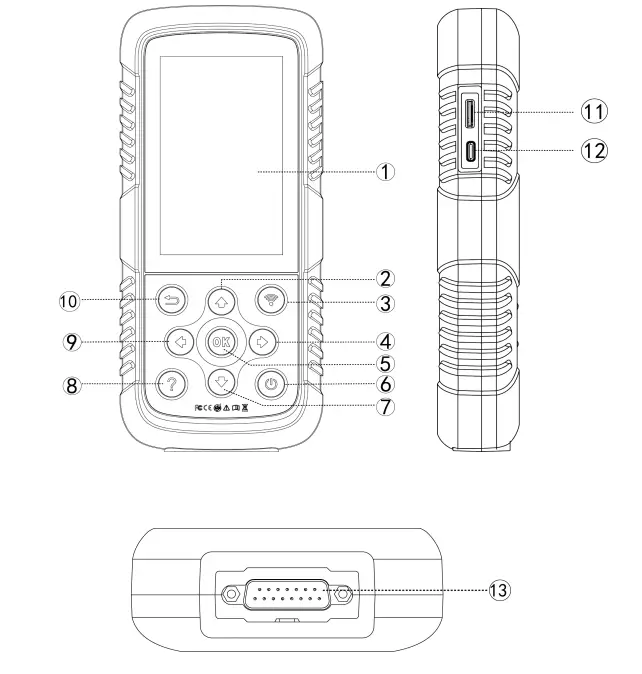
| Serial number | Name | Description |
| ① | Touch screen | Display menu and test results |
| ② | Up button | Option moves up |
| ③ | Activation key | Send confirmation when TPMS wirelessly recognizes and programs |
| ④ | Right button | Option moves to the right |
| ⑤ | Confirm button | Confirm OK |
| ⑥ | ON/OFF button | Press 3 seconds to turn on/off |
| ⑦ | Down button | Option moves down |
| ⑧ | Help button | Providing help information |
| ⑨ | Left button | Option moves to the left |
| ⑩ | Return button | Return to the previous menu interface |
| ⑪ | TF vehicled | TF vehicled insert port |
| ⑫ | Type-C interface | Connect the USB cable to charge the tire pressure matcher |
| ⑬ | OBD test interface | Tire pressure matching instrument connected to vehicle ECU through OBD interface |
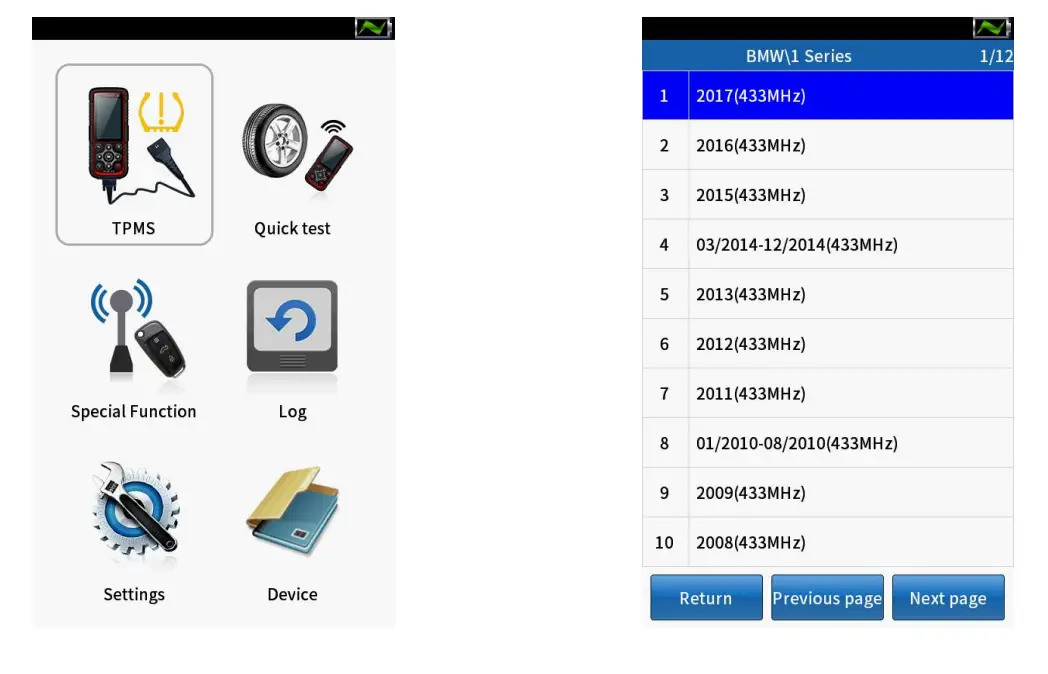
Basic TPMS Function
Read/Scan Sensor
On main menu select TPMS, select Make, Model and Year. 2.1 Read/Scan Sensor
Scan Sensor
① Select [TPMS diagnosis].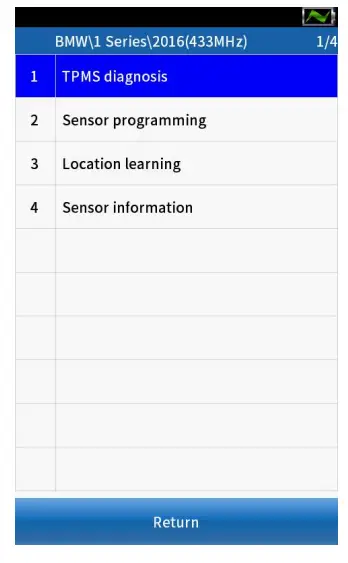
② Click [Confirm] to continue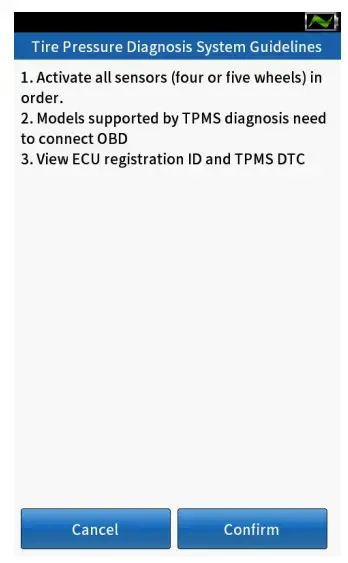
③ Selet tires, then press【 ![]() 】button to activate all sensors installed on the test vehicle separately.
】button to activate all sensors installed on the test vehicle separately.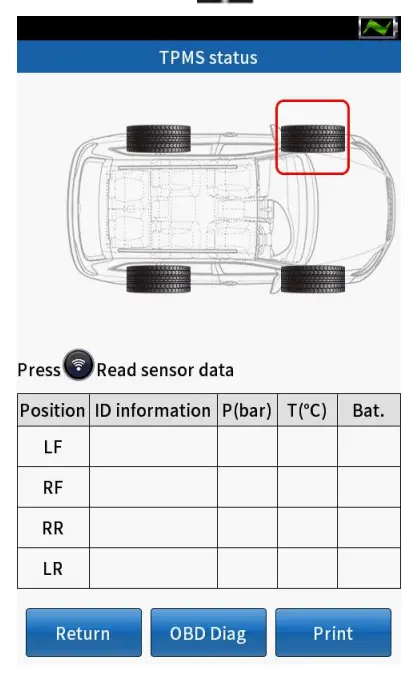
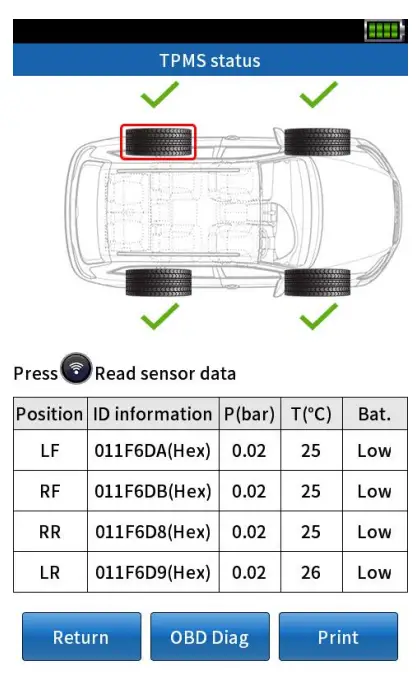
 | Successful activation |
 | Failed activation |
 | Repeat activation |
OBD diagnostic function
① Click [OBD Diag] to [Prompt message].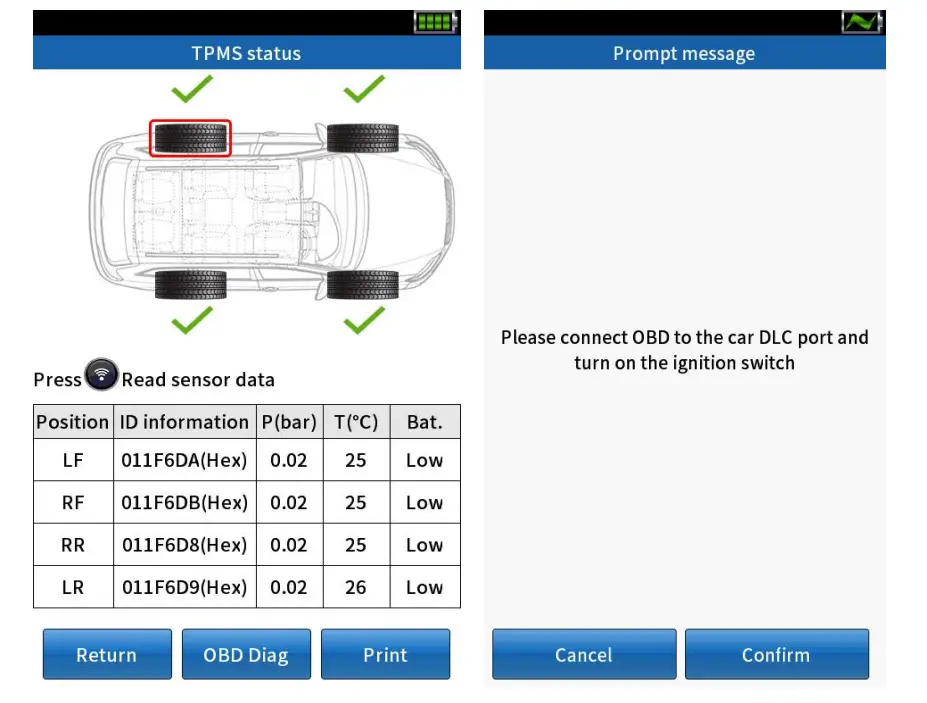
② Connect the OBD cable to the vehicle DLC interface, and turn on the ignition switch.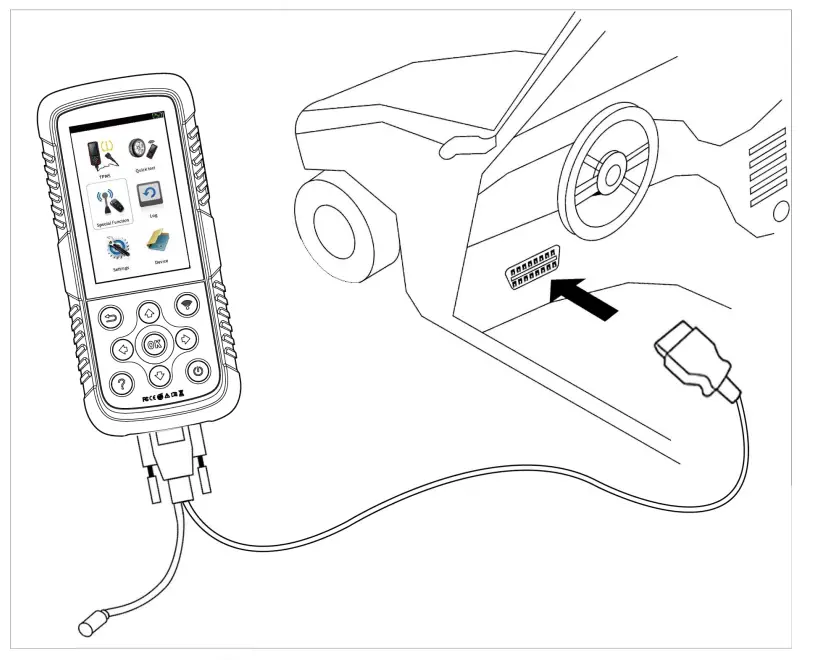
③ Click [Confirm], the screen will display the comparison between the ID value stored in the computer board and the tire ID value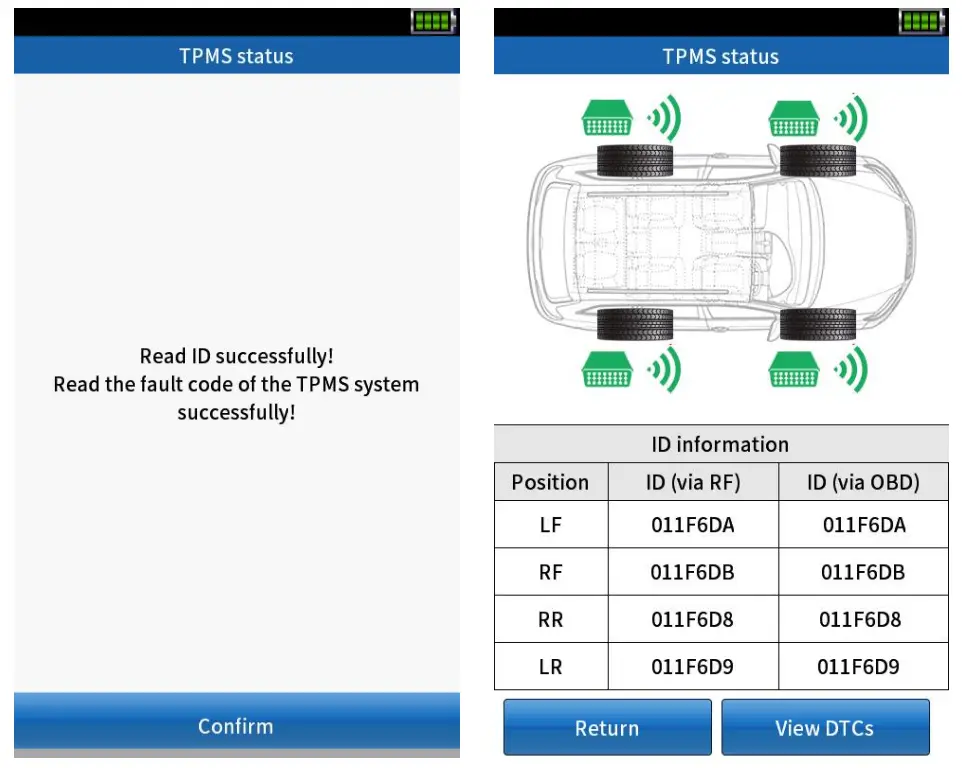
 | Green | Computer Board ID and Sensor ID Matching |
 | Red | Computer board ID does not match sensor ID |
④ Select [View DTCs].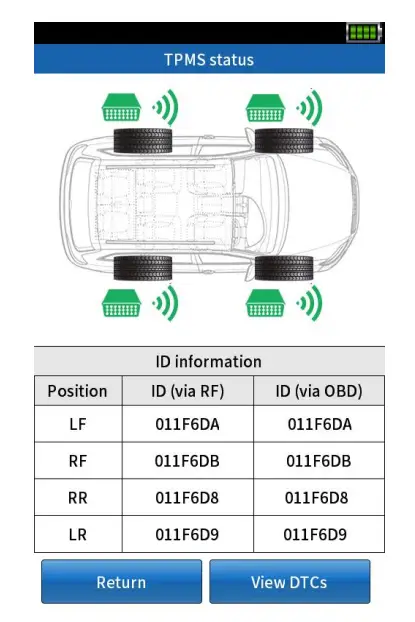
⑤ Click [Clear] to automatically clear the fault code and re-retrieve the computer board to ensure that all fault codes have been deleted; or click [Save] to store the fault. Code and can be viewed in the “data record”.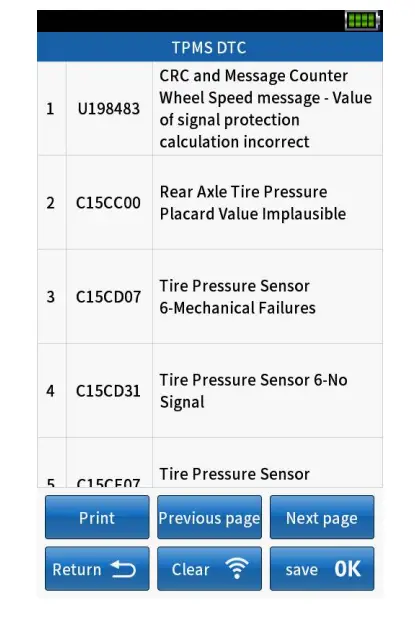
Sensor programming
Copy by OBD
① After the vehicle selection is completed, select [Copy by OBD] in [Sensor programming].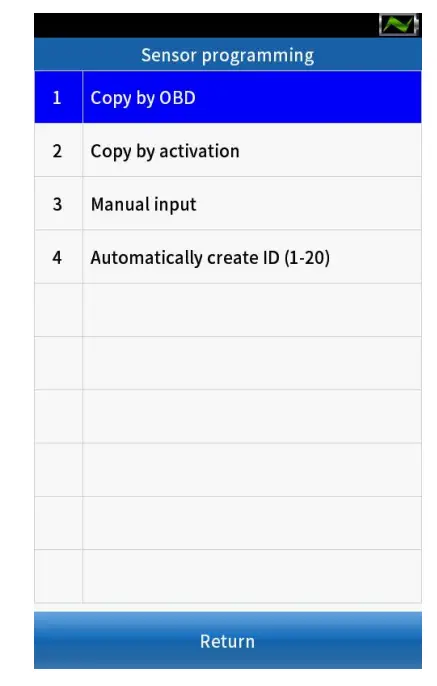
② connect the OBD line to the vehicle DLC interface and turn on the ignition switch.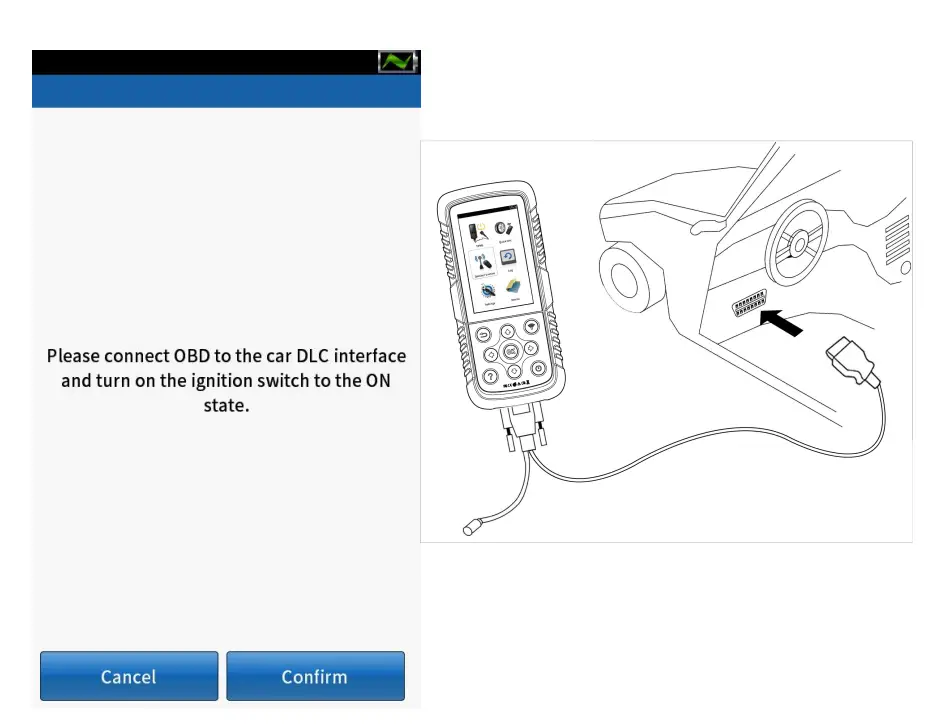
③ Click [Confirm], the device automatically read thesensor IDsaved in the device board and display it on thescreen.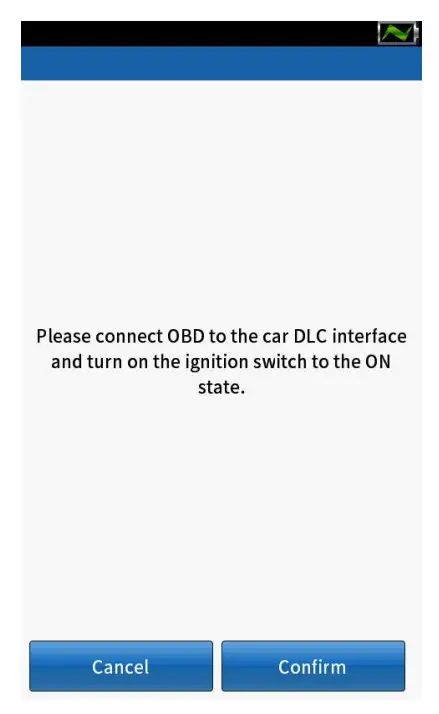
④ Place a QQr sensor within 10cm from the top of device.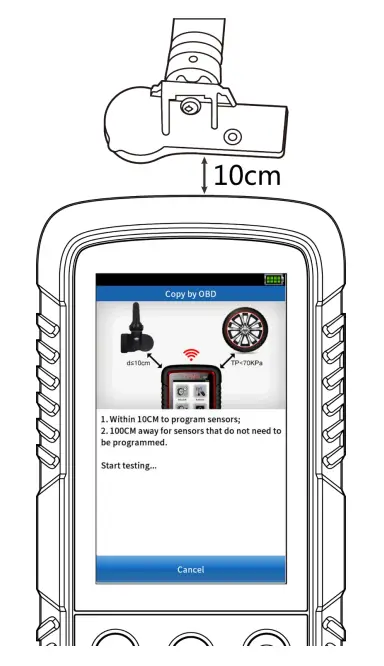
⑤ Select a sensor ID and click [Programming] to start detecting nearby sensors.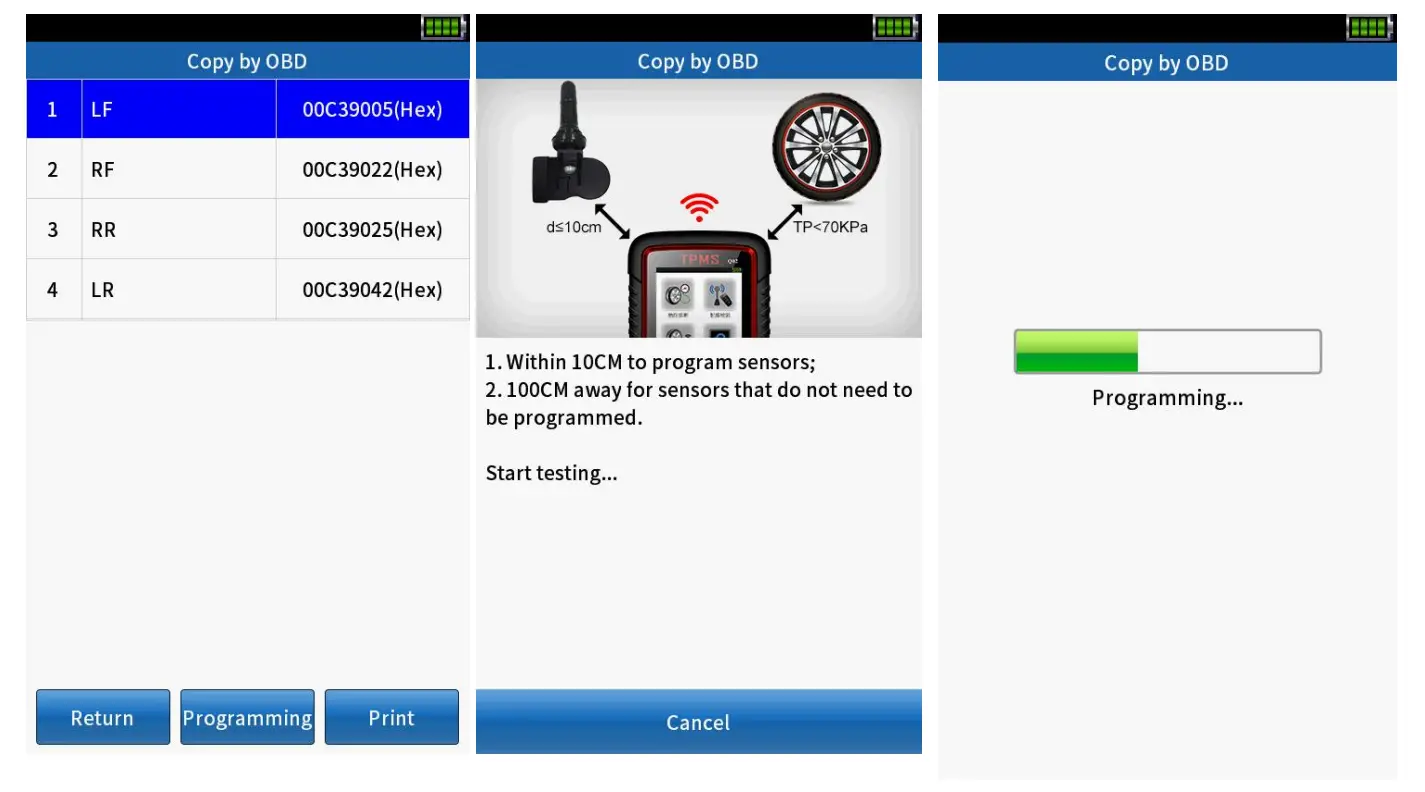
⑥ Click [Return] to repeat steps ③~⑤tocontinue programming other sensors.
Copy by activation
① After the vehicle selection is completed, select [Copy by activation] in [Sensor programming].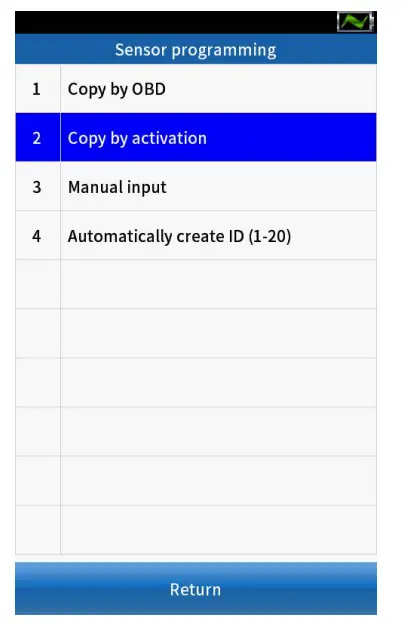
② Click【Activate】or【 ![]() 】to start activating the sensor.
】to start activating the sensor.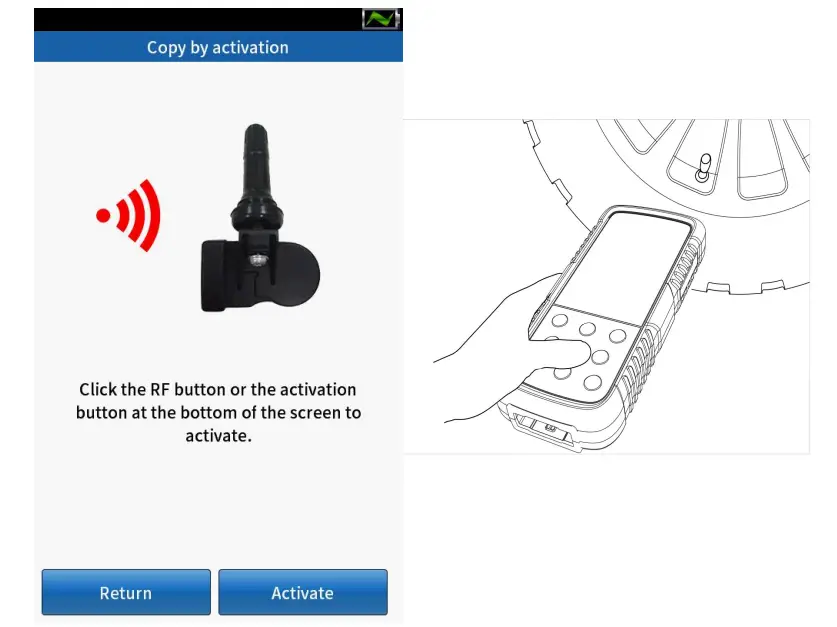
③ If the activation is successful, the OE sensor IDis displayed at the bottom of the screen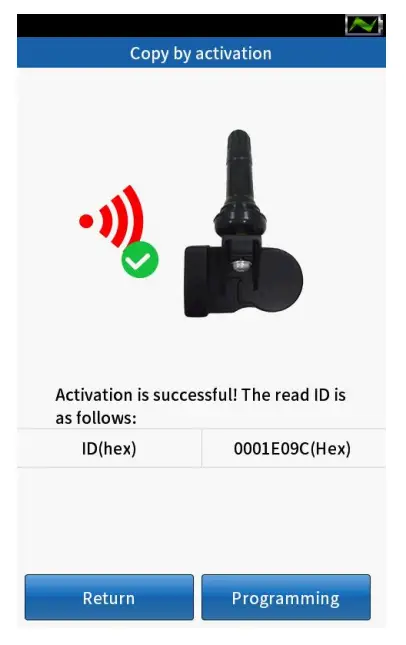
④ Place a new QQr sensor on the top of the device.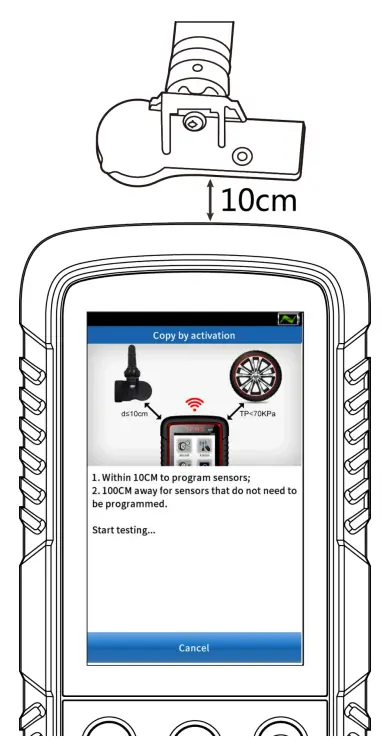
⑤ Click [Programming], the matching instrument starts to detect nearby sensors.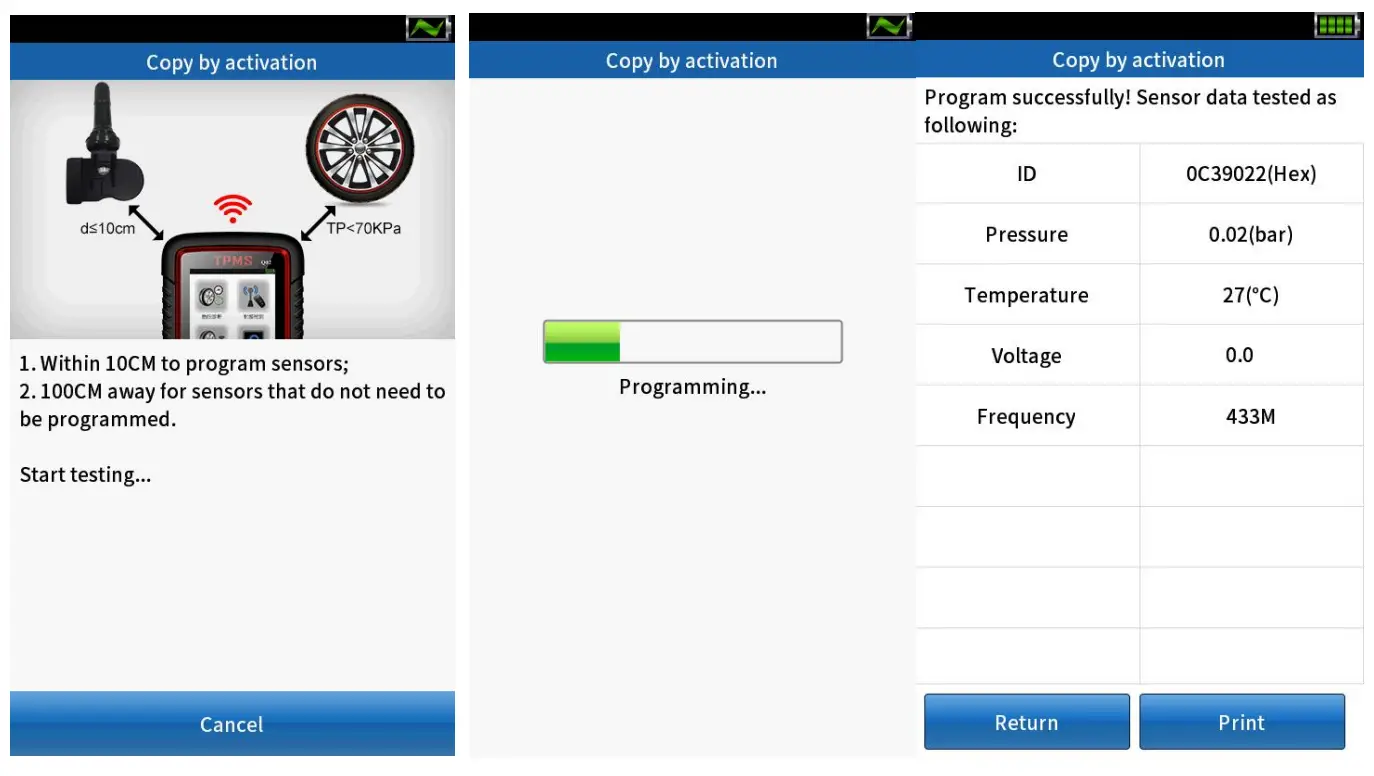
Manual input
① After the model selection is completed, select [Manual Input] in [Sensor programming].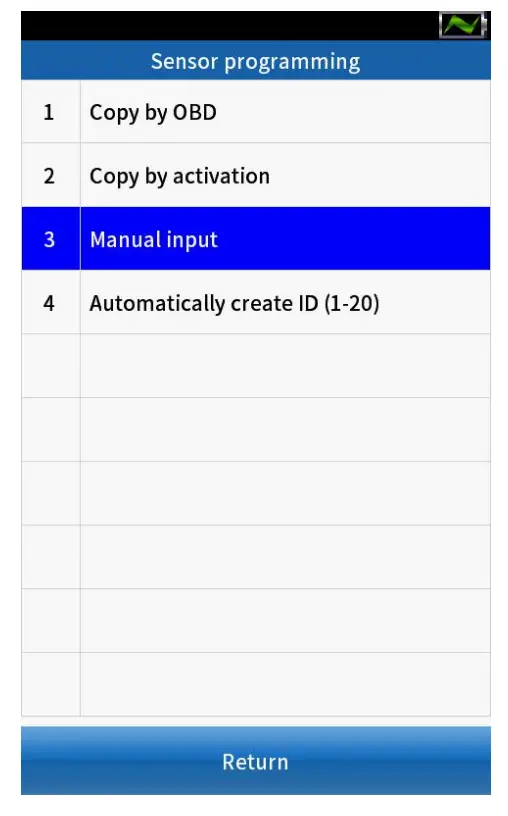
② Enter the 8-digit sensor ID number, click [Confirm] .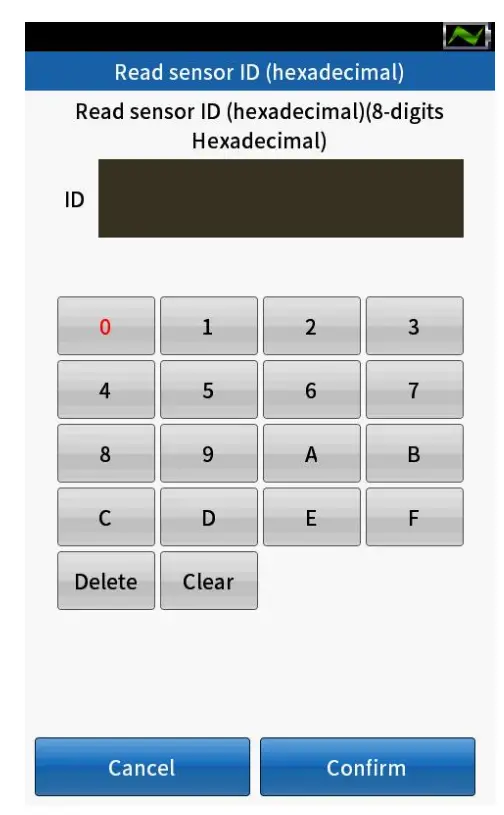
③ Click [Confirm] to continue programming.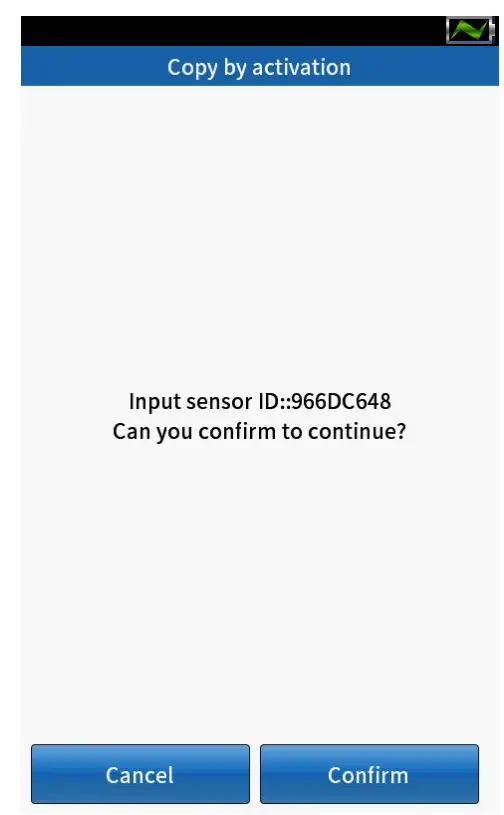
④ Automatically detects the nearby sensor; place a QQr sensor on the top of the tool within 10cm.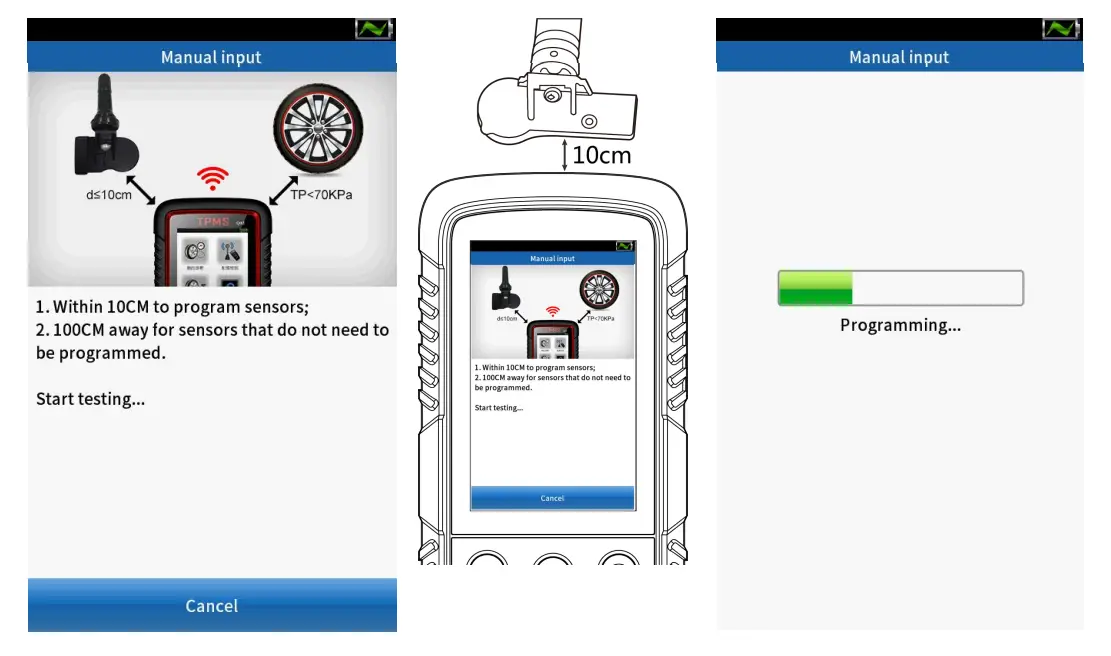
⑤ Program successfully, sensor data displayed on the screen.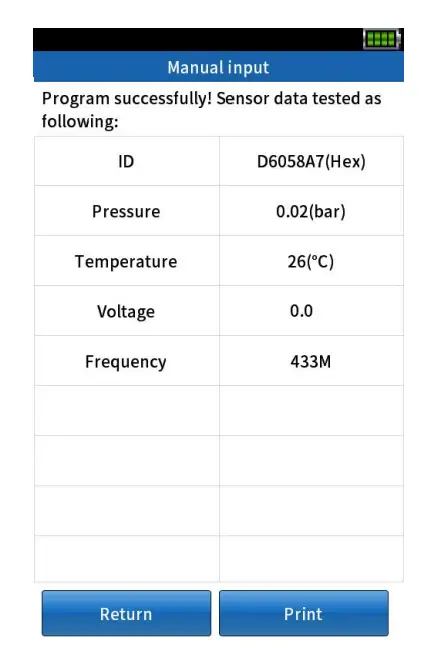
Automatically create ID(1-20)
① After the model selection is completed, select [Automatically create ID (1-5)] in [Sensor programming].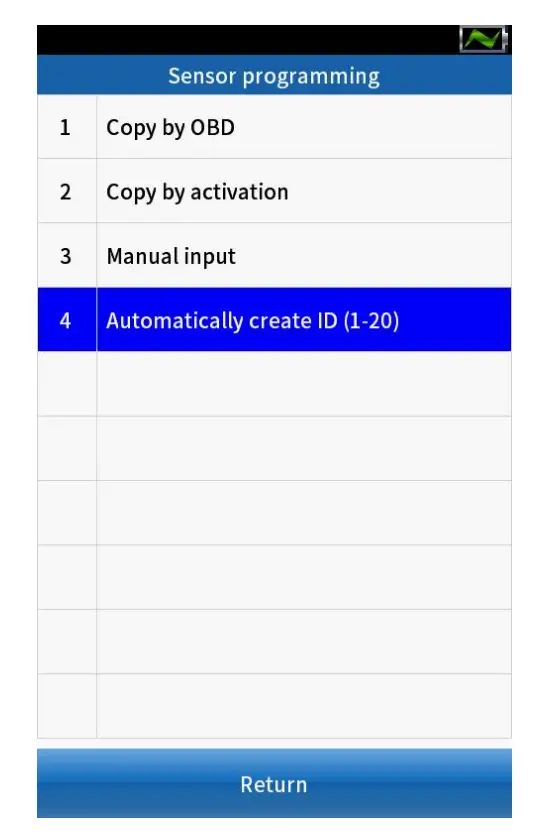
② Place 1-5 QQr sensors within 10cm of the tool; The instrument automatically detects nearby sensors.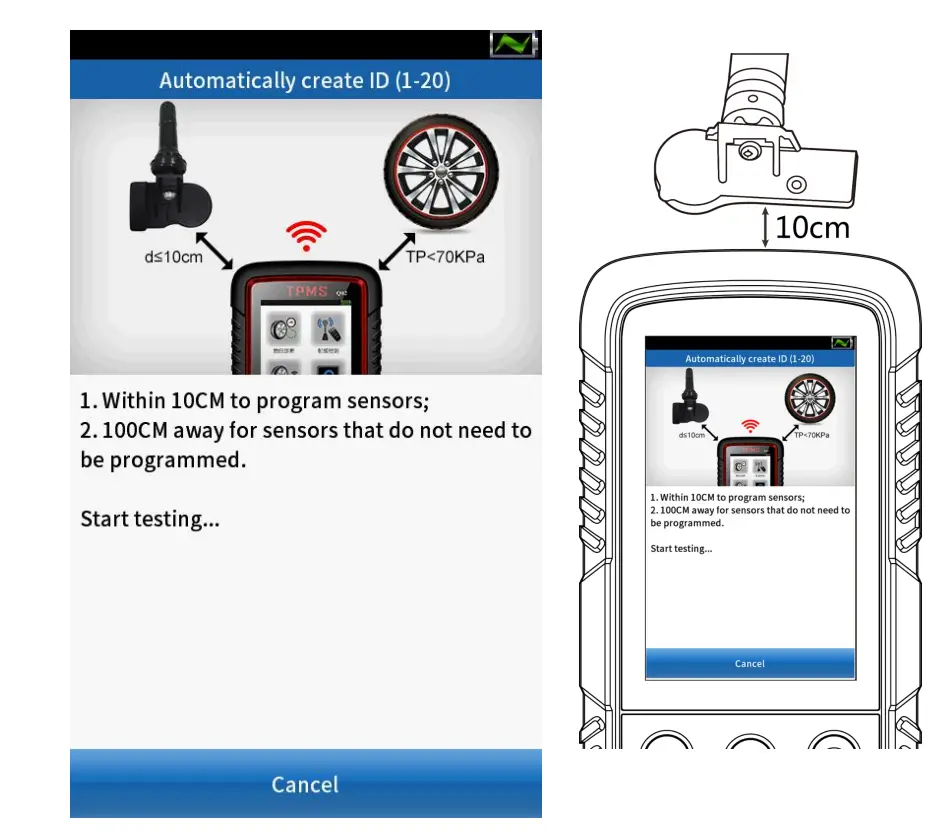
③ When a sensor is detected, click [Continue] to start programming.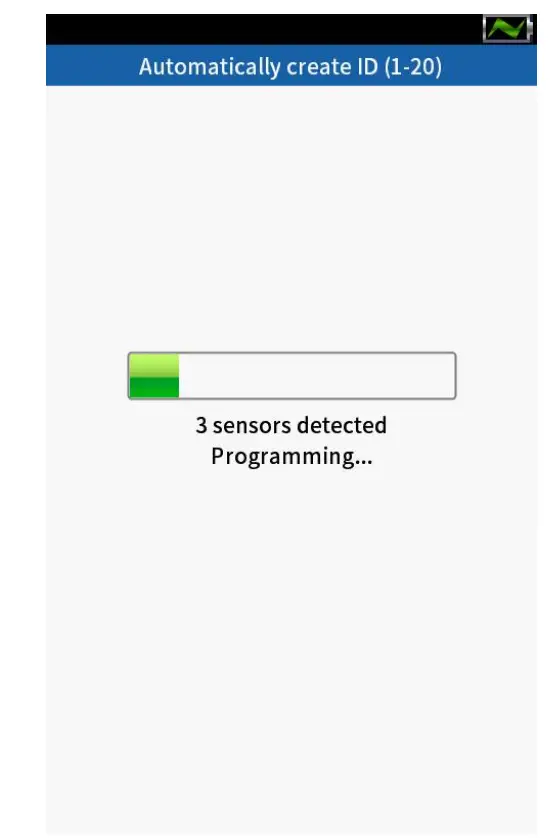
④Programsuccessfully, sensorID and SN displayedonthescreen.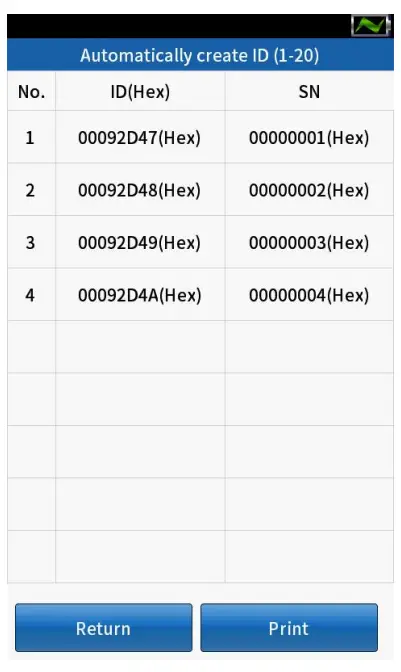
Location learning
OBD learning
① After the vehicle selection is completed, select [Location Learning].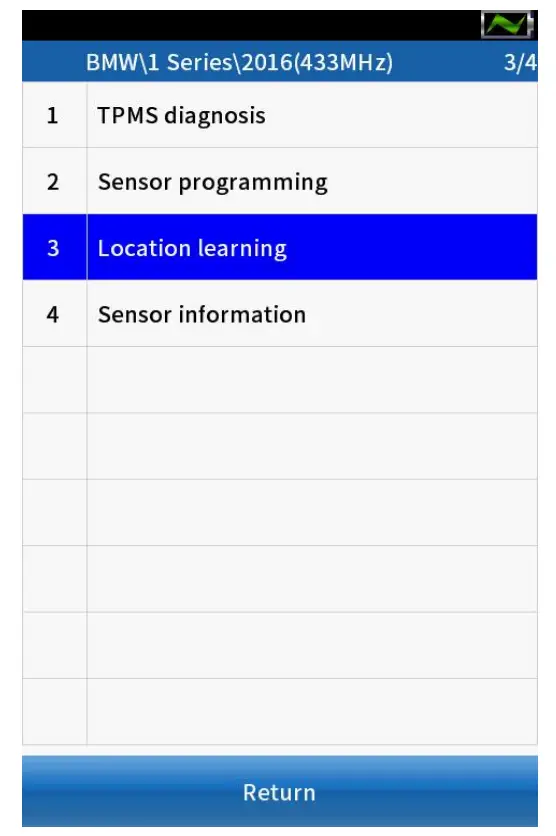
② Select [Confirm] to use the previously stored data, or select [Cancel] to use the new data.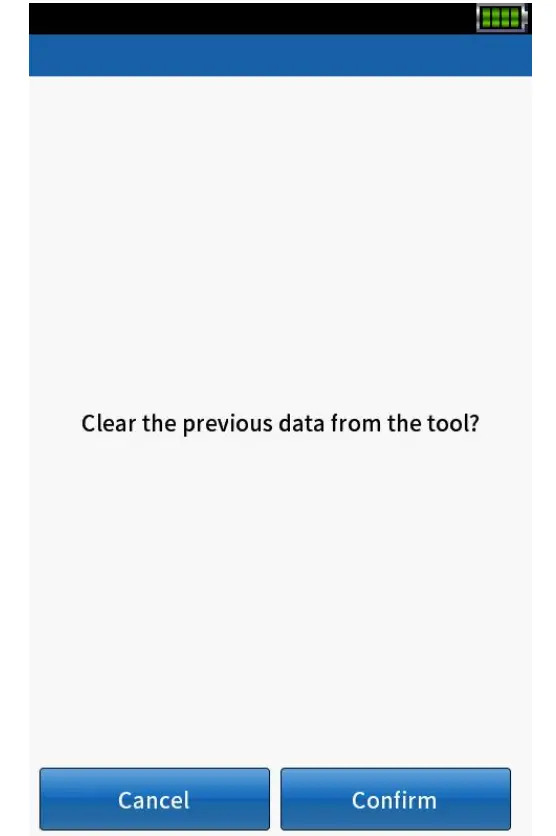
③ At this point, please read the “Learning guide” carefully and press “Confirm” to continue.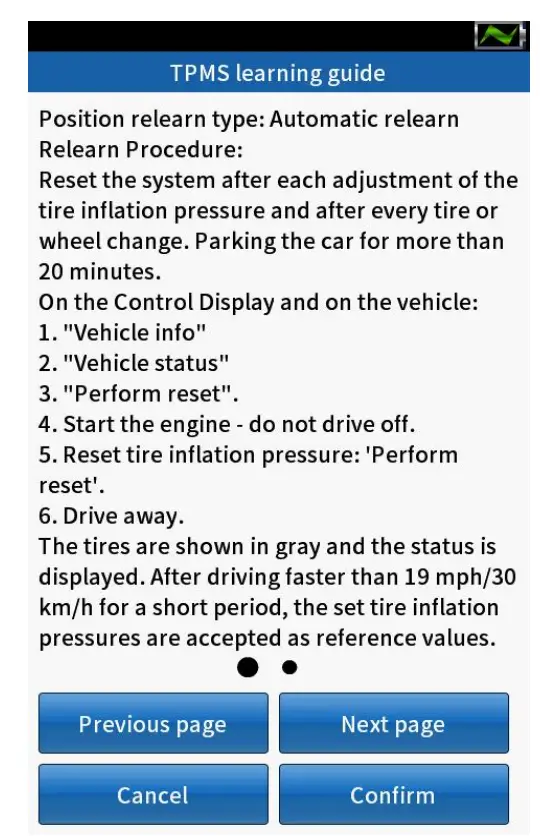
④ Press【 ![]() 】to activate all sensors installed on the vehicle separately
】to activate all sensors installed on the vehicle separately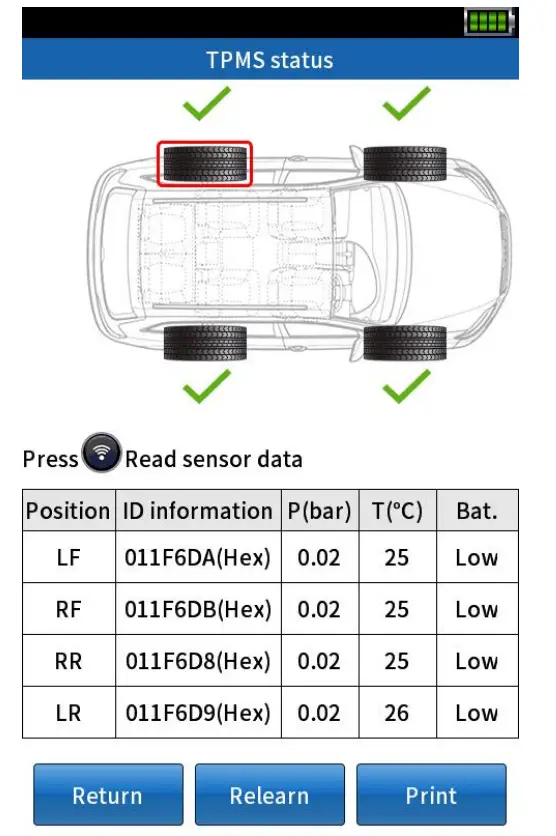
Note: If you select [Confirm] in step 2 tousethepreviously stored data, you do not needtoactivatethe sensor again.
The activation status prompt is as follows:
| Successful activation |
| Failed activation |
| Repeat activation |
⑤ Click [Relearn], and the device will prompt the user to connect to the vehicle.
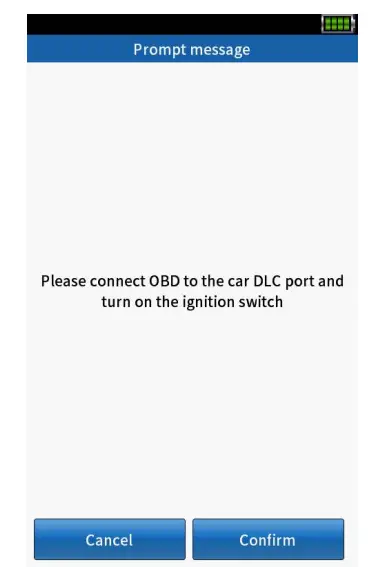
⑥ Connect OBD to the car DLC port, click [Confirm] to continue.
⑦ OBD learning successful, click [Confirm] to view the sensor ID information.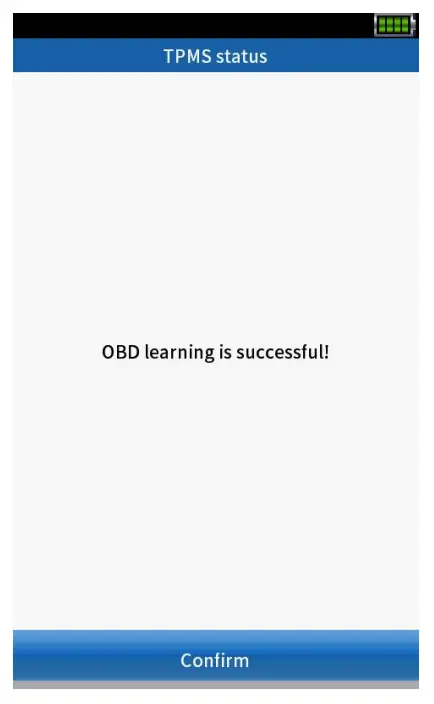
⑧ Select [Erase DTCs] to automaticallyerasethefault code in the device board andrecheckthedevice board to ensure that all fault codeshavebeen deleted.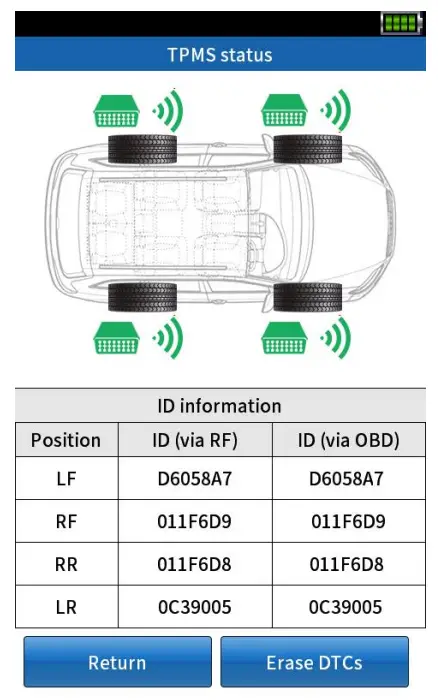
![]() Special function
Special function
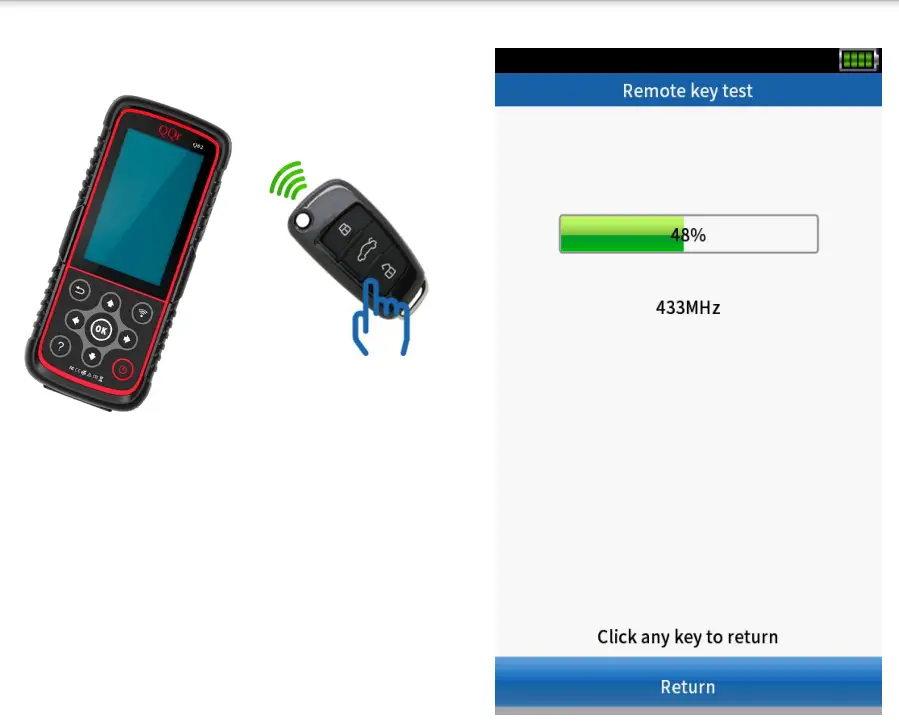
Use QQr’s TPMS device to test Remote ke
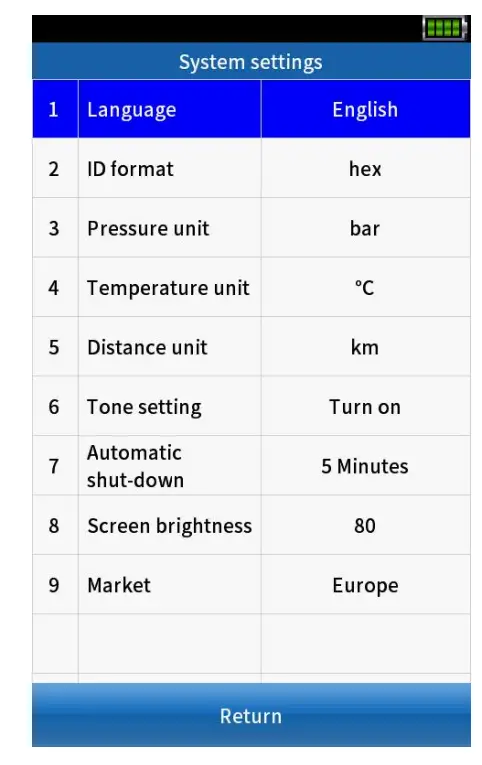
![]() System settings
System settings
 Update
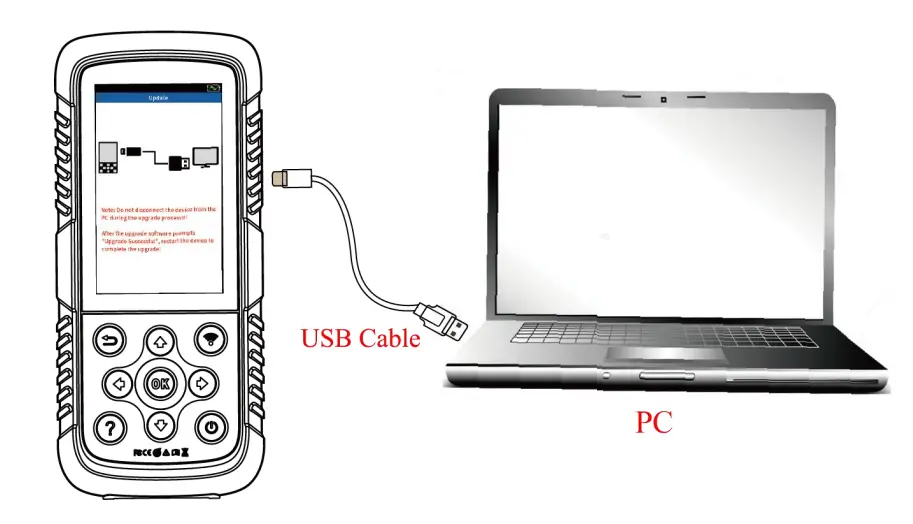
- Download the upgrade tool “DSO” in the computer.

- Using the USB cable to connect the device to computer.

- Making sure the upgrade tool can recognizethe SD card path normally.

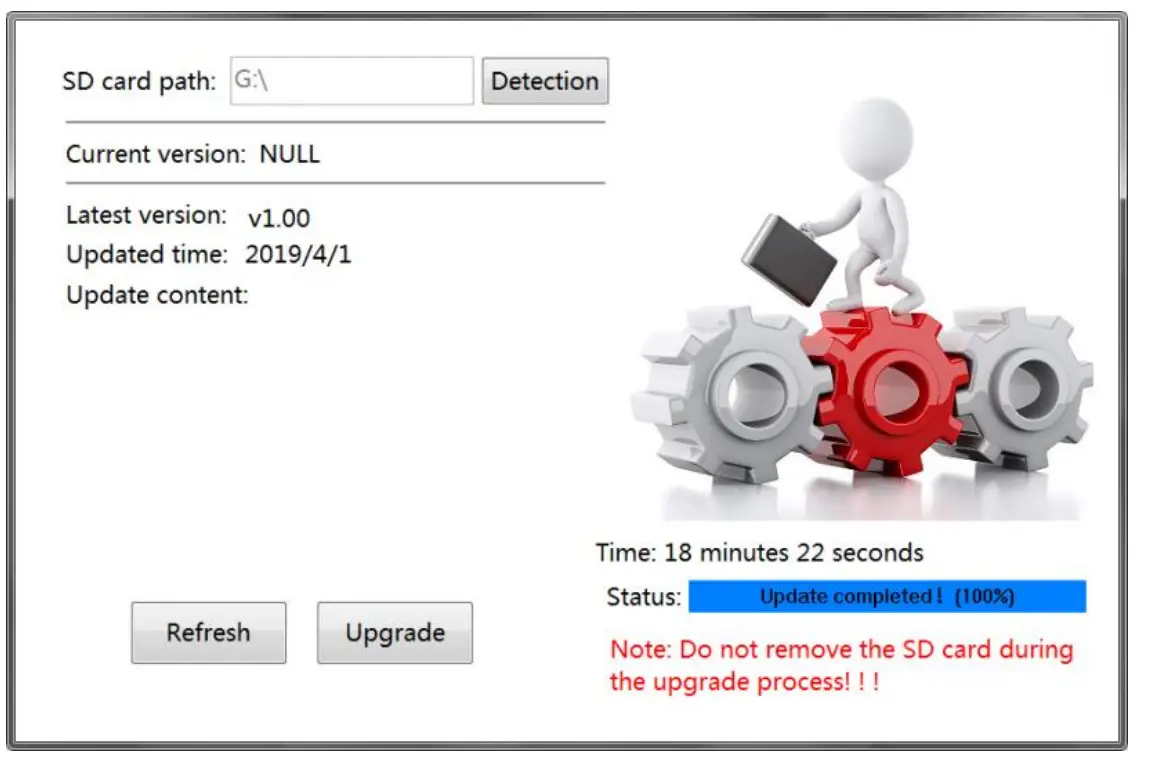
- Visit the website: http://www.dajin-tech.com/ technical- support-and-update/, download the upgrade tool: QQR_PC_Updatetool.rar.
- Click [Upgrade] to start the program upgrade.

- Check the progress level on the right side. When “Update completed! (100%)” is displayed, complete the upgrade


FCC Warning Statement: Changes or modifications to this unit not expresslyapproved by the party responsible for compliance could voidtheuser’sauthority to operate the equipment. This equipment has beentestedandfoundto comply with the limits for a Class B digital device, pursuant toPart 15of theFCC Rules. These limits are designed to provide reasonable protectionagainst harmful interference in a residential installation. This equipment generates, uses and can radiate radio frequency energy and, if not installedandusedinaccordance with the instructions, may cause harmful interferencetoradiocommunications. However, there is no guarantee that interference will not occur inaparticular installation. If this equipment does cause harmful interference toradioor television reception, which can be determined by turning the equipment off andon, the user is encouraged to try to correct the interference by oneor moreof the following measures:
- Reorient or relocate the receiving antenna.
- Increase the separation between the equipment andreceiver.
- Connect the equipment
into an outlet on a circuit different fromthat towhich the receiver is connected. – Consult the dealer or an experienced radio/TVtechnicianfor help. This device complies with Part 15 of the FCC Rules. Operationissubject tothefollowing two conditions: (1) this device may not cause harmful interference, and (2) this device must accept any interference received, includinginterference that may cause undesired operation. FCC Radiation Exposure Statement The device has been evaluated to meet general RF exposure requirement. Thedevice can be used in portable exposure condition without restriction.


