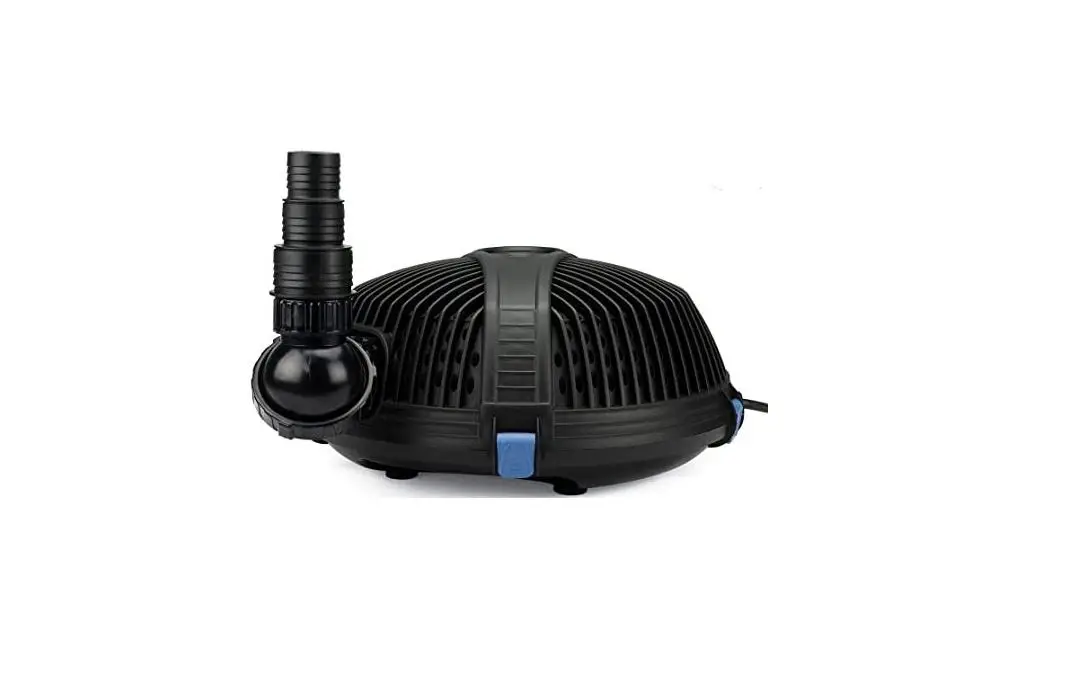
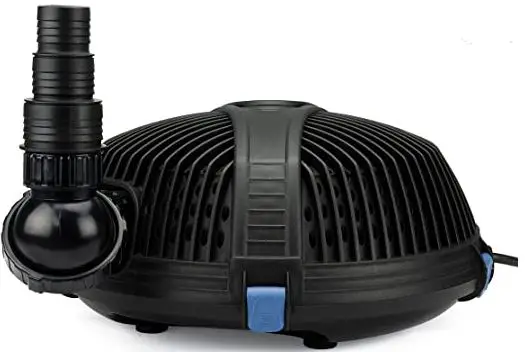
Aquascape 91011 Aquaforce Pond Pump
Thank you for choosing the AquaForce® pump. At Aquascape, our goal is to supply our customers with the best-valued products in water gardening. We hope you enjoy your purchase and thank you for choosing Aquascape. Your Paradise. Our Passion.®
The AquaForce® asynchronous solids-handling waterfall and filter pumps accomplish what most other pumps only aspire to achieve. The combination of energy-efficient performance, flow, and ease of maintenance make this pump the ideal choice for discriminating pond owners. The AquaForce® protective pre-filter cage allows the pump to be placed directly into the pond. AquaForce® pumps are able to pump solids up to one-quarter of an inch, making it ideal for use with external pressure filters or Aquascape waterfalls-type filter systems. The AquaForce® can also be used as a de-icer to help prevent winter fi sh loss by keeping a hole open in the ice during the cold winter months. The pump’s powerful water flow, positioned just below the surface of the water, will ensure critical oxygen levels are maintained in the pond throughout the winter.
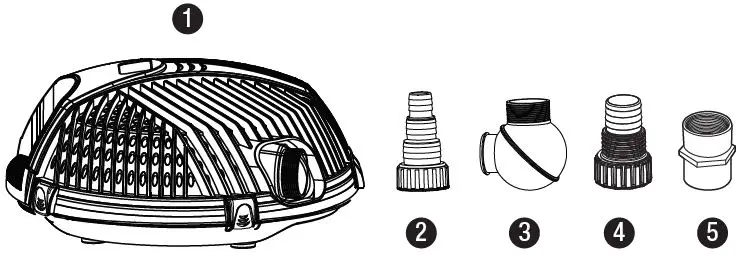
Contents
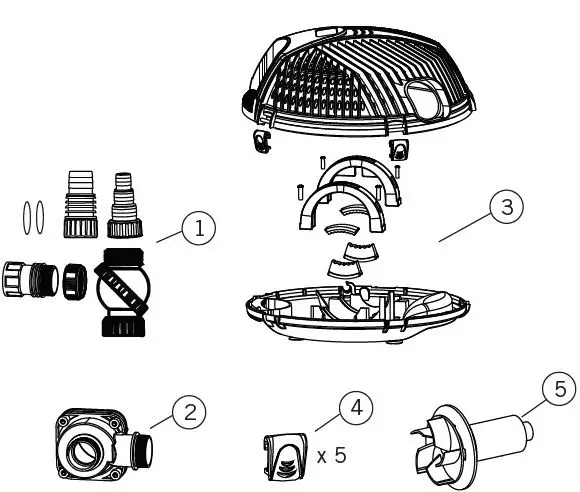
| No. | Description |
| 1. | (1) AquaForce Pump |
| 2. | (1) 1”, 1.25”, 1.5” Multi-Hose Adapter |
| 3. | (1) 1.5” Rotational Ball Output |
| 4. | (1) 1.5”, 2” Multi-Hose Adapter |
| 5. | (1) 1.5” Female Fitting |
Safety Information
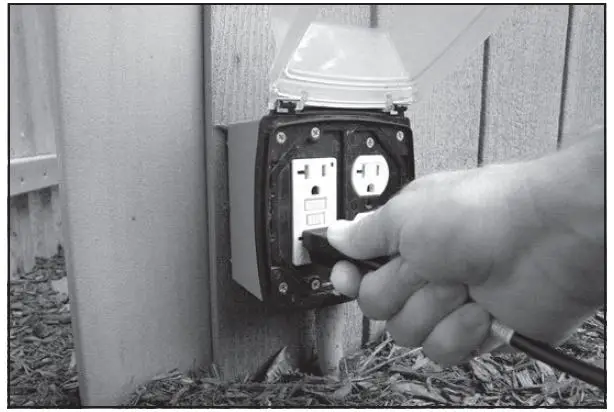
- Have a qualifi ed electrician install a properly grounded receptacle outlet, acceptable for outdoor use and protected from snow and rain.
- Inspect cord before using.
- Do not use extension cords.
- Any wiring of pumps should be performed by a qualifi ed electrician to ensure code compliance and user safety.
- Unplug the pump at the receptacle outlet when not in use and before removal from the pond.
- To reduce risk of electrical shock, all wiring and junction connections should be made per local codes. Requirements may vary depending on usage and location.
- The power cable should be protected at all times to avoid punctures, cuts, bruises, and abrasions.
- Never handle power cords with wet hands.
- Do not remove the cord and strain relief. Do not connect conduit to pump.
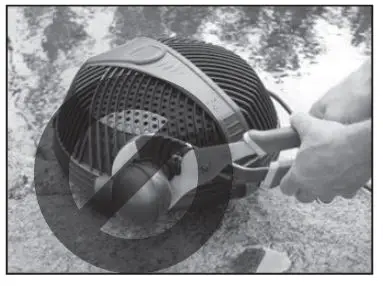
- Do not use a power cable to lift the pump.
| AQUAFORCE® PUMP SPECS | |||||
| Model Number | 1000 | 1800 | 2700 | 3600 | 5200 |
| Item Number | #91011 | #91112 | #91012 | #91113 | #91013 |
| Average Pond Size Recommendation | For Ponds up to 2,500 gallons | For Ponds up to 3,500 gallons | For Ponds up to 5,500 gallons | For Ponds up to 7,500 gallons | For Ponds up to 10,000 gallons |
| Maximum Flow Rate | 1,070 GPH | 2,149 GPH | 2,695 GPH | 3,868 GPH | 5,284 GPH |
| Maximum Head Height | 10 ft | 16.5 ft | 14 ft | 18 ft | 24 ft |
| Motor Type | Asynchronous | Asynchronous | Asynchronous | Asynchronous | Asynchronous |
| Wattage | 55 | 160 | 147 | 215 | 360 |
| Amperage | .51 | 1.33 | 1.25 | 1.8 | 3 |
| Power Cord Length | 25 ft | 25 ft | 25 ft | 25 ft | 25 ft |
| Pump Discharge Diameter | 1.5” MPT | 1.5” MPT | 1.5” MPT | 1.5” MPT | 1.5” MPT |
| Multi-Hose Fitting Diameters | 1”, 1.25”, 1.5”, 2” | 1”, 1.25”, 1.5”, 2” | 1”, 1.25”, 1.5”, 2” | 1”, 1.25”, 1.5”, 2” | 1”, 1.25”, 1.5”, 2” |
| Warranty | 3 Year Limited | 3 Year Limited | 3 Year Limited | 3 Year Limited | 3 Year Limited |
Installation
- Always operate the pump fully submerged. Failure to do so will overheat the pump and cause it to fail, thus voiding the warranty. DO NOT OPERATE DRY.
- Use only in fully assembled state, and be sure that both the upper and lower cage screens are snapped together. Failure to operate the pump without the fi lter cage closed will allow large debris to enter the pump, causing the pump to fail and voiding the warranty.
- Do not wear loose clothing that may become entangled in the impeller or other moving parts.
- Keep clear of suction and discharge openings. DO NOT insert fingers in the pump with power connected.
- Do not pump hazardous materials or liquids, such as oil, saltwater, or organic solvents.
- Do not block or restrict discharge.
- Products returned must be cleaned, sanitized, or decontaminated, as necessary prior to shipment so as to ensure that employees will not be exposed to health hazards in handling said material. All applicable laws and regulations shall apply.
IMPORTANT: Aquascape, Inc. is not responsible for losses, injury, or death resulting from a failure to observe these safety precautions, misuse or abuse of pumps or equipment.
AQUAFORCE® SPECIFICATIONS
- Input Voltage: 120V AC
- Input Frequency: 60 Hz
- Submersible pump
- For outdoor or indoor use
- Thermally protected
- This pump has been evaluated for use with freshwater only
- Input Amps & Wattage: See chart on next page
Typical Installation in an ecosystem water garden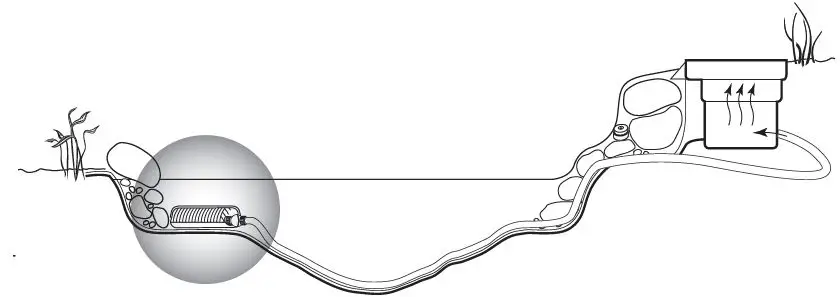
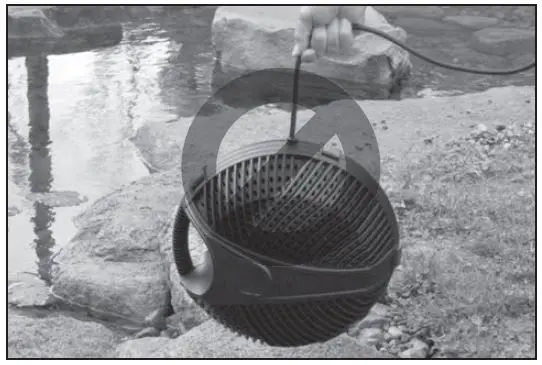
- The AquaForce® Pump is designed to be submerged directly into the pond. To maximize pond circulation, locate the AquaForce® pump as far away as possible from the location of the water
entering back into the water feature. - It is recommended that the pump NOT be positioned in the deepest area of the pond. This will protect the fi sh by preventing the pond from completely draining in the case of leak in the plumbing or fi lter. Bricks or stones can be used, if needed, to raise the pump up off the bottom of the pond.


- The AquaForce® includes a wide assortment of fittings to choose from. Select the appropriate fitting(s) needed for your application.
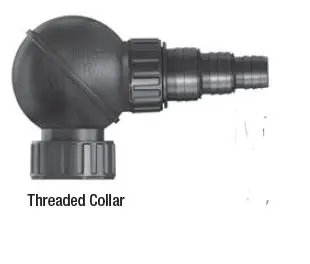
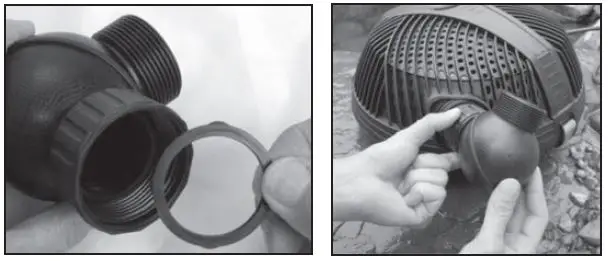
- The threaded collar, on all of the fittings, enables the AquaForce® pump to be installed and removed without the need for any tools. Do not use tools to attach the fittings onto the pump discharge. Fittings need to be hand-tightened only.

- The extremely versatile Rotational Ball Outlet provides you the ability to adjust the pump discharge to the perfect position that your water feature set-up requires. Loosening the threaded collar allows you to rotate the upper half of the ball. A fl at rubber washer seal is included to ensure a hand-tight and leak-free connection. Make sure the fl at rubber washer is in place before installing the fittings.

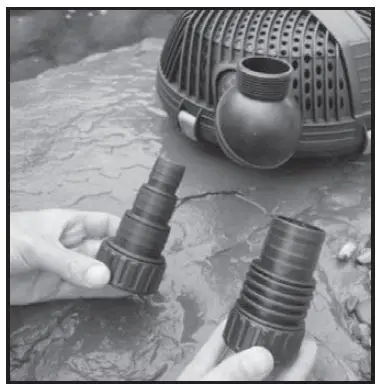
- Install the right-sized Multi-Hose Adapter, based on the diameter of the tubing you are using.

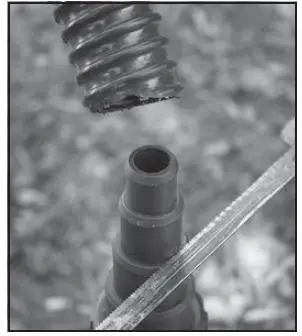
- If using pipe with a larger diameter than the smaller fi ttings of the Multi-Hose Adapters, cut off the smaller section to avoid any fl ow restriction.

- Attach tubing to the fi tting. If tubing is loose on the fi tting, use a hose clamp (not included) to secure tubing onto the fi tting.

- Connect the other end of the pump tubing to the pond filter, such as a biological filter, waterfall spillway or pressurized filter.

- Connect the pump to an outlet that is protected by a ground fault interrupter. Once the pump is running and water is circulating, check for any leaks where the external connections are made.

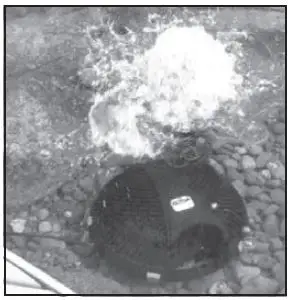
Using the AquaForce® as a Winter Bubbler
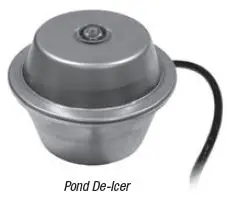
- The AquaForce® can also be used to prevent winter fish loss by keeping a hole open in the ice during the cold winter months. The AquaForce® helps ensure there is sufficient oxygen levels and proper gas exchange in the pond, helping Pond De-Icer to prevent fish loss. For best results use the AquaForce® in combination with a de-icer. The combination of the AquaForce® pump and a pond de-icer will further increase the pond’s oxygen levels, remove potentially harmful gases from the water, and allow for a backup in case one of the devices stops working.

• It is important to not place the AquaForce® on the bottom of the pond during the winter. This may disrupt the natural thermocline found in the deeper portions of the pond where the fish are overwintered. Instead, place the pump at least 1 foot above the deepest point of the pond. The rotational ball should be turned upwards, allowing the water to bubble at the surface of the pond. Bricks or stones can be used, if needed, to raise the pump to the proper level.
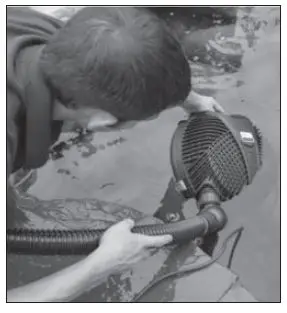
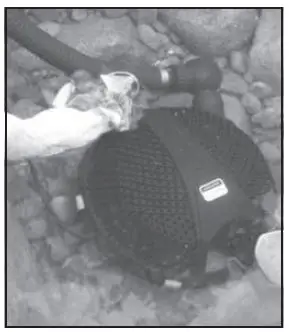
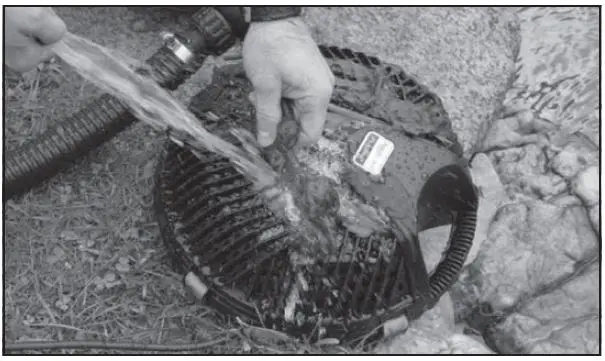
- Remove any debris stuck to the pump filter cage and/or use a garden hose to spray off any debris stuck to the filter cage.

- Internal Pump Cleaning – If you have thoroughly cleaned the filter cage screens and still have diminished flow rates, then you will need to remove the pump from the lower cage and inspect the impeller rotor assembly.

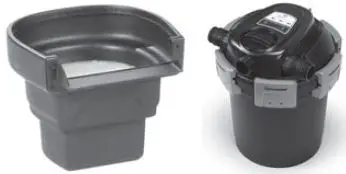
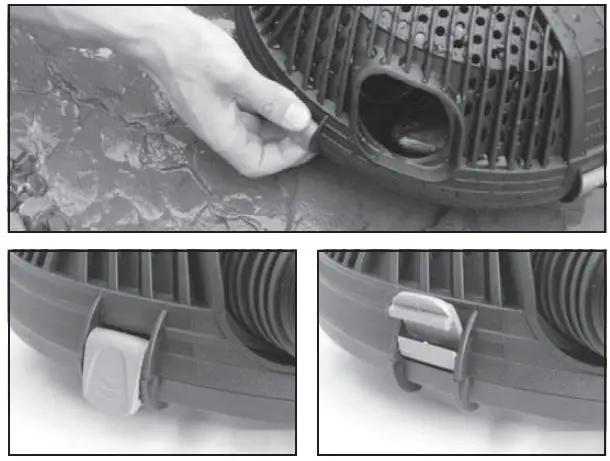
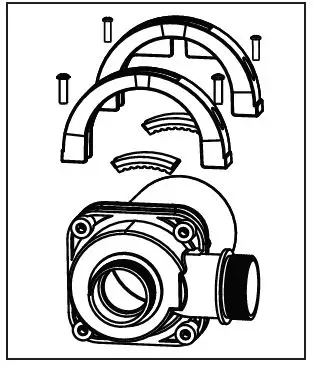
- Pull the cage release clips outward to unlock the upper and lower pump cages.

- With the cage clips released, the upper filter cage can be lifted to expose the pump.


Operation and Maintenance
- Pump Cage – Do not remove the upper or lower pump cage while operating the pump. Failure to operate the pump without the filter cage or operating the pump with a broken cage will allow large debris to enter the pump causing the pump to fail, thus voiding the warranty.
- Pump Cage Cleaning –
We recommend inspecting your pump on a regular basis to ensure it is functioning properly. If you notice the water flow rate diminish, it may be due to the pump’s filter cage becoming clogged
with debris. In many cases, the filter can simply be pulled from the pond and cleaned of any debris on the filter cage. Always disconnect the power before performing maintenance on the pump.
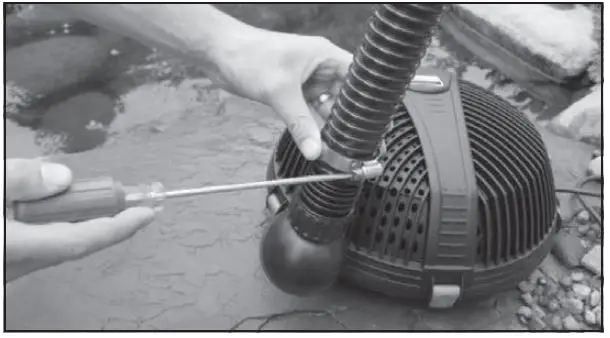
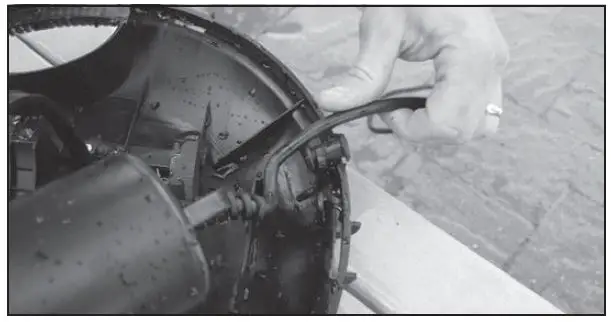
- Remove the screws securing the pump restraining bracket, allowing the pump to be lifted from the lower cage.

- For easier pump access, pull the power cord free from the strain relief.

- Remove the four screws that hold the water cover chamber and inspect the impeller rotor assembly.

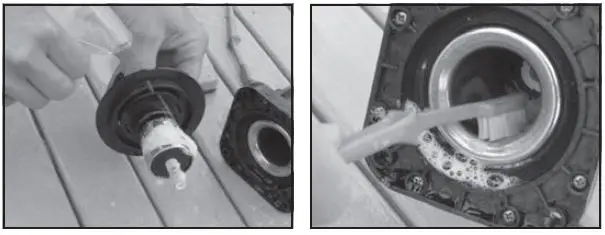
- If your rotor assembly impeller and internal pump body have excessive scale build-up, clean with a mild acid, such as white vinegar or non-abrasive calcium, lime and rust remover product. A sponge or soft-bristled brush that won’t scratch the stainless steel can be used at this time. Removing scale build-up will allow your pump to run like new again.
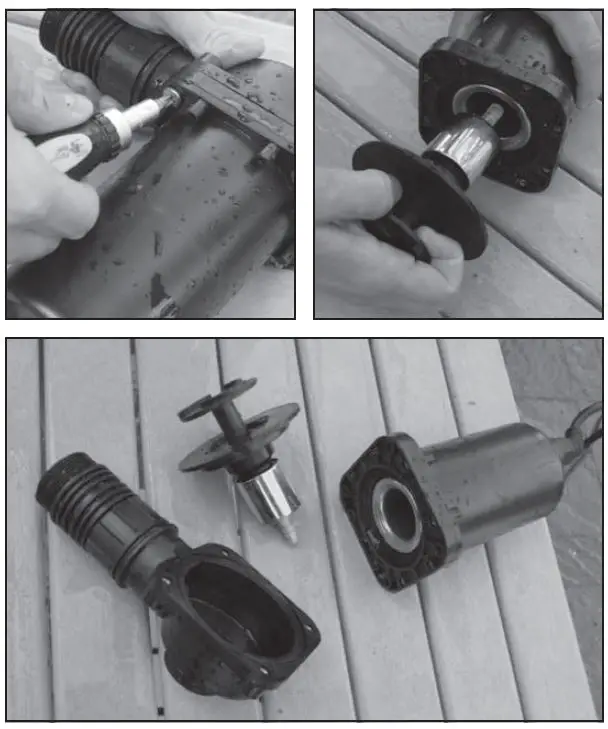
Replacing the Impeller/Rotor Assembly
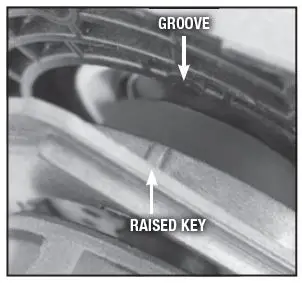
- For Model 3600 & 5200: When replacing the AquaForce® 3600 or 5200 rotor-impeller assembly into the pump chamber, note the proper orientation. The raised key on the impeller faceplate should be lined up with the groove in the pump housing.

- Models 1000, 1800, and 2700: 1000, 1800, and 2700 models allow the impeller-rotor assembly to be inserted into the pump body with no special alignment guides needed.

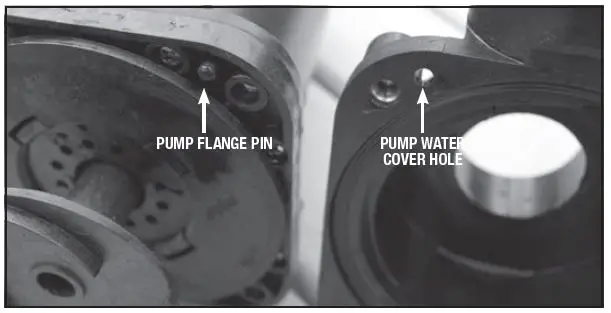
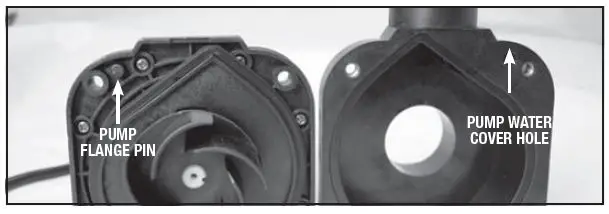
- AquaForce® 5200 ready for reassembly: The water chamber cover will only fi t back onto the pump with the top of the tear-drop shapes lining up, along with matching the hole in the cover with the pin on the face of the pump motor flnge.

Replacing pump in a cage
- Replace the pump into the lower cage and secure in place with the brackets. Also replace the power cord in the strain relief
- Reinstall filter cage and close all 5 clips.
Winter Storage
- The pump can be run during freezing weather if desired but should be removed if shutting down the pump for the winter. Disconnect the threaded collar on the discharge fitting and remove the pump from the pond (Be careful not to lose the flat rubber washer). Clean the pump and cage screens with fresh water and store the pump in a frost-free location.
Troubleshooting
Reduced Water Flow
- The pump or plumbing may be clogged. It may be necessary to clean the pump cage screens and impeller.
Pump Hums and Doesn’t Push Water
- Pump or plumbing may be clogged. It may be necessary to clean the pump cage screens.
- Remove the water chamber cover and inspect and clean the impeller rotor assembly and internal pump body.
- Make sure nothing is blocking or wrapped around the impeller.
- Make sure the pump is receiving the correct voltage.
Pump Not Working
- The ground-fault circuit-interrupter (GFCI) may have tripped
- The pump is not receiving the correct voltage.
Replacement Parts
| k | 91076 | AquaForce® 1000/1800/2700 Replacement Water Chamber Cover |
| k | 91077 | AquaForce® 3600/5200 Replacement Water Chamber Cover |
| l | 91078 | AquaForce® 1000/1800/2700 Replacement Pump Cage Kit |
| l | 91096 | AquaForce® 3600/5200 Replacement Pump Cage Kit |
| m | 91079 | AquaForce® (G2) Replacement Cage Clip Kit |
| n | 91080 | AquaForce® 1000 Replacement Impeller Kit |
| n | 91115 | AquaForce® 1800 Replacement Impeller Kit |
| n | 91081 | AquaForce® 2700 Replacement Impeller Kit |
| n | 91116 | AquaForce® 3600 Replacement Impeller Kit |
| n | 91082 | AquaForce® 5200 Replacement Impeller Kit |
Warranty
3 YEAR WARRANTY
The AquaForce® Pond Pump is guaranteed for three years from the date of purchase. Proof of purchase is required. The warranty does not cover damage resulting from negligent handling, misuse or lack of reasonable maintenance or care. Warranty is valid against defects due to material and the company’s workmanship only. The sole obligation shall be to replace the defective unit with a suitable replacement unit. Units should be checked for proper operation prior to returning as defective. No liability for loss or damage of any nature or kind, whether arising out of or from the use of the product, whether defective or not defective, is assumed by Aquascape, Inc. or its affiliates.
For more information about our company or products, please visit our website at www.aquascapeinc.com or call us at (US) 1-866-877-6637 (CAN) 1-866-766-3426


