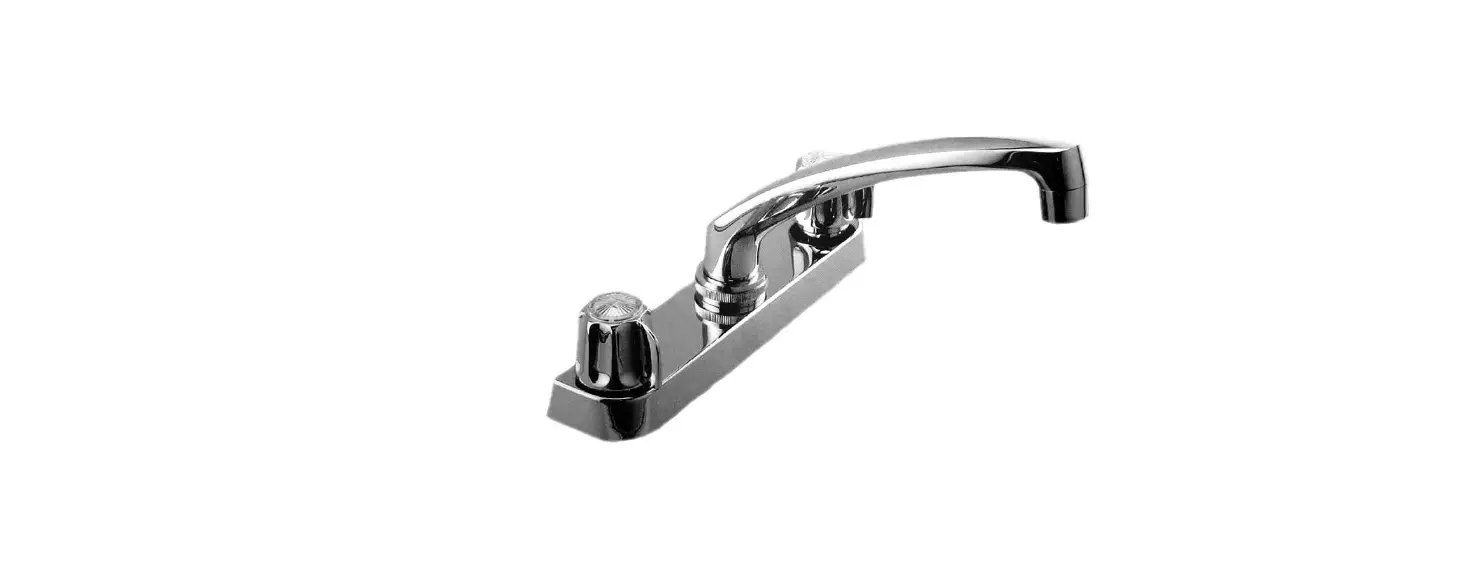
GERBER Two Handle Kitchen Faucet
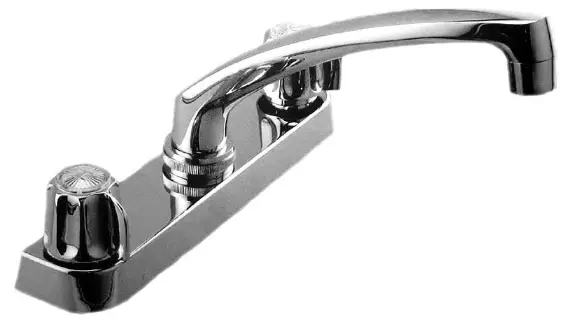
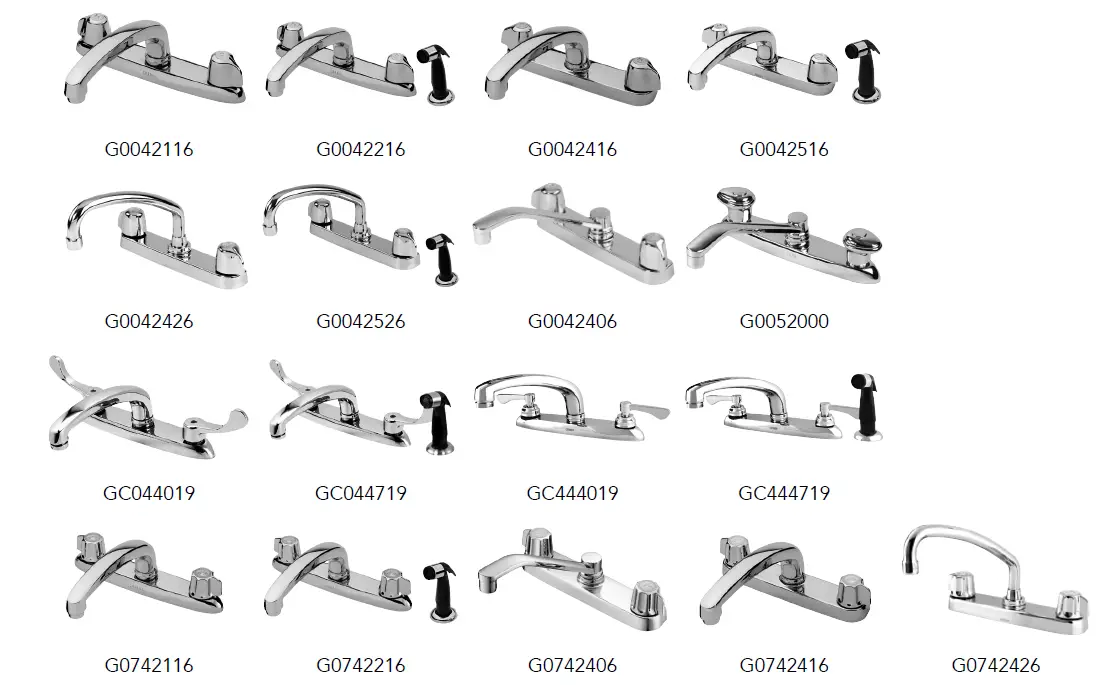
MODELS
Before Your Installation
Check the local plumbing code requirements before installation..
Tools You Will Need

- Adjustable wrenche
- Silicone sealant
- Groove joint plier
Maintenance
Your new faucet is designed for years of trouble-free performance. Keep it looking new by cleaning it periodically with a soft cloth. Avoid abrasive cleaners, steel wool and harsh chemicals as these will dull the finish and void your warranty.
Warranty Registration
Please log on to gerber-us.com to register your product today.
Faucet Installation Procedures
Gerber always recommends that plumbing products be installed by a licensed professional.
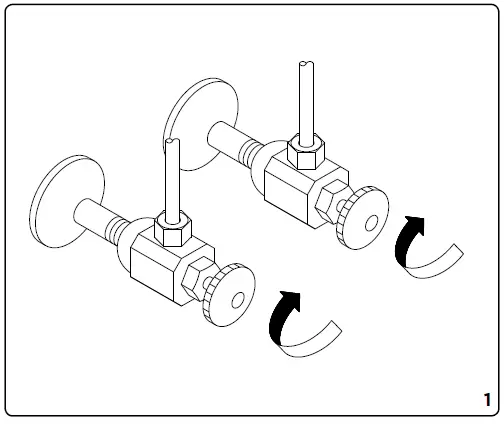
- Shut off main water supply before installation

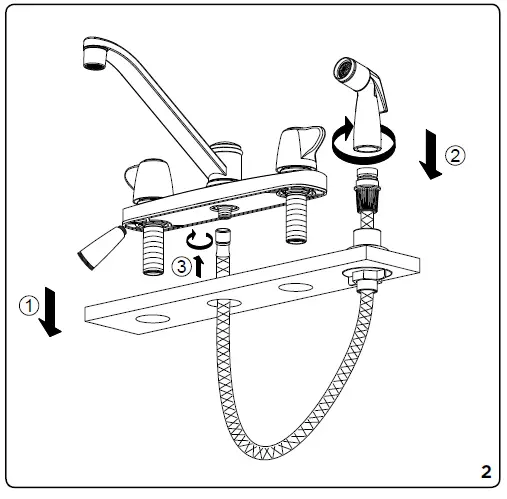
- Place silicone sealant beneath the plastic gasket and install faucet through center hole.

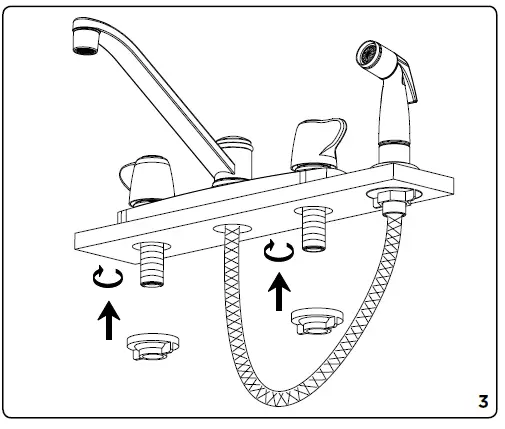
- Screw and tighten lock nuts onto faucet.

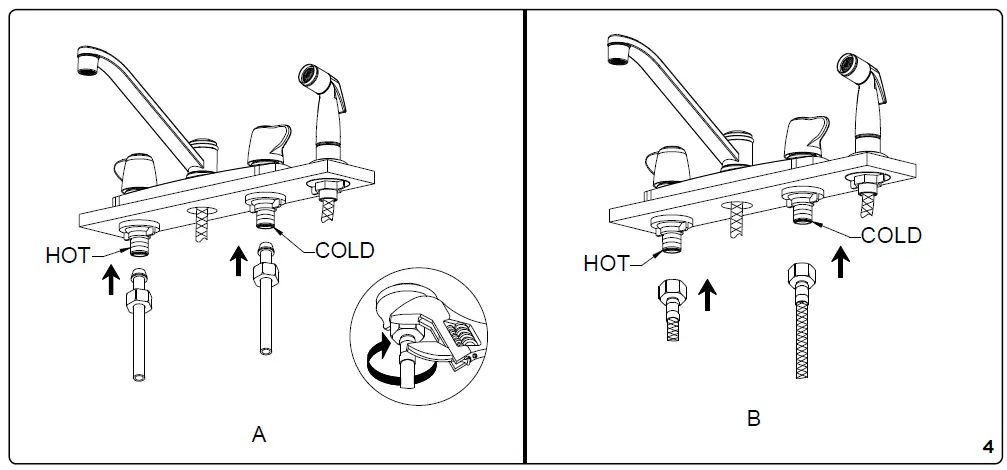
- Slip coupling nuts onto water supply tubes and screw onto inlet ports.
- Connect water supply hose and tighten with lock nut.

- Connect water supply hose and tighten with lock nut.
- After installing faucet, remove aerator and turn on water to remove any left over debris. Re-assemble aerator.


Trouble-Shooting
If you’ve followed the instructions carefully and your faucet still does not work properly, take these corrective steps.
- Problem Cause Action
- Leaks underneath handle Adjusting ring or cap has come loose. Remove handle and tighten adjusting ring or cap.
- Aerator leaks or has an inconsistent water flow pattern. Aerator is dirty or misfitted. Unscrew the aerator to check rubber packing or replace the aerator


