
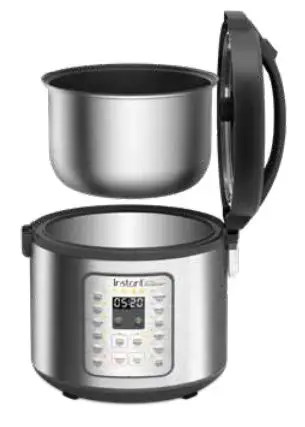
Instant Zest Plus Rice and Grain Cooker
Full manual and instruction videos available at instantappliances.com
Register your product today at instantappliances.com/support/register
Welcome to the world of Instant cooking.
Thank you for welcoming us into your kitchen.
Having families ourselves, we developed the InstantTM ZestTM Plus to allow busy families and professionals alike to cook healthy, delicious meals more easily and in less time.
We have partnered with chefs, authors and bloggers to compile a collection of recipes that we hope you enjoy!
Happy cooking,
Download the Instant Pot App
• Original Recipes
• New User Tips
• Getting Started Videos
Initial Setup
- Remove all packaging material from in and around the cooker, and verify that all parts are accounted for.
- Place the cooker on a stable, level surface, away from external heat sources.
- Read all Important Safeguards in the included Safety, Maintenance & Warranty booklet before use. Failure to do so may result in property damage and/or personal injury.
- Follow Care & Cleaning instructions in the included Safety, Maintenance & Warranty booklet to wash the cooker before first use.
- Do not remove safety warning stickers from lid or rating label from back of cooker base.
CAUTION
Never use the cooker on a stovetop. Do not place the appliance on or in close proximity to a hot gas or electric burner, or a heated oven. Heat from an external source will damage the appliance.
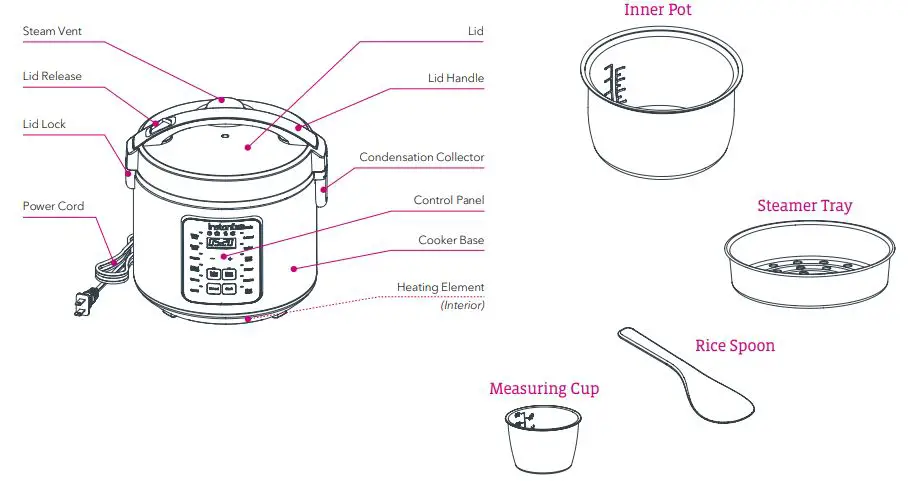
Product Overview
Getting Started
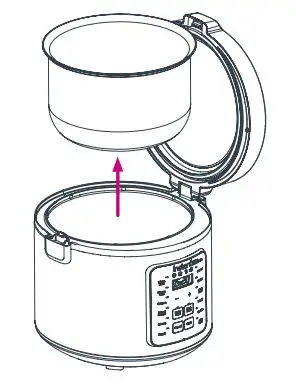
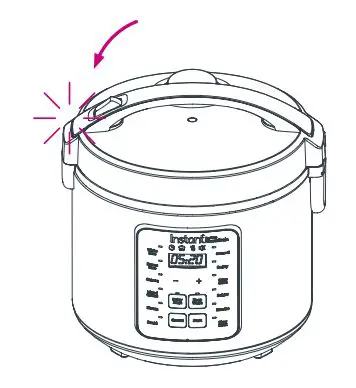
- Press the lid release button on the lid handle down, then open the lid.

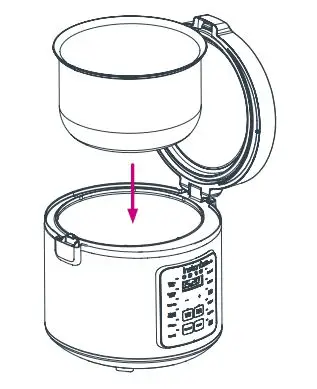
- Remove the inner pot from the cooker base.

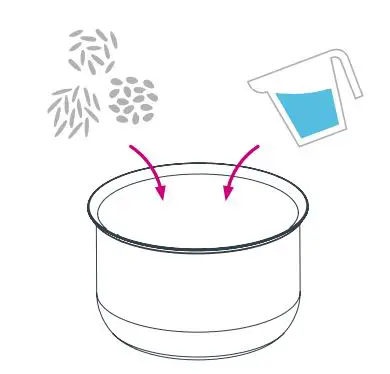
- Add grain and cooking liquid to the inner pot, according to your recipe.

- Insert the inner pot into the cooker base.

- Close the lid. It clicks to indicate that it is closed correctly.

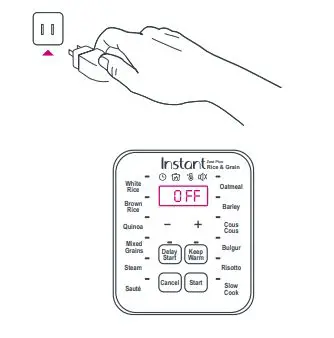
- Connect the power cord to a 120V power source.
The cooker is in Standby, and the display indicates “OFF”.
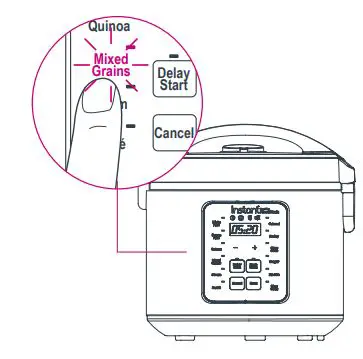
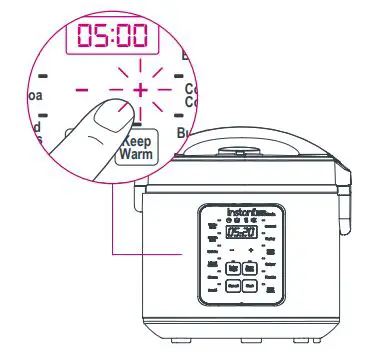
- Select a Smart Program.

- If applicable, use –/+ to manually adjust the cook time.
 Note: All Smart Programs except Steam, Sauté, Oatmeal and Slow Cook will automatically set the cook time based on the volume of grain in the inner pot.
 - Press Start to begin cooking cycle.
Display indicates “On” for automated programs. For manually adjusted programs (Sauté, Steam, Slow Cook, Oatmeal) the countdown time is displayed.
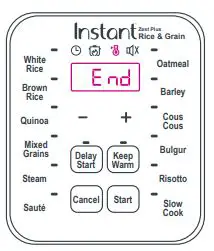
- When the Smart Program completes, the cooker will go to Keep Warm and display “End”. To cancel this function, press Cancel at any time.

- When ready, press the lid release on the lid handle down, then carefully open the lid.


 Note: All Smart Programs except Steam, Sauté, Oatmeal and Slow Cook will automatically set the cook time based on the volume of grain in the inner pot.
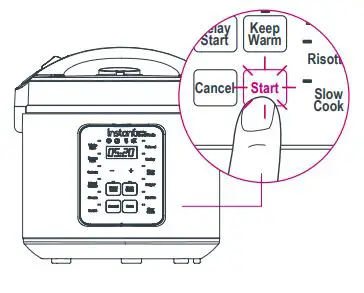

More Controls
- Cancel
Press to stop a Smart Program at any time. Cooker returns to Standby and displays “OFF”. - Delay Start
Postpone cooking up to 24 hours. Select a Smart Program and then press Delay Start to turn the setting On. Use –/+ to set the number of hours and minutes and press Start to begin cooking. There is no Delay Start function on Sauté program. - Keep Warm
Setting is on by default on all Smart Programs. Once Smart Program is selected, press Keep Warm to turn the setting off. - Sound Off
Sound is automatically set to On. To turn sound off, before choosing a smart program, press and hold “–” key until the Sound Off icon lights up.
Note: Error code alerts will be silenced. - Sound On
To turn sound back on, before choosing a smart program, press and hold “+” key until cooker beeps.
Smart Programs
| Smart Program | Grain : Water Ratio | Estimated Cook Time | Notes |
| White Rice | 1 cup : 1 ½ cups | 25 – 60 minutes |
The cooker detects the volume of grain and automatically sets the cook time accordingly. |
| Brown Rice | 1 cup : 2 cups | 40 – 90 minutes | |
| Mixed Grains | 1 cup : 2 cups | 40 – 90 minutes | |
| Quinoa | 1 cup : 1 ½ cups | 30 – 60 minutes | |
| Barley | 1 cup : 2 cups | 40 – 90 minutes | |
| Cous Cous | 1 cup : 1 cup | 15 – 40 minutes | |
| Bulgur / Cracked Wheat | 1 cup : 1 ½ cups | 30 – 60 minutes | |
| Oatmeal | 1 cup : 3 cups | 20 – 90 minutes | Manually set cook time. |
Note: Cooking times and ratios are recommendations only. Follow a trusted recipe. For the complete cooking timetable, visit instantappliances.com
| Smart Program | Temperature | Estimated Cook Time | Notes |
| Steam | 100ºC / 212ºF | 5 – 60 minutes | To preserve vitamins and minerals, use a steamer basket and keep your food out of the boiling water. |
| Sauté | Low / High | 1 – 30 minutes | Do not close the lid when using Sauté. To switch between ”Lo“ and ”Hi“ press the Sauté button before pressing Start. |
| Risotto | Auto | 30 – 60 minutes | Sauté dry rice and desired vegetables before adding liquid. |
| Slow Cook | Low / High | 30 minutes – 24 hours | To switch between ”Lo“ and ”Hi“ press the Slow Cook button before pressing Start. Compatible with all standard slow cooker recipes. |
| Manual Keep Warm | Low / High | up to 12 hours | To switch between ”Lo“ and ”Hi“ press the Keep Warm button before pressing Start. |
Register your product today at: instantappliances.com/support/register
Instant Brands Inc.
11 – 300 Earl Grey Dr., Suite 383 Ottawa, Ontario
K2T 1C1
Canada
Contact Customer Care:
1-800-828-7280
[email protected] instantappliances.com/#Chat
instantappliances.com
store.instantappliances.com


