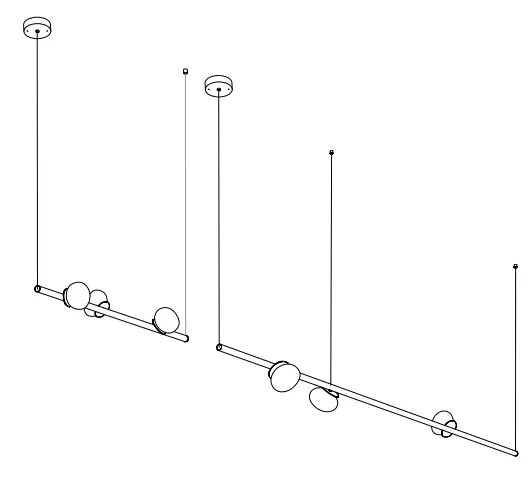
![]() STEM – CABLE SUSPENDED, HORIZONTAL
STEM – CABLE SUSPENDED, HORIZONTAL
84.3V
Levelling Kit
PRODUCT SPECIFICATION
approx 7 .4kg (16.4lb)
approx 8.4kg (18.4lb)
| PENDANTS: | three |
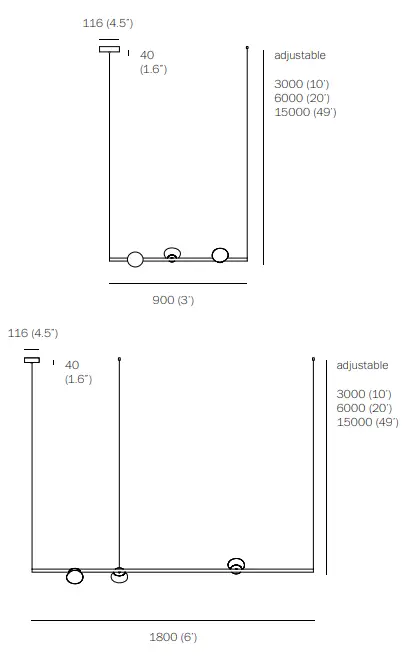
| MOUNTING: | deep white canopy 116mm (4.5”) in diameter x 40mm (1.6”) deep |
| LAMPING: | 1.5w LED |
| CABLE LENGTH | 3m (10’) / 6m (20’) / 15m (49’) |
| STEM LENGTH | 0.9m (3’) or 1.8m (6’) long stem |
| MATERIALS: | blown glass, electrical components, unlacquered brass or black powder coated brass stem, black or white canopy |
| WEIGHT: | approximately 7 .4kg (16.4lb) / 8.4kg (18.4lb) |
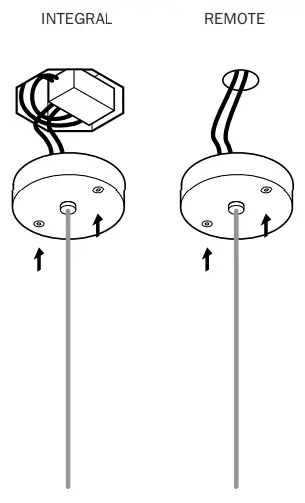
| POWER SUPPLIES: | integral |
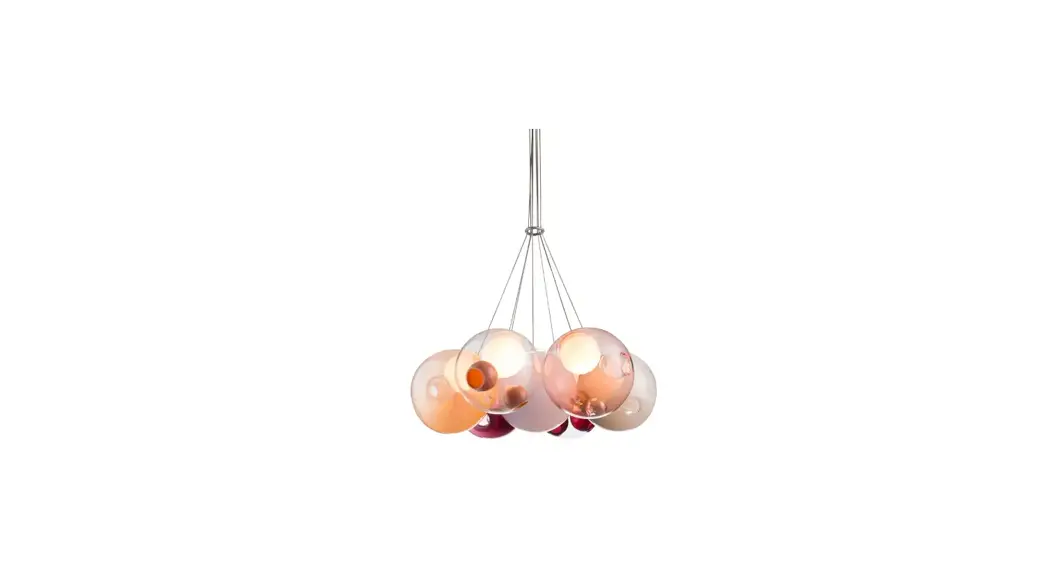
DESCRIPTION
The stem cable suspended horizontal system comes in unlacquered brass or black powder coated stem with a 116mm (4.5”) diameter white or black canopy rated for ceiling use.
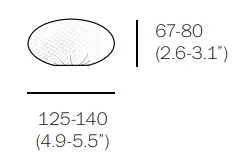
A white glass bubble is captured inside a fi ne copper mesh basket and then plunged into hot clear glass. Air is blown into the matrix to gently push the white glass through the mesh, creating a delicate pillowed form that is suspended inside the thick outer layer of clear glass. Sometimes the copper mesh basket folds and crinkles, adding specifi city to each piece.
NOTES
+ Purchase replacement lamps online at www.bocci.com/shop/bulbs
+ The brass used in our Stem Series is untreated and, as such, will develop a natural patina over time. To avoid any marking or tarnish on the brass during handling and installation, please use the gloves provided in your shipment.
+ To maintain your fi xture, please regularly dust with a lint-free cloth. If further cleaning is required, dampen a lint-free cloth with water only and wipe gently to remove dust or debris.
PRODUCT INSTALLATION INSTRUCTIONS
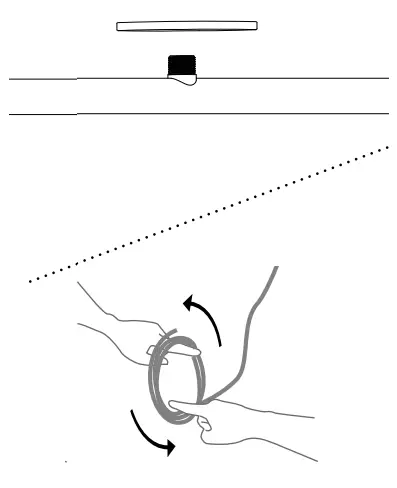
- Thread the pendant mounting plates onto the stem.
Very carefully uncoil the braided coaxial cable in a spool like manner. Insert your index fingers into opposite sides of the roll then rotate your fi ngers around each other to unroll the coaxial cable.
Use patience: allow the cable to uncoil completely to avoid kinks.
Note: Bocci recommends wearing thin gloves during installation to protect the stem finish and the glass surface.
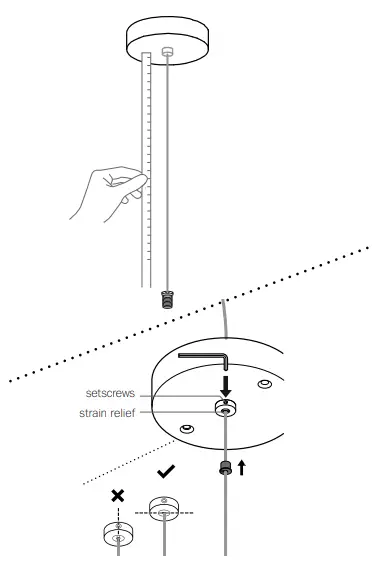
- Determine the overall drop.
Feed coaxial cable into canopy and set the length with set screw.
Note: this portion of the install will be done on the ground.
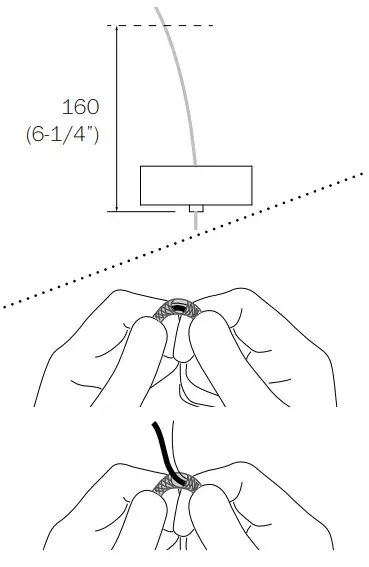
- Leave a minimum 160mm (6-1/4”) cable for next step.
Using a tool or your hands, pry a small hole in the braided cable to expose the two cables inside. Pull out the insulated cable and the aircraft cable.
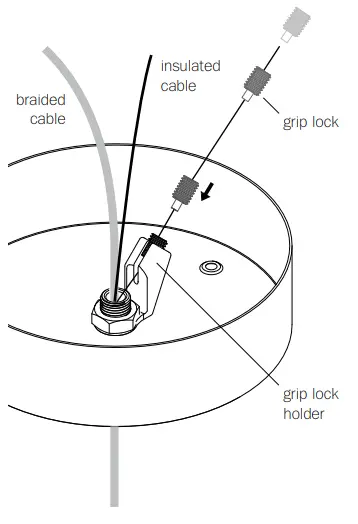
- Thread the griplock through the aircraft cable and slide the aircraft cable into the griplock holder located inside the canopy.
Push (tighten) the griplock against the holder so the griplock partially rests in the holder.
This aircraft cable provides primary support for the fixture.
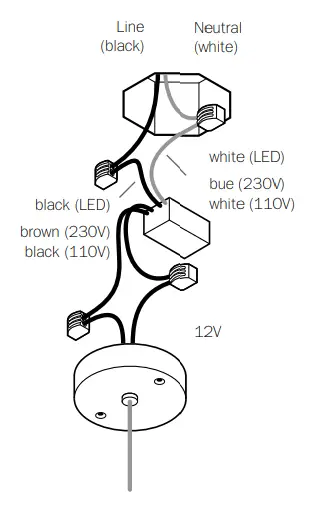
- Connect power supply to line voltage.
i. Connect input low voltage wire to 12V DC output wires.
ii. Connect the black wire to line wire and white wire to neutral wire.
iii. Ensure that line voltage is not active during this part of the installation!
For additional assistance, please contact Bocci:
Note: As an option, Bocci recommends mounting power supplies remotely in a close, accessible and hidden location for ease of long term maintenance. Installation to be done by [email protected] www.bocci.com certified personnel to ensure compliance with the code.
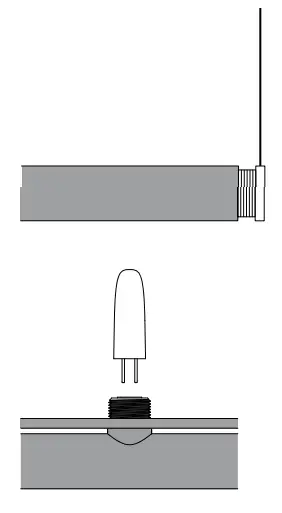
- The client is responsible for ensuring fasteners are attached to a robust structural substrate.
Affix mounting plate to surface with fasteners provided.
Note: Gently pull the coax cable to make sure cable is secured before attaching the canopy to the ceiling.
- Thread the stem onto the connector that is located at the end of the coax cable. Carefully insert provided lamps into sockets. Check that each lamp is working properly
as you go along by keeping power to the fixture on.
- Mark the location for the swag hook screw on the ceiling.
Ensure that the ceiling at the swag location is strong enough to hold 2kg (5lbs) before attaching swag hook with the provided screws.
Thread the swag hook on to the mounting plate, ensuring all the threads are engaged. Slide the ball end of the aircraft into the slot on the swag hook and secure with set
screw.
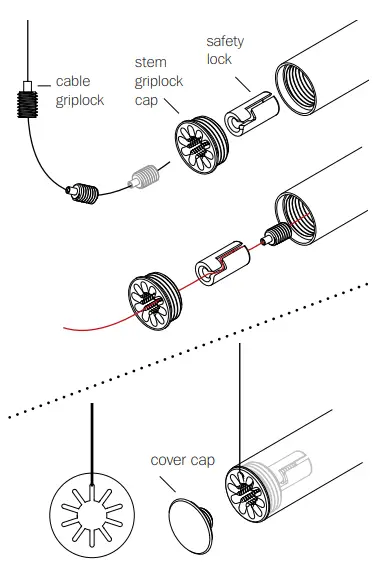
- Thread the cable griplock onto the aircraft, set to desired length, and trim off excess..
Apply tension to the griplock and make sure griplock is engaged.
Feed the griplock through the griplock cap.
Attach it to the safety lock and give it a gental pull to make sure it sits inside the safety lock.
Thread the stem griplock cap onto the opposite end of the stem and pull the aircraft cable up through the slot that allows best orientation the stem. Any adjustments to the level of the stem must be done at this end.
Thread the cover cap onto the end of the griplock cap to secure the aircraft cable.
- Thread pendants onto mounting plates end. Clean fingerprints from fixture surfaces.
For additional assistance. please contact Bocci:
Vancouver
[email protected]
www.bocci.com
Berlin
[email protected]
www.bocci.com
US Patent Pending EU Patent # 003611144-0001 to 0004
Made in Vancouver. Canada
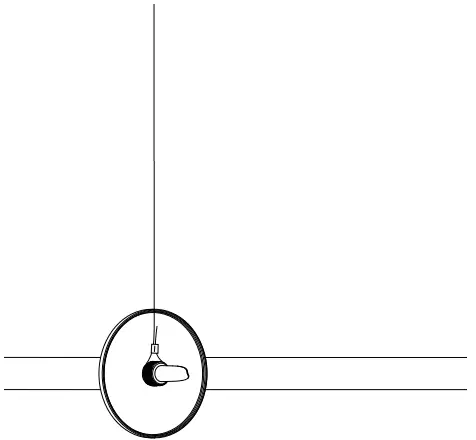
- Remove the pendant that is closest to the middle of the stem pole, exposing the pendant mounting plate.
Note: The levelling kit should only be attached once the system is installed to the desired height.
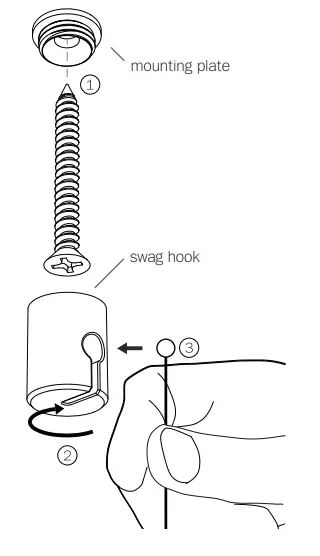
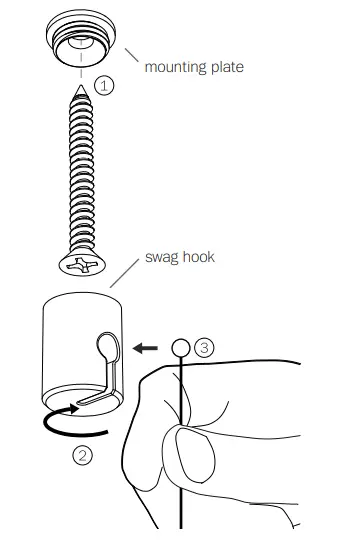
- Mark the location for the swag hook on the ceiling (directly above the pendant you just removed).
Ensure that the ceiling at the swag location is strong enough to hold 2kg (5lbs) before installing the swag hook mounting plate with the provided screws.
Thread the swag hook on to the mounting plate, ensuring all the threads are engaged.
Slide the ball end of the aircraft into the slot on the swag hook and secure with set screw.
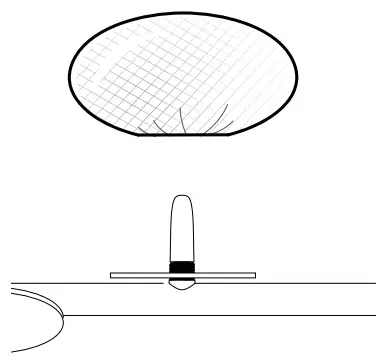
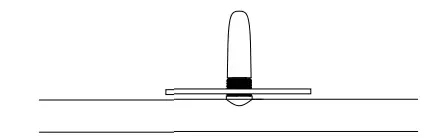
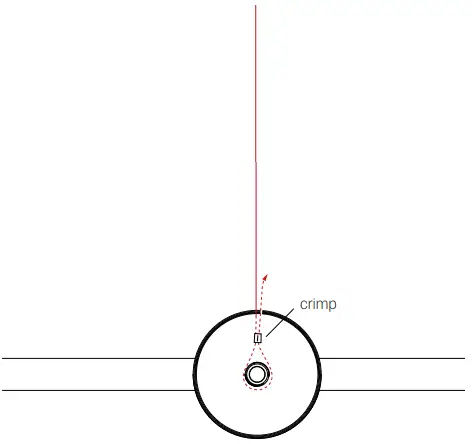
- Form a loop with the end of the aircraft cable around the front of the pendant mounting plate.
Secure the aircraft cable with the provided crimp (crimping tool not included). Trim the aircraft cable close to the crimp.
Note: Make sure the aircraft cable is straight and tight before securing it with a crimp.
- Thread the pendant back onto the mounting plate. Clean fingerprints from fixture surfaces
Note Bocci reccomends wearing thin gloves during installation to protect the stem finish and the glass surface
For additional assistance. please contact Bocci:
Vancouver
[email protected]
www.bocci.com
Berlin
[email protected]
www.bocci.com
US Patent Pending EU Patent # 003611144-0001 to 0004
Made in Vancouver. Canada
![]()
US Patent Pending
EU Patent # 003611144-0001 to 0004
Made in Vancouver, Canada
| Vancouver [email protected] www.bocci.com | Berlin [email protected] www.bocci.com |
© 2021, Bocci Design and Manufacturing Inc. All rights reserved. Any inquiries should be directed to: [email protected]


