AVMAGIC A6 Bluetooth Headphone
INTRODUCTION OF FUNCTION
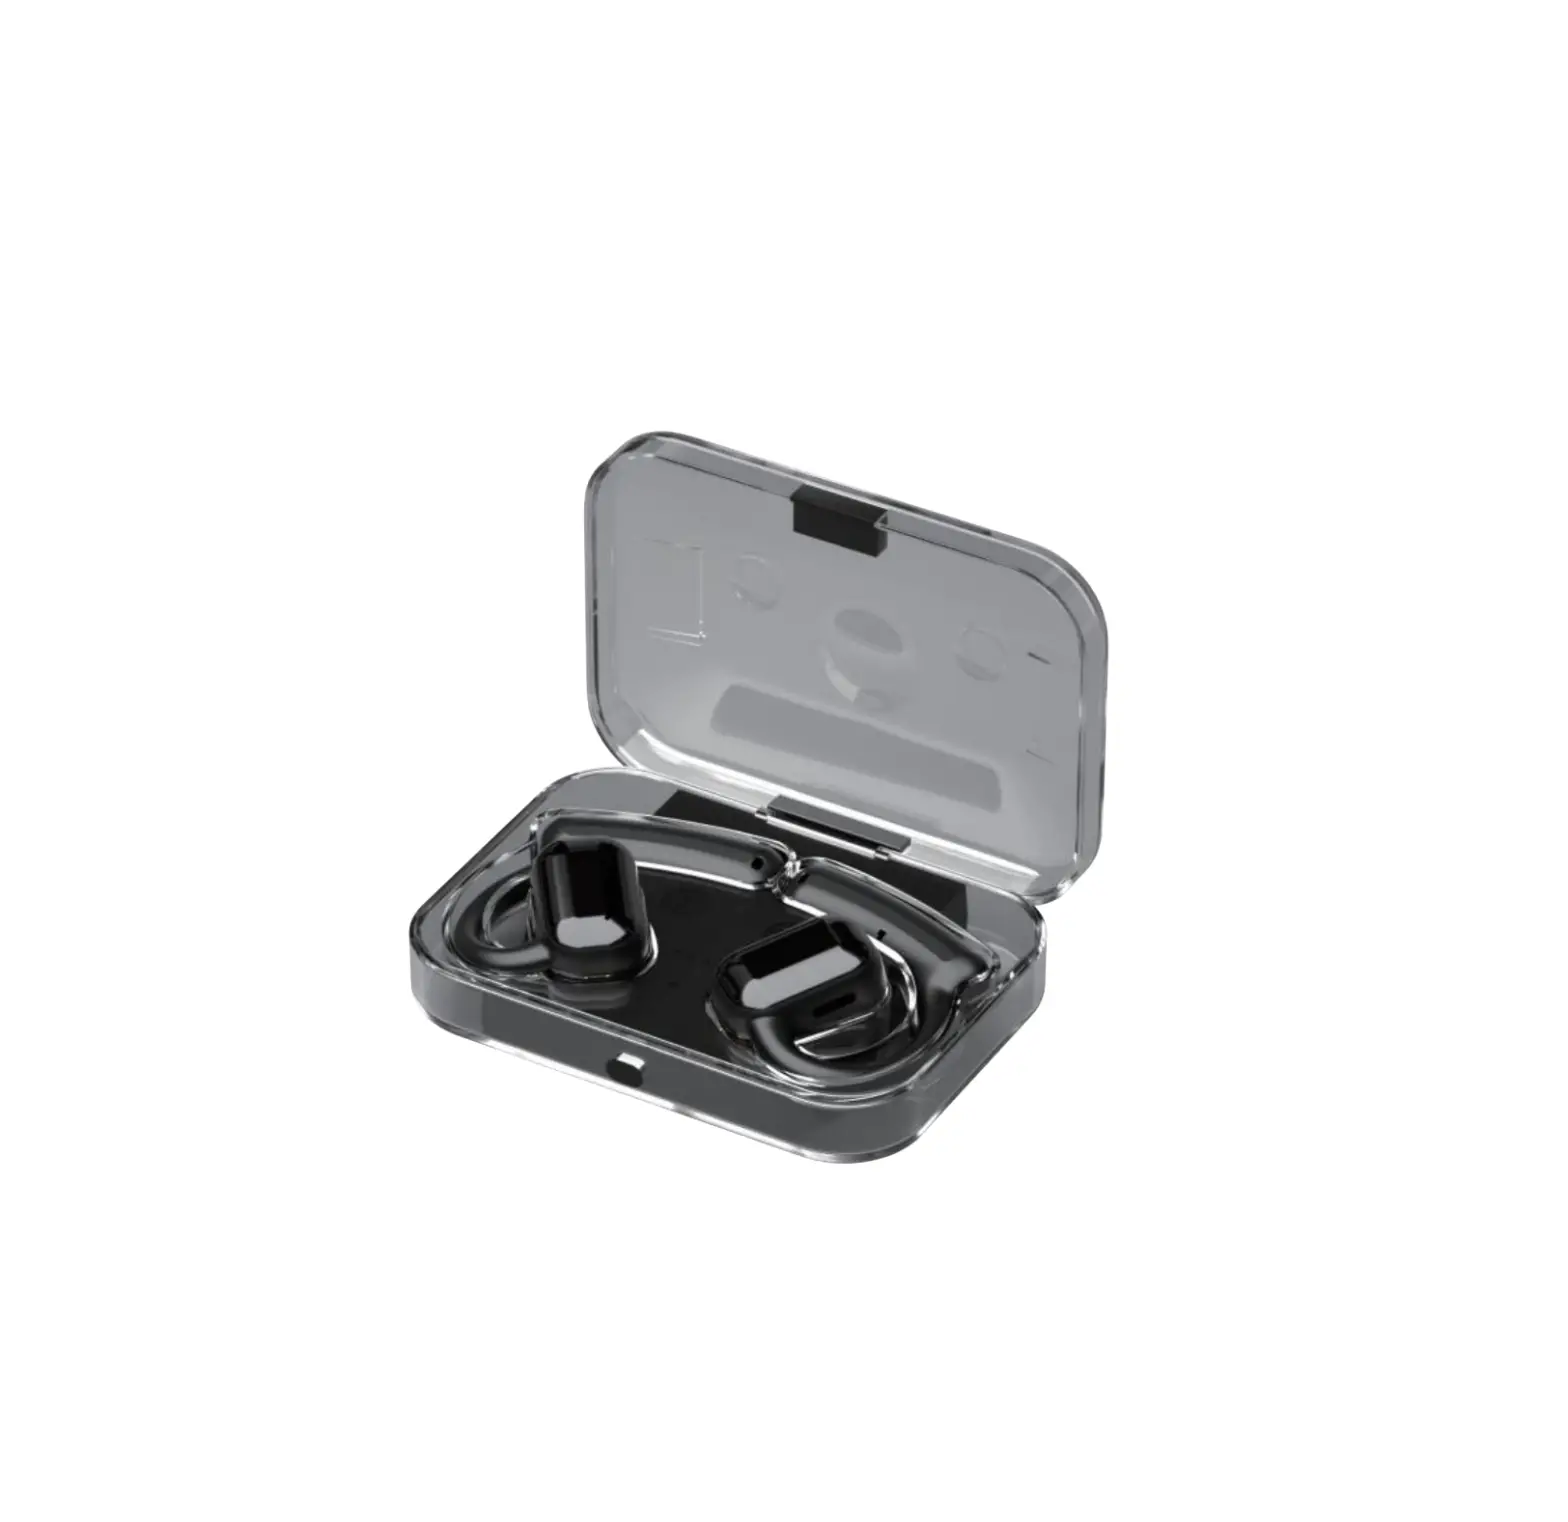
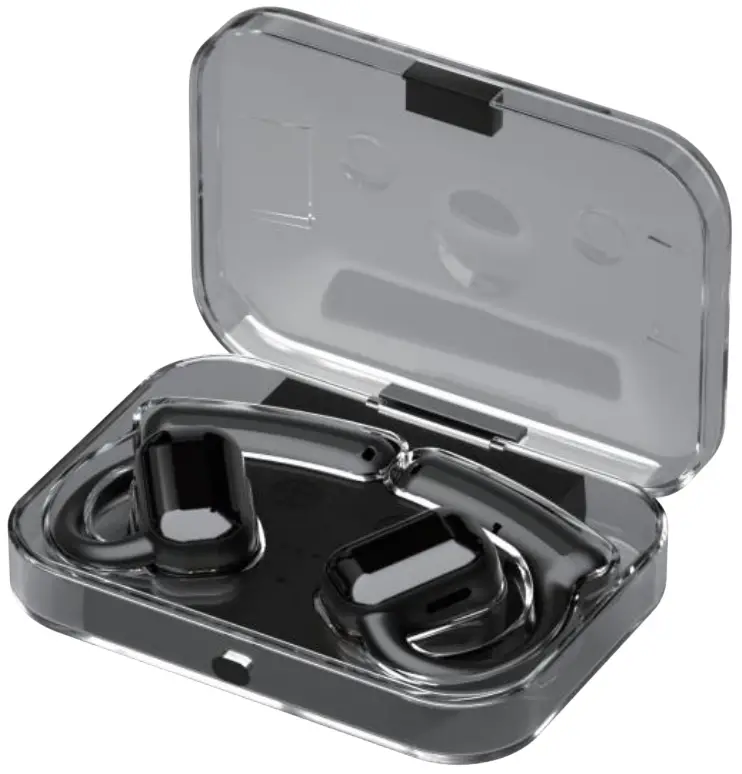
CHARGING CASE
❶ Power indicator light
❷ Charge indicator light
❸ Magnetic charging interface
❹ Function key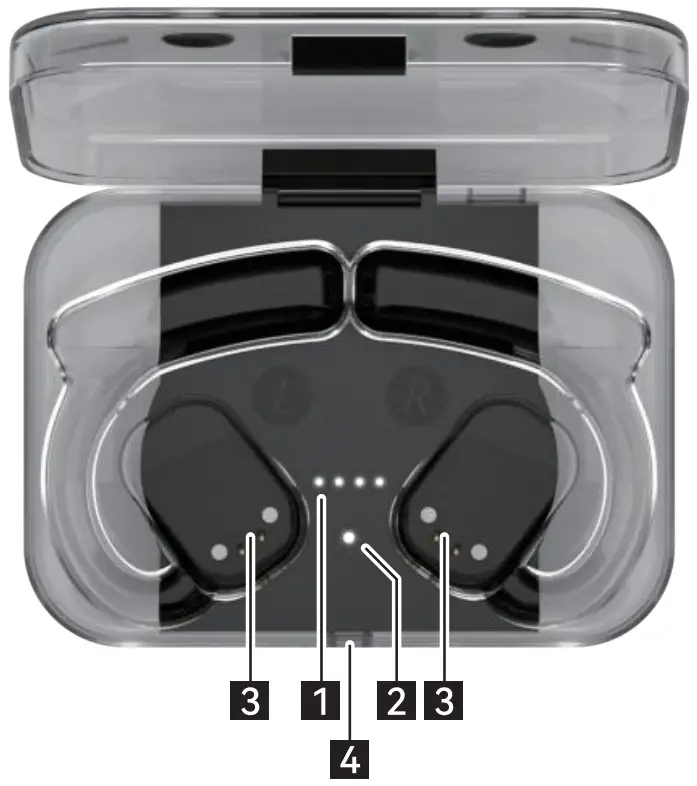
❺ Interface of charging case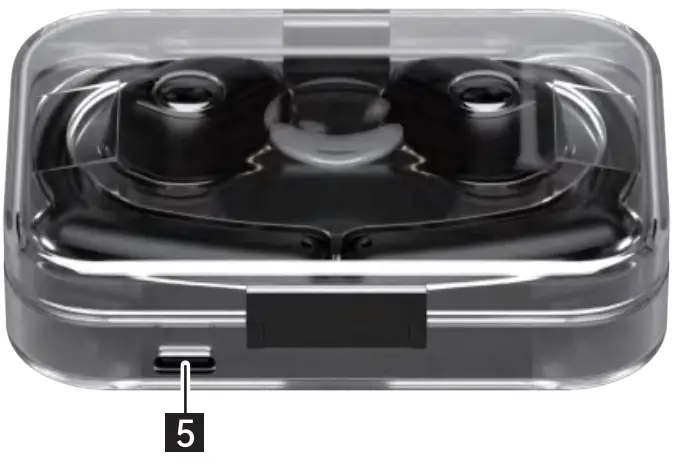
HEADPHONE
L: Left headphone
R: Right headphone
❻ Speaker
❼ Magnetic charging interface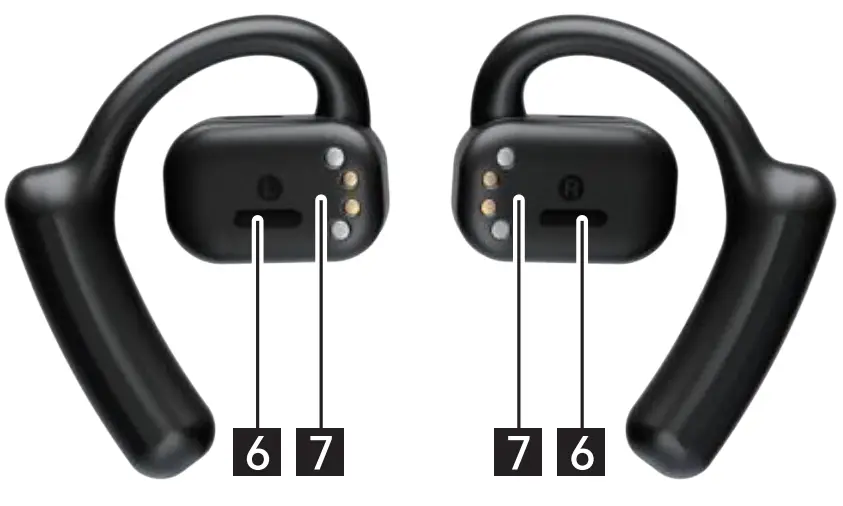
❽ Smart Touch key
❾ Rope hole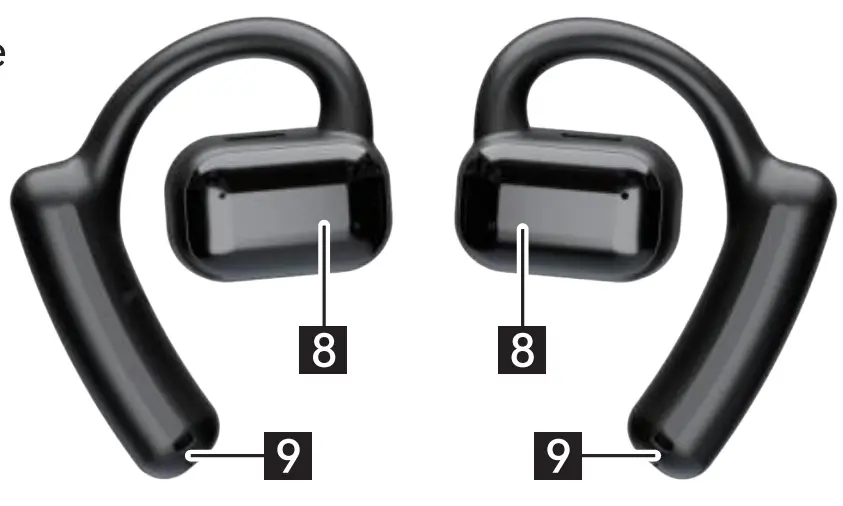
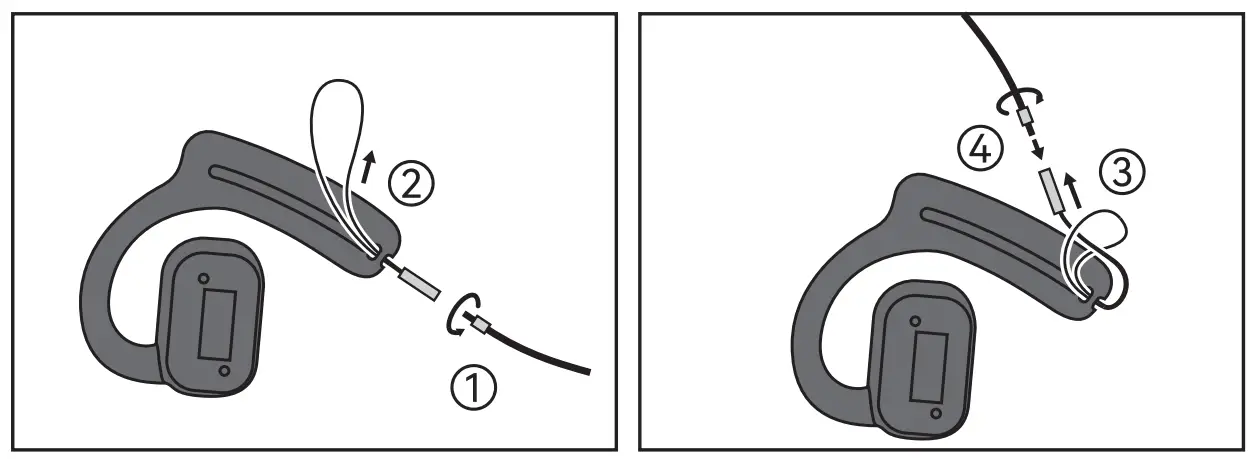
USE TECHNIQUE OF LANYARD HOLE
- DTwistand unfasten the chain.
- Pinch the rope ring through the headphone lanyard hole.
- And then pass the other end through the loop and pull it tight.
- Rotateandtightenthechain.

A6 FUNCTION OPERATION STATUS
| INSTRUCTIONS OF POWER ON/OFF | |||
| Operation | Method | Sound | Indicator light |
Power on | Turns on when removed from charging case | Tone | White light is on for 1s |
| Outside the case and not in use for a long time, need to press the headphone for 3s to turn on | Tone | White light is on for 1s | |
Power off | Automatically charge when enter the charging case | Tone | White light is always on, and the light goes out after it is fully charged |
| Automatically turn off if not connected within 5 minutes | Tone | White light is on for 1s | |
| PAIRING INSTRUCTIONS | |||
Operation | Method | Sound | Indicator light |
| Pairing | Automatically enter pairing mode after taking out the charging case | \ | Light of right head- phone flashes slowly, the left one goes out |
Connection | Turn on the Phone Bluetooth and search for 11A611 to connect | Tone | \ |
| Disconnect | Headphone will re-enter the pairing mode after disconnecting | \ | Light of right head- phone flashes slowly, the left one goes out |
Over-distance disconnection | The phone will disconnect from the headphone when Over-distance | Dong Dong Dong | \ |
| Over-distance reconnection | Return to the wireless range within 5 minutes will connect back automatically | Tone | \ |
| HEADPHONE UI | |||
| Function | Operation method | Sound | Indicator light |
Answer the Phone | Click Right/Left Headphone | \ | \ |
| Hang up the phone | Click Right/Left Headphone | \ | \ |
Reject Calls | Long press right/left Headphone for 2s | Tone | \ |
| Voice assistant | Three-click right/left Headphone | Ding | \ |
Music play/pause | Click Right/Left Headphone | Ding | \ |
| Volume down | Long press the left Headphone to keep the volume down | \ | \ |
Volume up | Long press the right Headphone to keep the volume up | Maximum volume “du” | \ |
| Last song | Double-click the left Headphone | Ding | \ |
Next song | Double-click the right Headphone | Ding | \ |
| Game mode | Four-click right/left Headphone in non-call status | “Game mode on” | \ |
| “Game mode off” | \ | ||
Low voltage alarm | Battery voltage < 3.6V | Tone | \ |
| Low voltage shutdown | Battery voltage< 3.1V | Tone | White light is on for 1s |
Charging status | Put back the charging case for automatic charging | \ | White light is always on |
| Full power | Headphone battery fully charged | \ | White light goes out |
| CHARGING CASE UI | |
| Status | Instructions |
| Factory settings | Press the 4 Function key for 8 seconds, and the white light of theheadphone will flash for 3 times, then factory settings will be restored. |
| Display Power | Open the charging case and click the 4 Function key to display thecurrent remaining power for 5 seconds. |
| Charging | Red light is always on |
| Full power | Green light is always on |
| Power display | 4 white lights on indicate 100% power (1 white light indicates 25% power) |
| Power supply | White light first display the power then display charging status of headphone. (The first white light indicates the left headphone, the fourth one indicates the right headphone) |
| Low battery alarm | When the battery voltage is lower than 3.3V, 4 white lights will flash 5 times |
| Stop discharge | When the battery voltage is lower than 3.0v, the charging case starts prot ection,wit hout indicator light and stop discharging |
| NTC protection | The charging environment temperature is -5°C to 60°C ; 4 white lights flash |
| Short circuit prompt | 4 white lights flash 10 times; switch the cover or charge to activate after short circuit |
Notes: Automatically reconnect to the last connected device after the headphone is turned on. If there is no successful connection within 1 Os, it will enter the pairing mode, the white light will flash slowly (right headphone), and the light on left headphone will be off .
A6 APPLICATION ENVIRMENT
- Please avoid using and storing headphones outside the temperature range of -5C ∼ 45C to prevent failure and damage .
- Do not expose headphone to the fire to prevent explosion
- Do not use headphone to touch sharp object to avoid damage
- Do not disassemble the headphone without guidance
- Please Keep the headphone in a dry environment.
- Charge the equipment regularly for long-term storage.
A6 PRODUCT PARAMETERS
| Bluetooth pairing name | A6 | Music time | 6.5 hours |
| Bluetooth version | Bluetooth 5.2 | Call time | 5 hours (maximum volume) |
| Bluetooth distance | 12 meters | Headphone battery type | Polymer Battery |
| Net weight | 12.4g (Single), 103.3g (Charging case) | Headphone battery capacity | 100 mAh |
| Snr | 90DB | Headphone charging time | 1.5 hours |
| Rated Power | 50MW | Battery capacity of case | 750 mAh |
| Maximum power | 60MW | Power supply time (Charging case) | 2h and 10 minutes |
| Frequency response range | 20HZ-20KHz | Charging time of case | 13 hours |
| Impedance | 22 OHM±15% | Charging mode of case | DC 5V / Type-C |
| Headphone distortion | <1% | Music playing current | 13±2MA |
| Sensitivity | -42dB±4db | Call current | 15mA |
| Bluetooth chip | qcc3040 | Supported protocols | HFP/A2DP/AVRCP |
| Box Size | 89.5*42*155 mm | Gross weight | 250g |
Note: The data are the result of testing in a standerd laboatory envirment please reter to the actual use.
A6 WARRANTY CARD
WARRANTY CARD
Please attach a copy of the receipt to the back of the warranty card to prove the date of purchase.
Please use the process if you find fault with the product, please contact our after- sales service.
Please make sure to fill in the warranty card clearly the product faults, problems, etc., so that we can timely deal with you.
FCC Caution:
This device complies with part 15 of the FCC Rules. Operation is subject to the following two conditions: (1) this device may not cause harmful interference, and (2) this device must accept any interference received, including interference that may cause undesired operation.
Any changes or modifications not expressly approved by the party responsible for compliance couldvoid the user’s authority to operate the equipment.
NOTE: This equipment has been tested and found to comply with the limits for a Class B digital device, pursuant to Part 15 of the FCC Rules. These limits are designed to provide reasonable protection against harmful interference in a residential installation. This equipment generates, uses and can radiate radio frequency energy and, if not installed and used in accordance with the instructions, may cause harmful interference to radio communications. However, there is no guarantee that interference will not occur in a particular installation.
If this equipment does cause harmful interference to radio or television reception,which can be determined by turning the equipment off and on, the user is encouraged to try to correct the interference by one or more of the following measures:
- Reorient or relocate the receiving antenna.
- Increase the separation between the equipment and receiver.
- Connect the equipment into an outlet on a circuit different from that to which the receiver is connected.
- Consult the dealer or an experienced radio/TV technician for help.