![]() WLS600
WLS600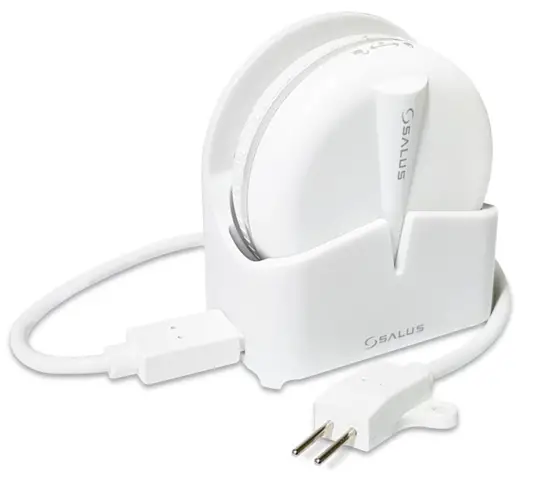
Introduction
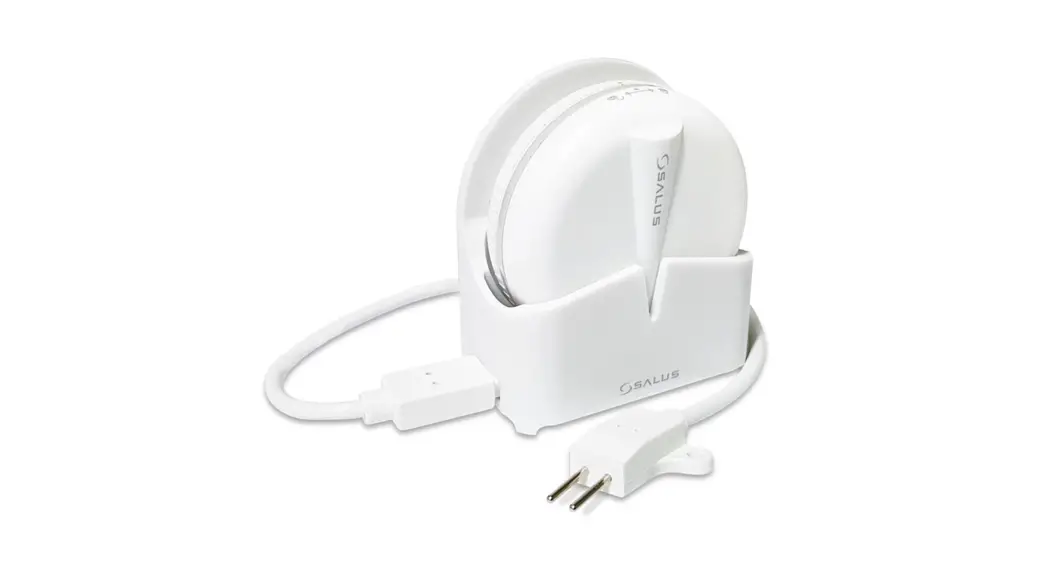
The WLS600 Water Leak Sensor is designed to detect the presence of water on a surface under the sensor, or across the contacts of the leads attached to the sensor. The sensor can be place either horizontally or vertically as required by space constraints. The leads are attached to the sensor via a wall mount accessory. WLS600 must be used with the
Universal Gateway UG600/UGE600 and the SALUS Smart Home App.
Product Compliance
This product complies with the essential requirements and other relevant provisions of the following EU Directives: RED 2014/53/EU and RoHS 2011/65/EU. Full text of the EU Declaration of Conformity is available on www.saluslegal.com 2405-2480MHz; <14dBm
Safety Information
Use in accordance with national and EU regulations. Use the device as intended, keeping it in dry condition. Product for indoor use only. Installation must be carried out by a qualified person in accordance with national and EU regulations.
LED Indication
| State | LED |
| Power Up | Solid red |
| Pairing Mode | 3 red flashes then pause |
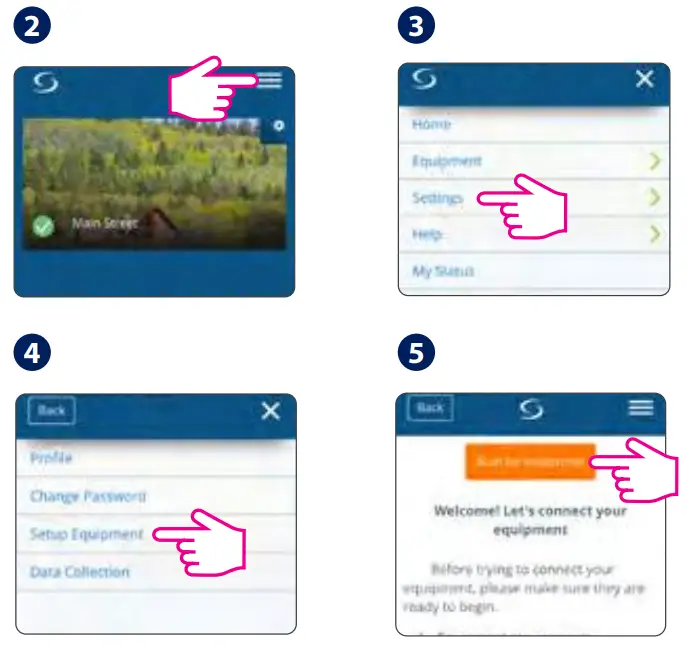
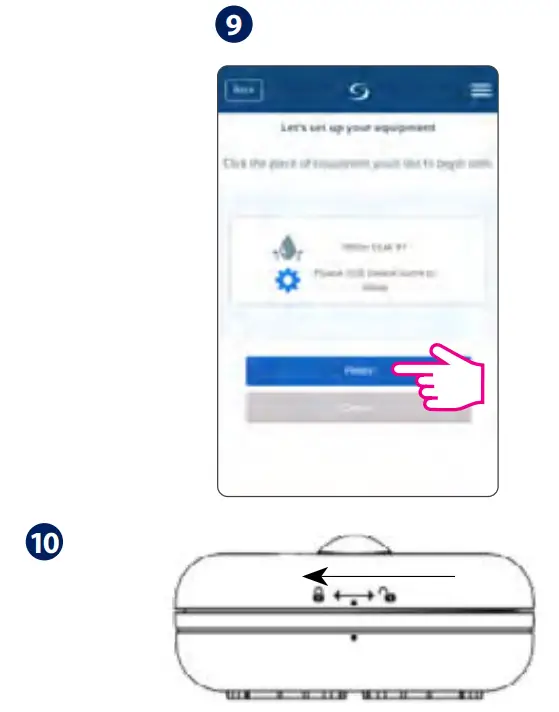
App Pairing
Go to the App
 | 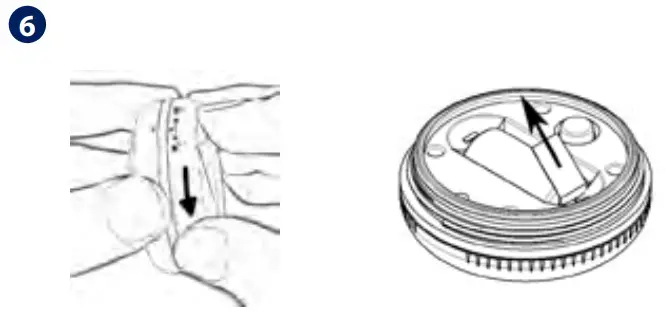 |
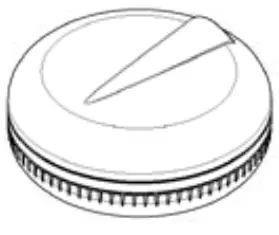
Remove the Face Plate from the sensor by turning the Face Plate counter-clockwise and pull the battery tab to start the pairing process.
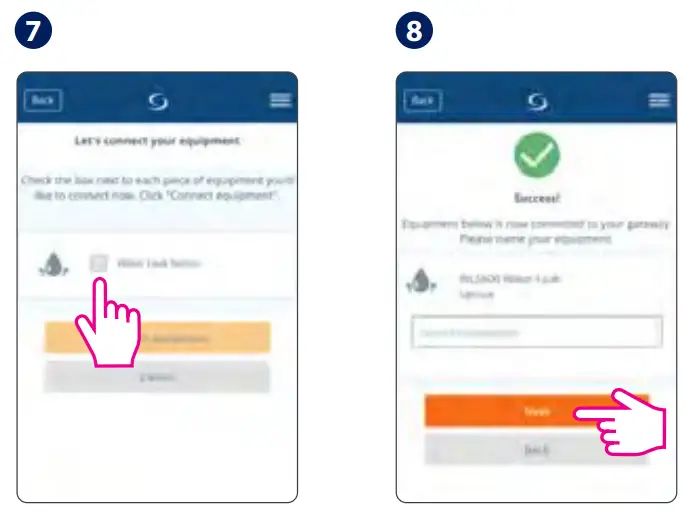 |  |
When the sensor is detected and added to the system, replace the Face Plate by aligning the dots and turning the Face Plate clockwise. Make sure the dots are fully aligned for a proper seal.
Dashboard display
No water leak
Water leak detected
Installation
Identify a level surface for the sensor, where water will likely accumulate in the event of a leak. 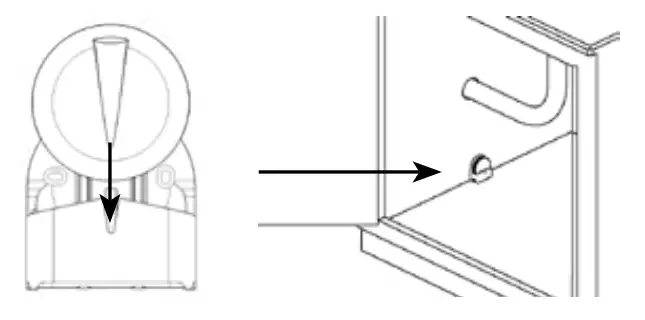 If the sensor is too wide for placement at the desired location, the stand can be used for a narrower profile.
![]() For tighter locations or locations with radio problems, use the provided Sensor Cable.
For tighter locations or locations with radio problems, use the provided Sensor Cable.
Sensor Cable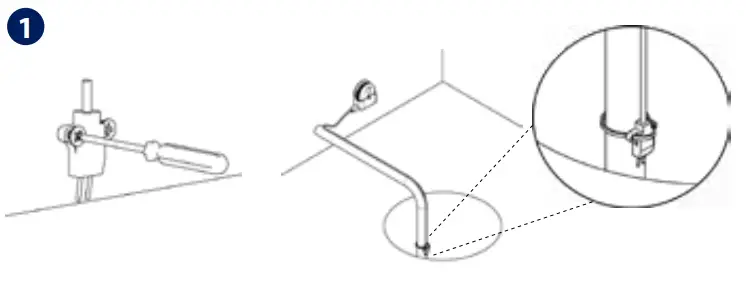
Surface Install
Sump Install
To install the Sensor Cable, first, run the cable to the desired location, and fasten the winged end of the Sensor Cable into place.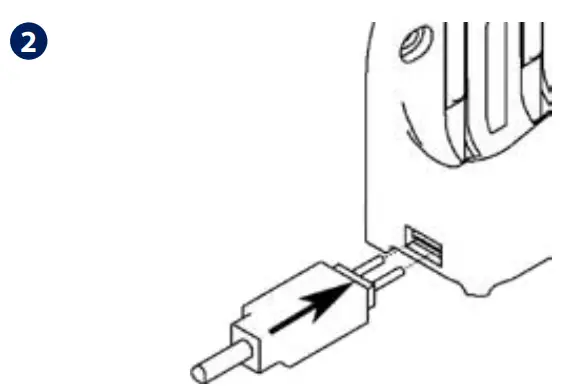
Insert the square end of the Sensor Cable into the terminals on the stand.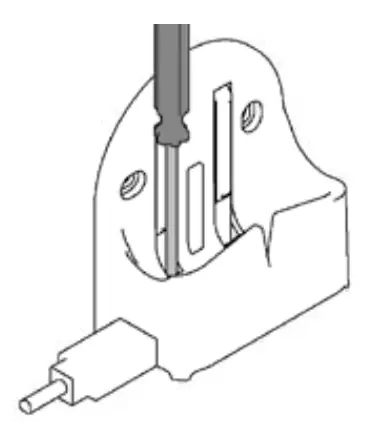
Screw down both terminals until the cable is firmly held in place.
Mount the Stand to the wall or other surface using the supplied double-sided adhesive pad or screws.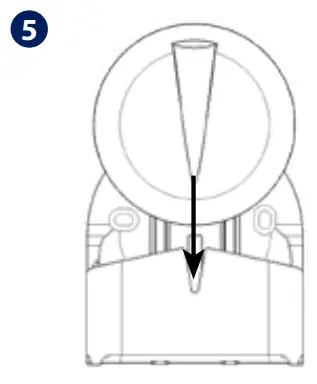
Insert the Water Leak Sensor into the stand to begin operation.
Battery replacement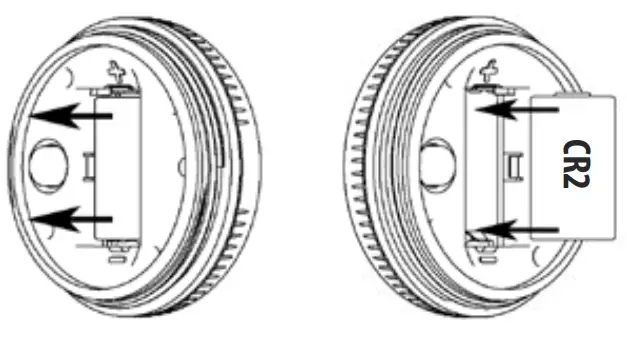
Grasp the battery from both ends and lift to remove the battery from the sensor. Then, insert a new battery into the sensor, following the correct polarity.
Factory Reset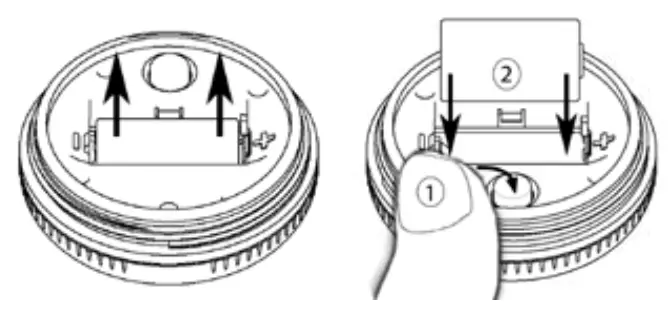 Remove the battery. Then, press and hold the Tamper Switch while re-inserting the battery. Release the Tamper Switch when the LED turns on. WLS600 will reset to factory defaults and it will enter pairing mode.
www.Salus-controls.eu
DISTRIBÚTOR:
Thermo-control SK s.r.o.
Podunajská 31
821 06 Bratislava
[email protected]
www.thermo-control.sk
IMPORTER:
QL CONTROLS Sp. z o.o. Sp. k.
ul. Rona 4, 43-262 Kobielice
PRODUCER:
Salus Limited
6/F, Building 20E, Phase 3, Hong
Kong Science Park, 20 Science
Park East Avenue, Shatin,
New Territories, Hong Kong
T: +44 (0) 1226 323961
E: [email protected]
![]()
![]()


