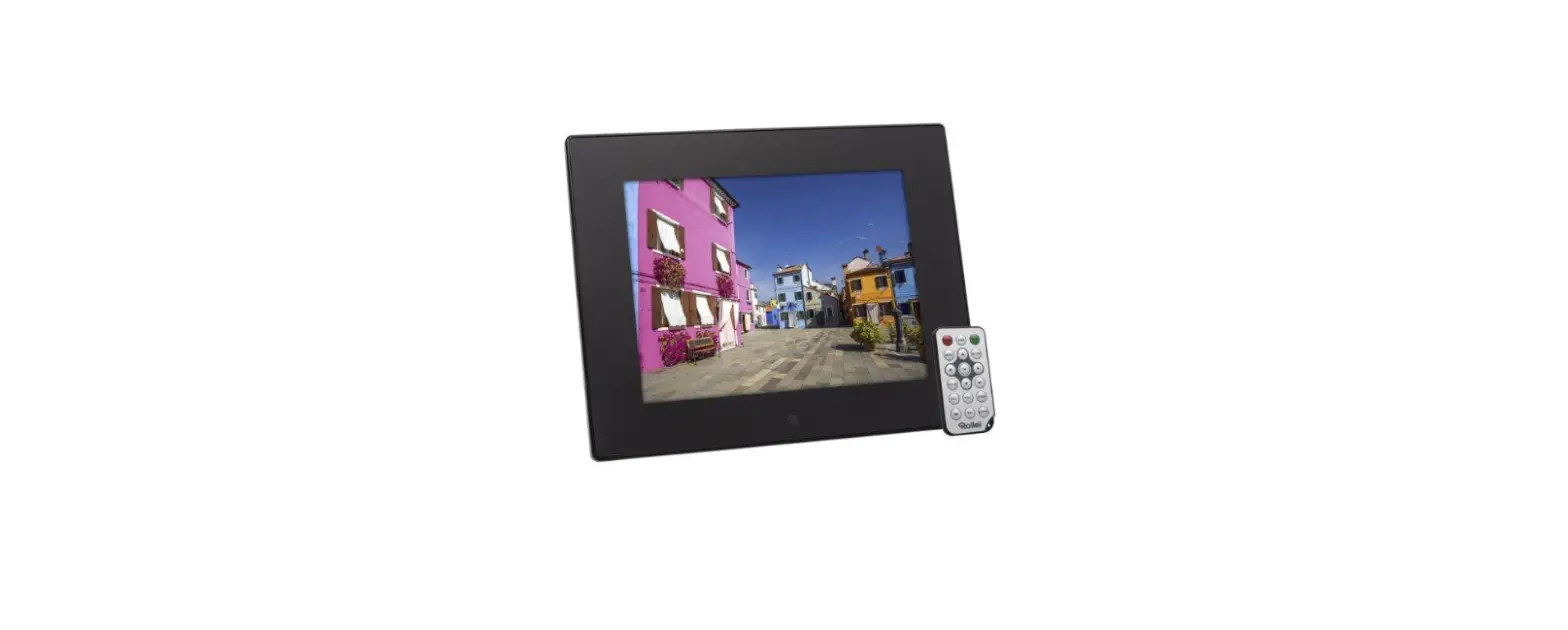
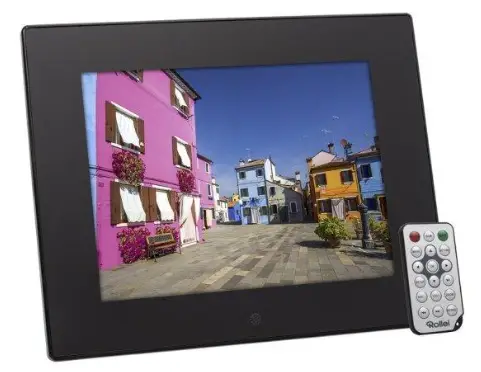
Rollei DPF-860 Pissarro Digital Photo Frame
Before the First Use
Before using the device for the first time, read the operating instructions and the safety instructions carefully. Keep the operating instructions together with the device for later use. if other people use this device, please make these instructions available to them. If you pass the device on to third parties, these instructions belong to the device and must be supplied with ft.
Explanation of Symbols
The following symbols are used in this manual, on the digital image frame, the remote control, or on the aging.
- Products marked with this symbol comply with all relevant community regulations of the European Economic Area.
- Products marked with this symbol are operated with direct current.
- Products marked with this symbol are operated with alternating current.
- Devices with this symbol have additional or reinforced insulation and correspond to protection class l.
- For inside only. Devices with this symbol may only be operated indoors (dry environment). ee Products marked with this symbol have positive polarity. They may only be connected to products that also have a positive polarity.
Accessories In Package
- 8inch Digital Photo Frame: 1x
- Stand Of Digital Photo Frame: 1x
- Remote Control: 1x
- Button Battery(CR2025 3V) In Remote Control: 1x
- AC/DC Adapter: 1x (Shenzhen Jiyin Industrial Co., Ltd. | Model: JYSY021A-0501000E | Input: 100-240 Vv 0.3 A | 50/60 Hz/Output: 5 V- 1 A| protection class: I1)
- User Manual(This Paper): 1x
Safety Precautions
Precautions and maintenance
- For indoor use only.
- Do not expose the unit to moisture or condensation to avoid the risk of fire or electric shock.
- Do not block the ventilation holes on the rear of the digital photo frame to avoid overheating.
- Keep the digital photo frame out of direct sunlight.
- Do not disassemble the digital photo frame. Disassembling the digital photo frame will void our warranty
Cleaning the LCD screen
- Treat the screen carefully. The screen of the digital photo frame is made of glass and it can easily break or be scratched. if fingerprints or dust accumulate on the LCD screen, we recommend using a soft cloth, such as used for camera lenses, to clean the screen.
- Moisten the cleaning cloth With the cleaning solution; do not apply cleaning agent directly on he screen.
Warning
Switch the unit off before inserting or removing a memory card or USB device. Failure to do so may cause damage to the memory card, UsB device and the unit.
Note: this device is for private use only and not designed for commercial use.
Features
- Supports picture formats: JPEG / BMP / PNG / GIF
- Supports memory cards: SD / SDHC (up to 32 GB)
- USB Connection: USB 2.0
- Auto Slide-show when inserting memory card or USB drive
- upports viewing8 pictures in thumbnail mode
- Picture display mode: slide-show, preview, zoom, rotate
- Adjustable slide-show speed and more than 7 transition modes
- Built-in clock and calendar with slide-show window, scheduled auto on/off
- OSD language: English, German and others
Product Overview
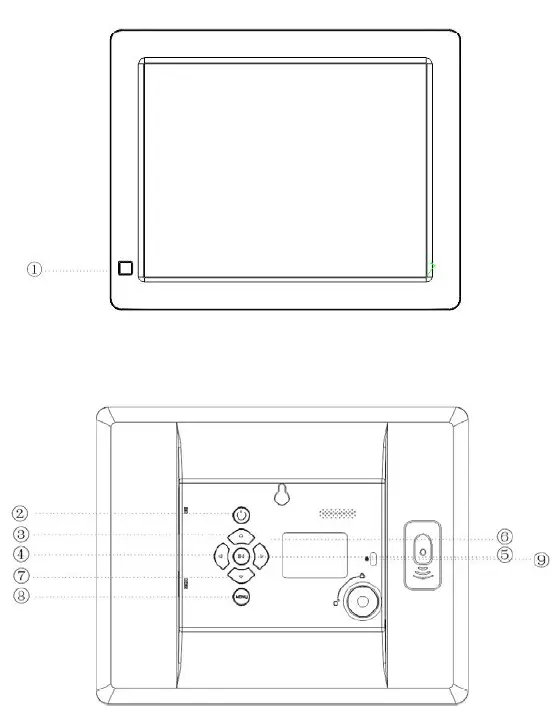
- RECEIVING WINDOw OF REMOTE CONTROL
- POWER ON/OFF
- UP
- REV /RIGHT
- PLAY/PAUSE
- NEXT/LEFT
- DOWN
- MENU
- LOCK

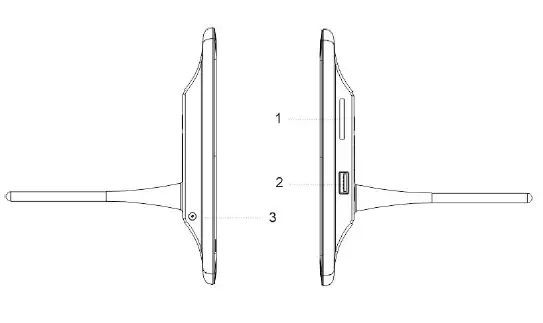
- SD/SDHC CARD SLOT
- USB PORT
- DC IN
Remote Control

 Power unit on/off.
- Return to the previous menu.
 :Move cursor up/down/left/right. OK: Confirm selection or toggle pause/play function in playback mode.
- Play photo slide-show.
- Display date and time.
- Clockwise 90 in photo playback mode.
- Enter Sub-menu.
Installing & Replacing The Battery
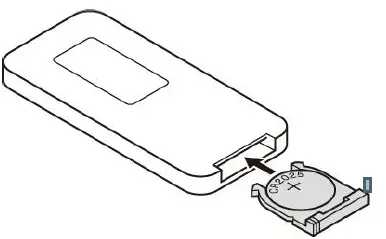
Hold the remote control upside down, press the ridged area of the battery cover and pull towards you to remove the tray. Place one CR2025 lithium button-cell battery in the tray with the positive side facing you. Reinsert the tray.
Getting Started
- Place the digital photo frame with installed stand on a flat surface. Connect the power adapter to a standard electrical outlet and DC in on the left side of the unit.
- Remove the plastic battery insulator from the battey compartment and make sure the remote control hasa battery inserted. Refer to “installing & replacing the battery” if a new battery is needed.
- The unit will start up automatically when powered on. Press power at the rear of the unit or on the remote control to switch the unit on or off.
Main Screen (Memory Card and USB Device)
SD/SDHC cards (max. 32G8) and USB 2.0 devices are supported. After inserting a memory card or USB device, press![]() until main screen as below appears. Press
until main screen as below appears. Press ![]() to select the memory device.
to select the memory device.
Note: when multiple memory cards are inserted at same time, the files in USB drive will be played first.
Operating Instructions
Press OK to access the menus, Photo, Clock, Calendar, Browser or Setting.
| Photo | Picture thumbnail mode |
| Clock | Clock mode |
| Calendar | Calendar mode |
| Browser | File folders in memory device |
| Setting | Setting menu of digital photo frame |
Photo Mode
Select Photo and press OK] or press![]() on the remote control to start picture thumbnail mode or the slideshow.
on the remote control to start picture thumbnail mode or the slideshow.
- Press,
 then clockwise 90° in photo playback mode.
 - Press
 to enter the picture thumbnail mode and select the photo for full-screen display with
 .
.
Note: if press![]() , slide-show is finished and turned to picture thumbnail mode.
, slide-show is finished and turned to picture thumbnail mode.
|
Slideshow Setup | Display Ratio | Select from full screen/fit to screen |
| Clock On Slideshow | On/Off | |
| Slide Interval | Select from 3 seconds/5 seconds/l5 seconds/ 30 seconds/l minute/5 minutes/l5 minutes/ 30 minutes/l hour | |
| Slide Effect | Select from random/fly in/chessboard/cut/erase/ louver/random line/off | |
| Slide Mode | Select from single window/four windows | |
| Playback Mode | Select from sequential/random | |
| Slide Repeat | Sequential/Random | |
|
Calendar & Time Setup | Date | Setup of year/month/date |
| Time | Setup of time | |
| Time Format | Select from 24/l2 hour format | |
| Clock Mode | Select from 6 modes | |
|
System Setup | Language | Select from 7 languages |
| Power On & Off | Select from once/every day/work days/weekend | |
| Auto Power Off | Select from off or auto off time | |
| Auto Power On | Select from off or auto on time | |
| Start Mode | Select from Photo/Clock/Calendar/off | |
| Firmware Version | Show firmware version of the digital photo frame | |
| Reset Default Settings | Reset to default factory settings |
Auto Rotation
Simply rotate the frame 90 degrees anti-clockwise and your photos will automatically rotate, So you can view your vertical photos the correct way up, this only applies to single pictures.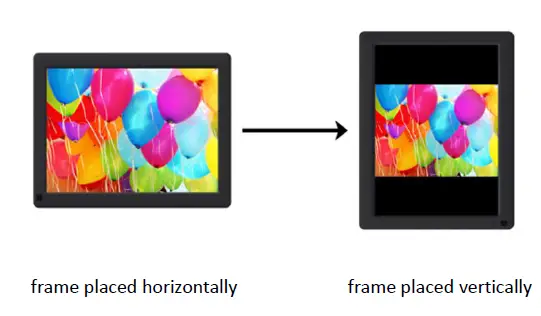
File
Select Browser] and press OK] to enter. Browse all files in your selected storage device. Press ![]() to select the file and press [OK] to confirm.
to select the file and press [OK] to confirm.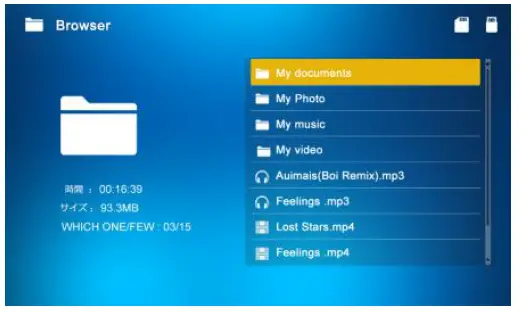
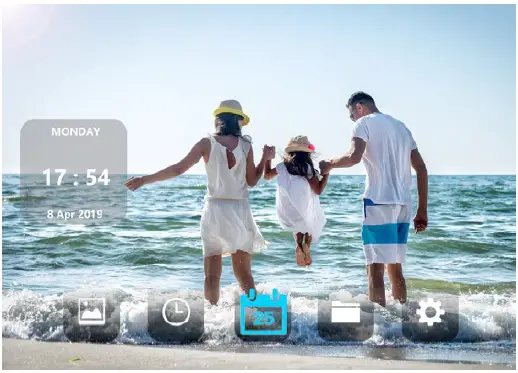
Clock
Select Clock] and press OK] to enter. Press![]() to select from 6 clock styles
to select from 6 clock styles
Calendar
Select Calendar and press OK] or press on the remote control to enter.
Setting
Select Setting and press |OK] to enter. Press ![]() to highlight the menu item.
to highlight the menu item.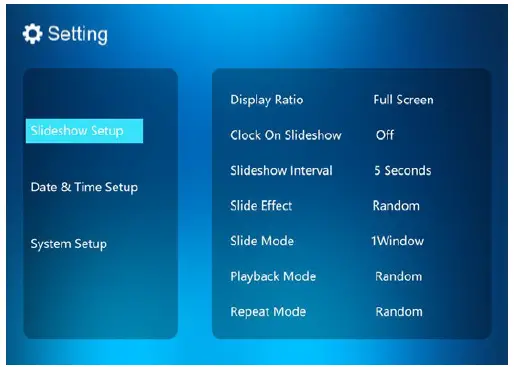
- Press |OK to enter the sub-menu.
- Press to change the value and press AV to confirm.
Note: after setting a menu item and accessing the next item, the set value will automatically be saved.
Recycling Information
Dispose of the packaging according to its type. Use the local possibilities for collecting paper, cardboard and other materials (Applicable in the European Union and other).
Devices that are marked with this symbol must not be disposed of with household waste! You are legally obliged to dispose of old devices separately from to dispose of household waste. Information on collection points that accept old appliances free of charge can be obtained from your local authority or town council.
Batteries and rechargeable accumulators must not be disposed of in household waste! As a consumer you are legally obliged to dispose of all batteries and accumulators, whether they contain harmful substances* or not, to be disposed of in an environmentally sound manner. Accumulators and batteries are therefore marked with the symbol shown opposite. For more information, contact your dealer or contact return and collection points in your community.
marked with: Cd Cadmium, Hg = Mercury, Pb = Lead
Conformity
Rollei GmbH & Co. KG hereby declares that this device complies with the following guidelines
- 2011/65/EC RoHS Directive
- 2014/30/EU EMC Directive
- 2014/35/EU LVD Directive
- 2009/125/EG EuP Directive
The complete text of the EU Declaration of Conformity can be downloaded at the following Internet address: www.rollei.com/EGK/pissarrodpf860
Rollei GmbH & Co. KG
In de Tarpen 42, 22848 Norderstedt, Germany
Rollei GmbH & Co. KG In de Tarpen 42 22848 Norderstedt www.rollei.com
Service-Hotline: +49 40 270750270 @rollei_de/rollei.foto.de


