![]()
NuTiny-SDK-NUC122 User Manual
ARM Cortex™-M0
32-BIT MICROCONTROLLER
NuTiny-SDK-NUC122 User Manual
For NuMicro™ NUC122 Series
The information described in this document is the exclusive intellectual property of Nuvoton Technology
Corporation and shall not be reproduced without permission from Nuvoton.
Nuvoton is providing this document only for reference purposes of NuMicro™ microcontroller-based system design.
Nuvoton assumes no responsibility for errors or omissions.
All data and specifications are subject to change without notice.
For additional information or questions, please contact Nuvoton Technology Corporation.
Publication Release
Date: Mar. 25, 2011
Revision V1.0
Downloaded from Arrow.com.
Overview
NuTiny-SDK-NUC122 is the specific development tool for the NuMicro™ NUC122 series. Users can use NuTiny-SDK- NUC122P to develop and verify the application program easily.
NuTiny-SDK-NUC122 includes two portions. One is NuTiny-EVB-122 and the other is Nu-Link-Me. NuTiny-EVB-122 is the evaluation board and Nu-Link-Me is its Debug Adaptor. Thus, users do not need other additional ICE or debug the equipment.
NuTiny-SDK-NUC122 Introduction
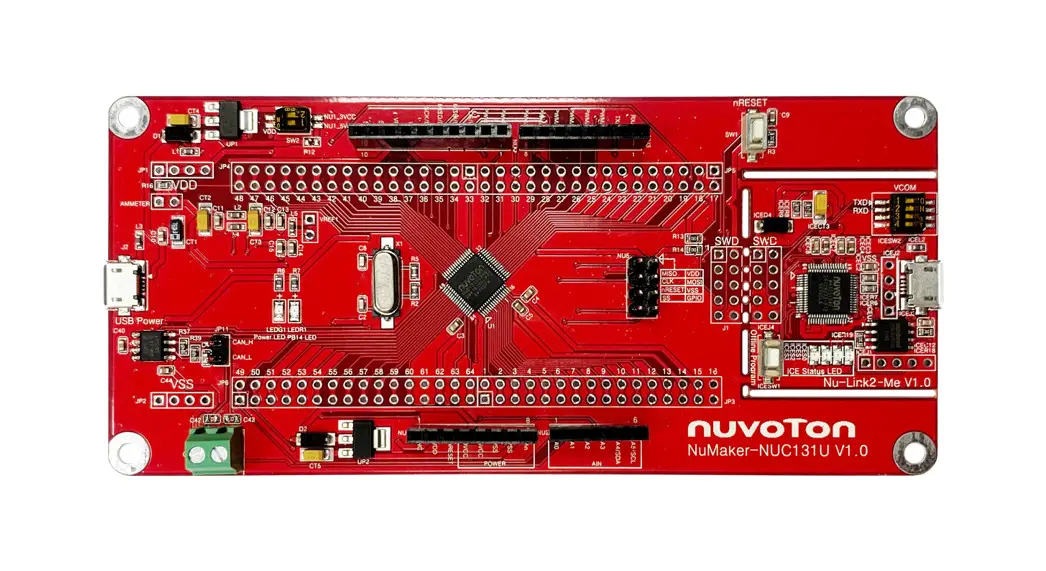
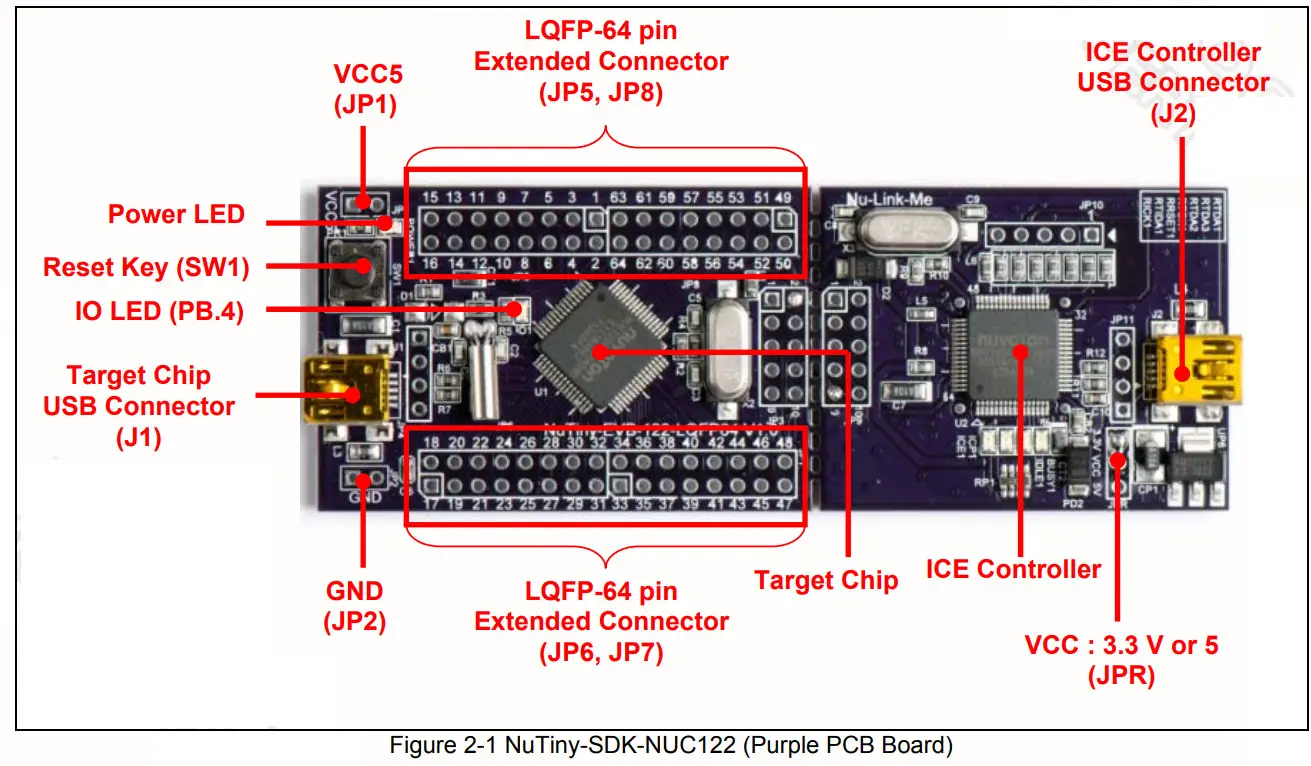
NuTiny-SDK-NUC122 uses the NUC122RD2AN as the target microcontroller. Figure 2-1 is NuTiny-SDK-NUC122 for the NUC122 series, the left portion is called NuTiny-EVB-122 and the right portion is Debug Adaptor called Nu-Link-Me. NuTiny-EVB-122 is similar to other development boards. Users can use it to develop and verify applications to emulate the real behavior. The onboard chip covers NUC122 series features. The NuTiny-EVB-122 can be a real system controller to design users’ target systems.
Nu-Link-Me is a Debug Adaptor. The Nu-Link-Me Debug Adaptor connects your PC’s USB port to your target system (via Serial Wired Debug Port) and allows you to program and debug embedded programs on the target hardware. To use the NuLink-Me Debug adaptor with IAR or Keil, please refer to the “Nuvoton NuMicro ™ IAR ICE driver user manual“ or “Nuvoton ™ NuMicro Keil ICE driver user manual” for detail. These two documents will be stored in the local hard disk when the user installs each driver.
2.1 NuTiny-SDK-NUC122 Jumper Description
2.1.1 Power Setting
- J1: USB port in NuTiny-EVB-122
- JP1: VCC5 Voltage connecter in NuTiny-EVB-122
- J2: USB port in Nu-Link-Me
| POWER Model | J2 USB Port | J1 USB Port | JP1 VCC5 | Target MCU Voltage |
| Model 1 | Connect to PC | X | DC 3.3 V or 5 V output [1] | DC 3.3 V or 5 V [1] |
| Model 2 | X | Connect to PC | DC 4.8 V or 5 V output [2] | DC 4.8 V or 5 V [2] |
| Model 3 | X | X | DC 2.5 V ~ 5.5 V input | DC 2.5 V ~ 5.5 V that decided by JP1 VCC5 input |
X: Unused.
Note 1: It is depended on the setting (VCC via connecting to 3.3 V or 5 V via) at the JPR jumper in Nu-Link-Me.
Note 2: It must put a diode device (4.8 V) or make both pins short (5 V) at the D1 in NuTiny-EVB-122.
2.1.2 Debug Connector
- JP3: Connector in target board (NuTiny-EVB-122) for connecting with Nuvoton ICE adaptor (Nu-Link or NuLink-Me)
- JP9: Connector in ICE adaptor (Nu-Link-Me) for connecting with a target board (for example NuTiny-EVB-122)
2.1.3 USB Connector
- J1: Mini USB Connector in NuTiny-EVB-122 for application using
- J2: Mini USB Connector in Nu-Link-Me connected to a PC USB port
2.1.4 Extended Connector
- JP5, JP6, JP7, and JP8: Connect to all chip pins in NuTiny-EVB-122
2.1.5 Reset Button
- SW1: Reset the button to reset the target chip in NuTiny-EVB-122
2.1.6 Power Connector
- JP1: VCC5 connector in NuTiny-EVB-122
- JP2: GND connector in NuTiny-EVB-122
2.2 Pin Assignment for Extended Connector
NuTiny-EVB-122 provides NUC122RD2AN on board and the extended connector for the LQFP-64 pin. Table 2-1 is the pin assignment for NUC122RD2AN.
| Pin No | Pin Name | Pin No | Pin Name |
| 01 | PB.14, /INTO | 33 | VSS |
| 02 | X320 | 34 | PC.13 |
| 03 | X321 | 35 | PC.12 |
| 04 | PA.11,12C1SCL | 36 | PC.11, MOSI10 |
| 05 | PA.10, I2C1SDA | 37 | PC.10, MIS010 |
| 06 | PD.8 | 38 | VDD |
| 07 | PD.9 | 39 | PC.9, SPICLK1 |
| 08 | PD.10 | 40 | PC.8, SPISS10 |
| 09 | PD 11 | 41 | PA.15, PWM3 |
| 10 | PB.4, RX1 | 42 | VSS |
| 11 | PB.5, TX1 | 43 | PA.14, PWM2 |
| 12 | PB.6, RTS1 | 44 | PA.13, PWM1 |
| 13 | PB.7. CTS1 | 45 | PA.12, PWM |
| 14 | LDO | 46 | ICE DAT |
| 15 | VDD | 47 | ICE CK |
| 16 | VSS | 48 | ADD |
| 17 | VBUS | 49 | PD.0 |
| 18 | VDD33 | 50 | PD.1 |
| 19 | D- | 51 | PD.2 |
| 20 | D+ | 52 | PD.3 |
| 21 | PB.0, RXO | 53 | PD.4 |
| 22 | PB.1, TXO | 54 | PD.5 |
| 23 | PB.2, RTSO | 55 | PB.15, /INT1 |
| 24 | PB.3, CTS0 | 56 | XT1 OUT |
| 25 | PC.5 | 57 | XT1_IN |
| 26 | PC.4 | 58 | /RESET |
| 27 | PC.3, MOS100 | 59 | VSS |
| 28 | PC.2, MIS000 | 60 | VDD |
| 29 | PC.1, SPICLKO | 61 | PS2DAT |
| 30 | PC.0, SPISSOO | 62 | PS2CLK |
| 31 | PB.10, TM2, SPISSO1 | 63 | PVSS |
| 32 | PB.9, TM1, SPISS11 | 64 | PB.8, TMO |
Table 2-1 Pin Assignment for NUC122 LQFP-64
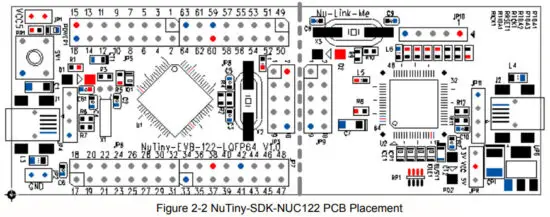
2.3 NuTiny-SDK-NUC122 PCB Placement
Users can refer to Figure 2-2 for the NuTiny–SDK-NUC122 PCB placements.
How to Start NuTiny-SDK-NUC122 on the Keil μVision® IDE®
3.1 Keil uVision
IDE Software Download and Install
Please visit the Keil company website (http://www.keil.com) to download the Keil μVision® IDE and install the RVMDK.
3.2 Nuvoton Nu-Link Driver Download and Install
Please visit the Nuvoton company NuMicro™ website (http://www.nuvoton.com/NuMicro ) to download “NuMicro™ Keil® μVision
IDE driver” file. Please refer to Chapter 6.1 for the detailed download flow. When the Nu-Link driver has been well downloaded, please unzip the file and execute the “Nu-Link_Keil_Driver.exe” to install the driver.
3.3 Hardware Setup
The hardware setup is shown in Figure 3-1

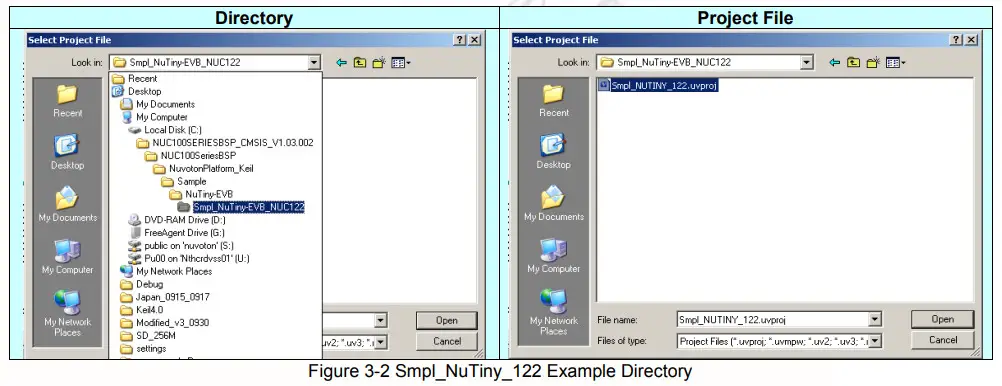
3.4 Smpl_NuTiny-NUC122 Example Program
This example demonstrates the ease of downloading and debugging an application on a NuTiny-SDK-NUC122 board. It can be found on the Figure 3-2 list directory and downloaded from the Nuvoton NuMicro™ website following Chapter 6.3.
To use this example:
The PB.4 LED will toggle on the NuTiny-EVB-122 board.
 Start μVision®
- Project-Open
Open the Smpl_NuTiny_122.uvproj project file  Project – Build
Compile and link the Smpl_NuTiny-NUC122 application Flash – Download
Program the application code into on-chip Flash ROM Start to debug mode
Using the debugger commands, you may: Review variables in the watch window
 Single-step through code
 Reset the device
 Run the application
How to Start NuTiny-SDK-NUC122 on the IAR Embedded Workbench
4.1 IAR Embedded Workbench Software Download and Install
Please connect to the IAR company website (http://www.iar.com) to download the IAR Embedded Workbench and install the EWARM.
4.2 Nuvoton Nu-Link Driver Download and Install
Please connect to the Nuvoton Company NuMicro™ website (http://www.nuvoton.com/NuMicro) to download the “NuMicro™ IAR ICE driver user manual” file. Please refer to Chapter 6.2 for the detailed download flow. When the Nu-Link driver has been well downloaded, please unzip the file and execute the “Nu-Link_IAR_Driver.exe” to install the driver.
4.3 Hardware Setup
The hardware setup is shown in Figure 4-1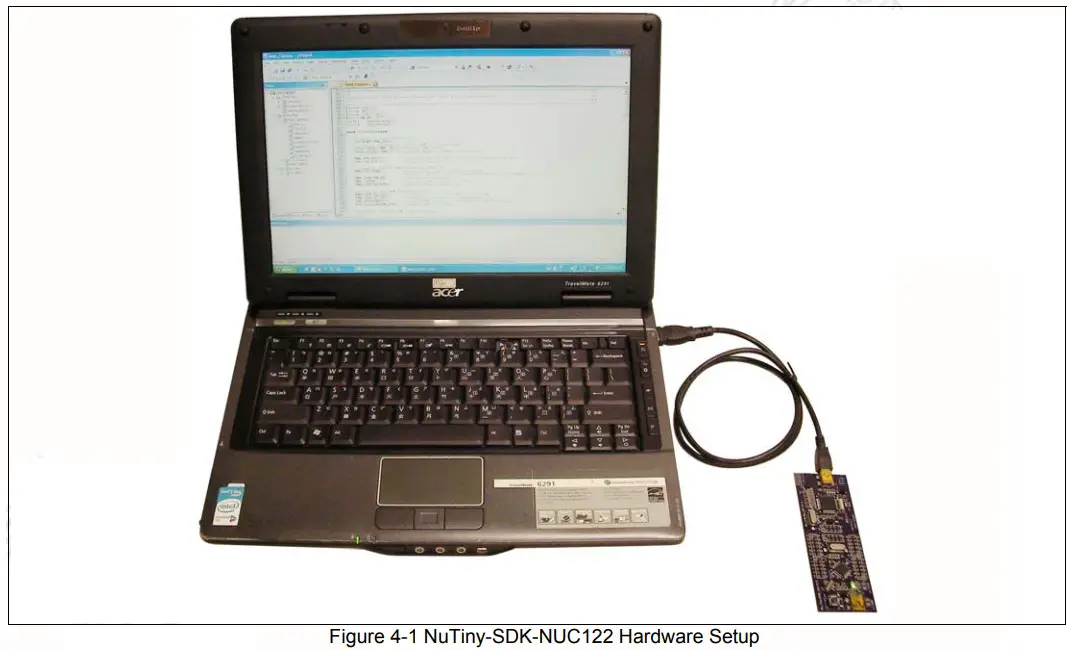
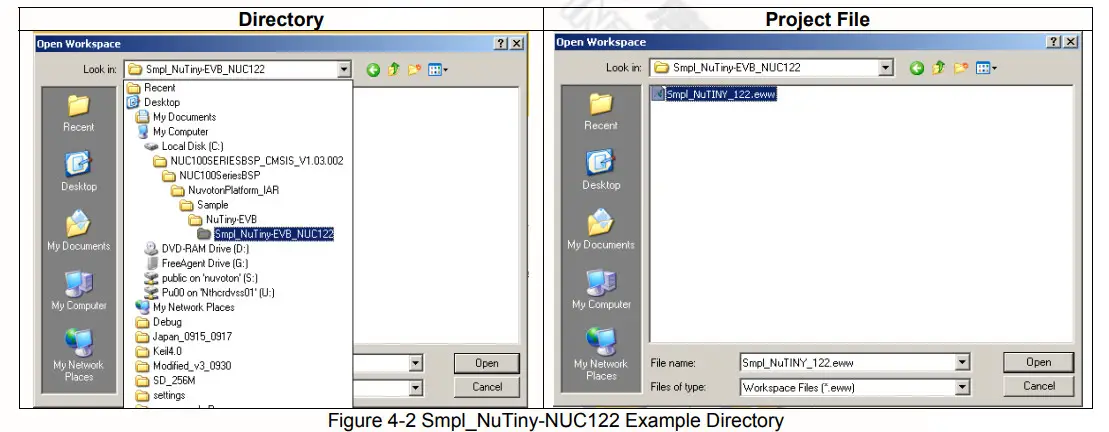
4.4 Smpl_NuTiny-NUC122 Example Program
This example demonstrates the ease of downloading and debugging an application on a NuTiny-SDK-NUC122 board. It can be found on Figure 4-2 list directory and downloaded from Nuvoton NuMicro ™ website following on Chapter 6.3.
To use this example:
The PB.4 LED will toggle on the NuTiny-EVB-122 board.
 Start IAR Embedded Workbench
- File-Open-Workspace
Open the Smpl_NuTiny_122.eww workspace file  Project – Make
Compile and link the Smpl_NuTiny-122 application Project – Download and Debug
Program the application code into on-chip Flash ROM. Single-step through code
 Reset the device
 Run the application
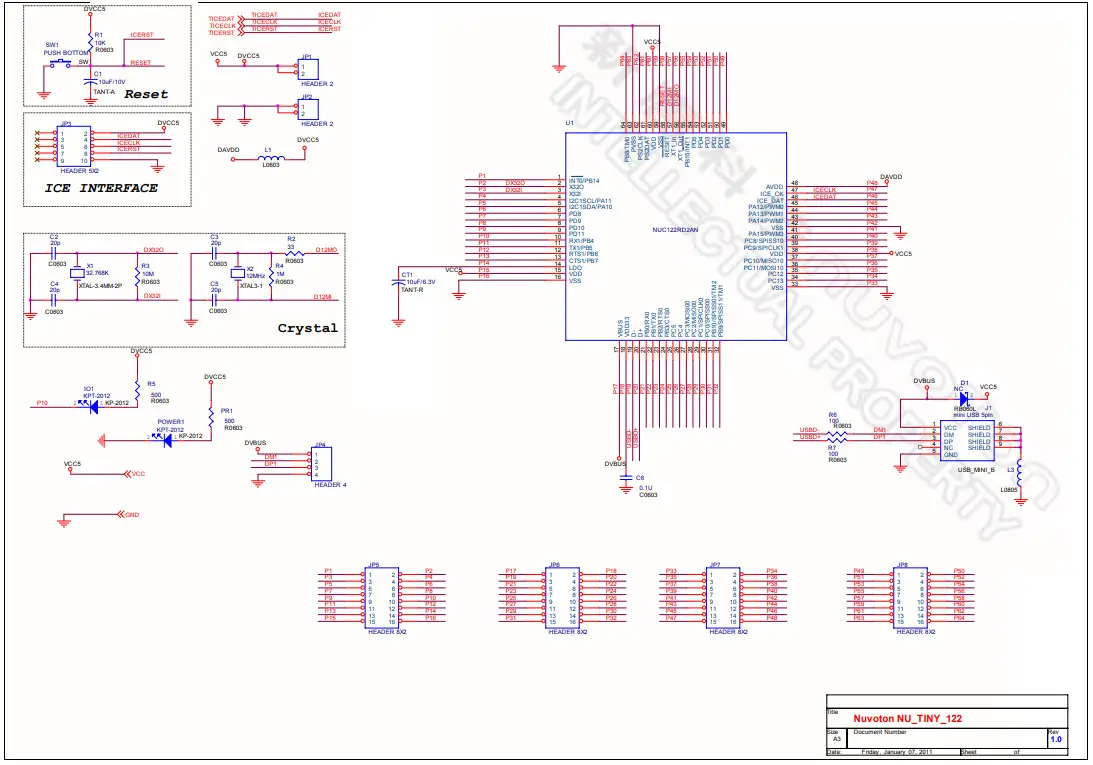
NuTiny-EVB-122 Schematic
6.1 Download NuMicro™ Keil μVision® IDE Driver
| Step 1 | Visit the Nuvoton NuMicro™ website: http://www.nuvoton.com/NuMicro |
| Step 2 | 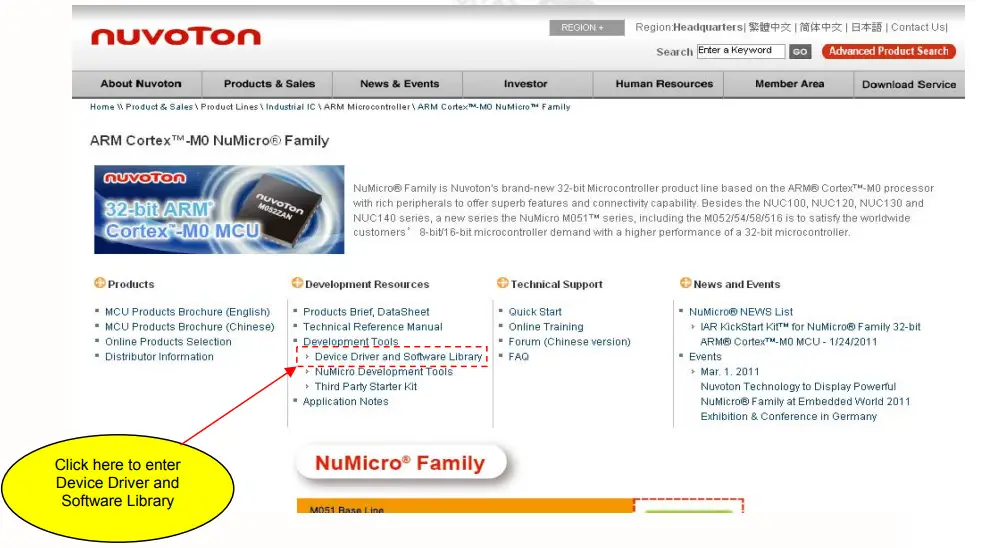 |
| Step 3 |  |
| Step 4 | Download the NuMicro ™ Keil μVision® IDE driver |
6.2 Download NuMicro™ IAR EWARM Driver
| Step 1 | Visit the Nuvoton NuMicro™ website: http://www.nuvoton.com/NuMicro |
| Step 2 |  |
| Step 3 | 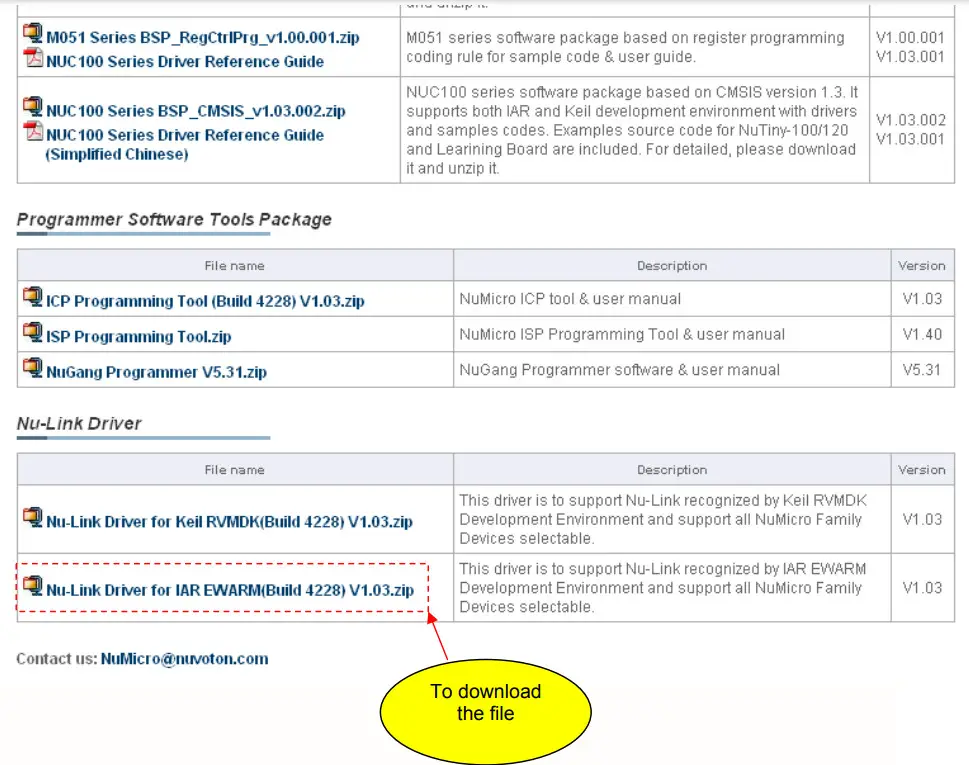 |
| Step 4 | Download the NuMicro™ IAR Embedded Workbench® driver |
6.3 Download NuMicro™ NUC100 Series BSP Software Library
| Step 1 | Visit the Nuvoton NuMicro™ website: http://www.nuvoton.com/NuMicro |
| Step 2 | 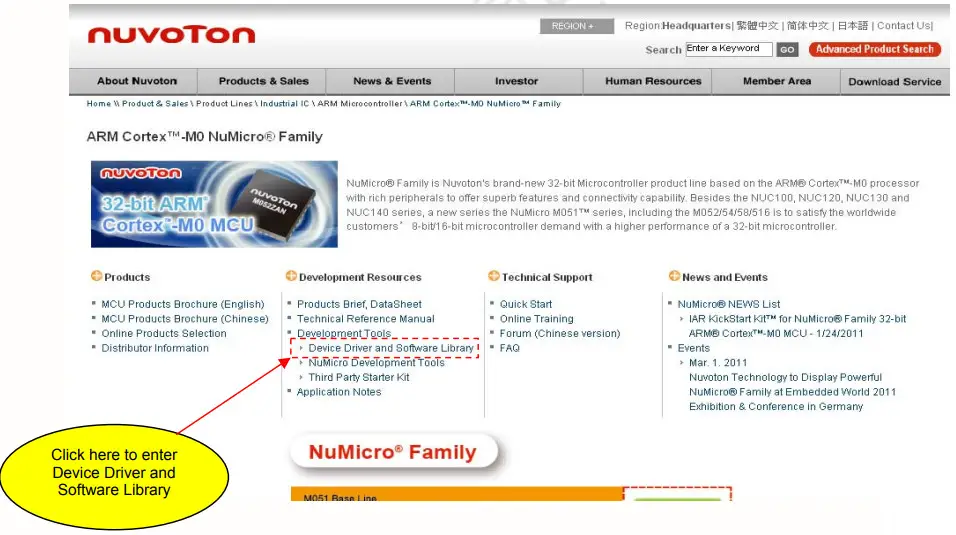 |
| Step 3 | 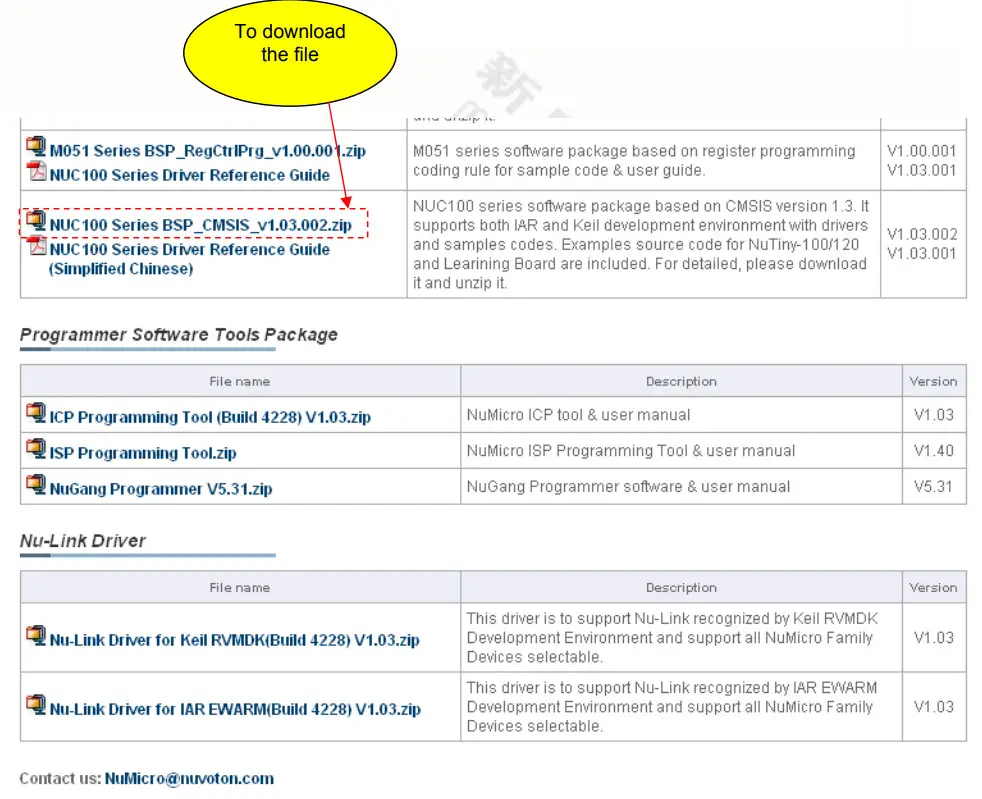 |
| Step 4 | Download the NuMicro™ NUC100 series software library |
Revision History
| Version D | Date | Page | Description |
| 1 | Mar. 25, 2011 | — | Initial Release |
Important Notice
Nuvoton products are not designed, intended, authorized, or warranted for use as components in systems or equipment intended for surgical implantation, atomic energy control instruments, airplane or spaceship instruments, transportation instruments, traffic signal instruments, combustion control instruments, or other applications intended to support or sustain life. Furthermore, Nuvoton products are not intended for applications wherein failure of Nuvoton products could result or lead to a situation wherein personal injury, death, or severe property or environmental damage could occur.
Nuvoton customers using or selling these products for use in such applications do so at their own risk and agree to fully indemnify Nuvoton for any damages resulting from such improper use or sales.
Please note that all data and specifications are subject to change without notice. All the trademarks of products and companies mentioned in this datasheet belong to their respective owners.
Publication Release Date: Mar. 25, 2011
Revision V1.0


