![]()
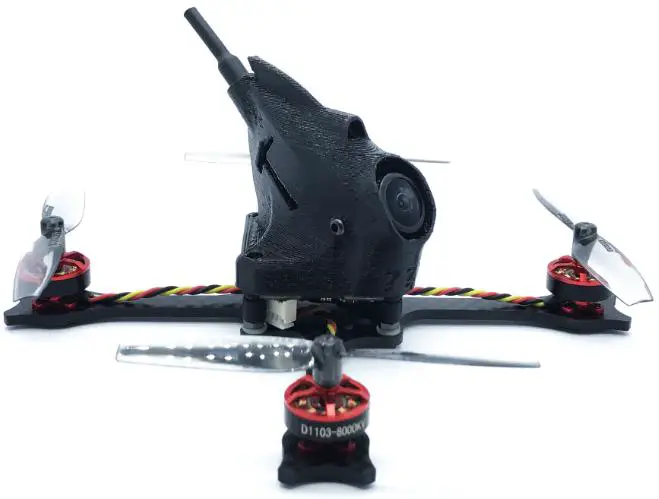
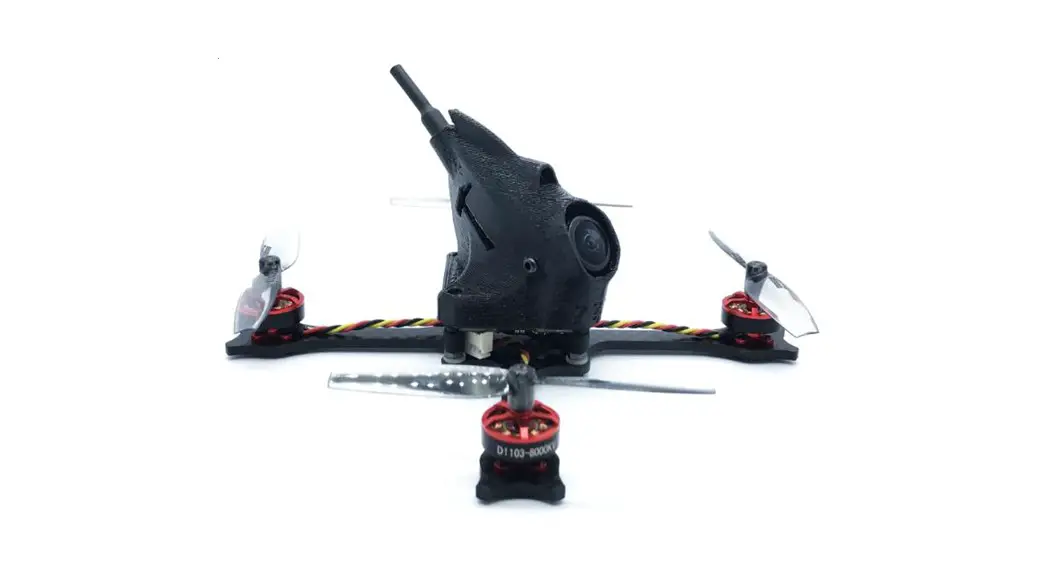
NameLessRC N47 FPV Racing Drone
User Manual
Specification:
Brand: NameLessRC
Item Name: N47 FPV Racing Drone
Prop: Gemfan 65mm2.5 inch
Input Power: 2S~3S Lipo battery
Wheelbase: 105mm
Weight: 42g
Camera: Caddx EOS2
Antenna: Copper pipe antenna
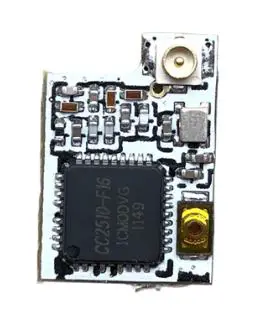
VTX: NameLessRC Nano400 VTX
FC & ESC: NameLessRC AIO4122S-4S F4 12A
Motor: 1103 8000KV
Pins Assignment
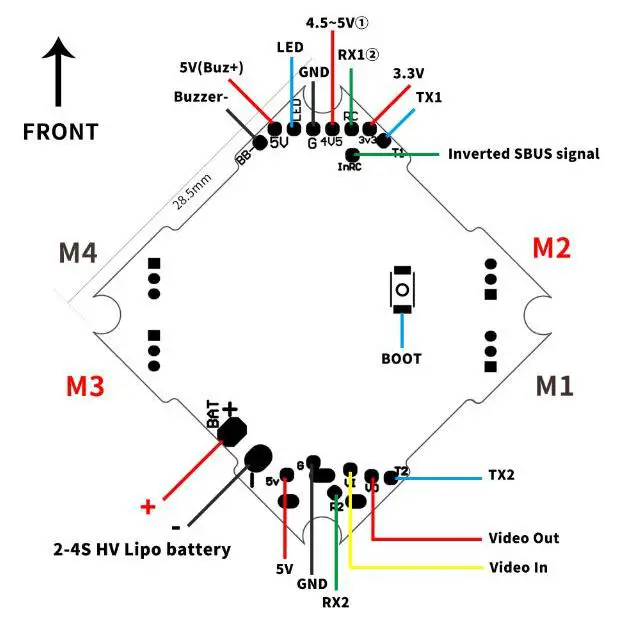
*1 When thew AIO board is powered only via USB port, only this pad provided output voltage.
*2 This pad can connect with PPM/DSM/non-inverted SBUS receiver’s signal port.
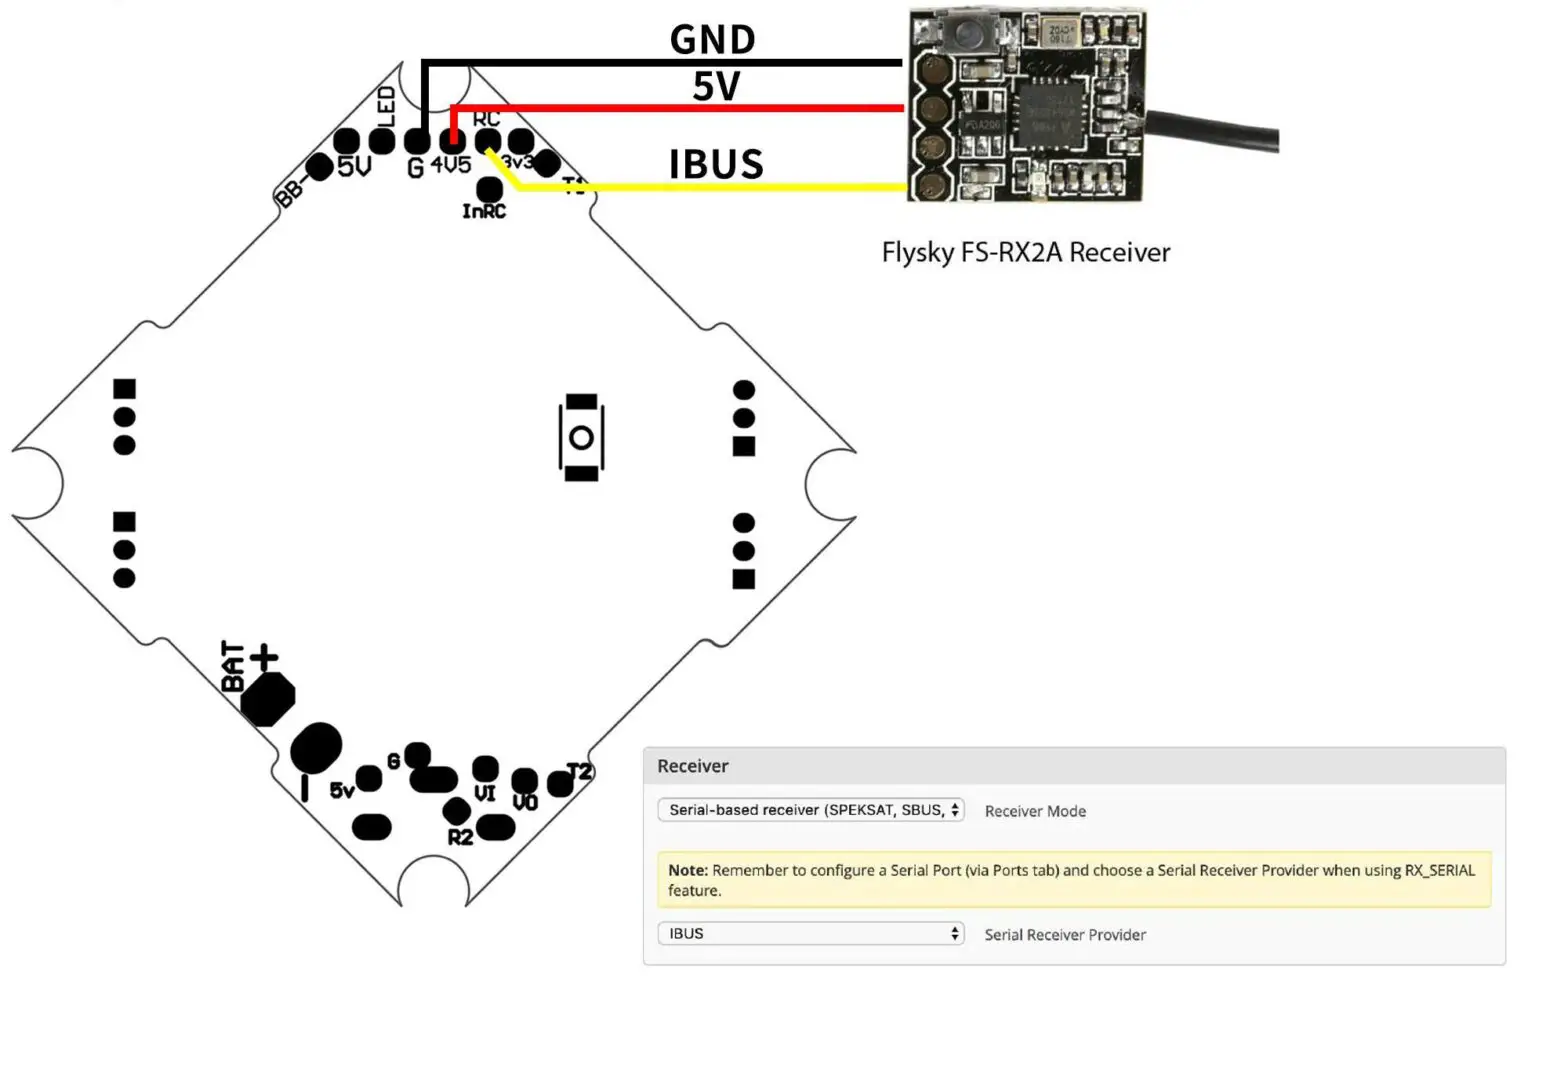
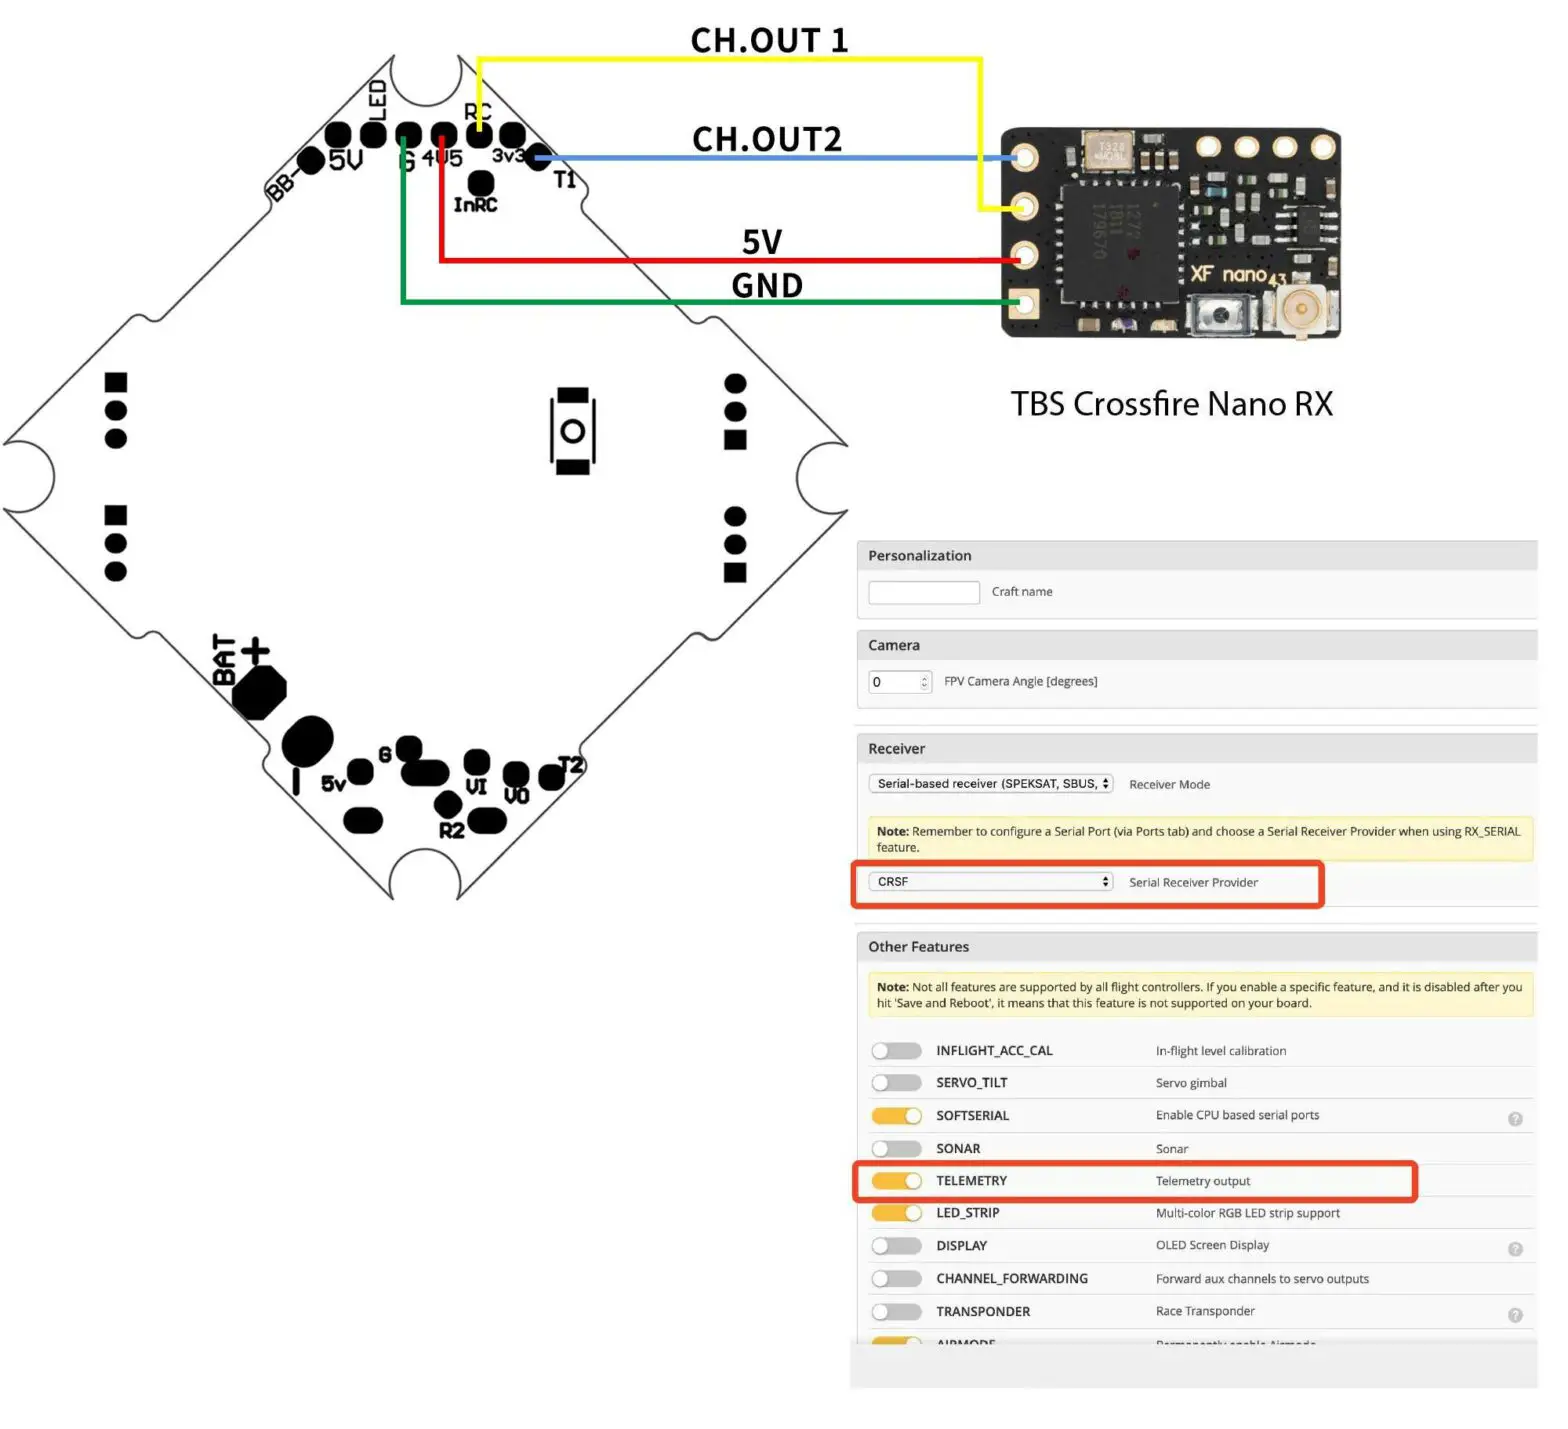
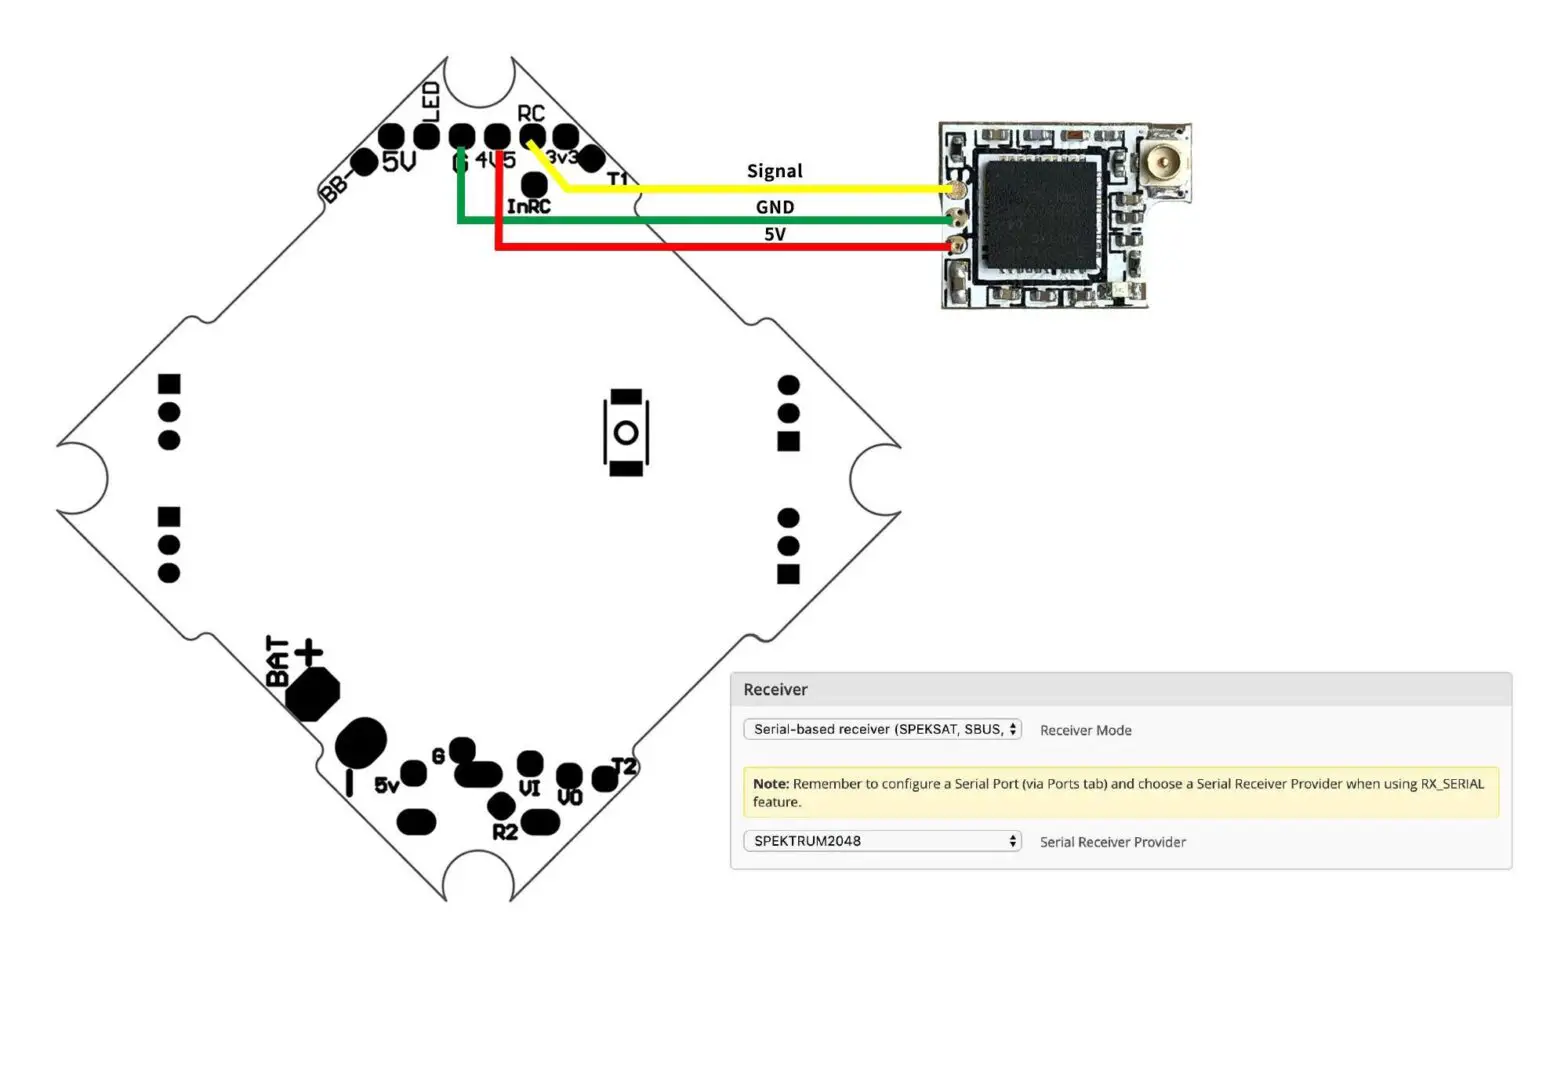
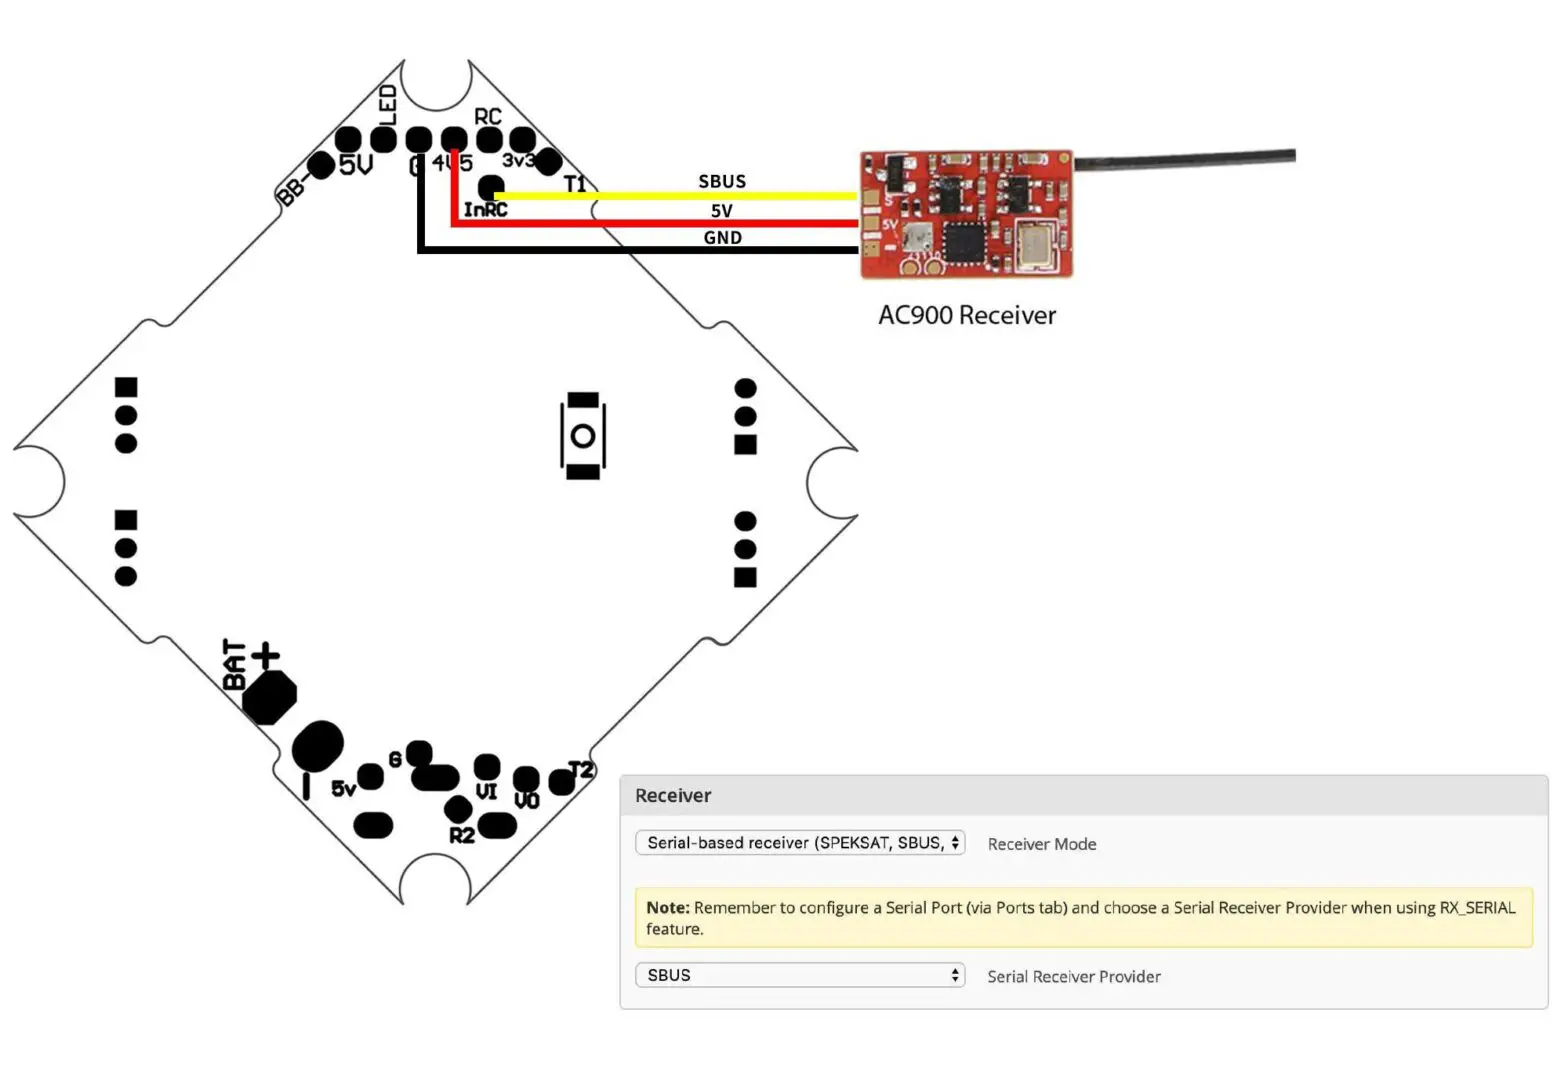
To connect the receiver
TBS Crossfire Nano RX:
Flysky FS-FX2A (IBUS):
DSMX (FullSpeed):
AC900 (Support FrSky D16 && FUTABA S-FHSS)
Binding
DSM receiver:
- Connet the receiver to FC and run the BF.Choose the correct port and type of your receiver on the flight controller.
- Type: set spektrum_sat_bind=9 in CLI then type ‘ save’.
- Disconnect the power and repower. The light on the receiver will flash quickly which means it’s on binding mode.
- Turn on the radio and select bind mode. Wait a moment.It means bind successfully if the light on receiver keeps brighting.
- After binding. Type: set spektrum_sat_bind=0 and type ‘save’ to quit the binding mode.
FRSKY receiver:
- Select D8 mode on Frsky remote control. Hold the bind key on Frsky-Nano receiver and connect the battery, then the receiver’s red light will be always on.
- Select the BIND mode on remote control , the Frsky-Nano receiver’s blue light will flash slowly and the red light will be always on which means bind complete.
- Enter: set sbus_inversion = off (set serialrx_inverted = on if your F3 FC is BF3.3 or newer)on BF CLI and save.
- Repower the Frsky-Nano receiver . The red light on it will flash very quickly which means it receives the singal from remote control.
The receiver defaults to the BUS protocol (The non-invert signal). When using F3 and F7 flight controller, it can be switched to SBUS protocol (The invert signal) by entering the command in BF CLI (step 3 of the binding tutorial). When using F4 flight controller (F4 flight controller does not support to switch signal type by entering command on CLI), if there isn’t respond in BF receiver page when the receiver binding with remote controller successfully, please press the binding button to switch the signal protocol after the receiver power on. After short pressing the binding button, the red or blue light on receiver will flash 3 times. Blue light flashes 3 times means the receiver is on BUS protocol (original default setting), the red light flashes 3 times means the receiver is on SBUS protocol (which can be supported on most of F4 flight control).Please re-power the receiver afther switching the protocol then the red/blue light on receiver will flash 3 times to show the current protocal.

- Press and hold the key on the receiver and connect the power to the receiver. The green indicator light on the receiver indicates that the frequency is entered.
- the remote control into the frequency of the state; the frequency into the receiver status indicator from the rapid flash to slow flash.
- the remote control manually out of the frequency interface, then the receiver green light becomes bright. Indicates that the signal receiver is successful.
VTX
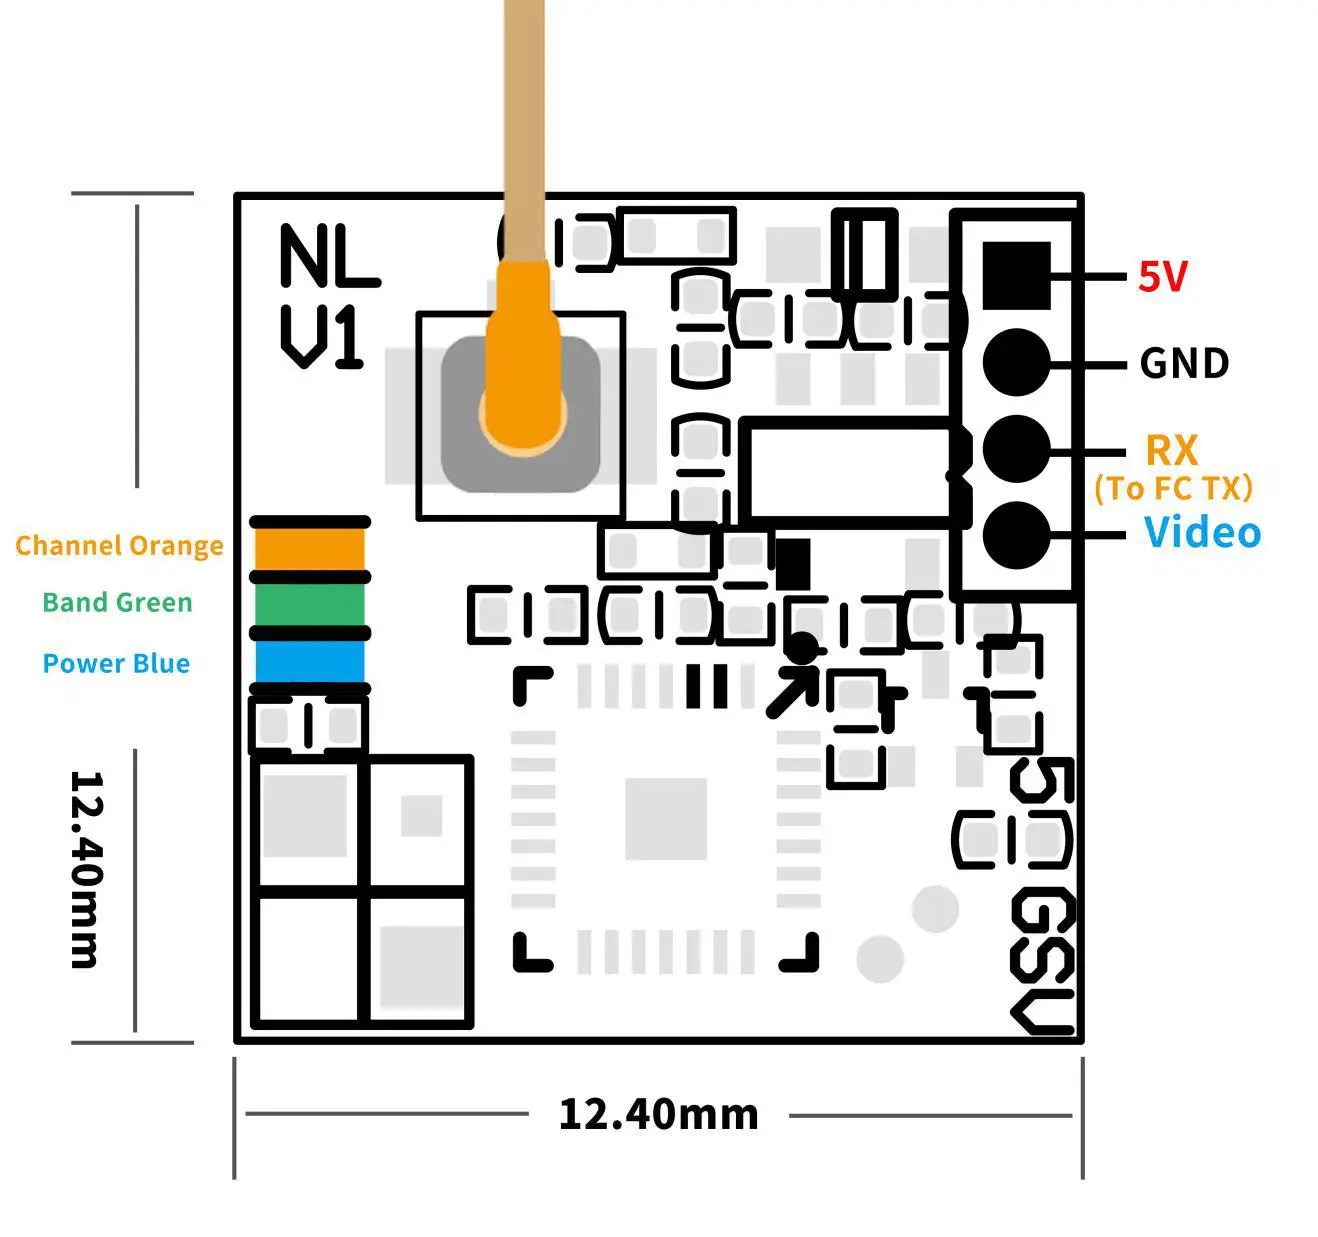
Frequency and power control methods
- The NLRC Nano400 VTX is set up via BFOSD Control (IRC Tramp)
- The NLRC Nano400 VTX’s default set up is lock on 25mw.
- To lock/unlock the VTX channels, please enter the PIT mode for three times within 30secs after powering up the VTX (PIT mode switch is set in BF mode page). The 3 LEDs will flash one by one if the VTX is successful to lock/unlock. Please re-power the VTX after this step.
LED functions
- Orange LED shows channels status. Green for bands and Blue for power.
- The Green LED flash after Orange and blue LED flash at the same time means the VTX enter PIT mode successfully.
- The three LEDs will flash one by one after the VTX is powered. After that, each LED will flash to show the channel, band & power’s status. Orange LED flash 1 time for Channel 1, 2 times for Channel 2. Green LED flash 1 time for Band 1, 2 times for Band 2 and so on. The three LEDs will flash one by one again after finish showing the status.
Frequency Table(Mhz):
Red area on frequency table is locked area! Please follow your local laws and regulations .
| Channel | 1 | 2 | 3 | 4 | 5 | 6 | 7 | 8 |
| Band A | 5865 | 5845 | 5825 | 5805 | 5785 | 5765 | 5745 | 5725 |
| Band B | 5733 | 5752 | 5771 | 5790 | 5809 | 5828 | 5847 | 5866 |
| Band E | 5705 | 5685 | 5665 | 5645 | 5885 | 5905 | 5925 | 5945 |
| FS | 5740 | 5760 | 5780 | 5800 | 5820 | 5840 | 5860 | 5880 |
| Race Band | 5658 | 5695 | 5732 | 5769 | 5806 | 5843 | 5880 | 5917 |
| Low Race | 5362 | 5399 | 5436 | 5473 | 5510 | 5547 | 5584 | 5621 |


