 Igloo Ice Maker Manual
Igloo Ice Maker Manual

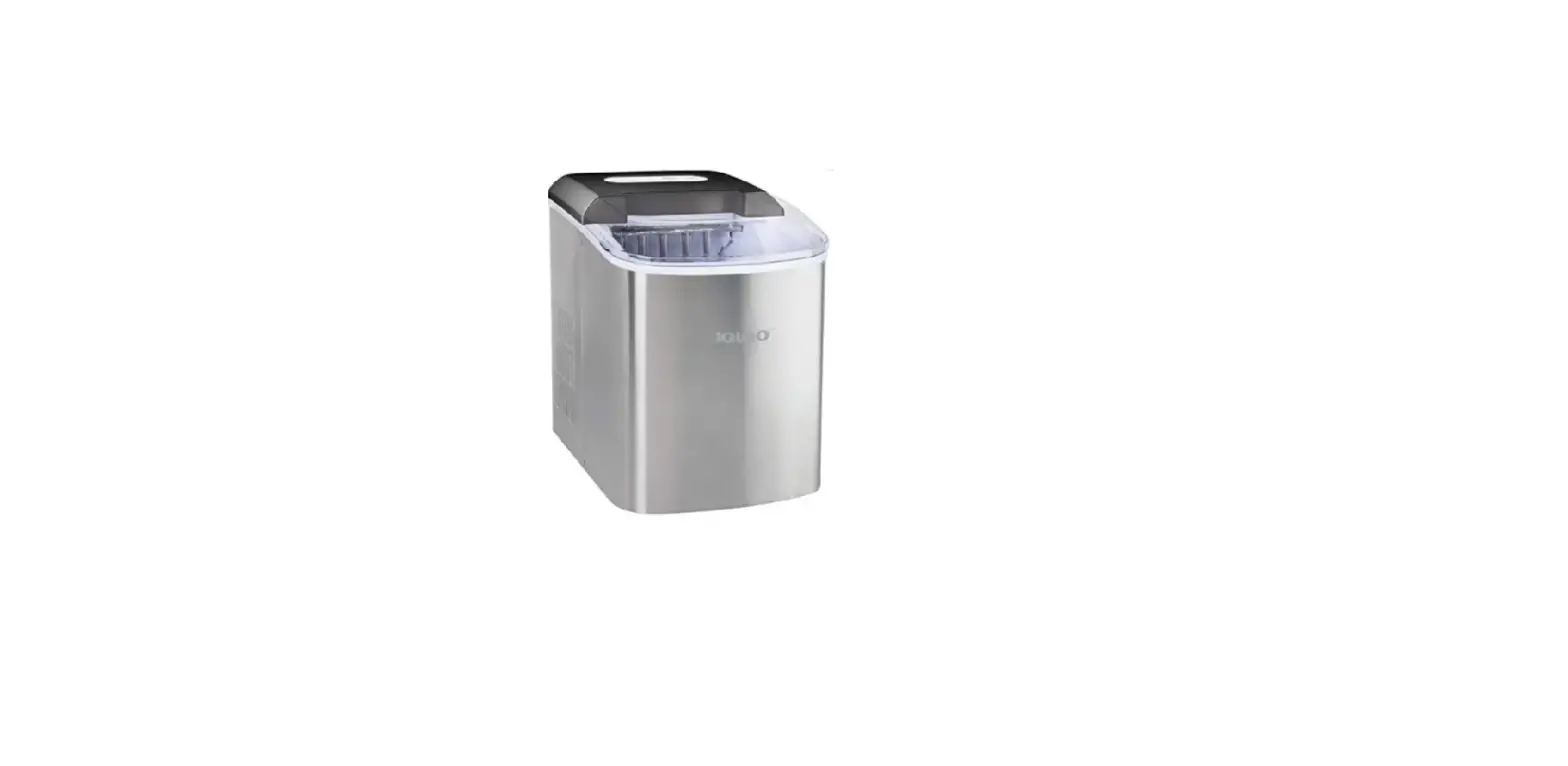
1. Cover with transparent window
2. Ice maker and pusher
3. Water reservoir (Not shown)
4. Control panel
5. Water drain cap: For draining water from ice water (Front Button of Unit)
6. Compressor cooling fan (Do not block air flow)
7. Ice shovel
8. Ice basket
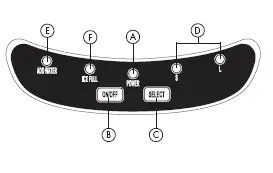
A. Power ON LED indicator light
B. Power ON/OFF button
C. Ice cube SELECT SIZE button
D. Selected ice size LED light indicator displaying: SMALL, and LARGE ice
cubes to make
E. “ADD WATER” (Alerts that there is no water in the water reservoir), must add water F. “ICE FULL” LED indicator
OPERATING INSTRUCTIONS
This portable icemaker uses a fully automatic control system, with an advanced microcomputer for easy and convenient ice making. Making ice is simple and fast. Just add water, plug into an outlet, and press the ON button. You can select one of the two ice cube sizes with the touch of a button. When first turning on the unit or during icemaking cycles, the compressor will stay idle for 3 minutes, while energizing.
There are warning indicators that alert you to fill water when the reservoir is empty and to remove ice when the storage basket is full. The icemaker also has built-in safeguards that can limit accidental damage, automatically shutting down the system when necessary.
Pre-Operating Instructions
Please read carefully.
1. The incline angle of the icemaker cabinet should not exceed 45° during transportation or use. Do not turn the icemaker upside down. Doing so could cause the compressor or refrigerating system to operate incorrectly. When the icemaker is moved or transported, please allow time for the fluids in the compressor to settle. Before using the icemaker for the first time, please wait 2 hours after the unit has been leveled and positioned in its proper place.
2. Please ensure the icemaker is level and on a stable table or platform to avoid malfunction.
3. The machine must be placed on a dry and level surface with sufficient ventilation, far from heat sources such as ovens, heaters and corrosive gases.
Leave an 8-inch clearance on all sides of the icemaker for proper ventilation.
4. Do not fill the water reservoir with hot water. This may damage the icemaker. It is best to fill the water reservoir with water of room temperature or lower.

Operating Instructions
1. Open the top cover, take out the ice storage basket and fill the water reservoir with drinkable (tap, purified or bottled) 2.3 quarts water to the level mark and replace the ice storage basket.
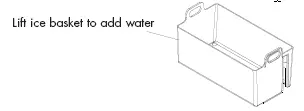
Make sure that the water level does not reach above the level mark or the
bottom of the ice storage basket. Close the top cover.
Note: During the operation process, if the level of water in the water reservoir becomes too low, the machine will automatically stop operating and the “Add Water” indicator will display on the LED.
2. Plug the unit into a grounded outlet. Push the ON / OFF button on the control panel to turn on the machine.
3. Select the desired size of ice cube by pressing the S or L ice selector button.
S = Small ice cubes (Approx. 7 minutes)
L = Large ice cubes (Approx. 12 minutes)
The icemaker will start making ice soon after. The next cycle of 9 ice cubes is complete (based on water temperature, ambient room temperature and selected ice cube size).
Note: To stop the operation, press the ON/OFF button.
Operating Process
1. Water is pumped from the water storage tank to the water box, which may take up to 1 minute.
2. The icemaking cycle begins when the evaporator rods are dipped into the water box. You will hear the compressor working.
3. It will take approximately 5-13 minutes for each icemaking cycle, depending on the size selected. The larger the size, the more time is needed to make the ice. After the cycle is finished, the water box will tilt forward and the remaining water will flow back into the water storage tank. The evaporator rods will then release the ice cubes.
Note: If the room ambient temperature is below 60° F, then small ice cube sizes are suggested to prevent ice cubes from fusing together.
4. Approximately 60 seconds later, the water box will tilt backwards and the ice pusher will push the ice into the ice storage basket. After the water box flips back to its original position, the next icemaking cycle will begin.
5. When the maximum capacity of ice cubes is collected and the ice reaches the temperature sensor, the icemaker will automatically stop operating. The “ICE FULL” LED indicator will light up.
If more ice is needed, remove the ice from the ice storage basket; then replace the basket into the machine, making sure that the basket is placed back to its original position. Note: When replacing the basket, ensure that the temperature sensor is above the basket so that the machine operates properly.
6. To continue making ice, check that there is water in the water storage tank. If there is no water in the water storage tank, then no water will be pumped into the water box, and the operation will stop. The “Add Water” LED display will light up. Press the “OFF” button. Fill the water storage tank with water, and then press the “ON” button for the icemaker to begin operating again. Allow the refrigerant inside the compressor at least 3 minutes to settle before
restarting.
7. If the compressor stops for any reason such as water shortage, too much ice, power off, etc., do not restart the machine right away. Wait at least 3 minutes before restarting the machine.
CLEANING AND MAINTENANCE
Before using your icemaker, it is strongly recommended that you clean the icemaker thoroughly. Be sure to clean the icemaker regularly.
1. When cleaning, please make sure the power has been turned off and the plug is disconnected from the outlet. When plugging or unplugging the unit from the outlet, pull directly on the plug. Never pull on the power cord.
2. Remove the ice storage basket.
3. Drain remaining water from unit. Remove the cap, then the
rubber plug from the spout. When assembling back together,
the rubber plug must be inserted first into the spout, and then
capped. Otherwise, the icemaker will leak.
4. Use a mild detergent diluted in warm water and wipe with a soft
towel or sponge. Solvents, detergents and abrasives must never be used for cleaning.
5. Wipe the inner parts, such as the ice storage basket, water reservoir, water box, ice pusher, and evaporator rods.
6. The outside of the icemaker should be cleaned regularly with a mild detergent solution, warm water, and a soft cloth.
7. Dry the interior and exterior with a soft cloth.
8. To begin making ice once the unit has been cleaned, pour clean water into the water reservoir and fill up to the level line follow operating instructions. Never tilt or place the icemaker on its side, otherwise you must wait 10 hours for compressor coolant to settle.
9. To ensure the cleanliness of the ice cubes, the water in the water storage tank should be replaced every 24 hours.
10. When the machine is not in use or will not be used for an extended period of time, unscrew the drain cap, then remove the rubber plug behind the unit to empty the remaining water in the water reservoir completely. (Follow the instructions in number 4 above.)

FAQS
The power light is only on when plugged in. The light flashes when the ice is stuck usually because the ice basket is full. Empty the ice bucket and press the light and production should resume.
Texas
Drain and wipe
The water reservoir is empty. Add water.
The water level is too high. Remove some water.
The ice maker has shut off automatically because of a malfunction. Turn off the power, wait for 10 minutes, and turn on again. If the problem persists, contact your dealer or Igloo customer service for assistance.
with the lid open (and room to open it) you will need 19 inches of headroom.
We have not had that issue. We only use distilled water. We have loved our ice maker. The plug needs to be tight
It is marked with the line and the word fill line.
Very minimal. You will hear the ice drop and being flipped into the bucket. But hardly any noise while making the ice.
2 amps
Does this need a water hookup ?
No it doesn’t need water hook up but please be aware that your cord can get hot and catch fire! They won’t do anything about mine and I had mine for 2 months! So much for honest companies !
The kind that breaks down and stops working about 31 days..
plugs into electrical USA standard outlet!
Igloo is based and manufactured in Katy, Texas
There is a basket inside the clear window that catches the ice cubes! Comes with a scoop and each drop of ice cubes is made every 6 minutes!
Mine is on constantly in the heat of summer & I transfer to ice cube bin into my freezer when it gets full!
It would be my understanding that the company making this product was only a licensee of the “brand” Igloo. This is my second unit, and it seemed very similar to my original unit, which I believe was actually made by Igloo. I would try to contact Igloo directly for whatever need you have with this unit.
Water level has to be correct the item does have to be level and then turn off the ice maker and turn it back on making sure you select what kind of ice cube’s you want. if it’s still not getting water then the pump may not be good or is clogged
The measurements are listed in the product description. But they are approximately 10″ wide, 12″ deep and 14″ high. It needs air circulation in the back and on the right side.
All ice cube comes in different sizes. Often times the ice are smaller in the first cycle since the machine is starting up. But once the ice is on the 3rd cycle, often times it becomes larger. Sizes vary depending on how long you run the machine. Best regards; Customer Care Representative
90 days.
Silent until it drops the ice and that’s really not much!
It has a sensor that activates a light and it will not make any more ice if it is full. You will kind of know bc it is quiet when not making ice. It is an awesome machine.
ice maker
No , it requires some cleaning but it is minimal in my opinion .
If you haven’t received the ice maker you ordered, you should be able to go to “ My Orders” then click on “ Track Package” … that should give you estimated delivery date…. If not, go to “ Contact Us” .. Customer Service.. Call Customer Service… They should be able to help you.
VIDEO
Igloo-Ice-Maker-Instruction-Manual
Igloo-Ice-Maker-Instruction-Manual-original
![]()


