Godox VK2-LT Vlog Kit
Forward
Thank you for purchasing!
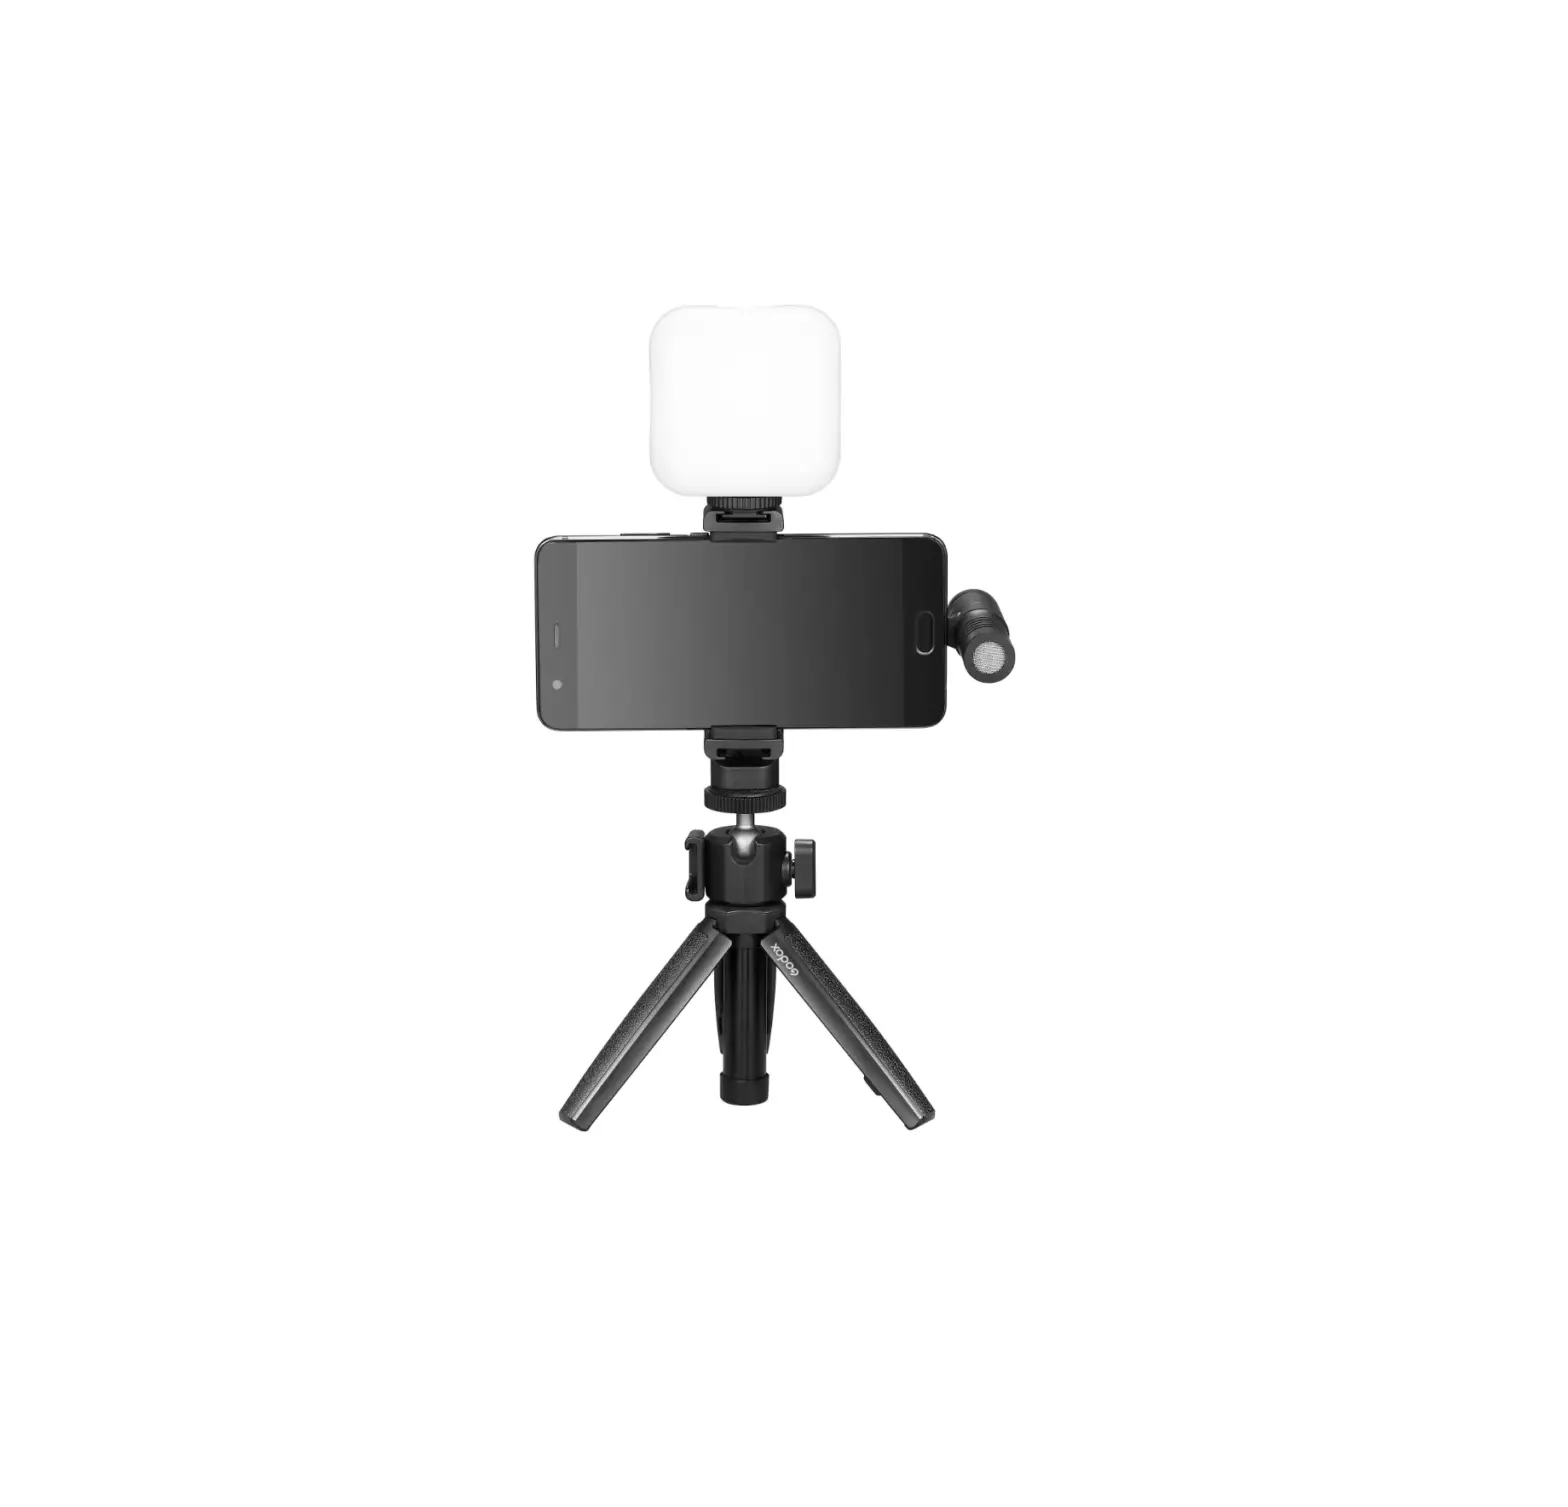
Vlog Kit helps you to easily start recording quality video and audio with your smartphone anytime anywhere.
This series of Vlog Kit is a high cost-effective combination. It is a complete package designed specifically for hassle-free, high-quality audio and video recording to any smartphone. And it supports a large number of usage scenarios of mobile phones, such as daily blog, online course teaching, Vlog video shooting, remote operation video conference lighting, video call lighting, pet life video shooting, children life video shooting, etc. VK2-LT is applicable to smartphone with lightning microphone connector.
About Vlog Kit
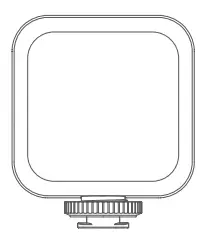
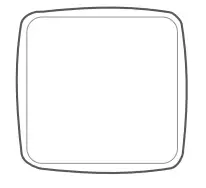
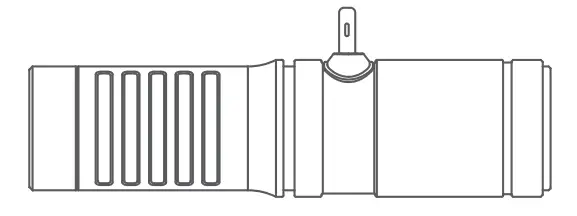
[Mini Bi-color Video Light) Compact and muti-function light with brightness adjusted between 0%-100%,color temperature adjusted between 3200-6500k, built-in rechargeable lithium battery charged by USB Type-C port, and the silicone diffuser making the light more soft and even.
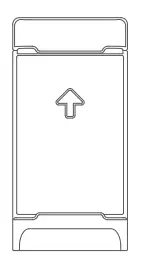
[Compact Directional Microphone) Super-cardioid microphone featured in compact and light-weight size, connected to smartphone, plug and play, with windscreen foam and wind cap to provide clear and natural sound recording.
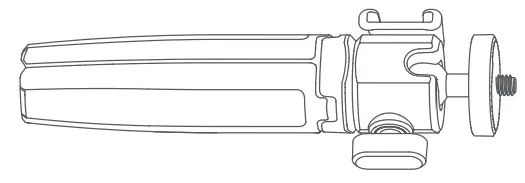
[Mini Tripod] Hand-held table tripod MT03, aluminium alloy and platic, three-stage telescopic adjustment (3 levels of height), with a rotatable 360° ball head and standard 1/4 inch screws.
[Smartphone Clamp] Practical mobile phone holder MTH02, compatible with multiple brands and types of smart phones, minimum width: 2.4 inches/6 cm; maximum width: 3.5 inches/9 cm. Stretch range: 60~90mm.
Warning
![]() Please read carefully and follow the warnings or instructions provided by the manufacturer. Keep this set out of reach of children to avoid to avoid unnecessary injury.
Please read carefully and follow the warnings or instructions provided by the manufacturer. Keep this set out of reach of children to avoid to avoid unnecessary injury.![]() LED6Bi and Geniusmic LT do not have waterproof function. Please take measures of
LED6Bi and Geniusmic LT do not have waterproof function. Please take measures of![]() waterproof in in rainy or damp environments.
waterproof in in rainy or damp environments.![]() Do not use LED6Bi in the presence of flammable gases, chemicals and other similar materials. In certain circumstance, these materials may be sensitive to the strong light emitting from this product and fire or electromagnetic interference may result.
Do not use LED6Bi in the presence of flammable gases, chemicals and other similar materials. In certain circumstance, these materials may be sensitive to the strong light emitting from this product and fire or electromagnetic interference may result.![]() Do not use Geniusmic LT in the presence of flammable gas. In certain circumstance, please pay attention to the relevant warnings.
Do not use Geniusmic LT in the presence of flammable gas. In certain circumstance, please pay attention to the relevant warnings.![]() LED6Bi has built-in lithium battery, do not disassemble, impact, squeeze or put it into fire. If serious bulge occurs, please do not use. Do not use or store the product if the ambient temperature reads over the range of -1 O • C to 40 • C. Please charge the product with included adapter and correctly operate it within the defined voltage and working temperate according to the instruction manual.! Do not place Geniusmic LT in a high temperature environment exceeding 60 degrees.
LED6Bi has built-in lithium battery, do not disassemble, impact, squeeze or put it into fire. If serious bulge occurs, please do not use. Do not use or store the product if the ambient temperature reads over the range of -1 O • C to 40 • C. Please charge the product with included adapter and correctly operate it within the defined voltage and working temperate according to the instruction manual.! Do not place Geniusmic LT in a high temperature environment exceeding 60 degrees.![]() Geniusmic LT is compatible with most mainstream models with Lightning interface on the market.
Geniusmic LT is compatible with most mainstream models with Lightning interface on the market.
Name of Parts
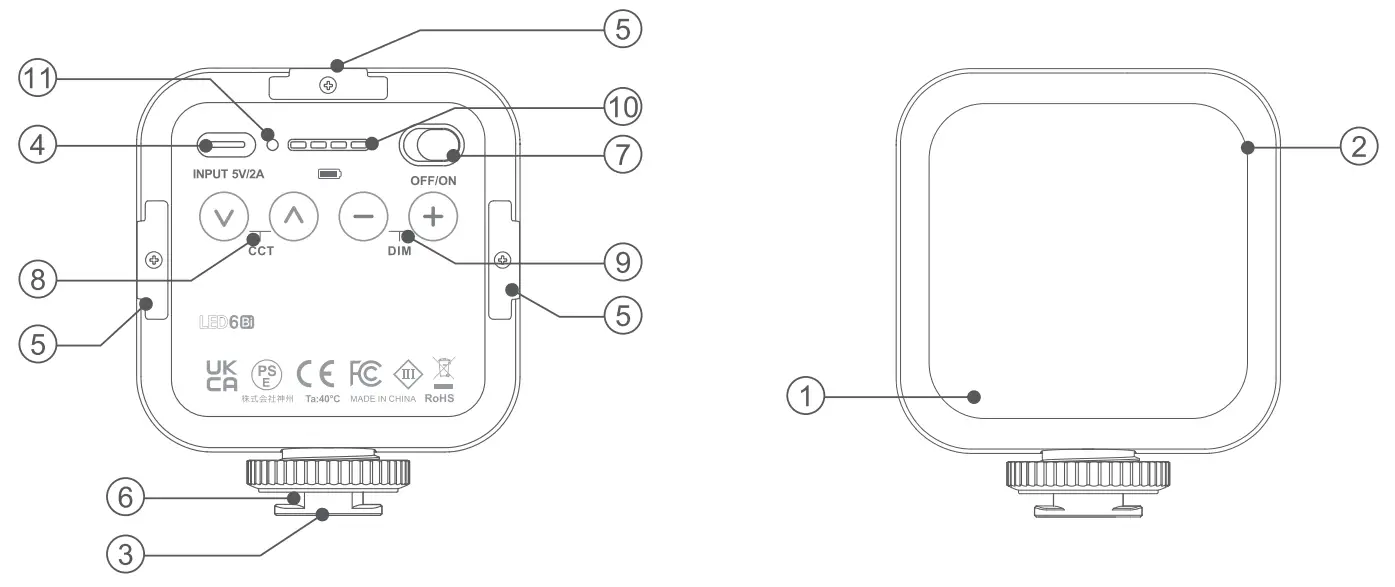
LED6Bi
- LED Beads
- Diffusion
- 1/4 Cold Shoe Mounting Base
- Type-C USB Charging Port
- Cold Shoe Slot
- Cold Shoe Slot
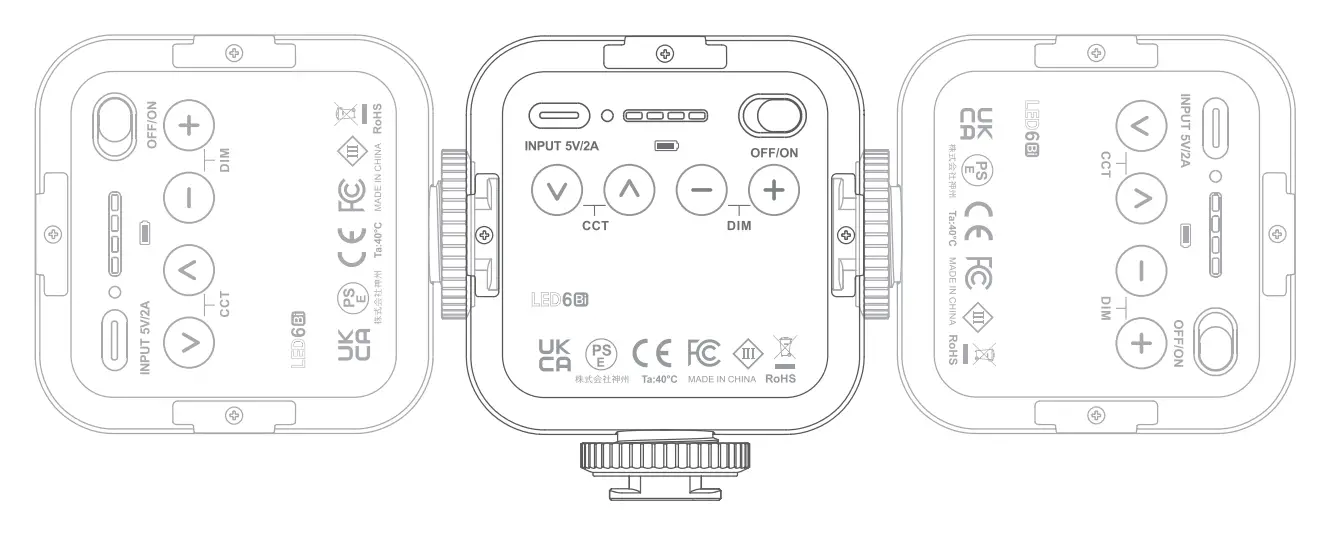
- Power Swith
- Color Temperature Adjustment Button
- Brightness Adjustment Button
- Battery Level Indicator
- Button indicator

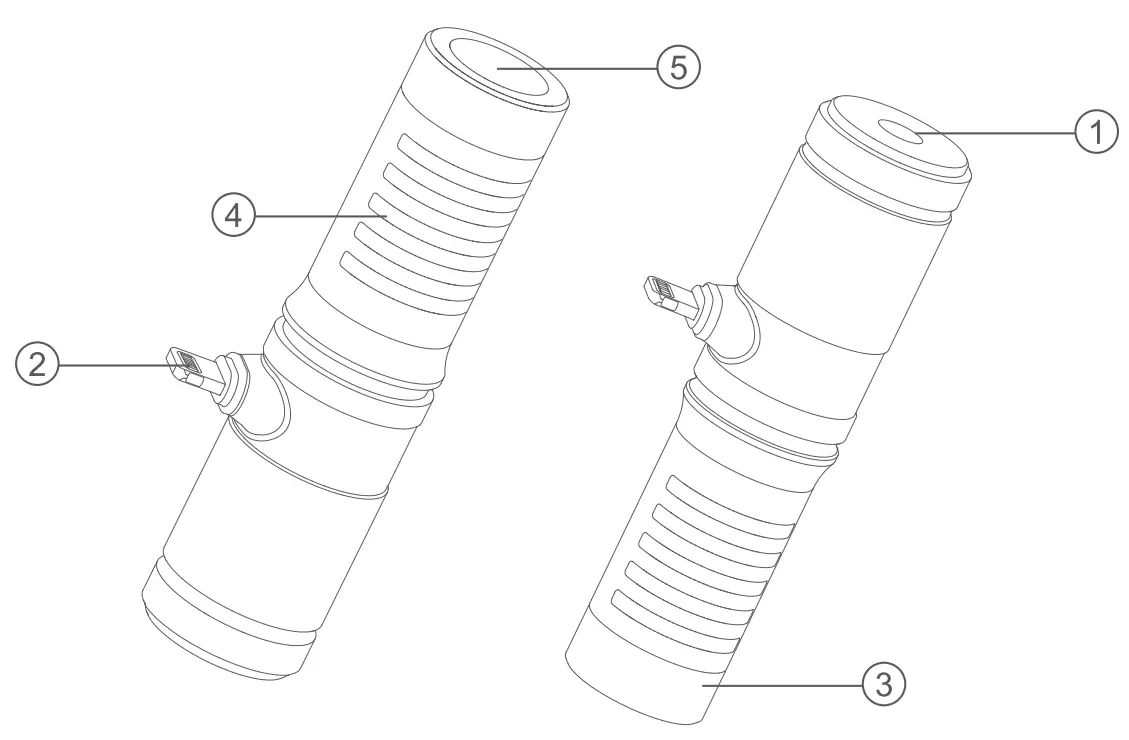
Geniusmic LT
- 3.5mm TRS connector
- MFicertif1catedLightningconnectorplug
- Hypercardioid radio microphone
- Protective Steel Mesh
- MIC Steel Mesh

WHAT’S INSIDE
VK2-LT
- LED6Bi•l
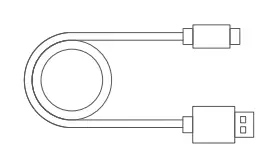
- USB Type-C Charging Cable*l
- Smartphone Clamp MTH02*1
- Geniusmic LT(Lightning connector) * l
- Diffuser*l
- Mini Tripod MT03*1
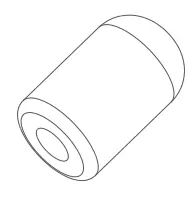
- Windscreen FoamA-1
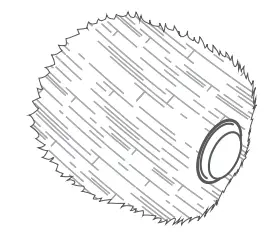
- Wind Cap*l
LEDGBi X 1 | USB Type-C | Diffuser X 1 | Mini Tripod MT03 x 1 |
Smartphone | Windscreen Foam x 1 | Wind CapX 1 | GeniusmicLT |
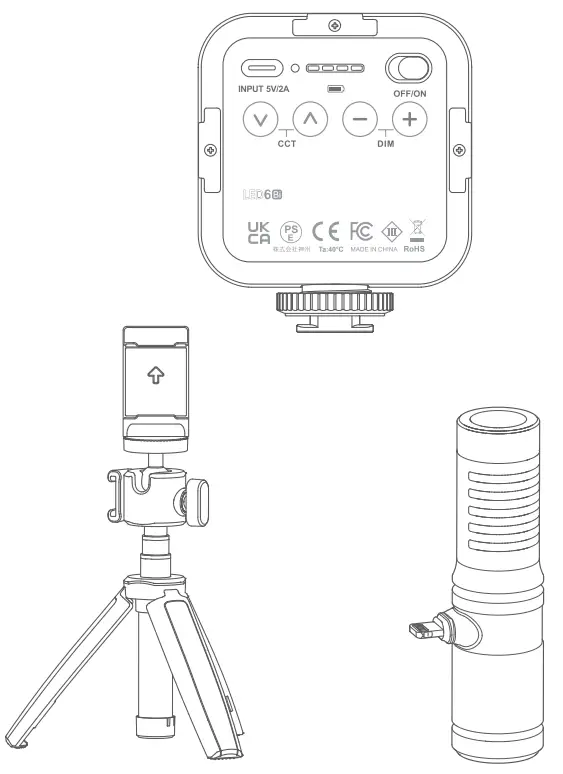
Installation Guide
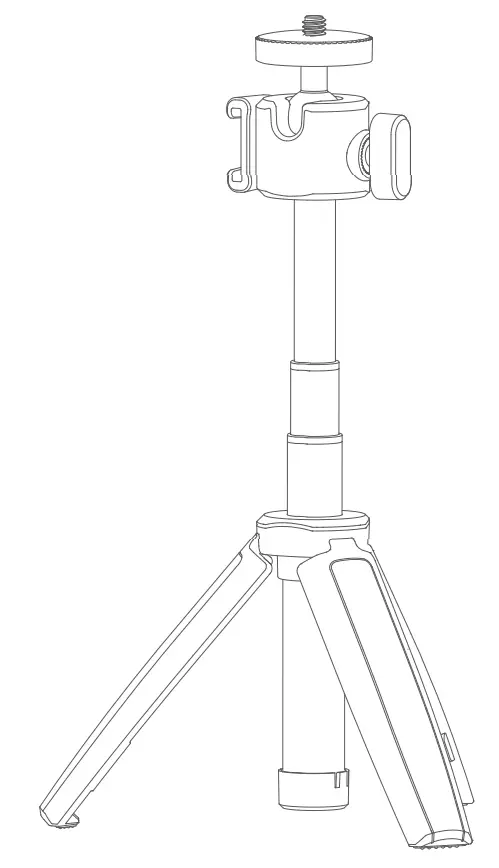
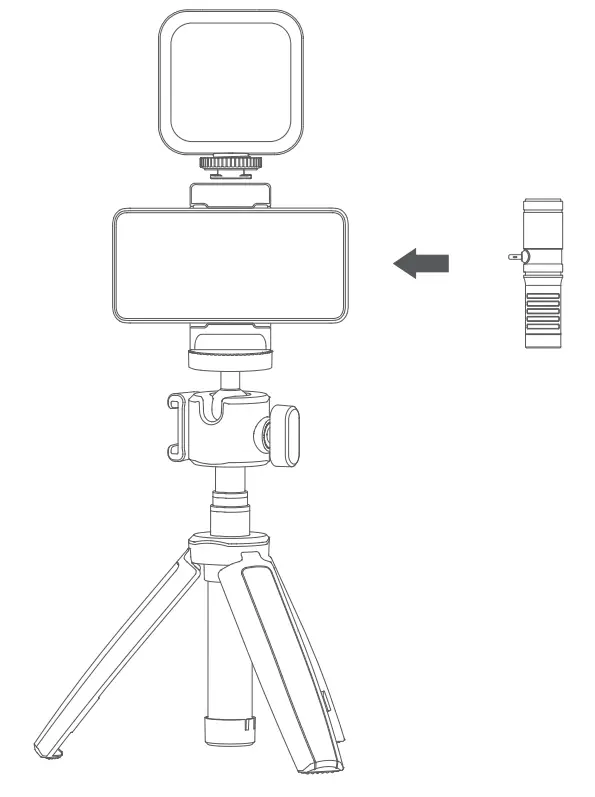
- Expand the mini tripod MT03.

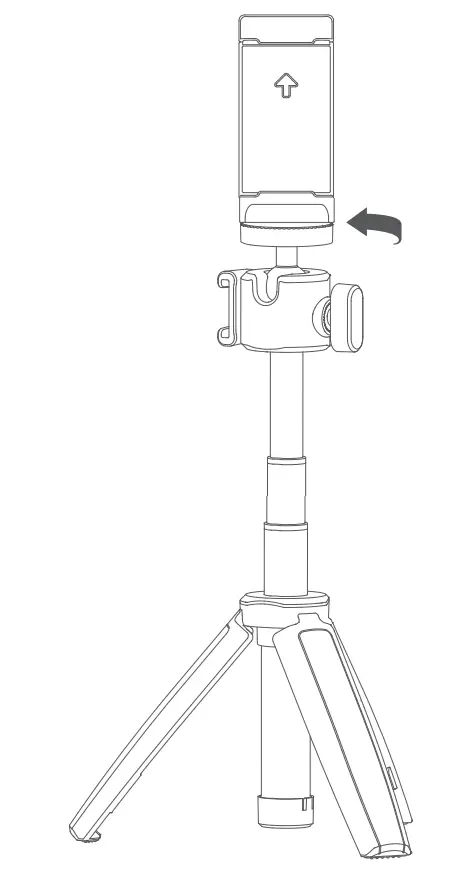
- Install the smartphone clamp MTH02 on the mini tripod in clockwise direction.

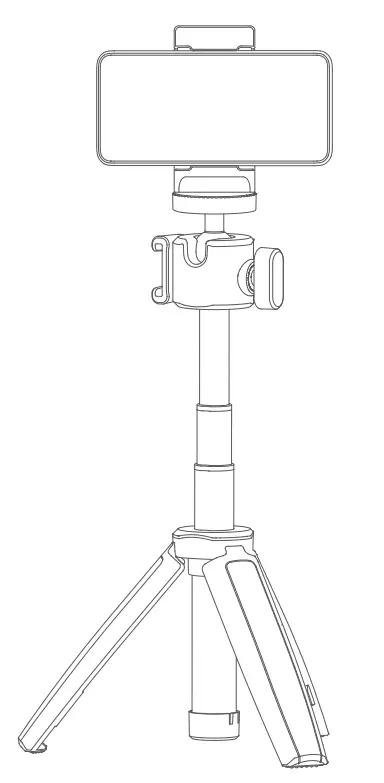
- Fix the smart phone in the smartphone clamp.

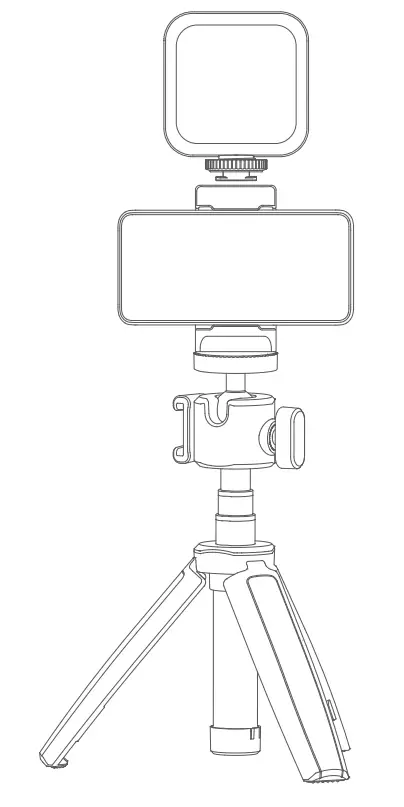
- Slide the cold shoe of the LED6Bi in to the cold shoe slot of the MTH02.

- Finally, plug the Geniusmic, Geniusmic UC or Geniusmic LT into the headset port of the mobile phone.

Note: the smartphone is not included.
Cautions
- For LED6Bi
• No over 24 hours’ continuous charging.
• Store in dry, cool. ventilated places.
• Do not put aside or into fire.
• Dead batteries should be disposed according to local regulations.
• Please charge the battery to approx. 70% before being placed for long time.
• If the battery had ceased using for over 3 months, please make a full recharge.
• It’s normal that the battery will be degraded after a period’s usage for the battery life limitation.
• It is recommended that the user can adjust the brightness to 100% only when the battery is fully charged for 2 grids.
• After the battery power is used up, it is recommended that the USB power supply side charging and using should not be greater than the brightness of 6 gear. - For Geniusmic LT
• To exert the optimum function of this product, please do not use non-official included accessories e.g. Windscreen Foam or wind cap, etc. The microphone may do not work properly or be seriously damaged if using other manufacture’s audio cables.
• Do not block or shield any sound hole, otherwise, the microphone’s performance may be influenced.
• The product doesn’t need extra battery, and plug into the phone to use.
• Please refer to the microphone input instructions of your phone to know more about the audio settings and adjustments, which will contributes a lot to use this product.
Operation Instruction
- About LED6Bi
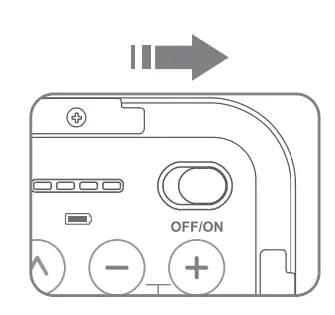
- Power ON/OFF
Push the power switch to ON to turn on the light while OFF to turn it off.
- Color Temperature Adjustment
Press the upper adjustment button< >to increase the color temperature value while lower button< >to decrease. Long press the button to adjust the value from 3200K to 6500K in 9 levels quickly. When the color temperature value is up to the maximum, the indicator will be blinking.
 - Brightness adjustment
Press the”“adjustment button to increase the brightness value while” ” button to decrease. Long press the button to adjust the brightness value from 10 levels quickly. When the brightness value is up to the maximum, the indicator will be blinking. - Installation and Multi Usage
The light can be fixed on the equipment with cold shoe or hot shoe through its cold shoe mounting base. It can be fixed on the equipment with 1/4″ sockets e.g. pan-tilt, tripod and light stand. And the three cold shoe sockets enable this light to be installed on the equipment with cold shoe mounting base.
The lights can be used in combination.
- Power ON/OFF
- About Geniusmic LT
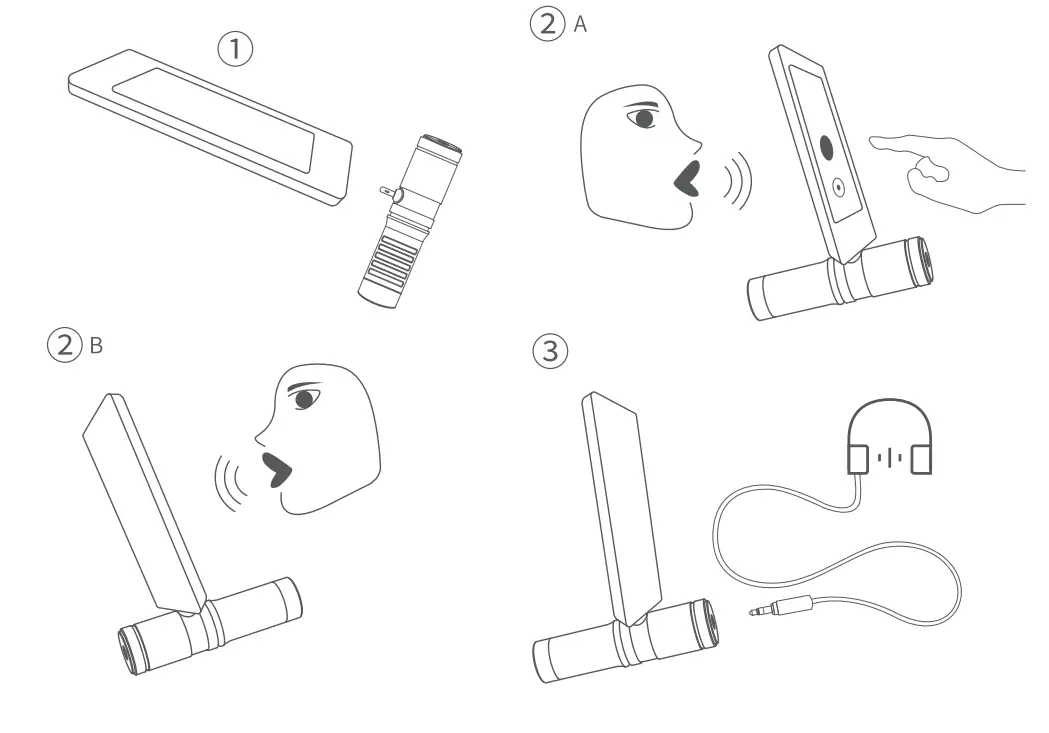
According to different scenes, use windscreen foam or wind cap to prevent wind and eliminate the blow into microphone.- Install windscreen foam sponge or wind cap onto the former end of the microphone to the suitable place.
- Geniusmic LT: Please plug the lightning connector into the mobile phone. If you need to monitor, please plug the headset into the headphone jack of the microphone.
- If the sound is distorted or the recorded sound is too high, please adjust the recording distance appropriately.

Technical Data
| Model | LED6Bi |
| Built-in lithium Battery | lB00mAh |
| Power Source of Charging | 5V/ 2A |
| Power | Max. 6W |
| Color Temperature Range | 3200K~6500K (in 9 levels) |
| 100% llluminance (LUX)(0.Sm)(“‘) | 360 |
| CRI(“‘) | 95 |
| Brightness Range | In 10 levels |
| Duration | l.SH-lOH |
| Working Environment Temperature | -10~40°C |
| Dimension | 11•66•30 mm |
| Net Weight | 100g |
| Model | Geniusmic LT |
| Pick-up sound range | Hypercardioid |
| Sig nal- noise ratio | 70dB |
| Sensitivity | -38dB±3dB(0dB=lV/Pa lKHz) (Testing Condition: 2V/2.2K) |
| Audio cable plug | 50-20KHz |
| Audio frequency range | MFi certificated lightning plug |
| Weight | 41g |
| Dimension | Length: 80mm |
| Temperature range | -20- +60°C |
| Material | Black aluminum alloy |
| Product Name | Mini Tripod |
| Model | MT03 |
| Interface | 1/4 Screw |
| Angle | Ball head: 360° |
| Height | 16cm(6.2 inches)-25cm (9.8 inches) |
| Material | Aluminum alloy+ Plastic |
| Net Weight | 84g |
| Product Name | Smartphone Clamp |
| Model | MTH02 |
| Interface | 1/4 Screw Hole |
| Width | 2.4 inch / Gcm- 3.5 inch/9 cm |
| Angle | 360° |
| Material | Plastic |
| Sttetch range | 60-90mm |
| Net Weight | 50g |
FCC Caution
This device complies with part 15 of the FCC Rules. Operation is subject to the following two conditions:
- his device may not cause harmful interference, and
- this device must accept any interference received, including interference that may cause undesired operation.
Any Changes or modifications not expressly approved by the party responsible for compliance could void the user’s authority to operate the equipment.
Note: This equipment has been tested and found to comply with the limits for a Class B digital device, pursuant to part 15 of the FCC Rules. These limits are designed to provide reasonable protection against harmful interference in a residential installation. This equipment generates uses and can radiate radio frequency energy and, if not installed and used in accordance with the instructions, may cause harmful interference to radio communications. However, there is no guarantee that interference will not occur in a particular installation. If this equipment does cause harmful interference to radio or television reception, which can be determined by turning the equipment off and on, the user is encouraged to try to correct the interference by one or more of the following measures:
• Reorient or relocate the receiving antenna.
• Increase the separation between the equipment and receiver.
• Connect the equipment into an outlet on a circuit different from that to which the receiver is connected.
• Consult the dealer or an experienced radio/TV technician for help.
The device has been evaluated to meet general RF exposure requirement. The device can be used in portable exposure condition without restriction.
Declaration of Conformity
GODOX Photo Equipment Co.Ltd. hereby declares that the This equipment are in compliance with the essential requirements and other relevant provisions of EU Directive 2014/30/EU. They are allowed to be used in all EU member states.
For more information of DoC, Please click this web link:
http://www.godox.com/DOC/Godox_Geniusmic_LT_DOC.pdf
Declaration of Conformity :
GODOX Photo Equipment Co,Ltd. hereby declares that the This equipment are in compliance with
the essential requirements and other relevant provisions of EU Directive 2014/35/EU, 2014/30/EU.
They are allowed to be used in all EU member states.
For more information of DoC, Please click this web link:
http://www.godox.com/DOC/Godox_LED6Bi_DOC.pdf.
Warranty
Dear customers, as this warranty card is an important certificate to apply for our maintenance service, please fill in the following form in coordination with the seller and safe-keep it. Thank you!
| Product Information | Model | Product Code Number |
| Customer Information | Name | Contact Number |
| Address | ||
| Seller Information | Name | |
| Contact Number | ||
| Address | ||
| Date of Sale | ||
| Note | ||
Note: This form shall be sealed by the seller.
Applicable Products
The document applies to the products listed on the Product Maintenance Information (see below for further information). Other products or accessories (e.g. promotional items, giveaways and additional accessories attached. etc.) are not included in this warranty scope.
Warranty Period
The warranty period of products and accessories is implemented according to the relevant Product Maintenance information. The warranty period is calculated from the day(purchase date) when the product is bought for the first time. And the purchase date is considered as the date registered on the warranty card when buying the product.
How to Get the Maintenance Service
If maintenance service is needed, you can directly contact the product distributor or authorized service institutions. You can also contact the Godox after-sale service call and we will offer you service. When applying for maintenance service, you should provide valid warranty card. If you cannot provide valid warranty card, we may offer you maintenance service once confirmed that the product or accessory is involved in the maintenance scope, but that shall not be considered as our obligation.
I Inapplicable Cases
The guarantee and service offered by this document are not applicable in the following cases: ① The product or accessory has expired its warranty period; ② Breakage or damage caused by inappropriate usage, maintenance or preservation, such as improper packing, improper usage, improper plugging in/out external equipment, falling off or squeezing by external force, contacting or exposing to the improper temperature, solvent, acid, base, flooding and damp environments, etc; ③ Breakage or damage caused by non-authorized institution or staff in the process of installation, maintenance, alternation, addition and detachment; ④ The original identifying information of product or accessory is modified, alternated, or removed; ⑤ No valid warranty card; CID. ⑥ Breakage or damage caused by using illegally authorized, nonstandard or non-public released software; ⑦ Breakage or damage caused by force majeure or accident; ⑧Breakage or damage that could not be attributed to the product itself. Once met these situations above, you should seek solutions from the related responsible parties and Godox assumes no responsibility. The damage caused by parts, accessories and software that beyond the warranty period or scope is not included in our maintenance scope. The normal discoloration, abrasion and consumption are not the breakage within the maintenance scope.
Maintenance and Service Support Information
The warranty period and service types of products are implemented according to the following
Product Maintenance Information:
| Product Typo | Name | Maintenance Period (month) | Warranty Service Type |
| Parts | Product Main Body | 12 | Customer sends the product to designated site |
| Battery | 3 | Customer sends the product to designated site | |
| Charger , Power Cable, Sync Cable, Electrical Parts etc. | 12 | Customer sends the product to designated site | |
| Other Items | Battery Case, Windscreen Foam, Wind Cap, Locking Device, Lanyard, Tie, Velcro Tape, Clip, Bag, Package etc. | No | Without warranty |
Godox After-sale Service Call 0755-29609320-8062