![]() TRAILARMOR.COM
TRAILARMOR.COM
839 HWY 2 CORINTH, MS 38834
(662) 233-5700
Installation Instructions
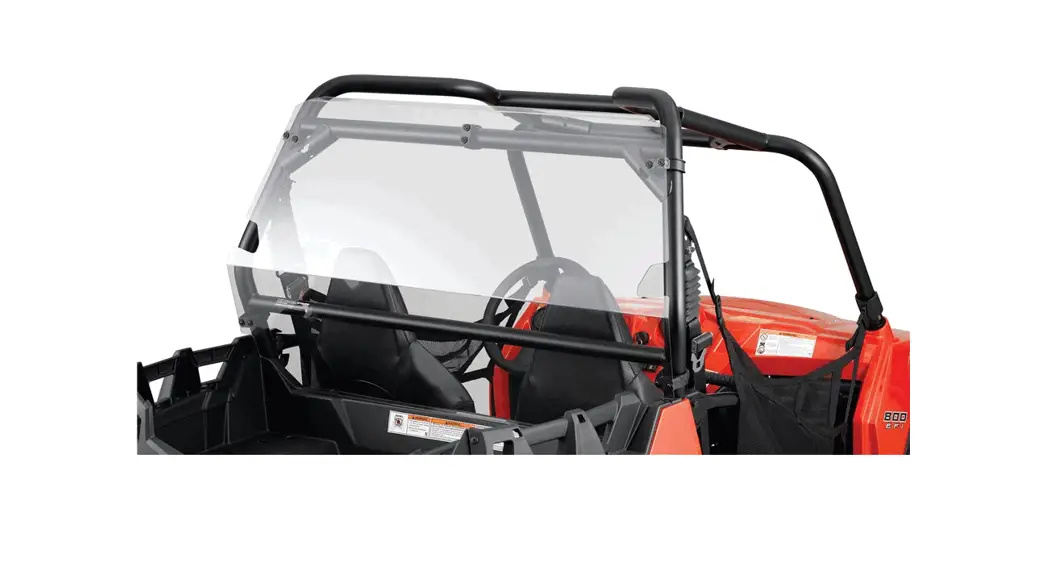
Trail Armor Polaris General XP 1000 Rear Window Dust Shield Kit
TA010RWDS-GEN-XP
Warnings and Product Liability Disclaimer
This product is intended to be used as a cosmetic accessory under normal equipment operation and should not be depended upon or used as a safety device Manufacturer assumes no liability for personal injury or equipment damage as the result of use or installation of this accessory User assumes all risk User should carefully read all instructions prior to installation.
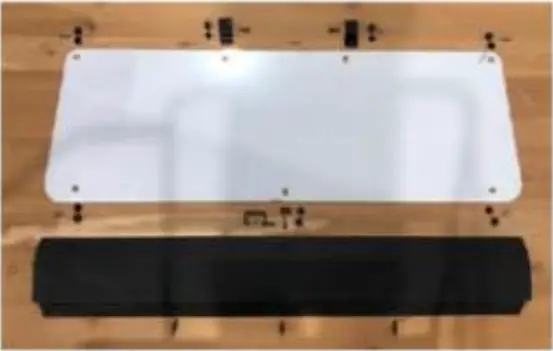
A. Locate the lower panel (black) from the Trail Armor set. Also, locate two supplied M6-1.0 x 26 mm. CHROME steel body bolts. Slide the short side of the panel between the roll cage from the outside of the vehicle. Holding panel into position. insert one 26 mm. bolt into each of the lower outside holes of the panel into the factory holes of the frame braces. See Picture 1.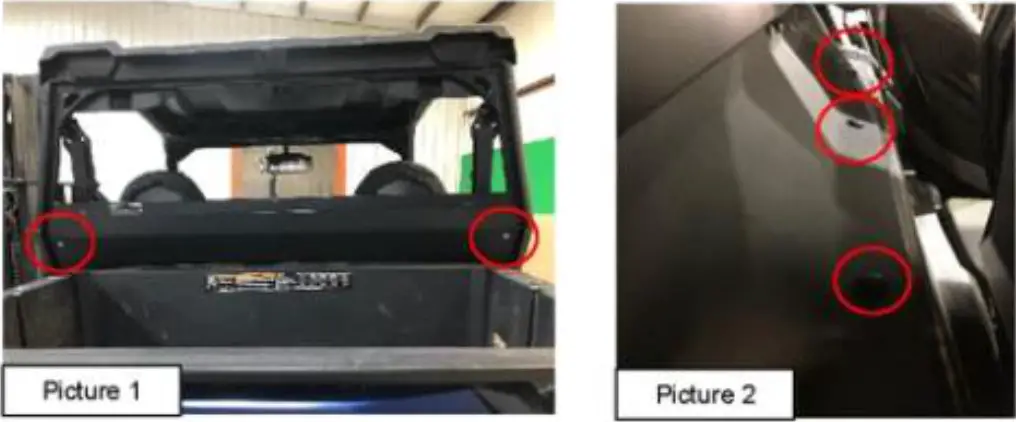 B. Locate three supplied Fascia push-type clips (long push pins). From inside the cab. behind the seats. insert one push pin through the panel into each of the factory holes. See Picture 2.
C. Locate the supplied WB-3 (plastic bracket) and install one supplied 1/4″-20 Panel Range: .025″ -. 150″ Center 25/32″ Extruded U-Nut. See Picture 3.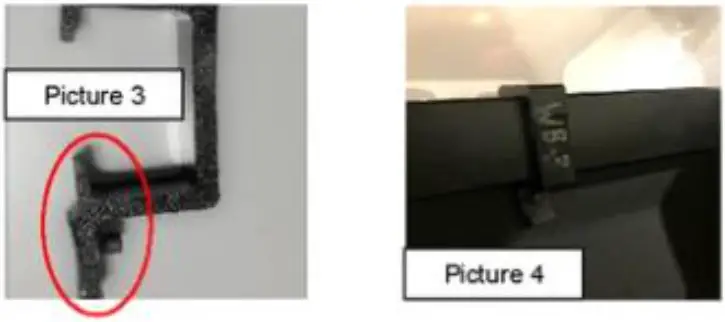
D. Snap the bracket, with the tab towards the bottom, over the center metal cross brace as shown in Picture 4.
E. Locate the upper panel (white) from the Trail Armor set. Also, locate the supplied bulb seal. Place the upper pane! onto a table white side up. The white side is the protected side of the window. Peel the plastic back from the outside edge all around the panel. ONLY peel! back enough to install the bulb seal for now. The bulb will need to be on the bottom side of the panel. Starting at the bottom center of the panel. roll the bulb seal onto the upper panel. See Picture 5.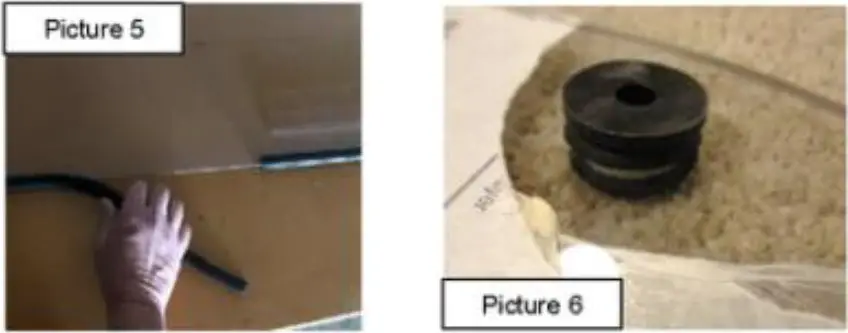 F. Locate seven supplied 4/16″ x 13/16 push-in grommets and seven shoulder washers with flanges. Peel the plastic back around the holes. Insert one grommet into each of the slotted holes of the pane!. Once installed, insert one shoulder washer into each of the rubber grommets. The flange of the shoulder washer should face upwards (white side). See Picture 6.
G. Locate four supplied M6-1.0 x 26 mm. CHROME steel body bolts. Holding the upper panel into place. insert one 26 mm. bolt into each of the four outside comer holes of the panel. See Picture 7.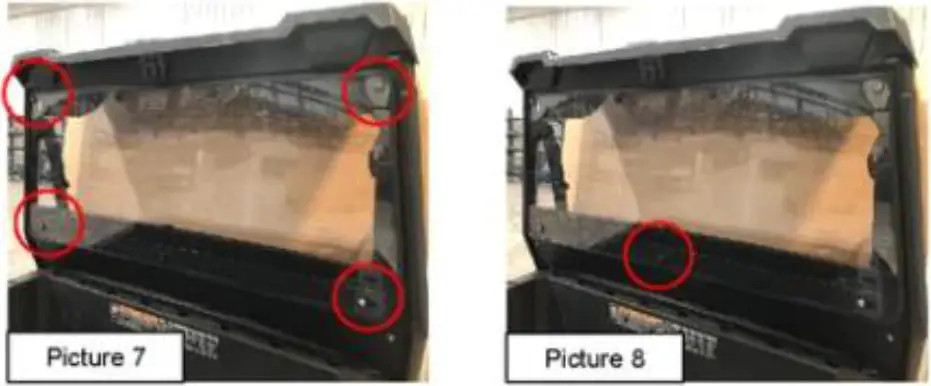
H. Locate one supplied %-20 x 1° torx truss screw. Install the 1” torx screw through the center lower hole of the panel into the u-nut on the W8-3 bracket. See Picture 8.
I. Locate two supplied extruded cage metal brackets and two supplied %-20 x 1” torx truss screws. From inside the cab. align one bracket with each of the top center holes of the panel. See Picture 9. Secure with the 1″ torx screws. See Picture 10.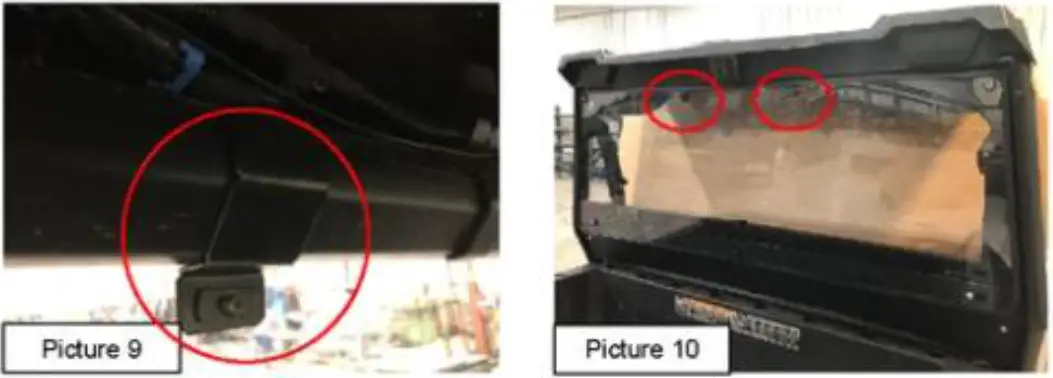
Enjoy! Any questions, contact Trait Armor at (662) 233-5700 or www.trailarmor.com.


