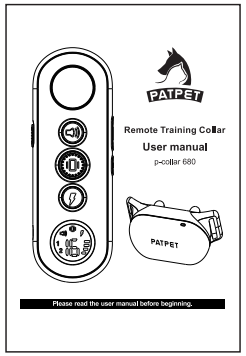
PATPET P-COLLAR 680 Remote Training Collar User Manual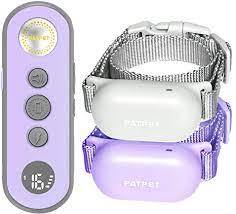
Important Safety Information
WARNING
Not for aggressive dogs. Do not use this product if your dog is aggressive, or if your dog is prone to aggressive behavior. Aggressive dogs can cause severe injury and even death to their owner and others. If you are unsure whether this product is appropriate for your dog, please consult your veterinarian or certified trainer.
CAUTION
Safety during on-leash training. It is vitally important that you and your dog remain safe while learning on-leash training. Your dog should be on a strong leash, long enough for him to attempt to chase an object, but short enough for him not to reach a road or other unsafe area. You must also be physically strong enough to restrain your dog when he tries to chase.
CAUTION
Risk of skin damage. Please read and follow the instructions in this manual. Proper fit of the collar is important. A collar worn for too long or made too tight on the pet’s neck may cause skin damage. Ranging from redness to pressure sores.
- Avoid leaving the receiver on the dog for more than 12 hours per day.
- When possible reposition the receiver on the pet’s neck every 1 to 2 hours.
- Check the fit to prevent excessive pressure; follow the instructions in this manual.
- Never connect a lead to the electronic collar; it will cause excessive pressure on the contacts.
- When using a separate collar for a lead, don’t put pressure on the electronic collar.
- If a rash or sore is found, stop using the collar until the injured part is healed.
- If the condition persists over 48 hours, see your veterinarian.
These steps will help keep your pet safe and comfortable. Millions of pets are comfortable while they wear stainless steel contacts. Some pets are sensitive to contact pressure. You may find after some time that your pet is very tolerant of the collar. Then, you may relax these precautions. It is important to continue daily checks of the contact area. If redness or sores are found, stop using until the skin is fully healed.
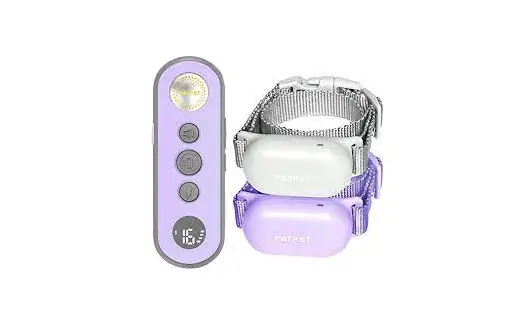
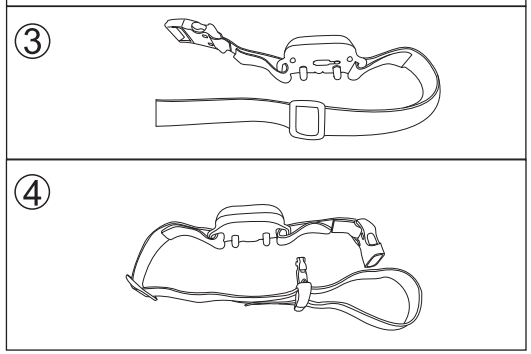
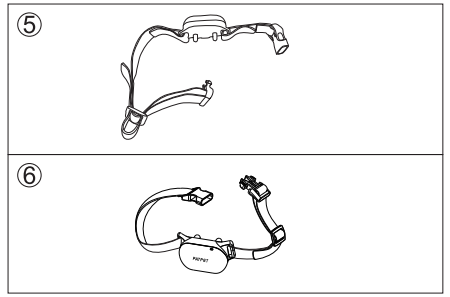
Components
- Operating and Training Guide

- Test Light

- Remote Transmitter

- Receiver

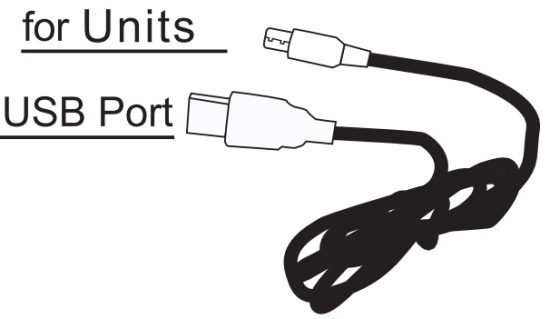
- For Units USB Port

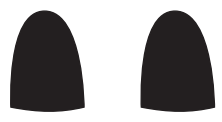
- Conductive Silicone

Other Items You May Need
- Screwdriver (the Test Light can be used as a screwdriver)
- Scissors
- Lighter
Overview
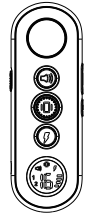
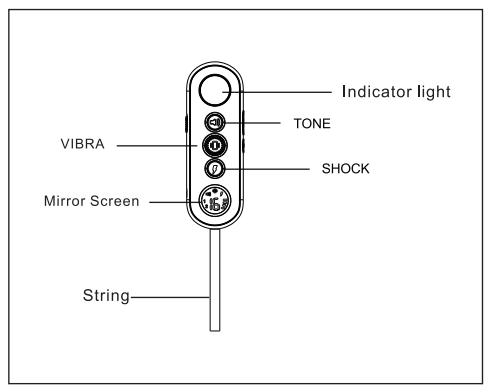
Remote
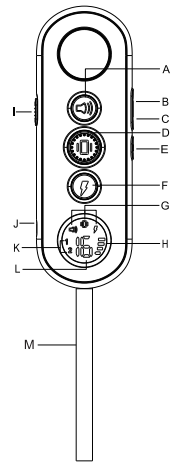
A. Tone Button
B. Shock Level +
C. Shock Level –
D. Vibration Button
E. On/Off Button
F. Shock Button
G. Mode Indication
H. Battery Display
I. Switch dog 1 or dog 2 mode
J. Charging Port
K. Dog 1 or dog 2 mode
L. Shock Level Display
M. String
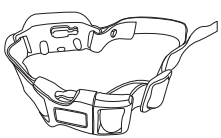
Receiver Collar
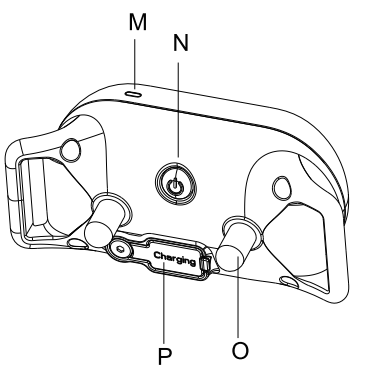
M.LED Indicator
N .On/off Off Button
O. Contact Pointe(x2)
P .Charging Port (with cover)
Operating Guide
How to turn the p-collar 680 on/off
Prepare the Remote and the Receiver
Turn ON/OFF the Remote
- Long press the ON/OFF button to turn the remote ON.
- LCD will be lighted, and show the information of current channel, battery power and levels. If not, please charge the remote.
- Long press the ON/OFF button to turn the remote OFF.
Turn on the Receiver Collar
- Press the On/Off Button the Green LED light comes on.
- In normal mode, the Green LED will flash every 4 seconds, indicating the Receiver Collar is on and ready to receive a signal from the Remote.
Turn off the Receiver Collar
- Press long the On/Off Button until the Red LED light shuts off (This takes approximately 3 seconds).
- Release the On/Off Button.
NOTE: To extend the life of the batteries, please turn the Receiver Collar off when it is not in use.
- Press
 or
or  CD or
CD or  once to send a vibration, sound, shock command to Receiver Collar.
 - Press and hold or , Receiver Collar will have a continuous vibration/shock, It will stop automatically after 10 seconds.
Note: Do NOT press and hold or for long time to avoid physical or psychological hurt to the dog
- Toggle
 once to switch between Dog 1 and Dog 2.
 - Press
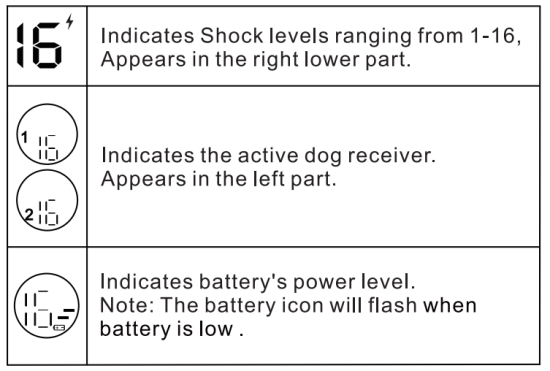
 to adjust Shock Level from 1-16.
Step 3: How to use the collar correctly
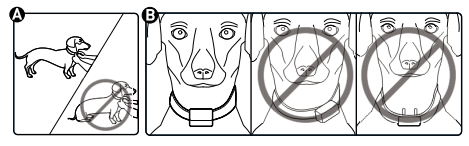
Fit the Training Collar Remark:
The proper fit and placement of your training collar is important for effective operation. The contact points must directly touch the neck skin of your dog.
- Start with the collar turned off and your dog standing comfortably, not sitting(A).
- Put the receiver collar directly under the chin of your dog. Make sure both the contact points are in the center of your dog’s neck and contacted his neck.
NOTE: Sometimes it’s necessary to trim the hair around the contact points to make sure that contact is consistent. We’ve also included longer contact points.
CAUTION
Do not shave the pet’s neck as this may increase the risk of skin irritation. The training collar should not be worn for more than 12 hours each day. Leaving the training collar on too long could lead to skin irritation. Remove the collar when you’re not training your dog.
How to find the best shock level
The unit comes with Up and Down buttons to control the Shock Level, with Level 1 being the lowest level for Shock and Level 16 being the highest for Shock.
Better adjust the Shock level suitable for your dog according to his acceptance limitation for shock. Always start at the lowest level and work your way up.
The appropriate level can be found when the dog responds to the Shock with a mild reaction, such as a tensing of the neck muscles. The Shock Level may vary depending on the training situation. When high-ly distracted, dogs will require a higher level of Shock.
To maximize the distance
The range may vary depending on the way of the Transmitter being held. Hold the Transmitter away from your body to receive the greatest range. For maximum signal strength, keep the device properly charged.
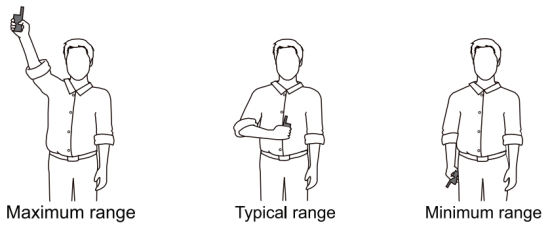
Avoid touching the antenna , as the range may decrease substantially.
The LCD and LED indicator
Transmitter LED indicator light – Function and response
| Button | Button Function | Transmitter Indicator Light Responses |
| Delivers audible tone to collar (volume cannot be adjusted) | Green | |
| Delivers vibration to collar. (vibration will pause if keep pressing for more than 10 seconds) | Orange | |
| Delivers shock to collar base on current level (shock will pause if keep pressing for more than 10 seconds) | Red |
Receiver indicator light – Function and response
| Receiver Collar Function | Green LED Response |
| Power On | Flashes once |
| Normal Operation – Good battery | Flashes once every 5 seconds. |
| Tone | While pressed, light flashes green. |
| In Pairing Mode | Flashes once every second for 15 seconds. |
| Complete Pairing | Flashes rapidly for 3 times. |
| Complete Charging | Light stays green. |
| Receiver Collar Function | Red LED Response |
| Power Off | Flashes red for 3 times. |
| Normal Operation – Low battery | Flashes red rapidly till auto power-off |
| Vibration/Shock | While button is pressed, the light flashes red. |
| Charging | The light stays red |
Charging the unit
The unit uses Lithium-Polymer batteries.
- Charge the unit for 4 hours before using the first time.
- Do not charge the unit near any flammable substance.
- Charging the unit full firstly if the device has been left unused more than 3 months.


