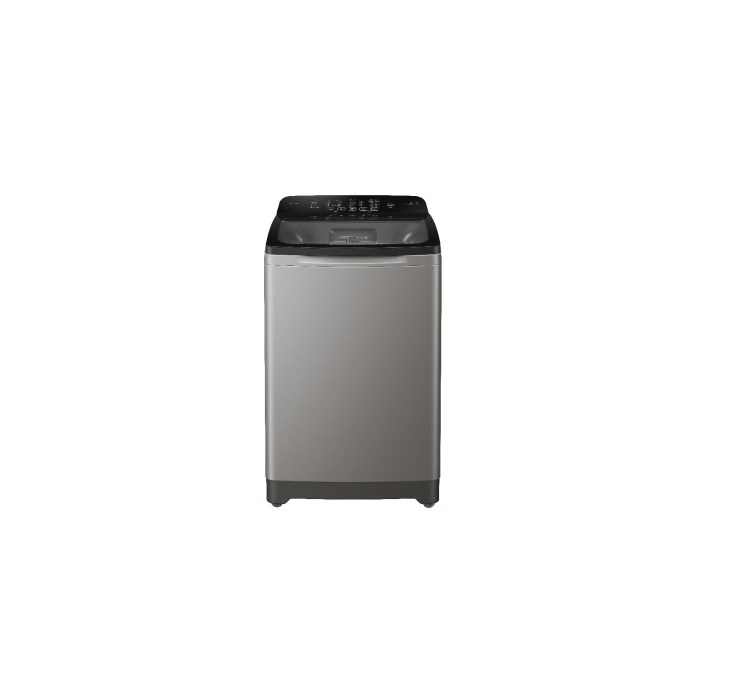
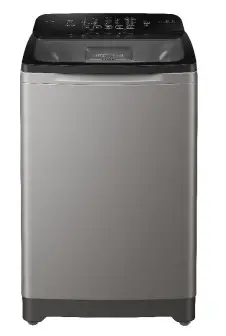
Haier HWM120-1678ES5 TOP LOAD FULLY AUTOMATIC WASHING MACHINE
 MODEL
MODEL
HWM120-1678ES5
Please read this manual carefully before operating your washing machine and retain it for future reference.
Product overview
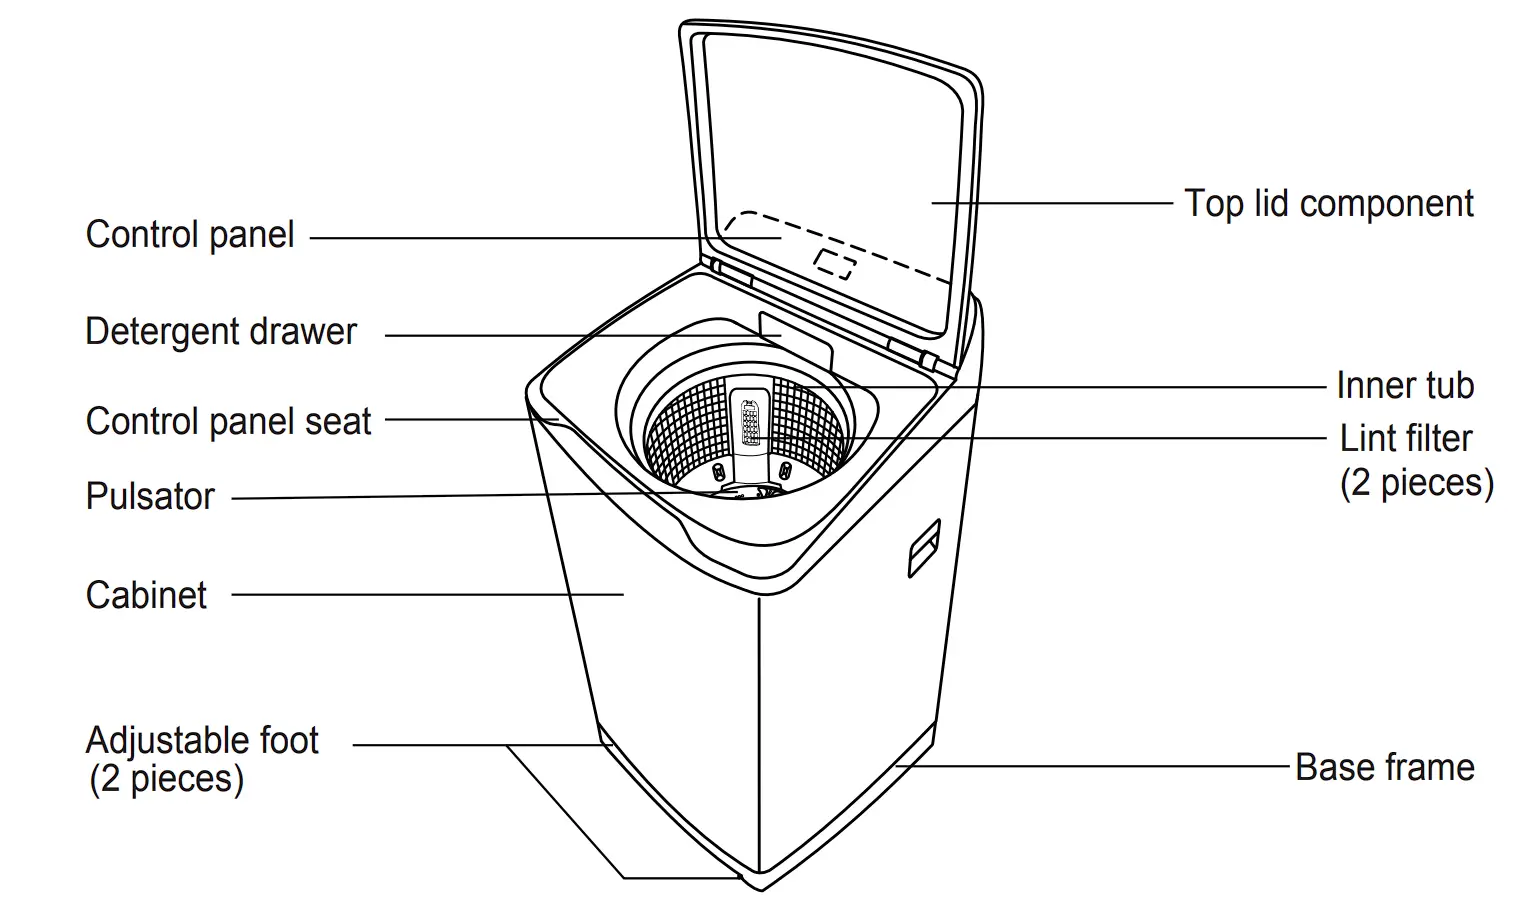
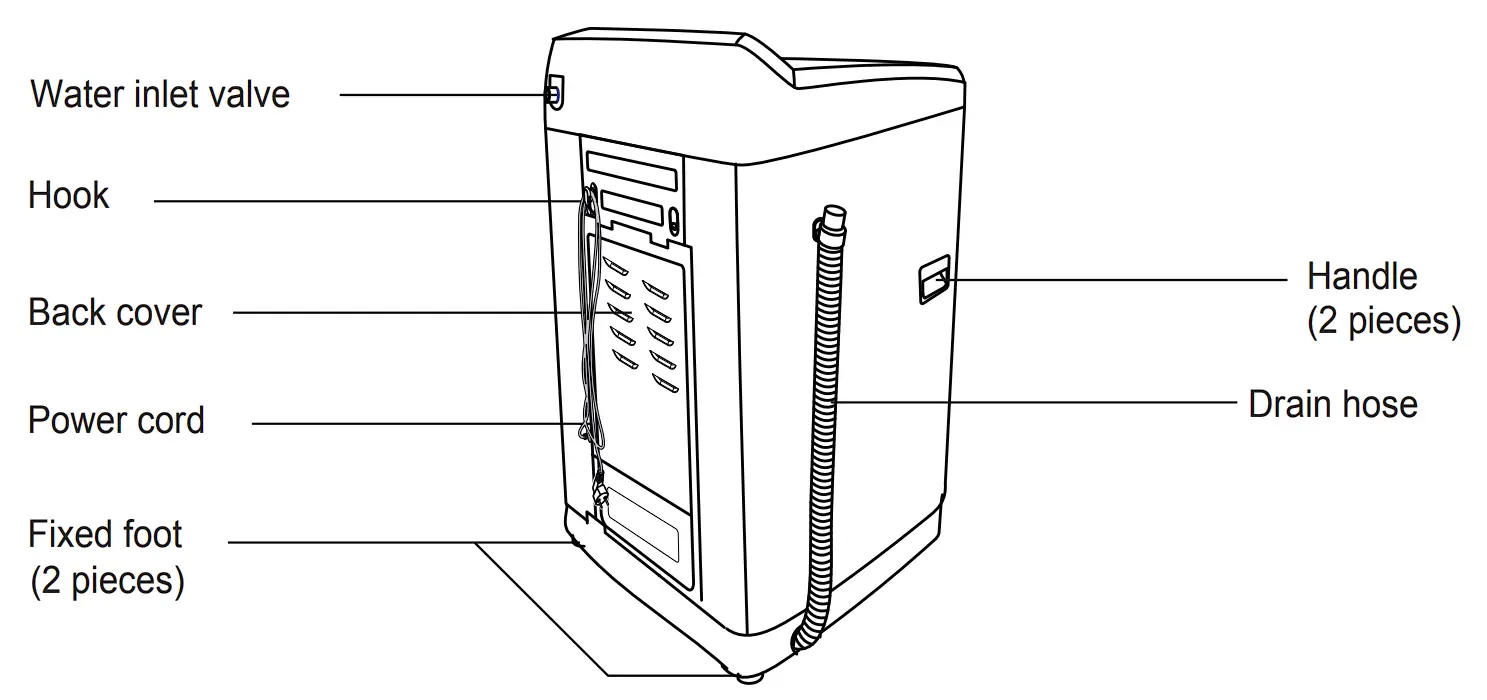
Please understand the shapes of the washing machine and accessories may be different from the sketch figures in this manual due to product improvement.
Safety precautions
Description of symbols
Warning sign | Contents marked with this symbol are related to the safety information of the products. Please operate in accordance to the contents of this manual, to prevent personal injury or property damage. |
Forbidden sign | Contents marked with this symbol indicate operations or actions that should not be undertaken by the user. Performing of such actions may result personal injury and/or property damage ,and void warranty. |

Safety warning
![]()

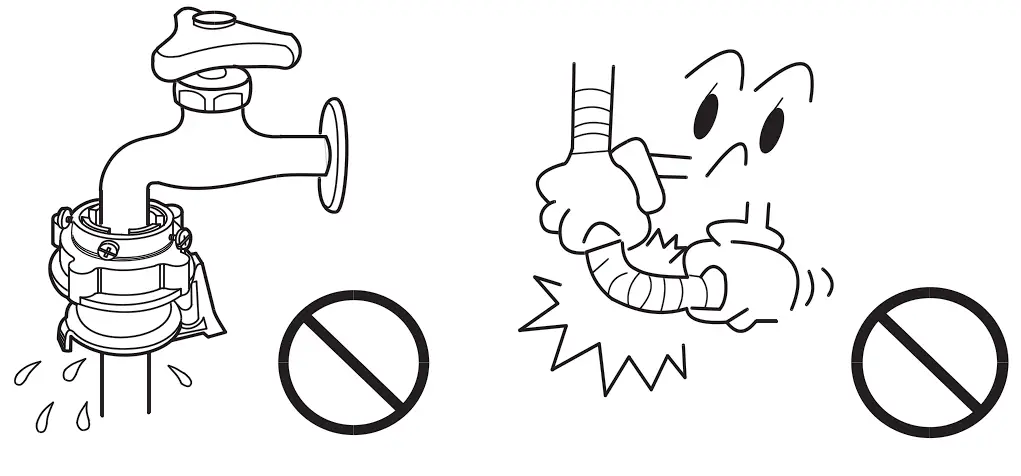
Please check power socket condition to ensure it has been earthed correctly prior to installation to ensure your safety
Warning
| A separate, earthed power socket is required for the power supply. Hold the plug-not the electric cable-when unplugging the washing machine. Do not insert or remove the power plug with wet hands. The power plug should be accessible after the machine installation. | Ensure the plug is removed and the taps turned off in the following cases.Power failure, cleaning, moving,installation and when not in use. |
If the supply cord is damaged,it must be replaced by the manufacturer,its service agent or similarly qualified persons in order to avoid a hazard.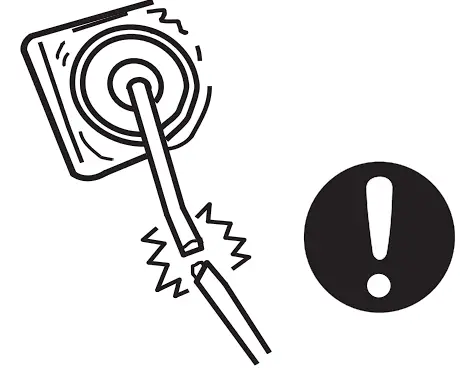 | |
![]() Forbidden
Forbidden
Do not install this appliance in a damp or wet environment. Do not leave wet laundry on the Control Panel or spray water directly on to this appliance as this may cause the washer to malfunction or cause an electrical fault.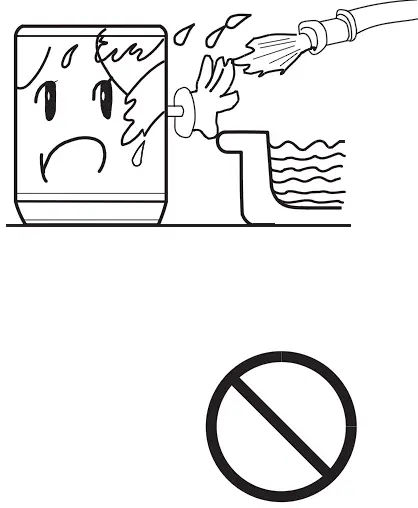 | Do not contact to water exceed 50°C in temperature. 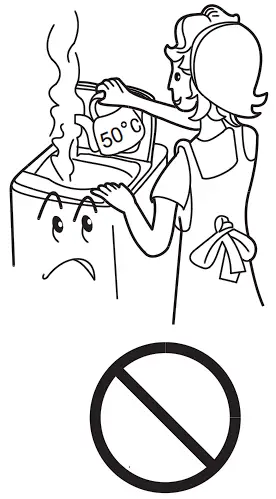 |
Do not use multi-plug adapters and extension cables. Do not touch the power cord with wet hands. 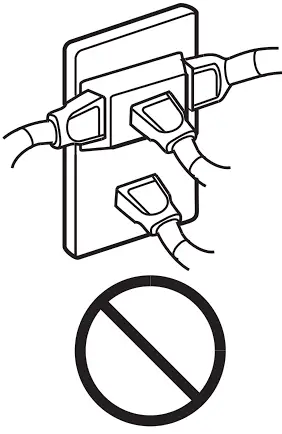 | Do not wash water-proof clothing as this may affect load balance during spin cycle(s). 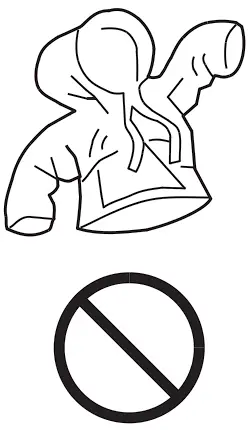 |
| The washing machine has ventilation opening in the base, the opening must not be obstructed by a carpet. | |
Do not attempt to put your hand into the washing machine while the operation is in progress. Children should be supervised to ensure they do not play with the appliance.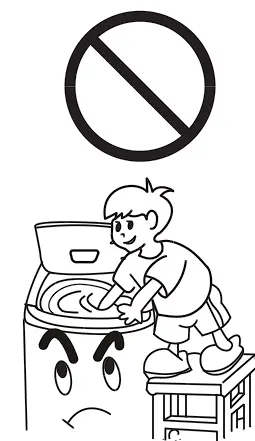 | Do not attempt to repair, disassemble or modify the appliance yourself.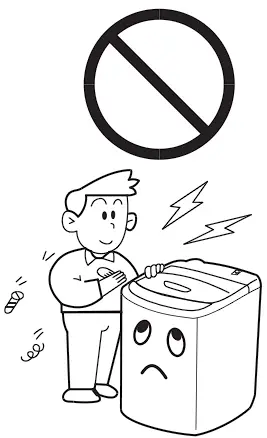 |
Do not leave hot or heavy items on lid or control panel as this may cause damage to the washer or make the washer unsafe to operate.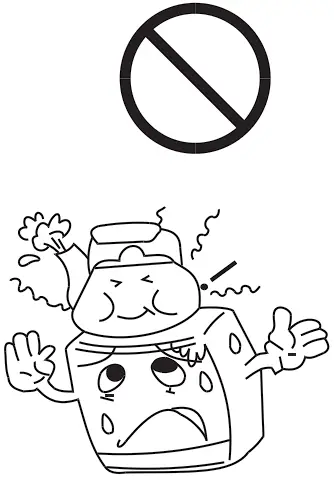 | Do not wash laundry with chemicals or other volatile materials(such as petrol,solvents or thinners) as this may cause damage to the machine.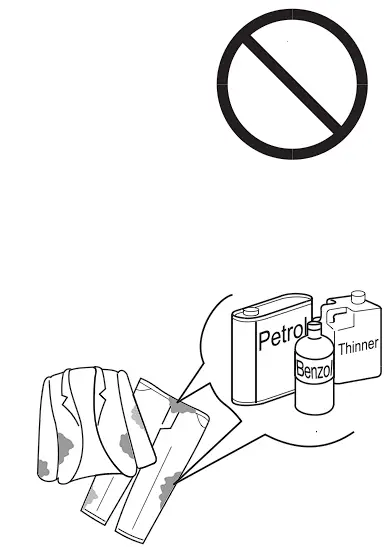 |
This appliance is not intended for use by persons (including children) with reduced physical,sensory or mental capabilities, or lack of experience and knowledge, unless they have been given supervision or instruction by a person responsible for their safety.Children should be supervised to ensure that they do not play with the appliance.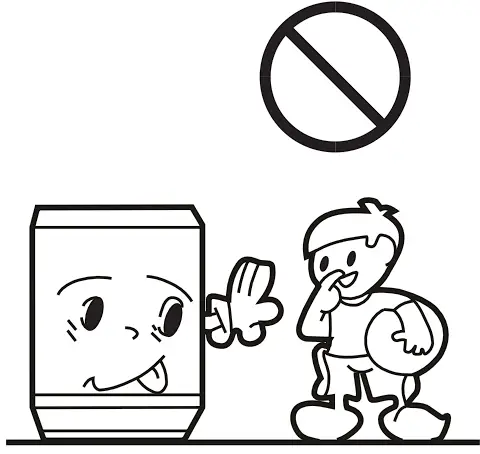 | Keep washer away from heat sources such as heater, stoves or direct sunlight.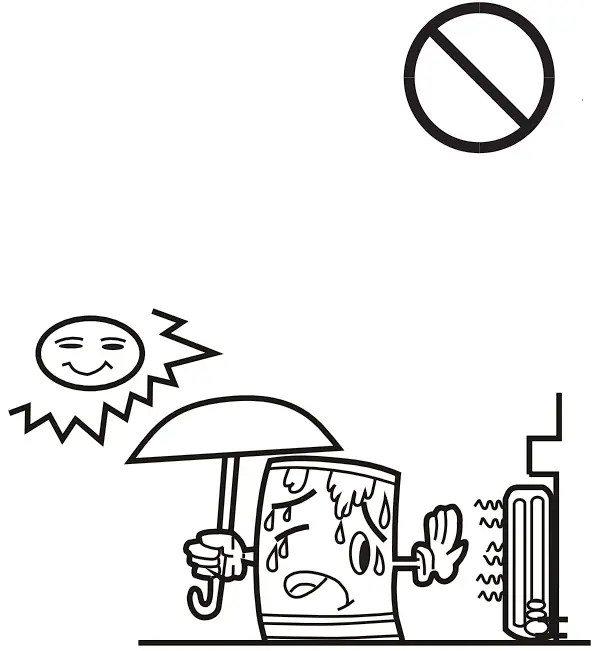 |
| You may open the lid when the water is filling in the tub. The new water inlet hose supplied with the appliance is to be used and the old water inlet hose should not be reused. | |
You may open the lid when the water is filling in the tub. The new water inlet hose supplied with the appliance is to be used and the old water inlet hose should not be reused.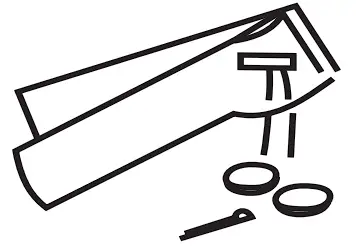 | You may open the lid when the water is filling in the tub. The new water inlet hose supplied with the appliance is to be used and the old water inlet hose should not be reused. |
| If the power cord or others parts of this appliance become damaged or faulty, please contact technician to repair or replace it. Do not attempt to fix it by yourself as this may cause personal injury or void warranty. |
Installation & Adjustment
Please install and position the machine according to the directions in this manual. It is very important to follow these directions for the safe operation of the machine, and to ensure your machine operates correctly.
Balance washing machine
Do not install the machine on a tilted floor. Pleas install the machine on a level floor. If the floor is not level, use the adjustable feet to adjust it. Keep the machine at 20mm from each adjacent wall.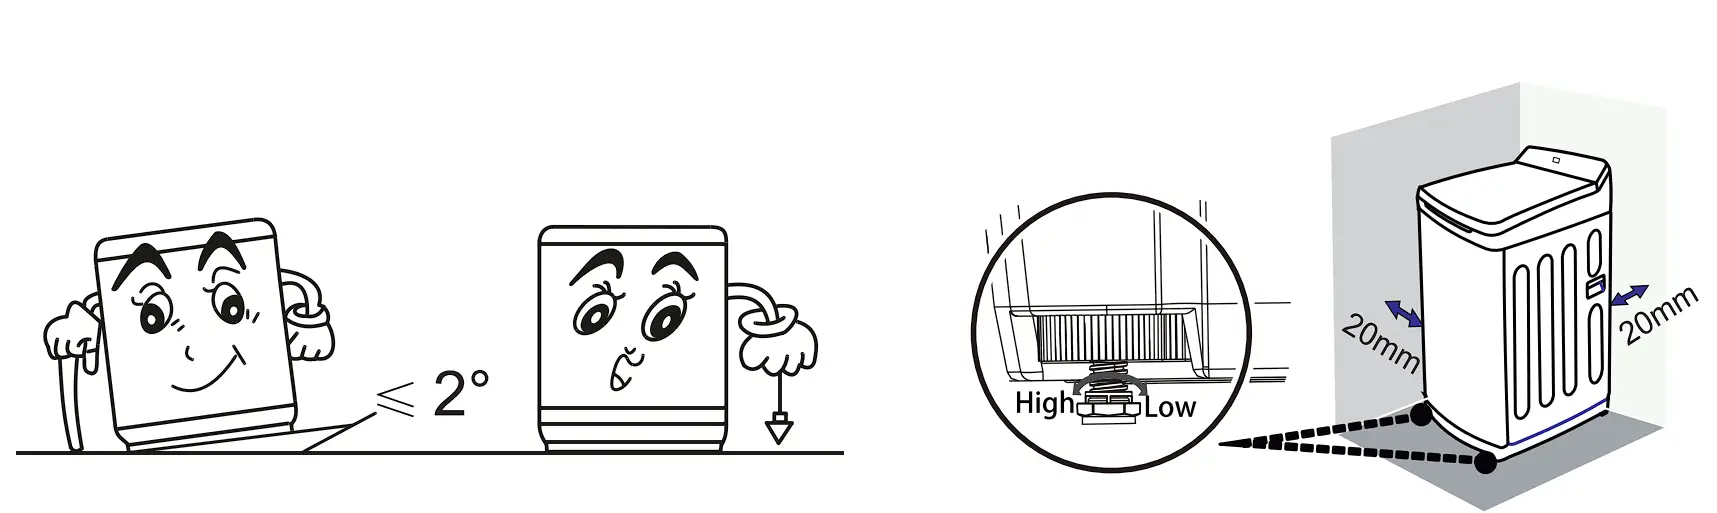 |
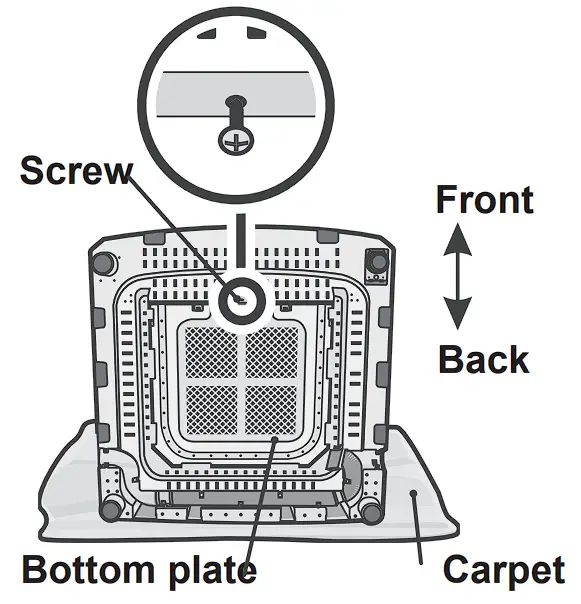
Install the bottom plate
| The purpose of the bottom plate is to reduce noise level from the washing machine while operation in progress. Steps:
|
Position the drain hose
| 1.Do not let the drain hose run over doorsills that protrude 10cm from the floor. | 4.If extra drain hose is needed, please make separate purchase.The inner diameter of the extra hose shall not less than 30mm,and the length shall not exceed 1.5m.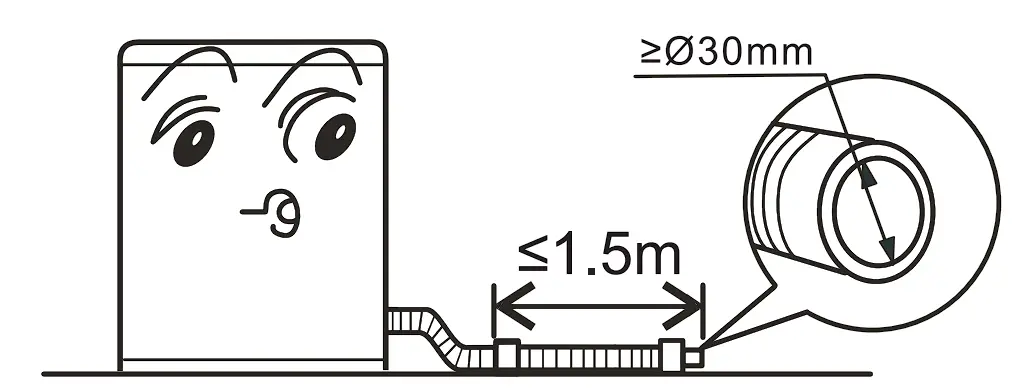 |
2.Do not trample on the drain hose.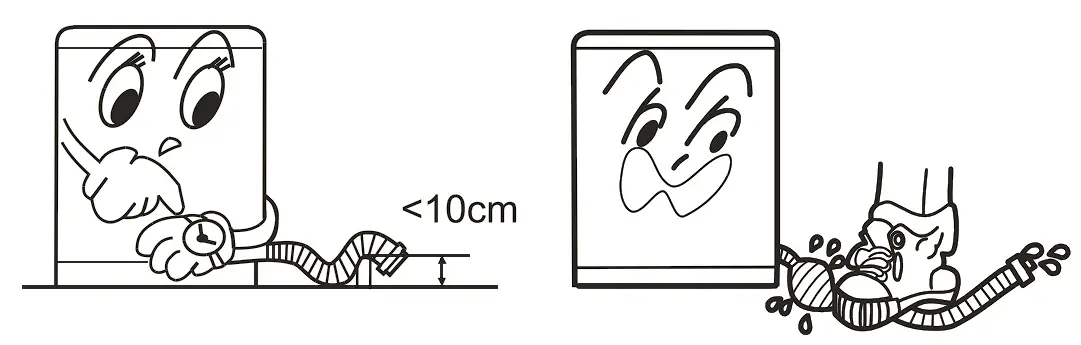 | |
3.Cut the excessive part if needed.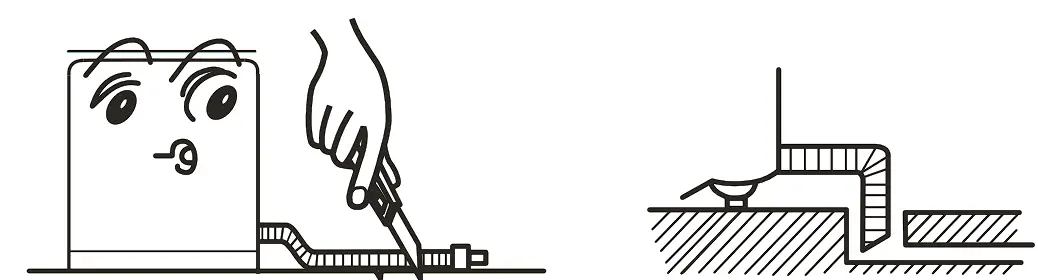 | 5.If the extra hose is too long, cut it either at A or at B point.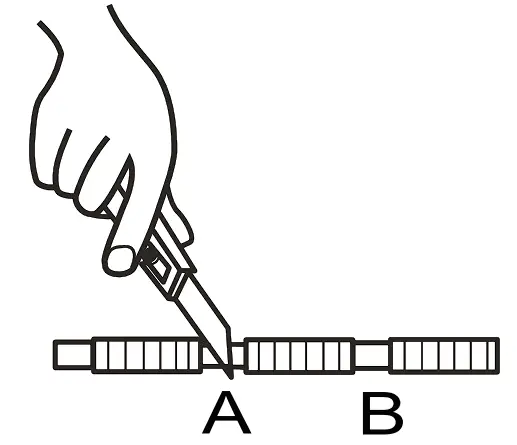 |
| Note: The new water inlet hose supplied with the appliance is to be used and the old water inlet hose should not be reused. | |
Inlet pipe connection
The new hose-sets supplied with the appliance are to be used and that old hose-sets should not be reused.
- Connect the water faucet
 It is required that the front end shall be longer than 10mm.
The exit end face of the faucet shall be flat and smooth. If not please file it to avoid leakage. - Connection between the water inlet hose jointer and the water faucet
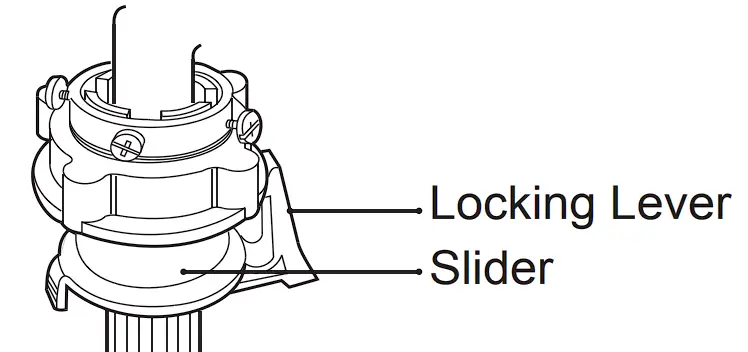
- Press the lower end of the locking lever and push down the slider. Remove the water inlet hose jointer from the water inlet hose component. See Figure 1.
- Remove the nameplate. Make sure the * is 4mm above the screw nut. See Figure 6. If the * is less than 4mm above the screw nut. Loosen the screws.
- Insert the jointer of the water inlet hose on the faucet. See Figure 2.If the faucet is too large and the jointer cannot be inserted on the water faucet, please loosen the four screws and remove the bushing in the jointer. The front end of the faucet must be smooth, otherwise it may leak water. See Figure 3.
- Tighten the four screws evenly. See Figure 4.
- Turn the screw nut in the arrow direction, see Figure
- After installation, the * is less than 2mm above the screw nut. See Figure 6.
- Connection between the water inlet hose and the washer
- Push down the slider. Insert the water inlet hose into the jointer.

- Connect the locking lever to the jointer. Release the slider with a clicking sound.
- Push down the slider. Insert the water inlet hose into the jointer.
- Check the connection between the jointer of the water inlet hose and the water faucet
- Swing the hose gently to ensure its firmly connected.

- Turn on the water faucet and check if there are any leaks around the connection areas.
- Do not stretch the water hose by force.
- After connecting the jointer to the water faucet, check if it is connected properly by pulling the water inlet hose downwards.
- Swing the hose gently to ensure its firmly connected.
- Disassemble the water inlet hose
- Close the water faucet.

- Press the locking lever. Push down the slider, remove the water inlet hose.
- Close the water faucet.
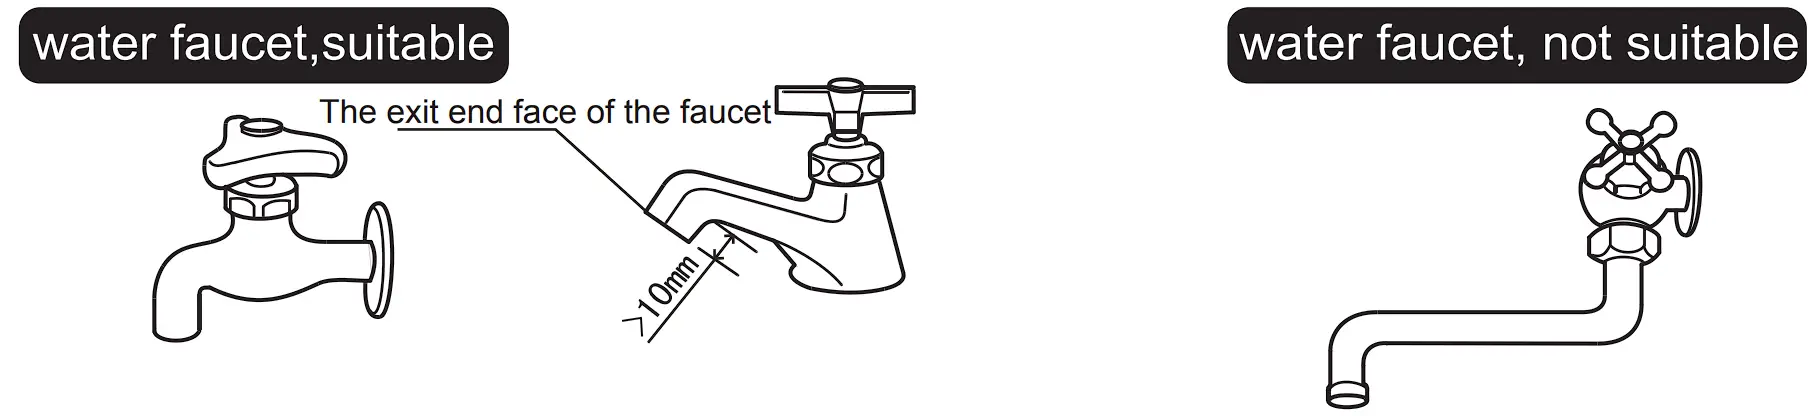 It is required that the front end shall be longer than 10mm.
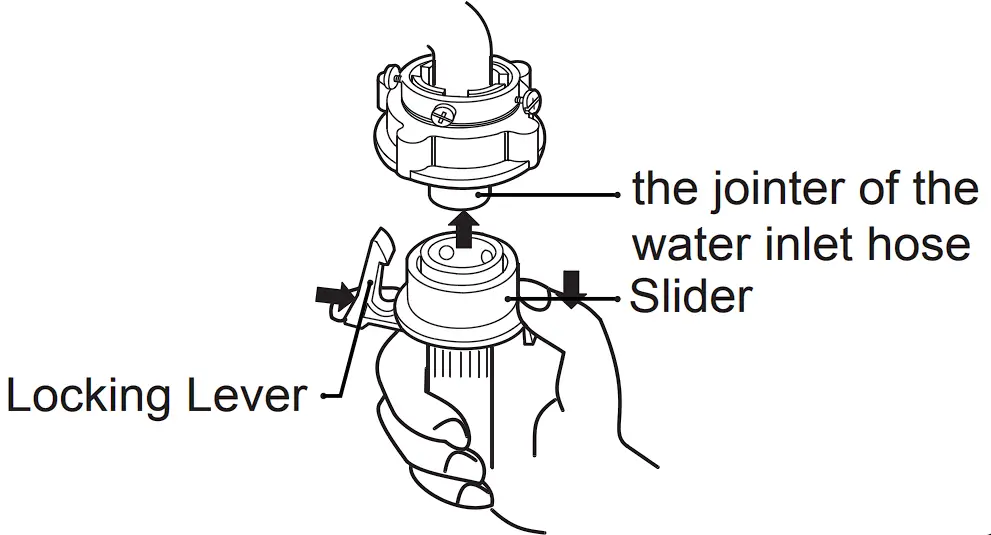
Before washing
| Preparation before washing
|
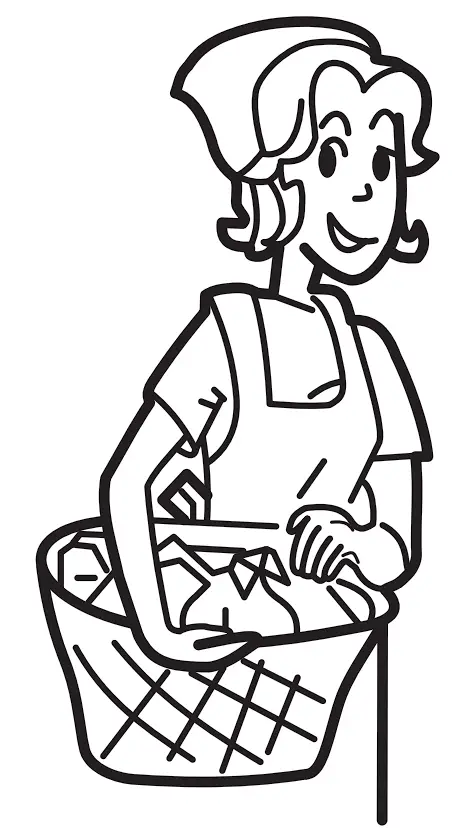

Laundry Guidelines
| Clear the pockets and take out loose items such as coins, soils, pins and others metal objects. | Tie any long straps or strings, button up and close zippers.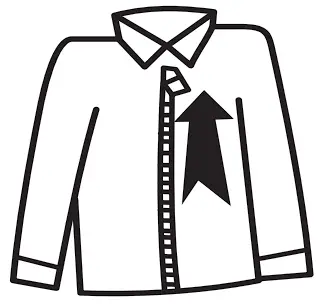 | The weight of the laundry shall not exceed the rated capacity of your machine, spread out the laundry before placing it evenly in the tub. | Turn the clothing inside out or put inside the laundry net to prevent excessive vibration or noise on the appliance while operation in progress.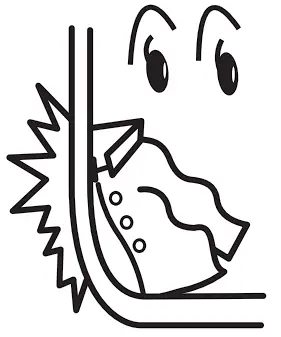 |
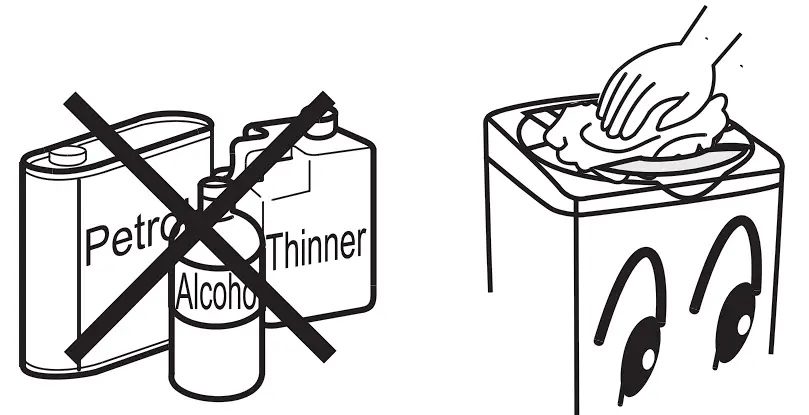
| a. Check the care label on the clothing, and sort them accordingly before start the wash. b.Separate white from colours. c. Do not put fabrics that are insoluble in water to the machine. d. Prewash the soiled clothes and apply detergent directly on the stain before washing. e. Turns the clothing inside out before washing to minimize the lint build-up after washing. f. Do not put the laundry contaminated with alcohol, paint thinner, gasoline, benzene and other inflammable or explosive substances like into the washing machine. | |||
Operation
Loading the appliance
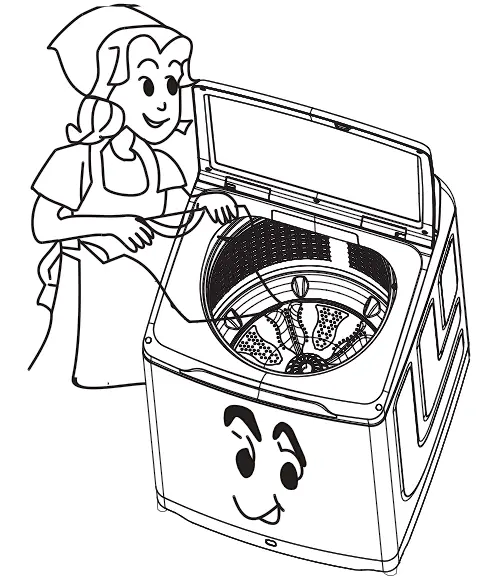
|
Adding Detergent
Detergent(liquid/ washing powder) compartment Softener compartment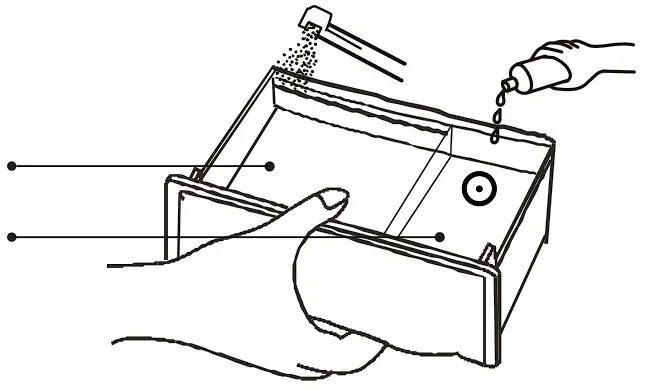 |
How to use liquid detergent
| Pour liquid detergent into the detergent compartment as illustrated in the figure above. |
How to use softener
|
How to use washing powder
|
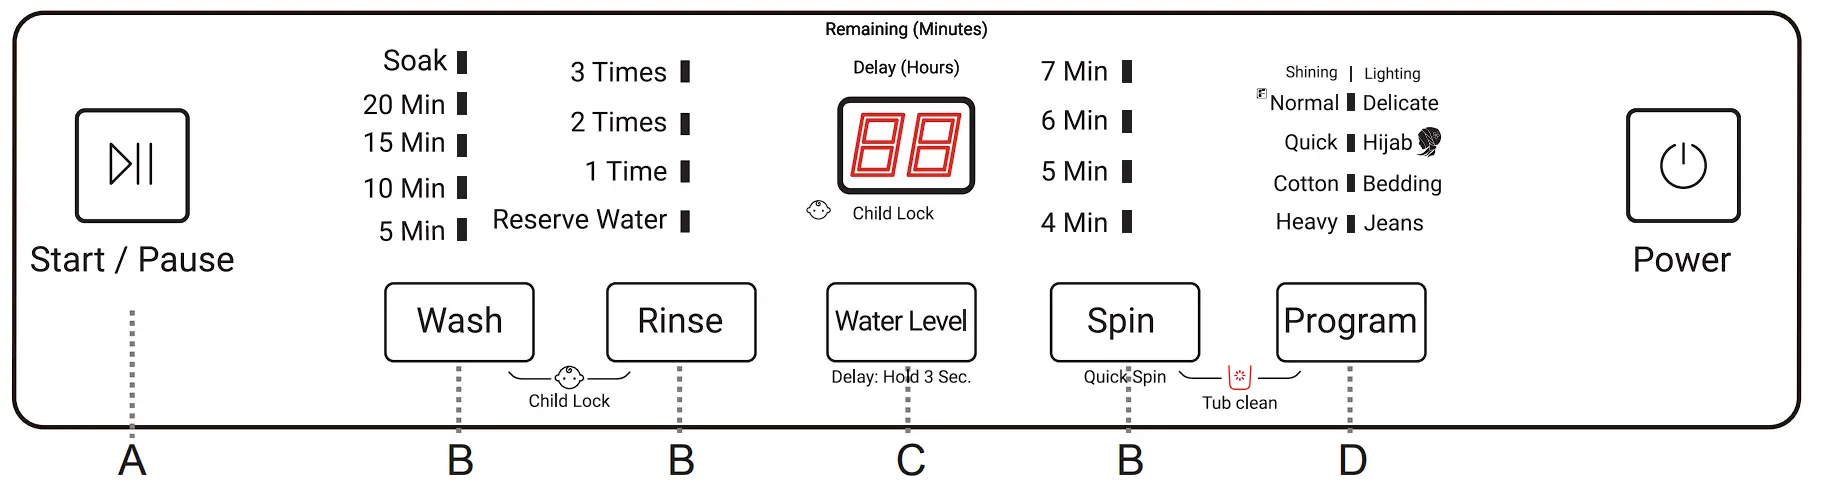
Control Panel
| Display | |
| Off | |
| On:Indicates the program is about to run and the selected cycle and options. | |
| Flashing:Indicates the program is running and the selected cycle and options. | |
| Child Lock function |
|
| Display | |
 |
|
| “Power” button | |
 Power |
|
| A “Start/Pause” button | |
 Start/Pause |
|
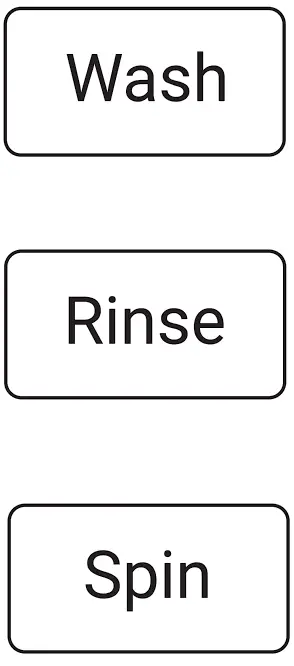
| B “Wash” “Rinse” “Spin” button | |
 |
|
| C “Water Level” button | |
 |
|
| Tub clean |
|
Explanation of program
 | Program and Application | |
| Normal | Use this cycle for normally soiled cottons and mixed fabric laundries. | |
| Quick | Use this cycle to wash small, lightly soiled laundries that are needed in a hurry. | |
| Cotton | Use this cycle to wash lightly soiled, dark or highly dyed natural fabrics, such as cotton that may be easily discolored. | |
| Heavy | Use this cycle to wash durable fabric materials like towels, workwear, children clothes and etc. at maximum washing capacity. | |
| Delicate | Use this cycle to wash lightly soiled garments and delicate clothes that need gentle washing. | |
| Hijab | Use this cycle to wash hijab. | |
| Bedding | Use this cycle to wash large items such as comforters, sleeping bags and blankets. | |
| Jeans | Use this cycle to wash jeans. | |
Delay
How to activate Delay function:
|

|
Cleaning and Maintenance
Maintenance
- Remove the power plug before carrying out any cleaning and maintenance.
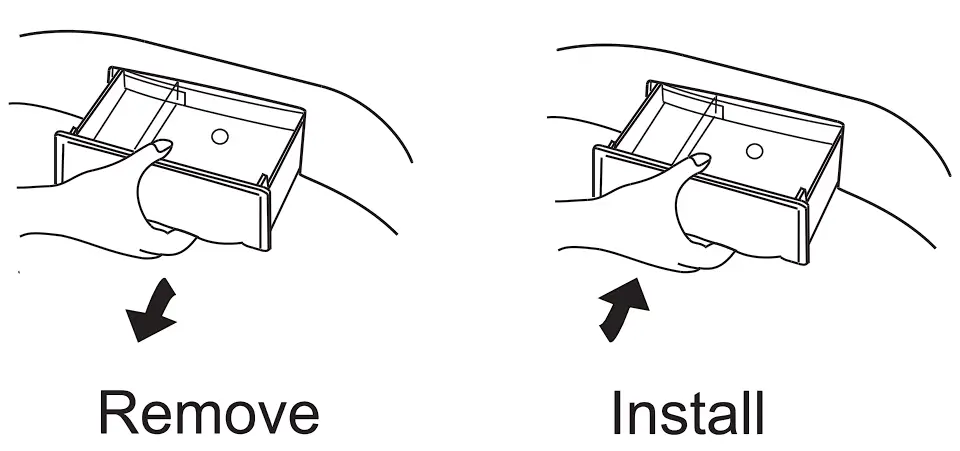
- Clean the lint filter(s) and detergent drawer after each wash,otherwise it may influence your next use.
Clean the detergent drawer and install back to the original position.
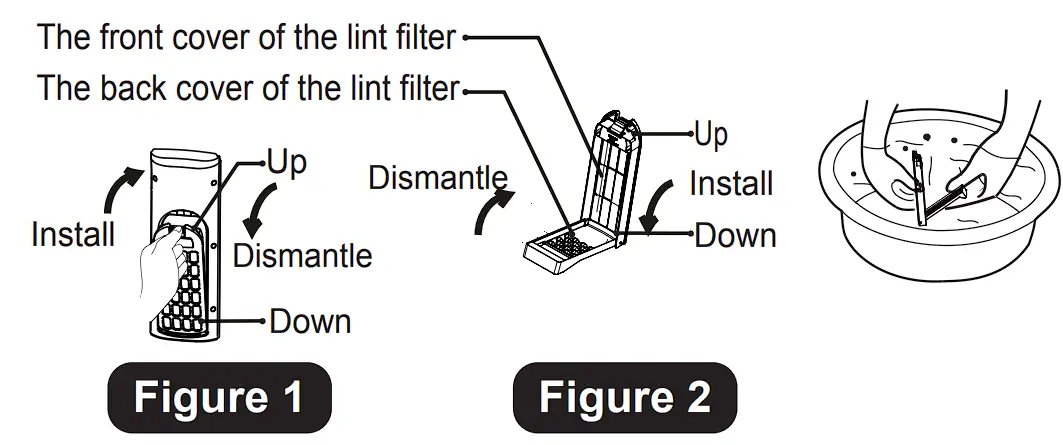
| The lint filter must be used during washing. Clean the lint filter after use. How to remove and install the lint filter:
|
To prevent blockage of water supply by dirt and dust, clean the filter at water inlet valve by brushing it every 2 months.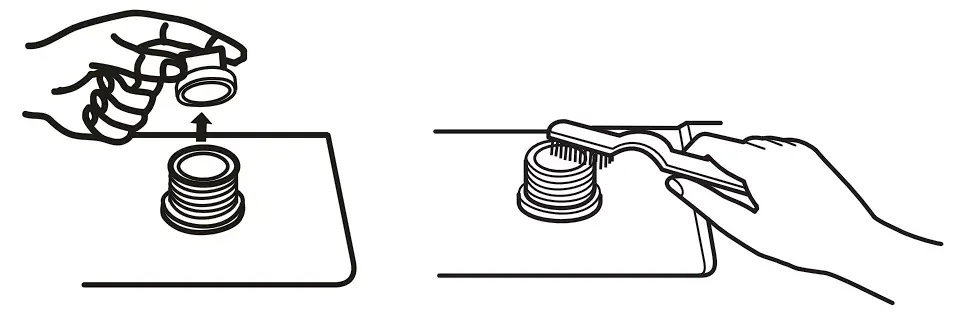 | |
If the washing machine case is dirty, wipe it with a damp cloth.
| |
| |
Troubleshooting
Many occurring problems could be solved by yourself without specific expertise. Please check all the shown possibilities and the solution below before contact the customer care team. Please switch off the machine and remove the power plug before troubleshooting.
| Problem | Cause | Action |
| Drainage failure. The display shows E1. | – Drain hose is blocked. | – Unblock the drain hose. |
| – Drain hose end is 10cm and above floor level. | – Make sure the drain hose properly installed. | |
| The machine stops running. The display shows E2. | – The lid is not closed. | – Close the lid and press the button “Start / Pause”. |
| The machine does not spin. The display shows E3. | – Unbalance of laundry. | – Spread the laundry evenly and press the button “Start/Pause”. |
| – Is the machine level? | -Level the machine. | |
| The display shows E4. | – No water / water supply failure. | – Check the water tap and ensure the water supply. |
| – Water Inlet valve is blocked. | – Check the water inlet valve. | |
| -Low water pressure. | – Check the water pressure. | |
| The display shows FA. | The water level sensor failed. | Please contact Customer Care. |
| The appliance fails to operate. | – Power failure. | – Check the power supply. |
| – Power plug is not insert properly to the socket. | – Insert the power plus properly to the socket. | |
| – Water is not reaching the preset level. | – Wait the water fill up to the preset level. | |
| – The lid is not closed. | – Close the lid. | |
| – Unbalance of laundry. | – Spread the laundry evenly. | |
| Vibrates excessively or make noise. | – Is the machine level? | -Level the machine. |
| – Unbalance of laundry. | – Spread the laundry evenly. | |
| – Any hard or metal objects like coins inside the tub? | – Remove the objects after the washing cycle completed. | |
| Leaks Water | – Is the water inlet hose loose? | – Make sure all hose connections are tight. |
| The display shows F2. Leaks Water The display shows F2. | – Indicates water reached a critical level. – Is the water inlet hose loose? – Indicates water reached a critical level. | – Please contact Customer Care. – Make sure all hose connections are tight. – Please contact Customer Care. |
Common occurrence
| Problem | Cause |
| – Stop spinning before complete the cycle. | – Spread the laundry evenly and close the lid. |
| – Selected spin program, but it doesn’t works. | – The water will drain out first before spinning cycle starts. |
| – Water in the drain hose when unpack. | – Residue from the performance inspection that done by factory. |
| – Operation stops before completing wash cycle. | – The appliance detected low water level, will add water automatically to the ideal level before resume the operation. |
| – Washing machine resume its operating after power supply back to normal. | – Once the power supply back to normal/ power plug insert properly to the socket, the machine will resume the washing cycle without reset program. |
Packing list
| Name | Quantity | Storage position |
| Automatic washing machine | One | |
| Bottom plate | One | Placed in the upper foam piece inside the washing machine packaging |
| User manual | One | Inside the document bag |
| Warranty card | One | Inside the document bag |
| Screw | One | Inside the document bag |
| Components of the water inlet hose faucet | One | Inside accessory bag |
Specification
| Type | Fully Automatic Washing Machine |
| Model | HWM120-1678ES5 |
| Rated voltage/frequency | 220V-240V~/50Hz |
| Rated washing power | 500W |
| Rated spinning power | 360W |
| Net weight | 48kg |
| Gross weight | 55kg |
| Dimensions(mm) | W 610 D 620 H 1045 |
| Water inlet pressure | 0.03MPa-1.0MPa |
| Rated Washing capacity | 12.0kg |


