KC10 MINI PC
Use Manual

Details
| Model | KC10 |
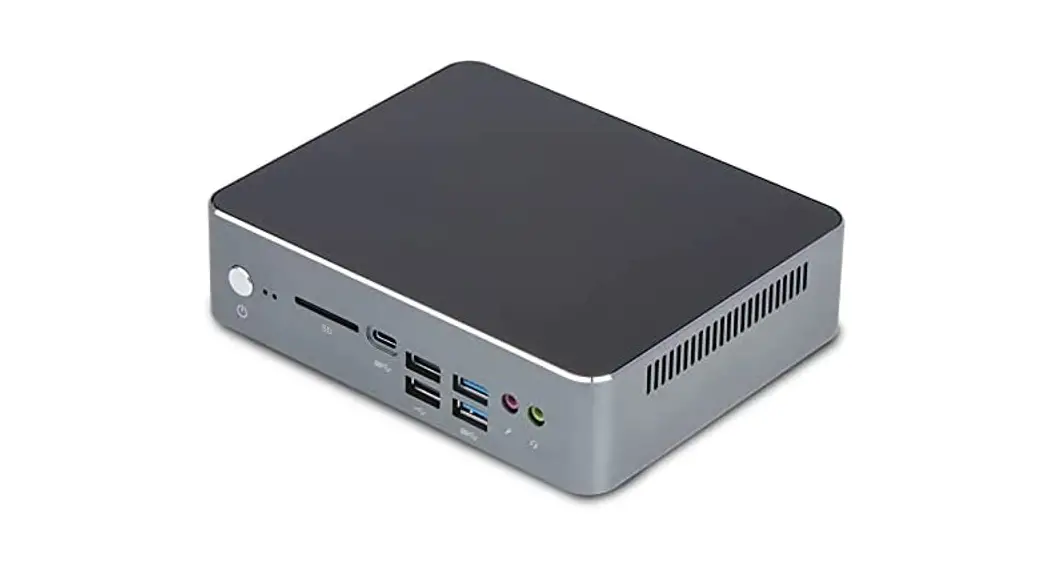
| Photos | 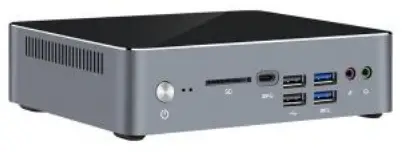 |
| OS | Windows 10 pro 64bit, Support windows 11 |
| CPU | Intel 80/10,” Core i5/i7 Processor |
| GPU | UHD 630 Graphics |
| Ram | 2xSodimm DDR4 slot, Max 64GB |
| Storage | 1xM.2 2280 Nvme SSD, 1×2.5inch HDD/SSDD |
| Output | HDMI 2.0×1, DP 1.4 x1 |
| LAN | 10/100/1000 Mbps x 2 Realtek RTL8168 |
| WIFI | 5G/5.8G 802.11a/ac/n; 2.4G 802.11b/g/n |
| Bluetooth | Bluetooth5.1 |
| USB | USB3.0x4, USB2.0x2, USB 3.1X1(Type-C) |
| Audio | Realtek ALC662 |
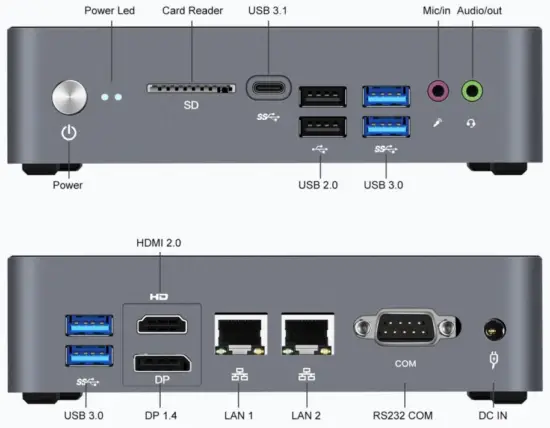
| I/O | 1xHDMI, 1xDP, 2xLAN 2xUSB 2.0, 4xUSB 3.0, 1xUSB 3.1 (TYPE-C), lx Audio Output, lx Microphone Input, lx DC In, SD Card Reader, 2.5-inch FIDD Hard Drive Slot ( Build In ) |
| Power | Input:100V-240V Output:19V/3.42A |
| Dimension | 160’130’40mm |
| Weight | Around 710g |
| Packing Content | Mini pc, Power cable, Adaptor, HDMI Cable 2.5inch HDD Cable, Vesa, Use Manua |
I/O Description
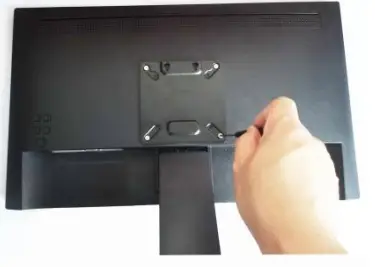
Mounting to Display
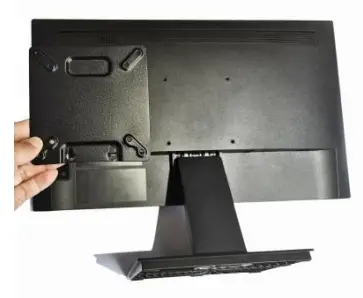 |  |
| 1. Attach mount vesa to the back of the display | 2. Put the vesa to 4 screws holes |
 | 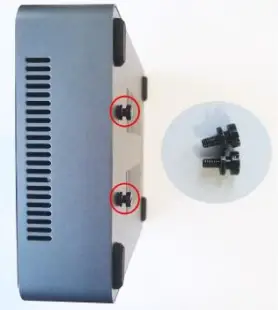 |
| 3. Locking the 4 screws | 4. Take out the 2 screws install them according to the photos |
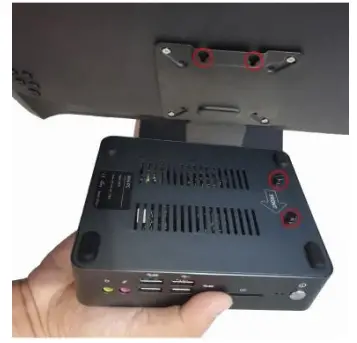 | 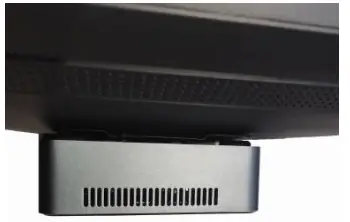 |
| 5. Attach the PC to the screw hole of the bracket | 6. Installation is complete as a photo |
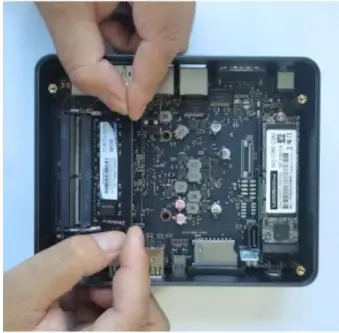
Ram,SDD,HDD Installation
 | 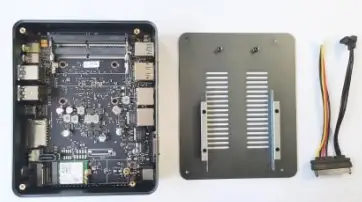 |
| 1. Remove the Button cover of the PC | 2. Take out the SATA cable |
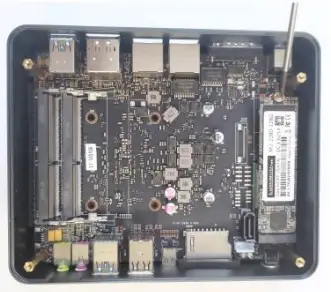 |  |
| 3. Locking the screw of the SSD | 4. Exchange the Ram as a photo |
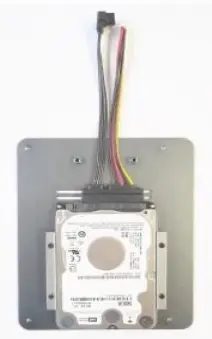 | 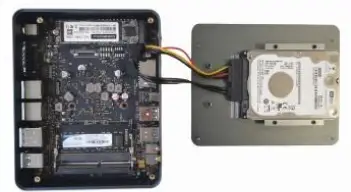 |
| 5. Put the HDD on the Button cover and connect Cable | 6. Attach the cable to the pc |
BOIS instruction
- How to start the BOIS screen
Start the PC and open the BIOS screen immediately with the < F2 > key. If you connect a keyboard with Bluetooth or wireless, you may not open the BIOS screen. In that case, please use the wire connection keyboard - How to setting auto power
Change the BIOS control screen, < boot > – < auto power on > disabled (disabled) to enabled (enable) and press enter. After choosing, press < F10 > to select Yes under < save and reset >. PC restarts automatically. Completion - How to setting RTC
Select the BIOS control screen. Fixed time mode wake-up hour time setting: 0 to 23. Example 23 is at pm11. Wake up minute settings: number up to 0 to wake up second seconds: after setting the number 0 to 59, press < F10 > and select [yes] under < save and reset >. PC restarts automatically - Wake-on-LAN
In this personal computer, the initial setting of WOL is enabled. If you want to disable it, do the following: Change boot > ~ < walk on land > Choose <Enable> to <Disable>
FCC Caution.
This device complies with part 15 of the FCC Rules. Operation is subject to the following two conditions: (1) This device may not cause harmful interference, and (2) this device must accept any interference received, including interference that may cause undesired operation.
Any changes or modifications not expressly approved by the party responsible for compliance could void the user’s authority to operate the equipment.
Note: This equipment has been tested and found to comply with the limits for a Class B digital device, pursuant to part 15 of the FCC Rules. These limits are designed to provide reasonable protection against harmful interference in a residential installation. This equipment generates uses and can radiate radio frequency energy and, if not installed and used in accordance with the instructions, may cause harmful interference to radio communications. However, there is no guarantee that interference will not occur in a particular installation. If this equipment does cause harmful interference to radio or television reception, which can be determined by turning the equipment off and on, the user is encouraged to try to correct the interference by one or more of the following measures:
-Reorient or relocate the receiving antenna.
-Increase the separation between the equipment and receiver.
-Connect the equipment into an outlet on a circuit different from that to which the receiver is connected.
-Consult the dealer or an experienced radio/TV technician for help.
*RF warning for Mobile devices:
This equipment complies with FCC radiation exposure limits set forth for an uncontrolled environment. This equipment should be installed and operated with a minimum distance of 20cm between the radiator & your body.
Manufacturer: aopoo technology co.,ltd
Address: Room 706, Bens Tower, Ganli 6 road, Longhua District, Shenzhen city
Tel:+86 18948726608
Email:[email protected] / [email protected]


