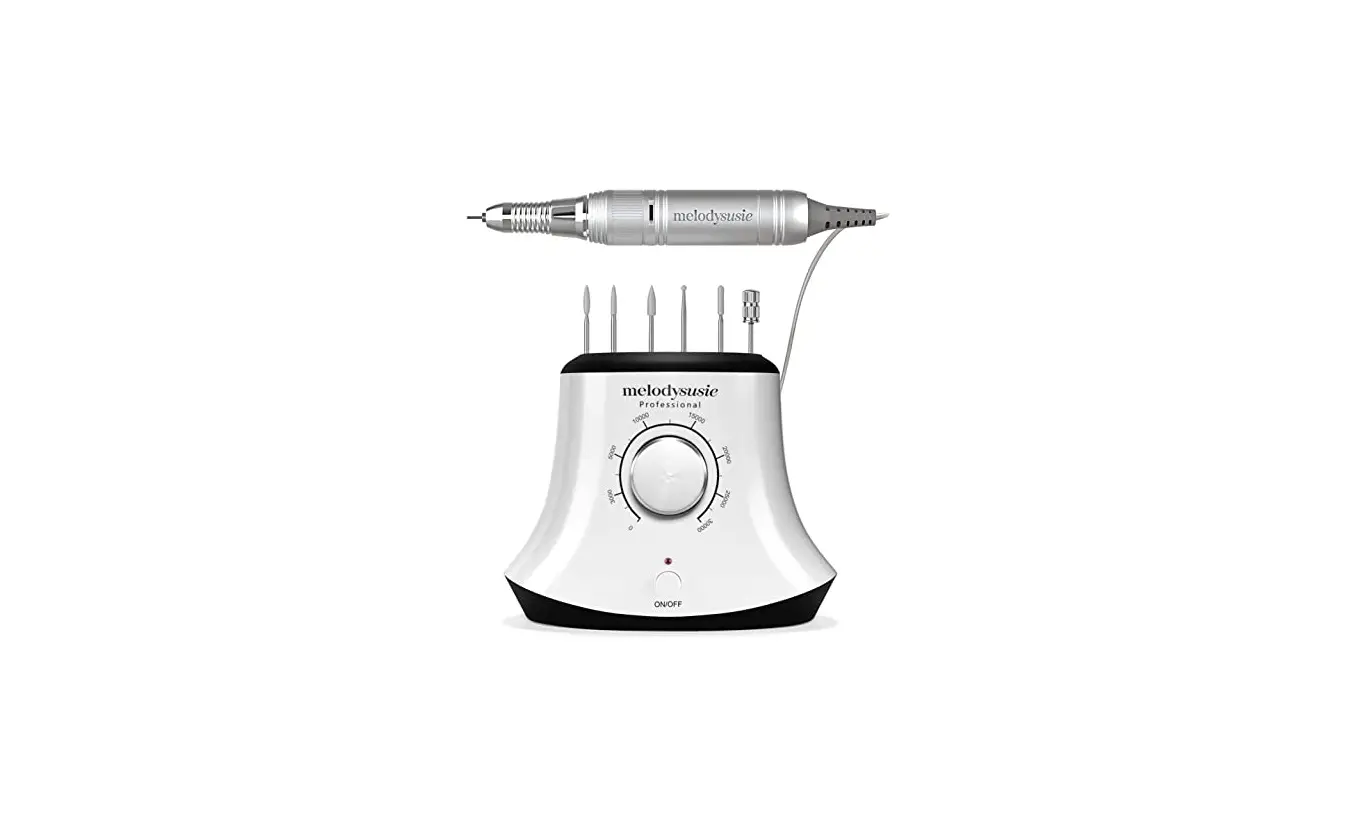
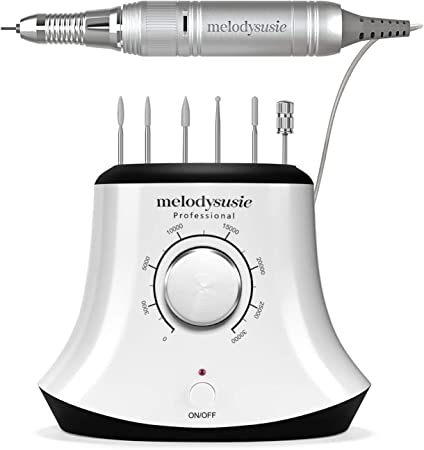
MelodySusie Scarlet Electric Nail Drill
Thank you for choosing MelodySusie! Please read this user guide carefully and keep it in an accessible location so you may refer to it later.
IMPORTANT SAFEGUARDS
READ ALL INSTRUCTIONS BEFORE USING
To reduce the risk of burns, electrocution, fire, or injury to persons.
Please be sure to read the safety instruction as follow to avoid potential hazards that could result in personal injuries or damage to the device.
Check before Using
- Check the power supply cord for damage before the first use and during the life of the device. Do not use this device if it has a damaged cord or plug or it is not working properly or damaged.
- Do not plug this device into a voltage system that is different from the voltage system specified on the device or charger. Use with improper voltage will damage the device and VOID warranty.
- Please use the original charger only.
- The handpiece of this nail drill is not compatible with other models of nail drill machines from MelodySusie and other brands. Please don’t connect the handpiece with a different nail drill machine.
Note for Using
- Do not draw out the connecting wires during use or touch the plug with a wet hand to prevent electric leakage and shock or fire. Please turn the power off after use.
- Do not use the crooked or damaged nail drill bit or replace the bit when the power is on.
- Adjust the speed gradually, not abruptly. Please stop to use once the unusual movement and noise happen.
- Do not cover the ventilation of the handpiece avoiding burning your hand or touching any rotating part while the device is working.
- Misuse, dropping or excessive force may cause device damage.
- Children under 18 years of age should not use this device without parental consent and supervision.
Maintenance Work
- Do not disassemble the device. Doing so could be dangerous and constitutes voiding warranty conditions.
- Do not keep the device in a place that is about or more than 50°C(in a metal box, car or other places in high temperatures). Keep the handpiece dry and keep it away from the oil and grease.
- Store the device in a cool and dry place. Do not store it in a hot or humid environment.
- Keep electrical cord away from heated surfaces.
- Do not dispose of the device in heat or fire.
- Do not clean the device with harmful chemicals or detergents.
Note for Injury
- Having manicures done frequently can cause injuries to the nails as well.
- If you need to remove the gel polish of natural nails, try to use nail polish remover pads to avoid damage to the nail bed with improper operation.
- Do not use the device if you have an open wound on your nail or hand.
- If you have any skin diseases, heat-sensitive, allergic reactions, onychomycosis or any other disorder, you should consult your doctor and medical professional before using the device.
The operator shall be responsible for any consequences including product damage or accidents if not strictly complies with the instructions. If you require any technical support, contact us at [email protected].
SAVE THESE INSTRUCTIONS
Items Included
- 1 x Electric Nail Drill
- 1 x Power Supply
- 1 x Foot Pedal
- 6 x Drill Bits
- 6 x Sanding Bands
- 1 x User Manual
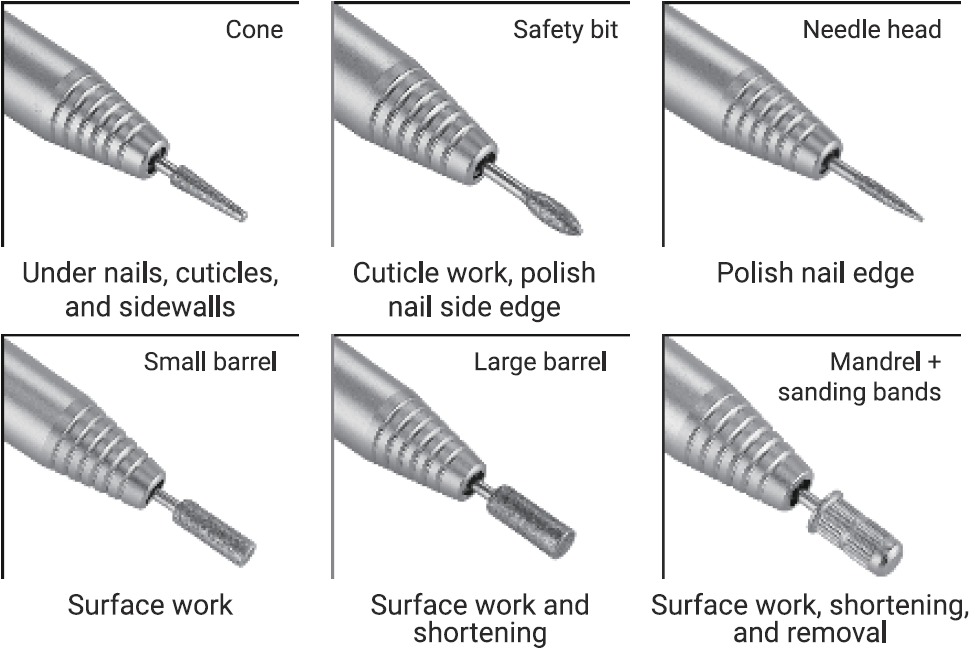
Six Drill Bits
How to Use
- Step l: Choose one grinding drill bit, release the handpiece, insert the drill bit at the drill head and lock it in place. The drill bit hole could be used to place the nail drill bits.
- Step 2: Connect the handpiece to the handpiece jack.
- Step 3: Connect the foot pedal to the foot pedal jack.
- Step 4: Connect the power supply with the power control device in the DC socket.
- Step 5: Press the ON/OFF button to turn on the device.
- Step 6: Rotate the speed control knob to accelerate or decelerate the rotation speed.
- Step 7: Change the rotation direction of the grinding drill bit on the F/R button if needed.
- Step 8: After the polishing is finished, please turn off the device and rotate the central barrel and take out the drill bit. The handpiece hole could be used to place the handpiece when not in use.
NOTE: When connecting the handpiece, please align with the handpiece connector and of the handpiece jack correctly.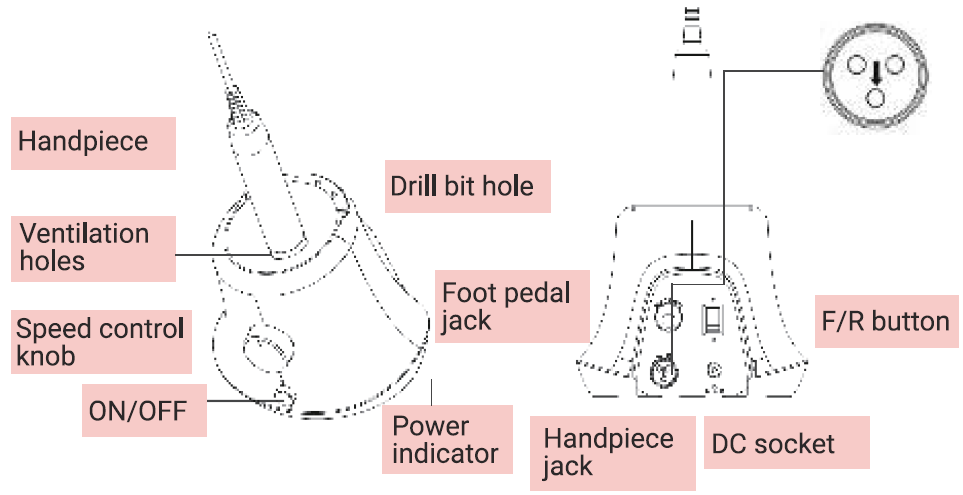
How to Replace Drill Bit
Originally a blank bar is attached but it can be removed as you like. Please make sure that the desired bit is suitable for the collet.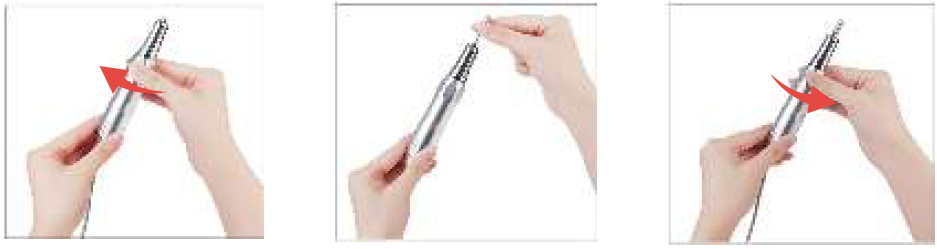
- Do not move the central barrel during operation.
- Do not cover the ventilation holes on the handpiece, when using the device.
- Turn the central barrel clockwise until hearing a “click” sound to release the drill bit. Taking out the blank bar. Put the desired bit into the handpiece.
- Turn the central barrel counterclockwise until hearing a “click” sound to lock the drill bit in place.
- Be sure to confirm the rotation of the bit and collet. Please take care of your fingers not to be hurt by the bit edge.
Problem and Terms of Settlement
Misoperation | Causing | Terms of settlement |
| Changing the nail drill bit when the power is on The power is on when not in use |
| Turn off the power when changing the nail drill bit. Turn off the power when not in use |
|
Long time, Large load work |
1. Motor burns out 2. Device lifespan shortens 3. Bearing damages (Loud Noise) 4. Handpiece damages | The continuous working time should not be too long when the working condition is in heavy load. When the device is overheating, it should be stopped immediately to make it return to normal temperature. |
| Insert into a mismatched power supply | 1. Motor burns out | According to the device voltage requirements, insert the matching power supply |
| Put the power cord at random/ Pull the power cord | 1. Device lifespan shortens 2. Power cord brokes 3. Poor connection 4. Easy to cause short circuit |
Do not pull the power cord |
| Replace the original charger randomly | 1. Device damages 2. Easy to cause short circuit | Use the original specification charger |
|
Dust into device | 1. Bearing damages {Loud Noise) 2. Motor gets hot 3. Rotational speed slows down 4. The potentiometer speed regulation fails 5. Handpiece damages |
Clean dust, add the dust-proof protection of the dustproof hood |
|
Device drops to the ground or by other impacts | 1. The ON/OFF button doesn’t work 2. The potentiometer speed regulation fails 3. F/Rbutton doesn’t work 4.Handpiece damages | Avoid device drops or by other impacts ( If the handpiece was damaged, it can be purchased separately. ) |
| Misoperation | Causing | Terms of settlement |
| Insert the nail drill bit into the device incorrectly /Rotate the central barrel into the place incorrectly /Take the drill bit out when the central barrel is locked |
1. Drill bit falls out 2. High vibration 3. Drill bit stucks 4. The Handpiece stucks and cannot be turned on 5.Handpiece damages | Insert the nail drill bit into the device correctly/If the drill bit stucks, please release the handpiece and try to take out it hard/Rotate the central barrel correctly |
| Replace drill bit when handpiece is not completely stopped | 1. The handpiece stucks and cannot be turned on 2. Handpiece damages | Do not replace drill bit when handpiece is not completely stopped |
| Cover the ventilation holes on the handpiece, when using the device | 1. Handpiece overheats 2. Hand burns | Do not cover the ventilation holes on the handpiece, when using the device |
| The size of drill bit is not suitable | 1. Can not insert the drill bit into the device | Use standard drill bit |
| Water into the device/Operate in wet or moist conditions/Use a wet cloth to clean the device | 1. Motor burns out 2. Device lifespan shortens | Do not operate in wet or moist conditions/Only a dry cloth is allowed for cleaning |
| Foot pedal drops to the ground or by other impacts | 1. Foot pedal damages | If the foot pedal was damaged, it can be purchased separately. |
Specifications
- Input voltage range: 100-240V /50-60Hz 0.6A
- Output voltage: 24.0V 1.0A
Email: [email protected]
Website: www.melodysusie.com
Address: 2809 Whipple Rd, Union City, CA 94587.
Warranty and Customer Service
MelodySusie offers a 6-month limited warranty on qualityrelated issues. Please register on our website to extend your warranty and to view this manual in other languages.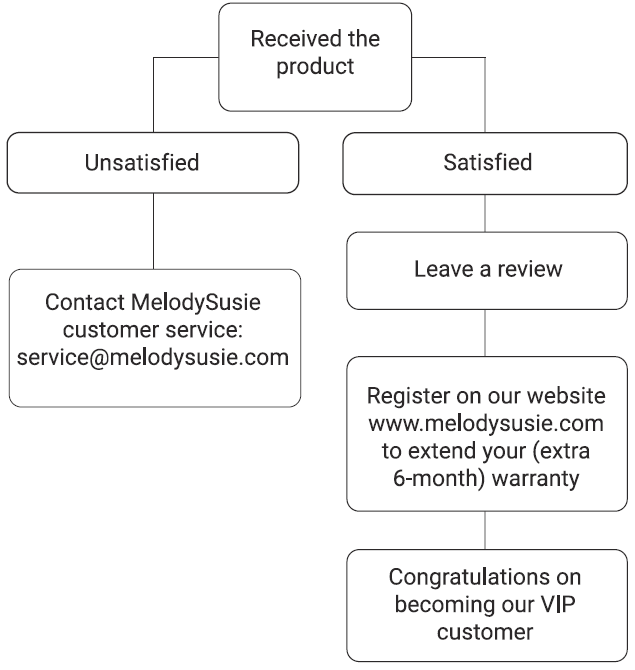
[email protected]
http://www.melodysusie.com
2809 Whipple Road, Union City, CA 94587.


