![]()
![]() MONOCRYSTALLINE FIXED GLASS SOLAR
MONOCRYSTALLINE FIXED GLASS SOLAR
PANEL USER MANUAL
KARTSP170
WHY KICKASS?
KickAss is focused on bringing the luxury of home to the outdoors. Your one stop shop for 12V products. All of our products are designed to be plug and play, for the ultimate camping experience.
Designed by the KickAss team in Australia.
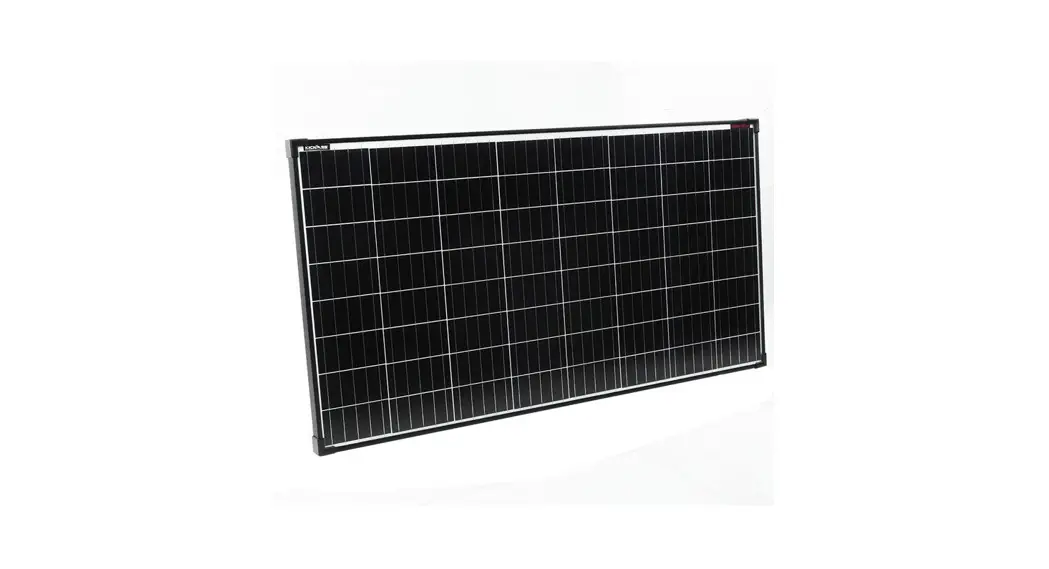
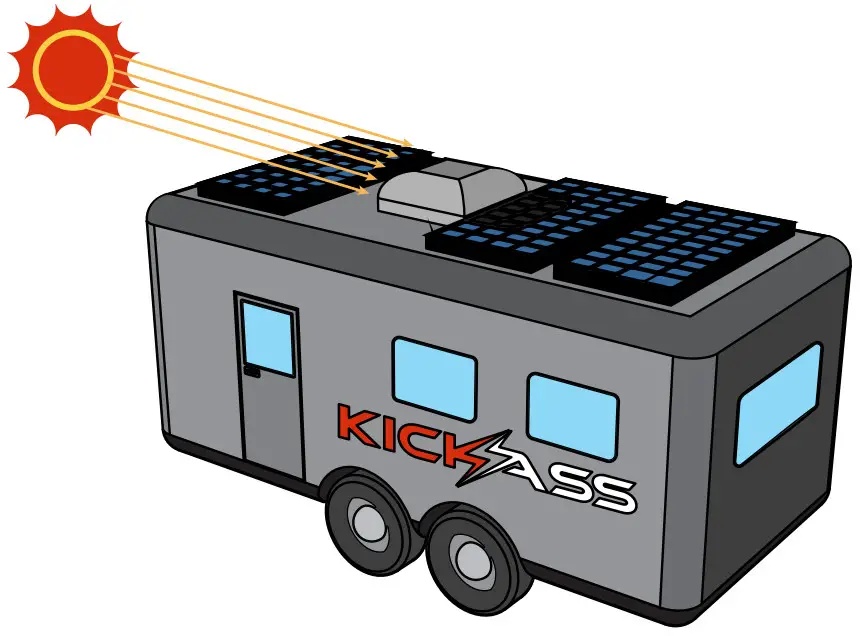
The KickAss Fixed Glass Solar Panel has been design to provide a compact and robust solar power solution, with a highly efficient power output.
The panel has been constructed with a 35mm extruded aluminium frame and shatter resistant tempered glass to provide better resilience in o-road environments. The panel is made up of monocrystaline A-grade cells which have been stringently tested to ensure a longer lasting quality product.
Our team of dedicated engineers test every product to make sure they stand up to the tough Australian outback. The new KickAss Fixed Glass Solar Panels are no different using high quality material and A-Grade cells. Each panel is designed with IP67 rated PV connectors that can be adapted in single, series or parallel configurations with available accessories, to integrate into our range of charging options.
IMPORTANT WARNING AND SAFETY INSTRUCTIONS
PLEASE SAVE THESE INSTRUCTION THIS MANUAL CONTAINS IMPORTANT SAFETY INSTRUCTIONS FOR KICKASS FIXED GLASS SOLAR PANEL.
DO NOT operate Solar Panel UNLESS YOU HAVE READ AND UNDERSTOOD THIS MANUAL and the Solar Blanket is installed as instructed.
WARNING! RISK OF EXPLOSIVE GASES
Working in the vicinity of Lead-Acid batteries is dangerous. During normal operation batteries generate explosive gases. It is important that the battery is operated in a well ventilated area and the Solar Panel is installed as directed.
WARNING!
Check the battery manufactures guide for the recommended voltage profile for charging. Failure to ensure the selected voltage does not exceed the recommend prole could damage your battery.
Change the selection if necessary before charging the battery.
WARNING! RISK OF INJURY AND DAMAGE DUE TO INCORRECT INSTALLATION OR SECURING OF PRODUCT
It is highly important to correctly secure your Solar Panel in the event of high wind. The instructions provided in this manual are a guide and it is the responsibility of the user to ensure the product is securely attached to a mounting surface at all times and in accordance with all local and national safety standards. In addition, any mounting devices used for installation must adhere to the manufacturer’s safety instructions and it may be required to exceed these, to comply with local and national standards. We recommend that a qualified installer be used.
CAUTION!
- This appliance is not intended for use by persons (including children) with reduced physical, sensory or mental capabilities, or lack of experience and knowledge, unless they are supervised or have been properly instructed on how to use the appliance by a person responsible of their safety.
- Children should be supervised to ensure they do not play with the appliance
- DO NOT connect the Solar Panels directly to a battery. ALWAYS use a solar regulator of the correct input rating to connect the Solar Panels to before connecting and charging the battery.
- Ensure to use the Solar Panel with a regulator of the correct input rating and suitable charge prole for the battery chemistry type being charged. Suitable battery types include; Lead Acid, Gel, Calcium, AGM or Lithium Iron Phosphate.
- The battery should be mounted in a well ventilated area, and a safe distance from any ignition source. NEVER smoke or allow a spark or flame in the vicinity of the battery. This may cause the battery to explode.
- To reduce the risk of sparks, connect or disconnect the Solar Panel to the charge regulator BEFORE exposure to sunlight. The Solar Panel may generate voltage up to the rated open circuit value, at the connection leads while unconnected.
- The Solar Panel will achieve best results when proper battery maintenance is regularly performed.
This includes but is not limited to checking water and specific gravity levels of the battery. - Do not use mirrors or other devices to artificially concentrate sunlight on the Solar Panel.
- The Solar Panel is not designed to be used in series or parallel.
- Partially shaded or partially obscured Solar Panel will have reduced output, and can potentially damage the panel over time.
PERSONAL SAFETY PRECAUTIONS
When connecting the Solar Panel to batteries via the regulator:
- Wear complete eye and clothing protection.
- Avoid touching eyes while working near a battery.
- If battery acid contacts your skin or clothing, remove the affected clothing and wash the affected area of your skin immediately with soap and water. If battery acid enters your eye, immediately flood the eye with running cold water for at least 10 minutes and seek medical assistance immediately.
 SCAN TO VISIT THIS PRODUCT’S LANDING PAGE
https://qrco.de/bdAcJb
FEATURES

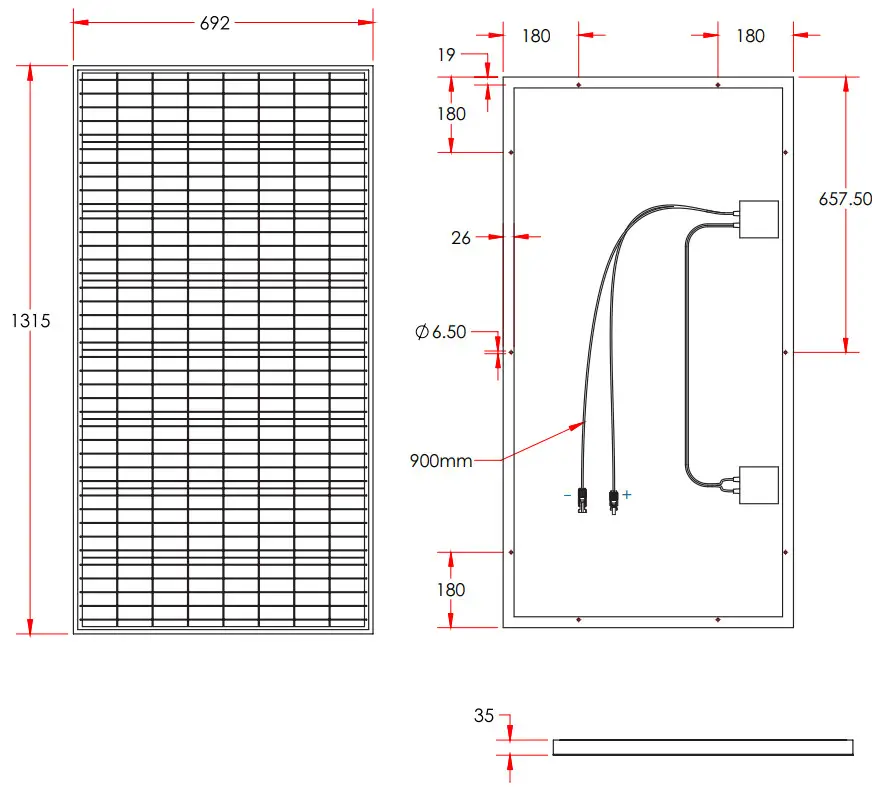
KARTSP170W DIMENSIONS / SPECIFICATIONS
SPECIFICATIONS
| SKU: | KARTSP170 | Application class: |
| Cell type: | High efficiency A-grade monocrystalline | Fire safety class: |
| Max power (Pmax): | 170W | Maximum system voltage: |
| Max power voltage (Vmp): | 18.46V | Operating temperature: |
| Max power current (Imp): | 9.2A | Nominal operating cell temperature: |
| Open circuit voltage (Voc): | 21.66V | Connector type: |
| Short circuit current (lsc): | 10.06A | Standard test condition: |
| Dimensions: | 1315mm x 690mm x 35mm | Power tolerance: |
| Weight: | 10.2kg | Dimension tolerance: |
| Frame: | Black powder coated aluminium | Conversion efficiency: |
SOLAR POSITION OPTIMIZATION GUIDE
KickAss Solar Panel will perform at their peak with the panel face angled directly towards the sun.
In the field this is not alway possible. KickAss recommends angling the panel between 20° and 40° from the ground. This ensure the most efficient total power output from your Solar Panel during the course of the day, in all seasons.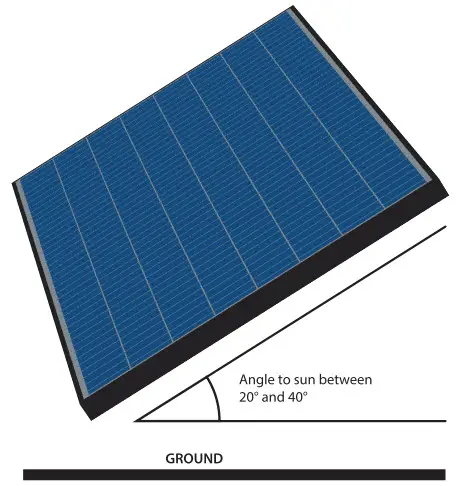 In the southern hemisphere, the sun is always in the NORTHERN half of the sky. Facing your panel NORTH ensures the best angle to the sun for a Solar Panel during the course of the day. In the northern hemisphere, the sun is always in the SOUTHERN half of the sky. Facing your panel SOUTH ensures the best angle to the sun for a Solar Panel during the course of the day.
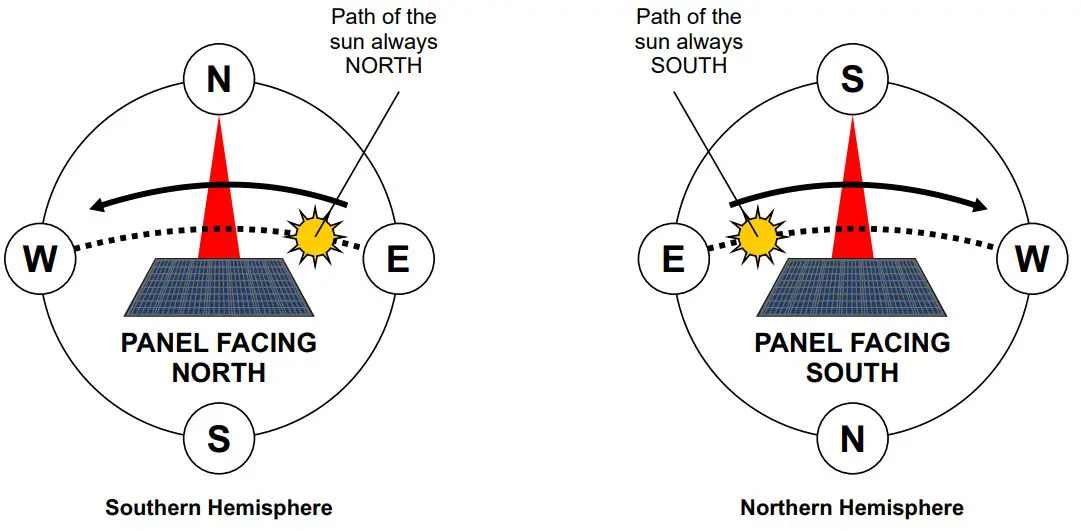 NOTE: High panel temperates may reduce the efficiency of the Solar Panel output. Heat radiation from surrounding surfaces eg. metal, may cause lower output if there is limited air flow. Take consideration when choosing mounting surfaces.
INSTALLATION GUIDE
RECOMMENDED CONFIGURATION
 |  |
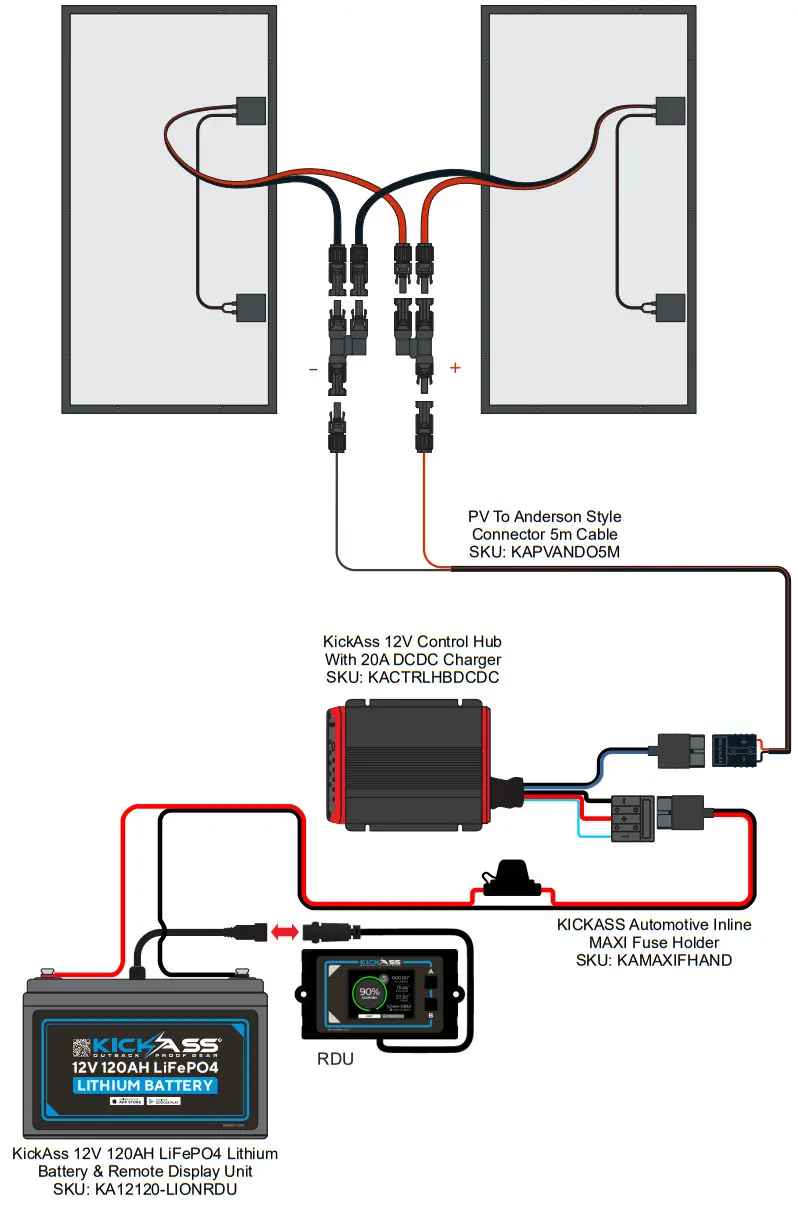 | |
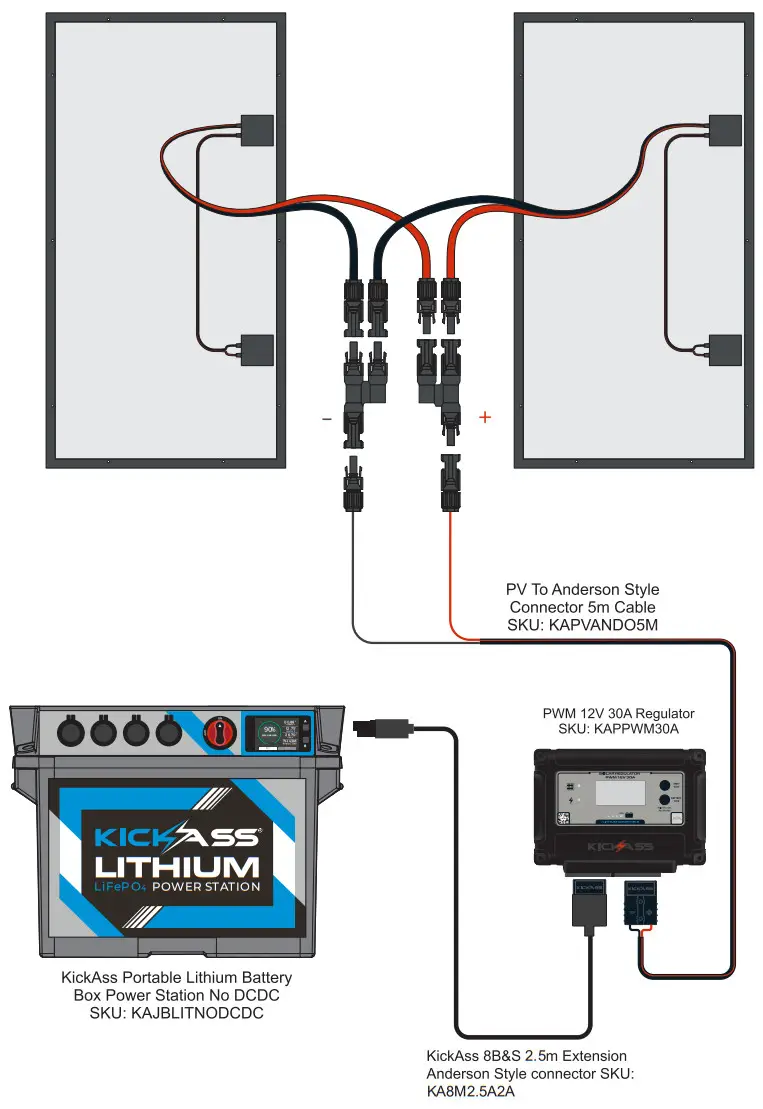
AVAILABLE ACCESSORIES
RECOMMENDED CONNECTION DIAGRAM
KickAss Solar Panels can be connected in Parallel or Series as per the diagrams below, or a combination of the two. Connecting two identical panels (of the same wattage) in parallel will multiply the total output current by 2 and keep the system voltage at the same level. Conversely, connecting two identical panels (of the same wattage) in series will multiply the system voltage by 2 and keep the output current at the same level. Parallel connections should be made using PV branch connectors. Quality KickAss PV 2 in 1 branch connectors are available and can be purchased through the store. Series connections should be made by connecting the negative connector of one panel to the positive of the next.
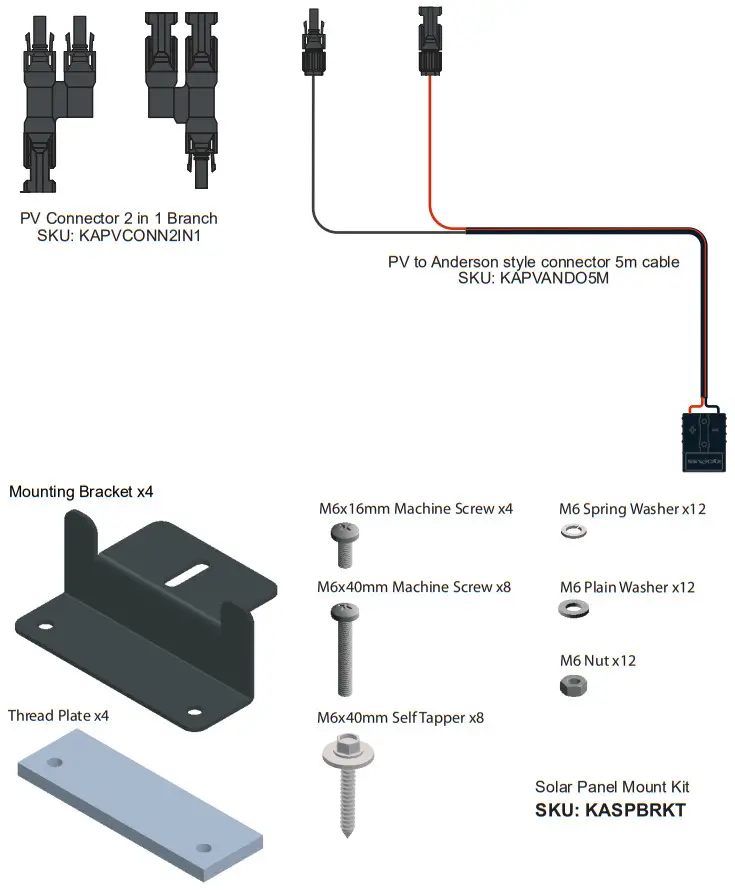
BRACKET ASSEMBLY GUIDE
The optional solar panel mounting bracket kit has been designed as an all in-one solution for rack or surface mounting.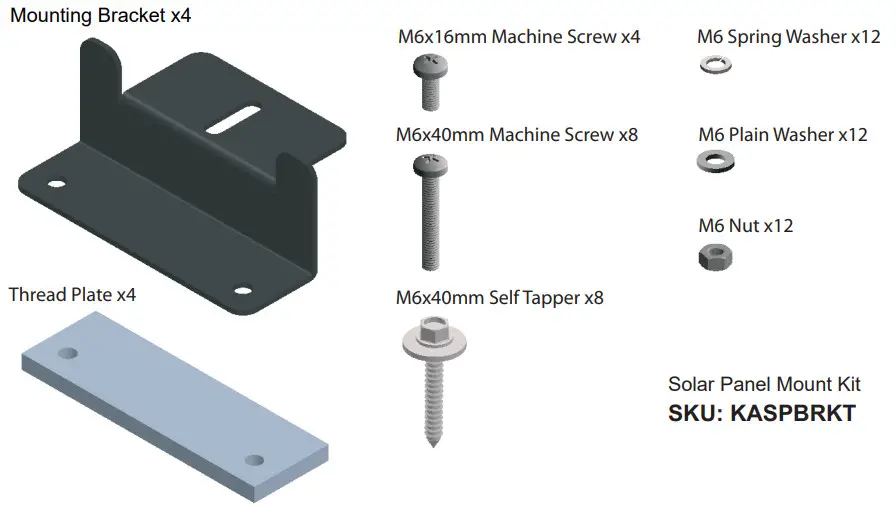 Bracket Assembly to Solar Panel
Step 1.
Locate pre-drilled holes in Solar Panel frame and secure all 4 mounting brackets.
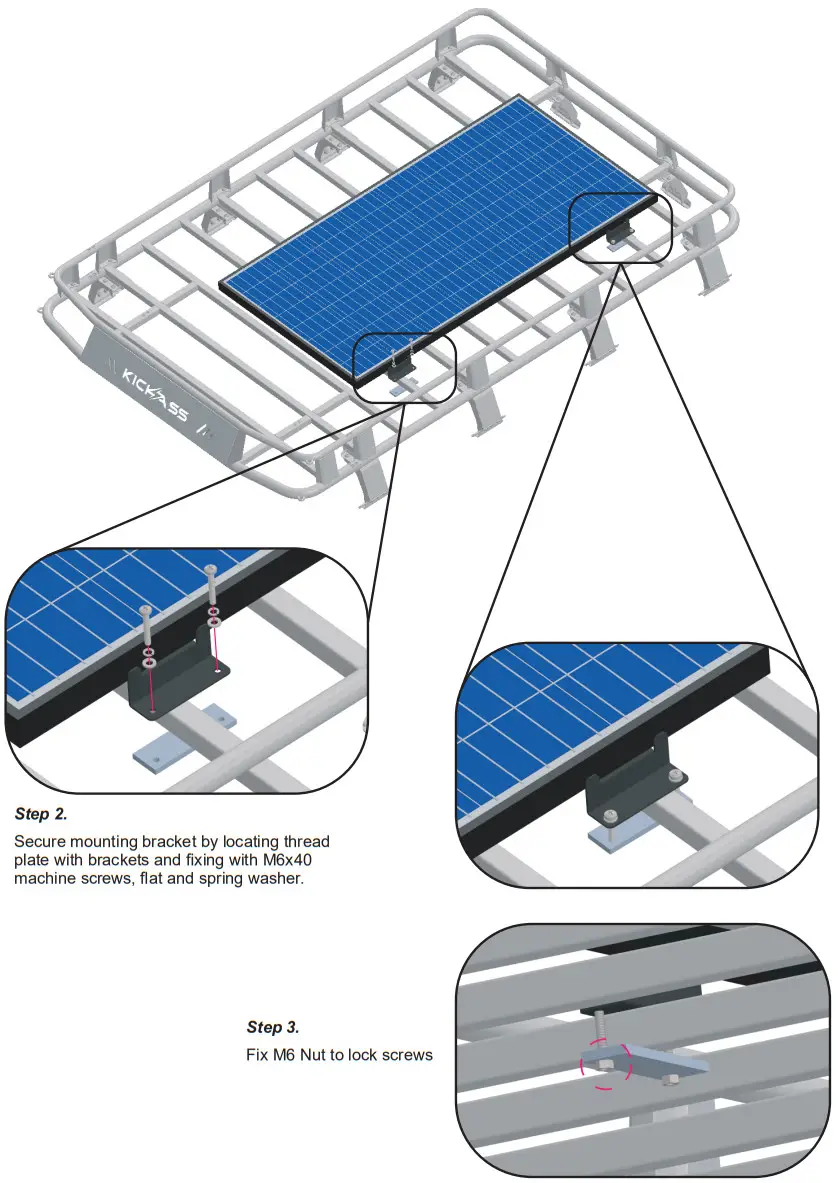
Note: Before choosing assembling hole locations, check fittment area for the best position to align with mounting surfaces. Step 2.
Assemble mounting bracket to Solar Panel frame as shown using the following hardware:
- M6x16mm Machine Screw x4
- M6 Spring Washer x12
- M6 Plain Washer x4
- M6 Nut x12
ROOF RACK MOUNTING GUIDE
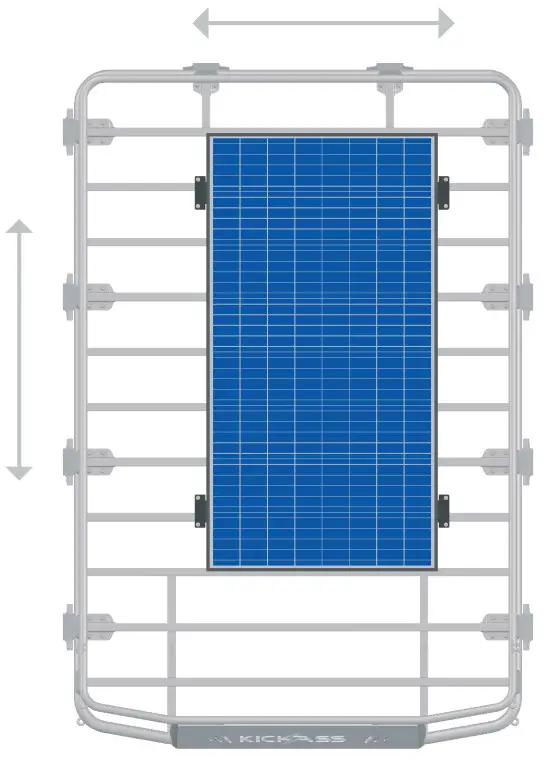
Step 1 – Locate Solar Panel on Roof Rack:
Consider the following when choosing location for the Solar Panel on the roof rack of your vehicle:
Alignment of mounting brackets with rack cross members so all 4 brackets are can be secured.
Cable routing – Keep all wiring away from shape edges and secure with zip ties.
Shading from existing fixtures.
 |  |
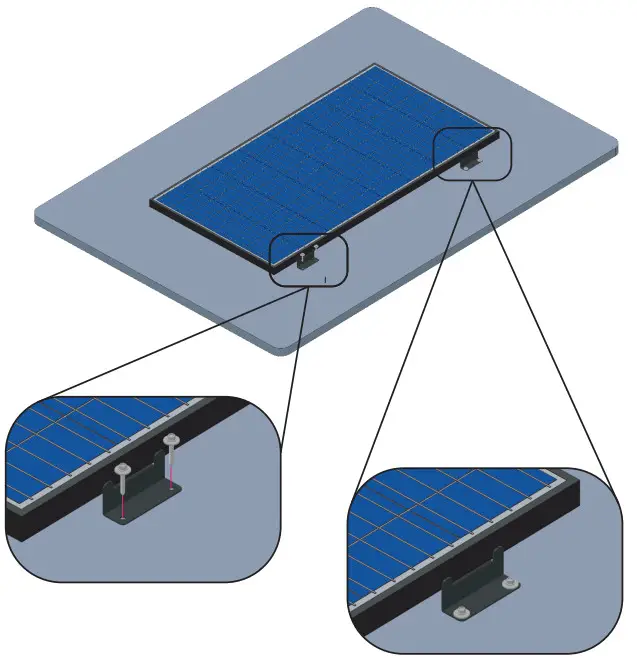
FLAT ROOF MOUNTING GUIDE
Step 1 – Locate Solar Panel on Roof Surface:
Consider the following when choosing location for the Solar Panel on rack:
- Alignment of mounting brackets one a flat surface so all 4 brackets are can be secured.
- Cable routing – Keep all wiring away from shape edges and secure well.
- Shading from existing fixtures.
 Step 2:
Secure mounting brackets with M6x40mm Self Tapping screws. Add a sealant around roof penetration holes to prevent water leaks where appropriate.
THANK YOU FOR CHOOSING![]() For more information please visit us at: kickassproducts.com.au
For more information please visit us at: kickassproducts.com.au


