IFIXIT PlayStation 3 Super Slim Teardown
INTRODUCTION
PlayStation 3 super slim – how to fully disassemble. You can see also: PlayStation 3 Super Slim Teardown Please SUBSCRIBE to my channel
TOOLS
- TR8 Torx Security Screwdriver (1)
- Phillips #1 Screwdriver (1)
- Phillips #00 Screwdriver (1)
- iFixit Opening Tool (1)
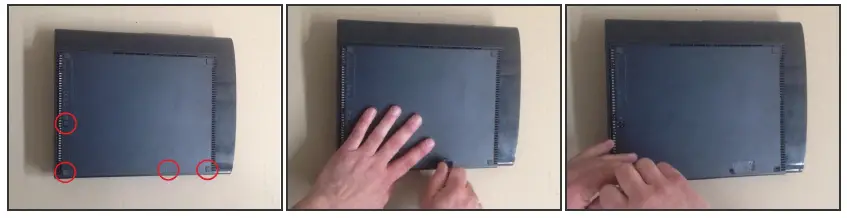
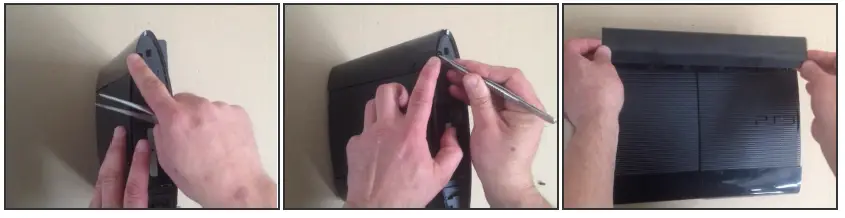
- Step 1 — PlayStation 3 Super Slim Teardown – Video tutorial

- Remove the three rubber feet, warranty sticker and four screws.
- Gently pull up on the bottom cover to remove it.
- Step 2

- Slide the HDD cover toward the rear of the device to remove it.
- Remove the blue screw shown to remove the HDD caddy with a #1 Phillips.
- Remove the 3 chassis screws with a TR8 Bit.
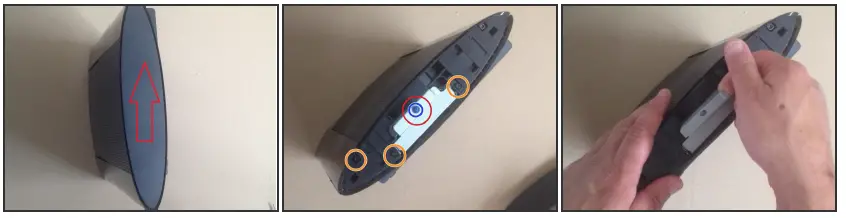
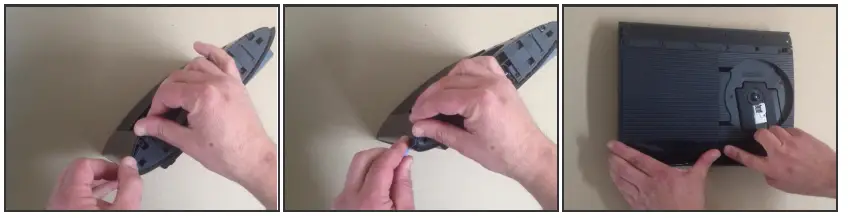
- Step 3

- Use a metal spudger to push the tab on the rear top finisher, and lift up to remove it.
- Step 4

- Repeat step 3 for the front top finisher.
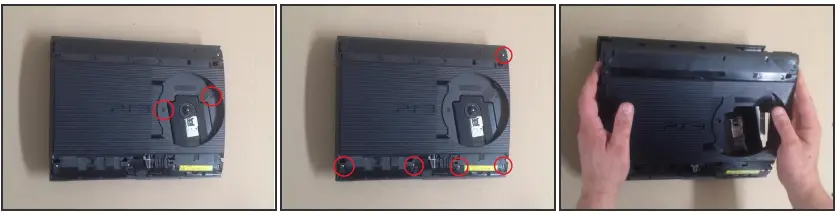
- Step 5

- Remove the two TR8 screws indicated in the disk reader.
- Remove the five Phillips #1 screws shown around the edge of the top cover.
- Lift the top cover up to remove it.
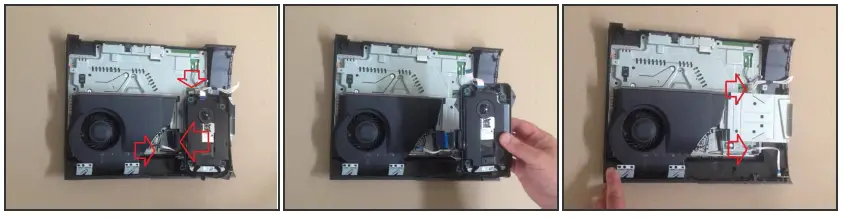
- Step 6

- Move the optical disk reader assembly to the left to expose one of the screws holding the power supply in.
- Remove the two Phillip #1 screws indicated and carefully disconnect the cable on the right side of the power supply.
- Lift the power supply straight up to remove it.
- Step 7

- Carefully disconnect the ribbon cables indicated.
- Lift the optical disk reader up to remove it.
- Disconnect and remove the white cable and ribbon cable indicated.
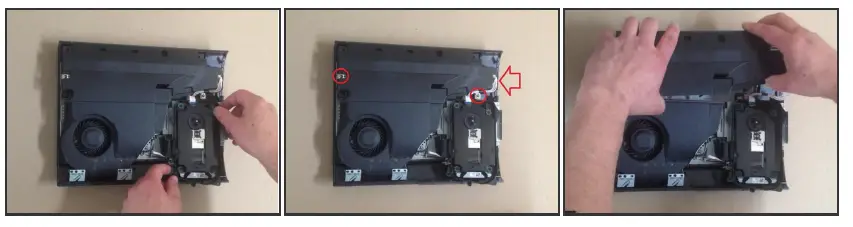
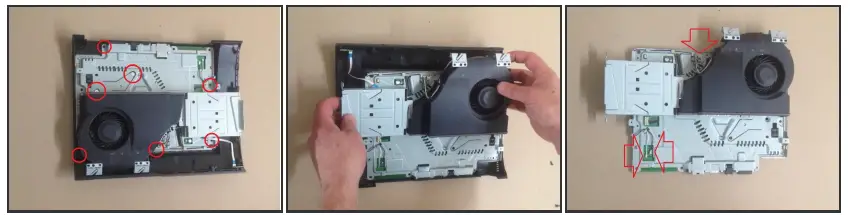
- Step 8

- Remove the seven Phillips #1 screws indicated.
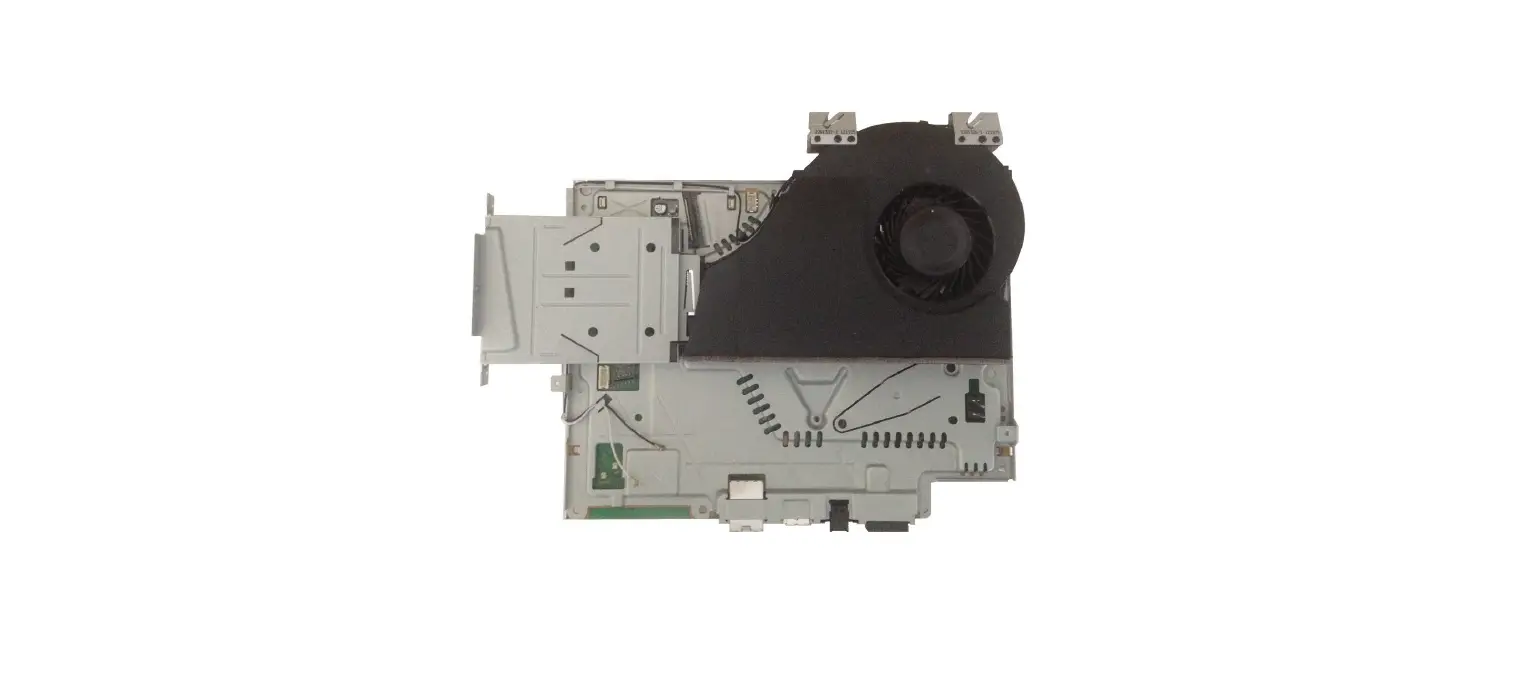
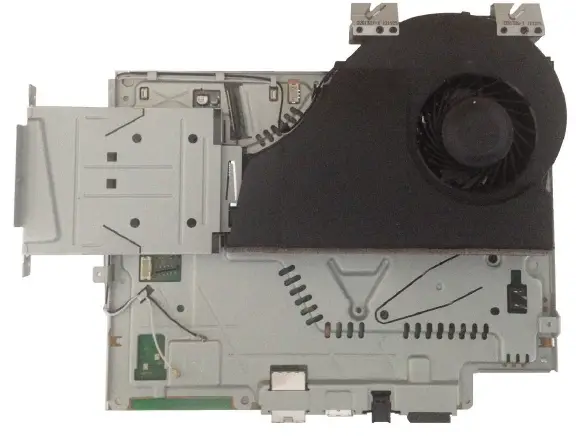
- Lift the motherboard assembly up out of the lower half of the case to remove it.
- Carefully disconnect the Wi-Fi antenna cables and fan connector indicated by red arrows.
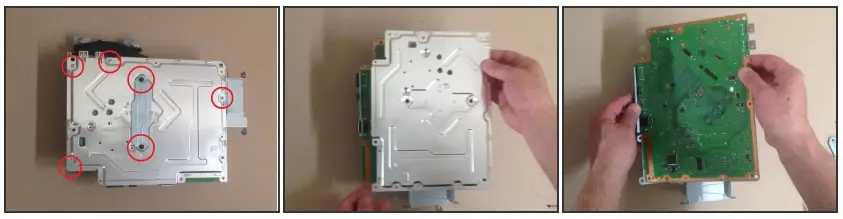
- Step 9

- Remove the six Phillip #1 screws indicated to separate the heatsink and shield from the motherboard.
- Step 10

- To reassemble your device, follow these instructions in reverse order.
This document was generated on 2022-08-09 09:23:18 AM (MST). © iFixit — CC BY-NC-SA www.iFixit.com


