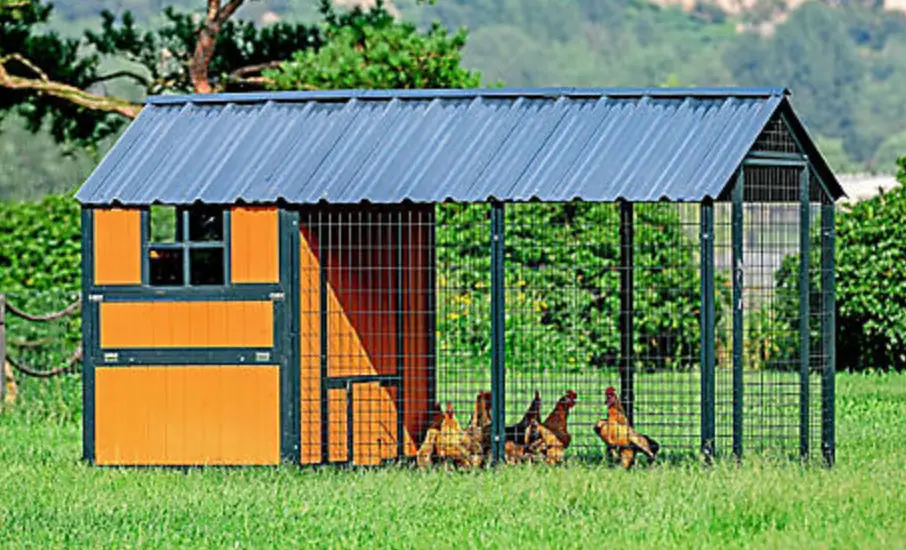
Tractor Supply Company 1994517 Guardian Chicken Coop
Product Information: PP Guardian Chicken Coop
The PP Guardian Chicken Coop is a durable and spacious coop designed to provide a safe and comfortable environment for your chickens. The coop is made in China and distributed by Tractor Supply Company. It comes with a range of parts including coop floor, wood panels, front and back panels, nesting box support bar, roosting bars, roof panel, mesh door panels, metal clamps, and screws among others.
Product Usage Instructions
Assembly of the PP Guardian Chicken Coop is simple and straightforward. Please note that tools required for assembly are not included. Here are the steps for assembling the coop:
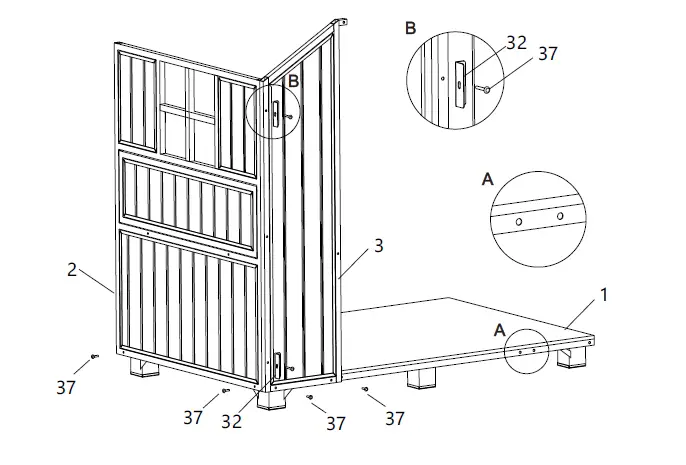
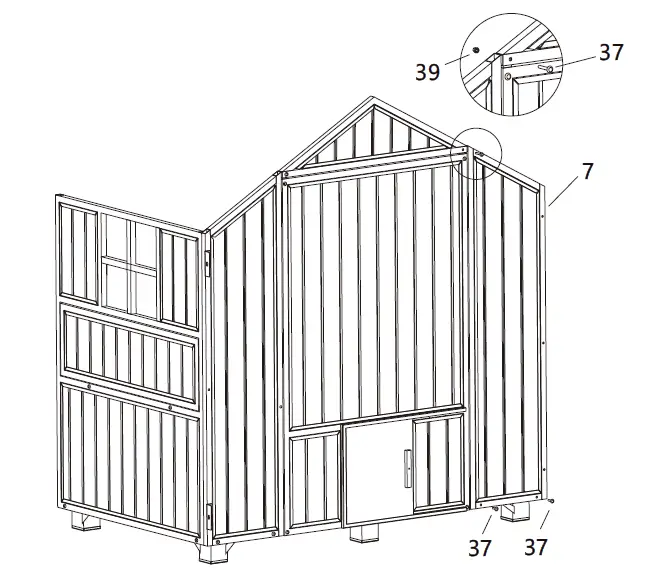
Step 1: Identifying the front of the Coop Floor
- Identify the front of the Coop Floor. There are two holes in circle A on the front side.
- Fix Coop Floor (#1), Coop Left Wood Panel (#2), and Coop Front Panel-Left Side (#3) together using Bolt (#37).
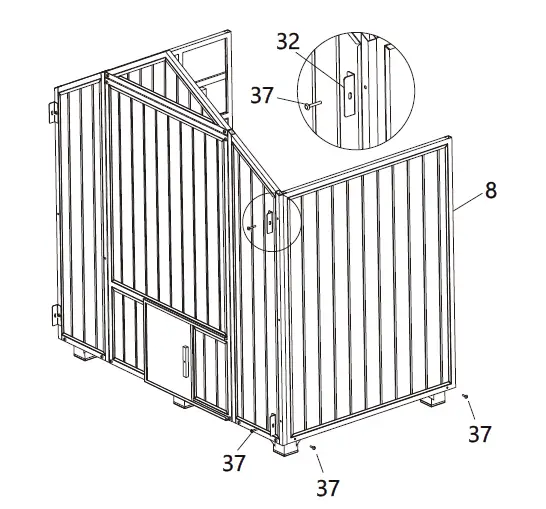
- On the left edge of the Front Panel, fix two pcs of Coop Connecting Metal (#32) with Bolt (#37) for later use.
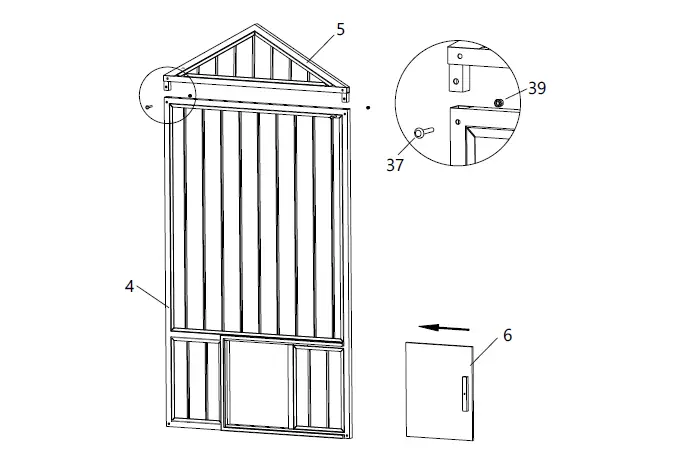
Step 2: Attaching the Coop Front Panel-Top Triangle and Sliding Door
- Fix Coop Front Panel-Top Triangle (#5) on the top of Coop Front Panel-Middle (#4), by Bolt (#37) and Nut (39#).
- Insert the Sliding door (#6) into the U-channel.
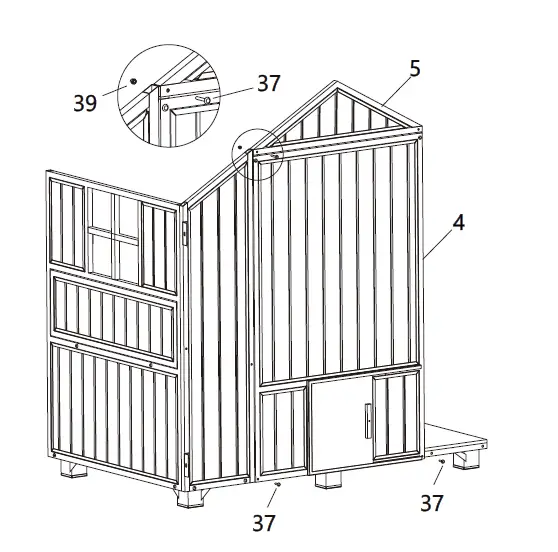
Step 3: Assembling the Front Panel
- Assemble the (#4) & (#5) combination part into the Coop by Bolt (#37) and Nuts(#39), next to (#3).
Step 4: Attaching the Coop Front Panel-Right Panel
- Fix the Coop Front Panel-Right Panel (#7) using Bolt (#37) and Nuts(#39).
Step 5: Attaching the Coop Right Wood Panel
- Attach the Coop Right Wood Panel (#8) using Bolt (#37).
- Fix the rest 2pcs of Coop Connecting Metal (#32) with Bolt (#37) on the right edge of the front panel.
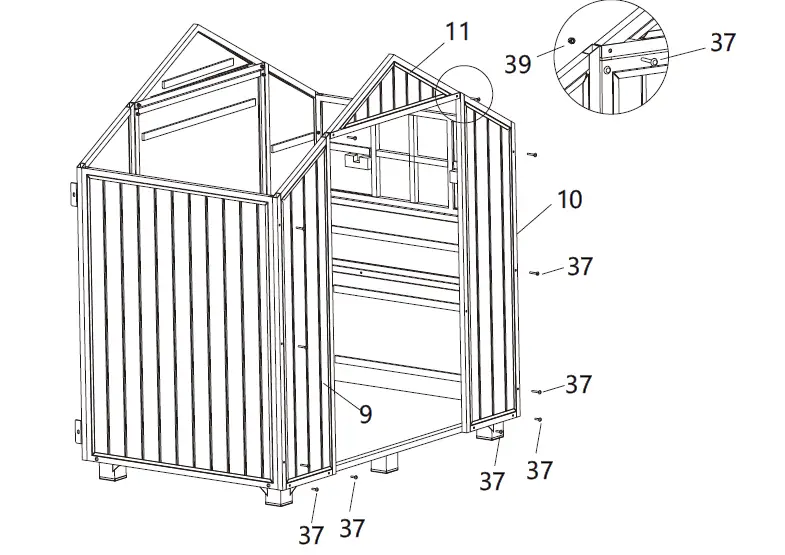
Step 6: Assembling the Back Panel
- Assemble Coop Back Panel-Left Side (#9), Coop Back Panel-Right Side (#10), and Coop Back Panel-Top Triangle Part (#11) using Bolt (#37) and Nut (39#).
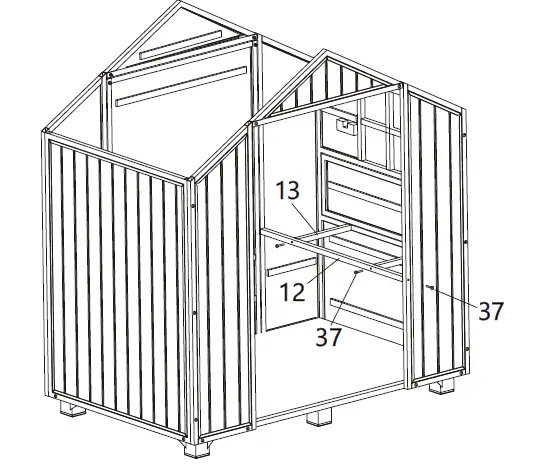
Step 7: Fixing Nesting Box Support Bars
- Fix the Nesting Box Support Bars (#12 & #13) using Bolt (#37).
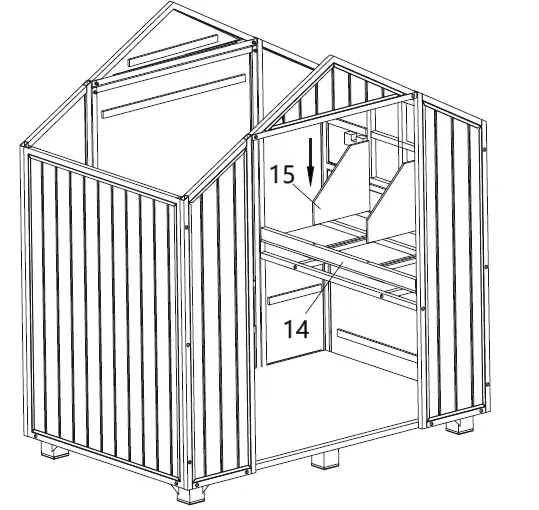
Step 8: Attaching Nesting Box Bottom Board and Divider
- Attach the Nesting Box Bottom Board (#14) and Nesting Box Divider (#15).
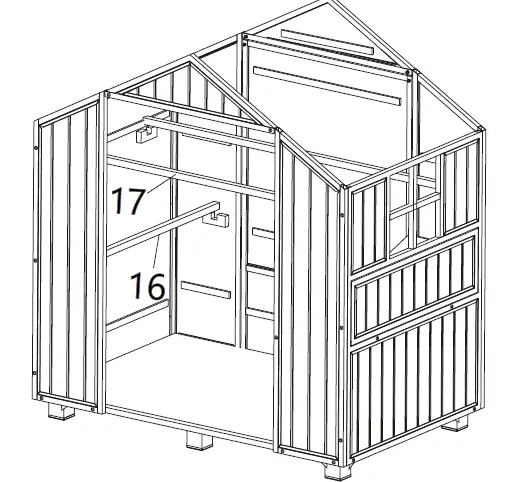
Step 9: Inserting Roosting Bars
- Insert the Short Roosting Bar(#16) and Long Roosting Bar (#17).
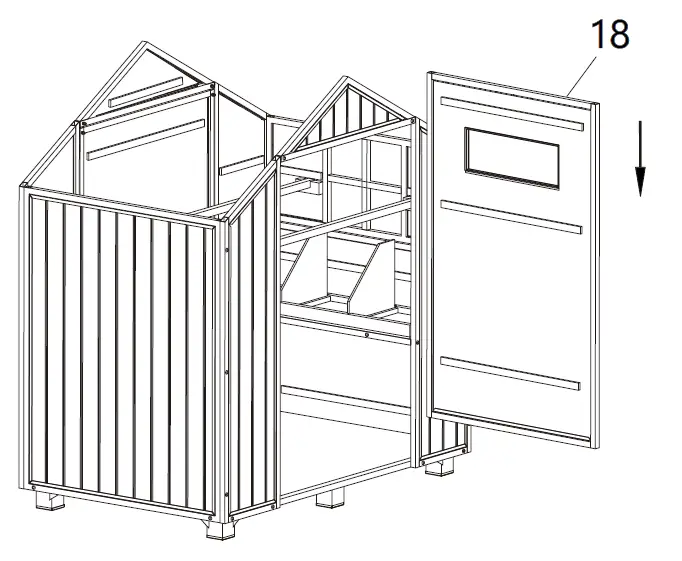
Step 10: Fixing the Door Panel
- Fix the Door Panel(#18) into its position.
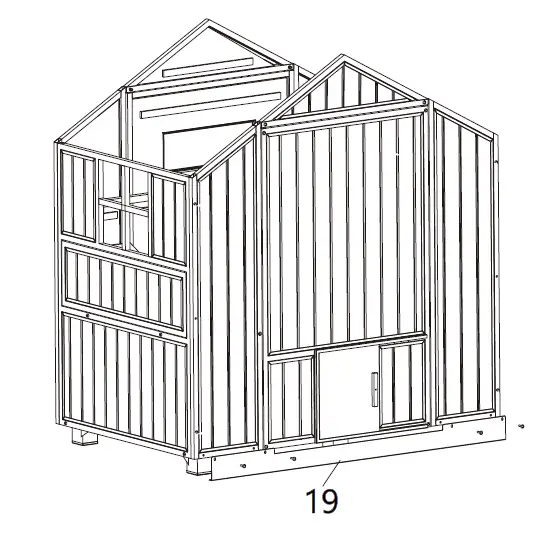
Step 11: Fixing the Guard Sheet
- Loosen the 4 screws in the Coop Floor.
- Fix the Guard Sheet (#19) as shown in the diagram.
- Reattach the Coop Floor.
Your PP Guardian Chicken Coop is now assembled and ready to use!
Tools required for assembly (not included)

Distributed by: TRACTOR SUPPLY COMPANY
5401 VIRGINIA WAY, BRENTWOOD, TN 37027
For customer support, call: 1-888-376-9601
www.TractorSupply.com
MADE IN CHINA
PARTS LIST
| Part# | Description | Drawing | Qty. |
| 1 | Coop Floor | 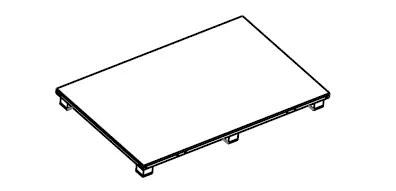 | 1 |
| 2 | Coop Left Wood Panel | 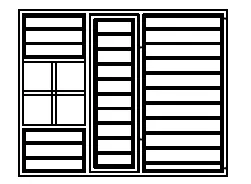 | 1 |
| 3 | Coop Front Panel-Left Side | 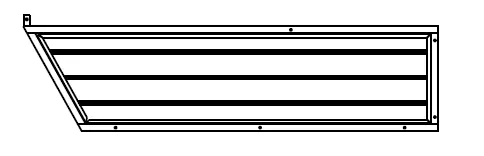 | 1 |
| 4 | Coop Front Panel-Middle | 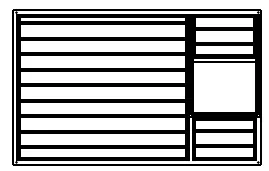 | 1 |
| 5 | Coop Front Panel-Top Triangle | 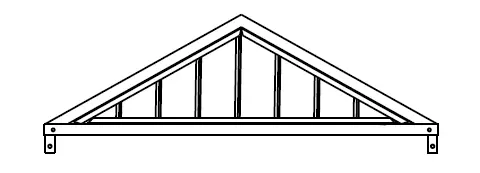 | 1 |
| 6 | Sliding Door | 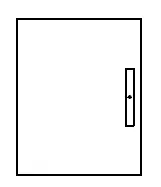 | 1 |
| 7 | Coop Front Panel-Right Side | 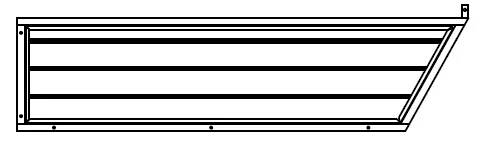 | 1 |
| 8 | Coop Right Wood Panel | 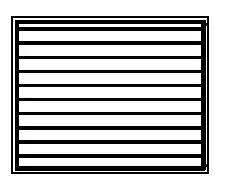 | 1 |
| 9 | Coop Back Panel-Left Side | 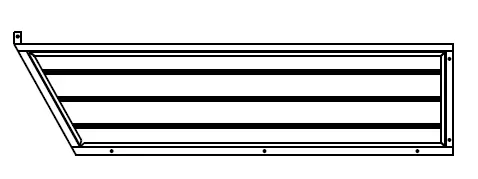 | 1 |
| 10 | Coop Back Panel-Right Side | 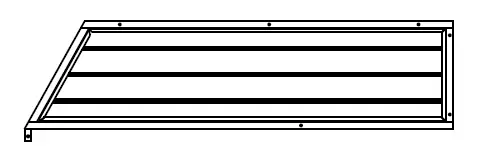 | 1 |
| 11 | Coop Back Panel-Top Triangle | 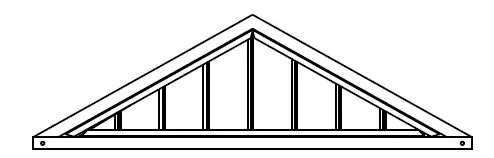 | 1 |
| 12 | Nesting Box Support Bar-1 |  | 1 |
| 13 | Nesting Box Support Bar-2 |  | 2 |
| 14 | Nesting Box Bottom Board | 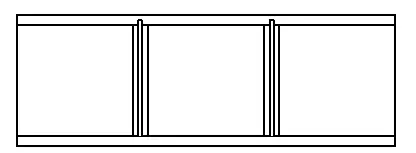 | 1 |
| 15 | Nesting Box Divider |  | 2 |
| 16 | Short Roosting Bar |  | 1 |
| 17 | Long Roosting Bar |  | 2 |
| 18 | Back Door Panel | 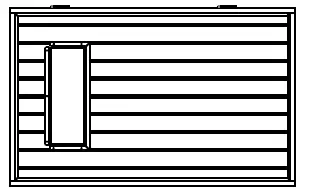 | 1 |
| 19 | Guard Sheet |  | 1 |
| 20 | Mesh Side Panel | 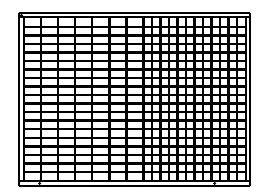 | 4 |
| 21 | Roof Support Frame 1 | 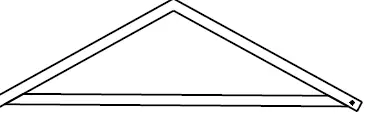 | 1 |
| 22 | Roof Support Frame 2 |  | 2 |
| 23 | Mesh Door-Left Panel |  | 1 |
| 24 | Mesh Door-Right Panel | 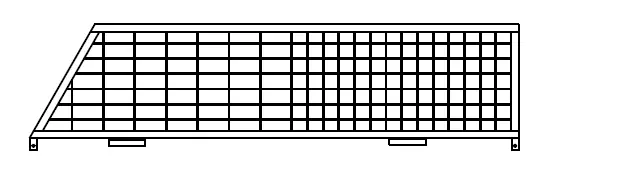 | 1 |
| 25 | Mesh Door-Top Triangle Panel | 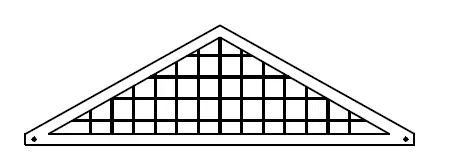 | 1 |
| 26 | Door Bottom Bar |  | 1 |
| 27 | Mesh Door Panel | 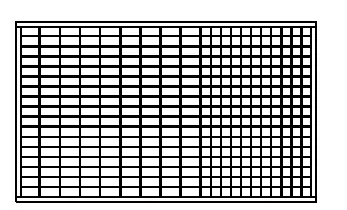 | 1 |
| 28 | Shoulder Support Frame |  | 6 |
| 29 | Roof Ridge Support Frame |  | 3 |
| 30 | Roof PVC Panel | 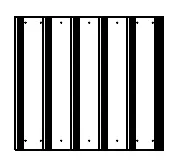 | 6 |
| 31 | Roof Ridge Metal Cover |  | 3 |
| 32 | Coop Connecting Metal | 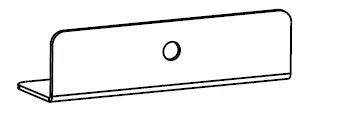 | 4 |
| 33 | Metal Panel Clamps | 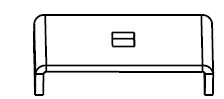 | 16 |
| 34 | Roof Panel Hook | 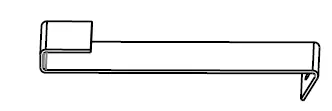 | 12 |
| 35 | Sliding Door Helper | 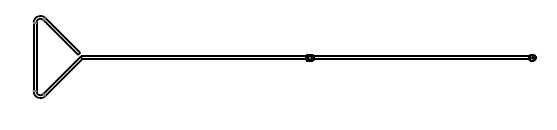 | 1 |
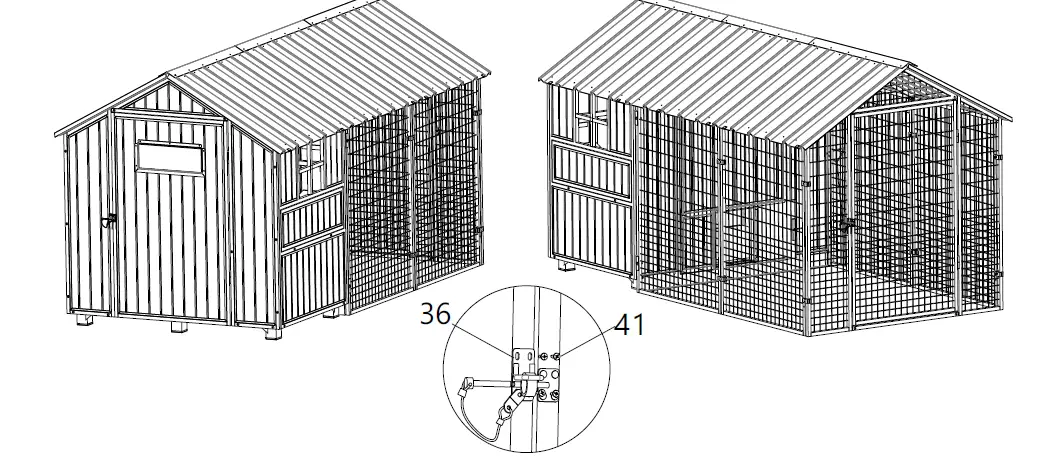
| 36 | Door Latch | 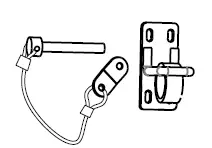 | 2 |
| 37 | M6x40 Bolt | 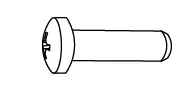 | 52+3 |
| 38 | M8x45 Bolt | 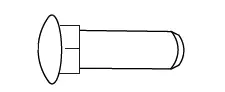 | 8+1 |
| 39 | M6 Nut |  | 20+2 |
| 40 | M8 Nut | | 8+1 |
| 41 | Self-tapping Screw 3.5×13 | 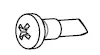 | 8+2 |
| 42 | Hexagonal Self-tapping Screw | 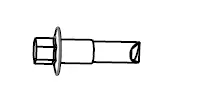 | 94+10 |
| 43 | Tapping Screw 3.9×19 | 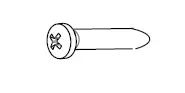 | 32+5 |
| 44 | M4x20 Bolt | 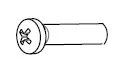 | 1 |
ASSEMBLY
Step 1
- Identify the front of the Coop Floor. (On the front side, there are two holes in circle A).
- Follow below diagram, fix Coop Floor (#1), Coop Left Wood Panel (#2), and Coop Front Panel-Left Side (#3) together by Bolt (#37).
- On the left edge of the Front Panel, fix two pcs of Coop Connecting Metal (#32) with Bolt (#37) for later use.
Step 2
- Fix Coop Front Panel-Top Triangle (#5) on the top of Coop Front Panel-Middle (#4), by Bolt (#37) and Nut (39#). Then insert the Sliding door (#6) in the to U-channel.
Step 3
- Assemble the (#4) & (#5) combination part into the Coop by Bolt (#37), and Nuts(#39), next to (#3).
Step 4
- Continue to fix the Coop Front Panel-Right Panel (#7) as below diagram by Bolt (#37), and Nuts(#39).
Step 5
- Attach the Coop Right Wood Panel (#8) by Bolt (#37). Then fix the rest 2pcs of Coop Connecting Metal (#32) with Bolt (#37) on the right edge of the front panel.
Step 6
- Repeat above steps assemble Coop Back Panel-Left Side (#9), Coop Back Panel-Right Side (#10), and Coop Back Panel-Top Triangle Part (#11) by Bolt (#37) and Nut (39#).
Step 7
- Follow below diagram, fix the Nesting Box Support Bars (#12 & #13) by Bolt (#37).
Step 8
- Attach the Nesting Box Bottom Board (#14) and Nesting Box Divider (#15).
Step 9
- Insert the Short Roosting Bar(#16) and Long Roosting Bar (#17).
Step 10
- Fix the Door Panel(#18) into its position.
Step 11
- Loosen the 4 screws in the Coop Floor, fix the Guard Sheet (#19) as below diagram, then reattach it.
Step 12
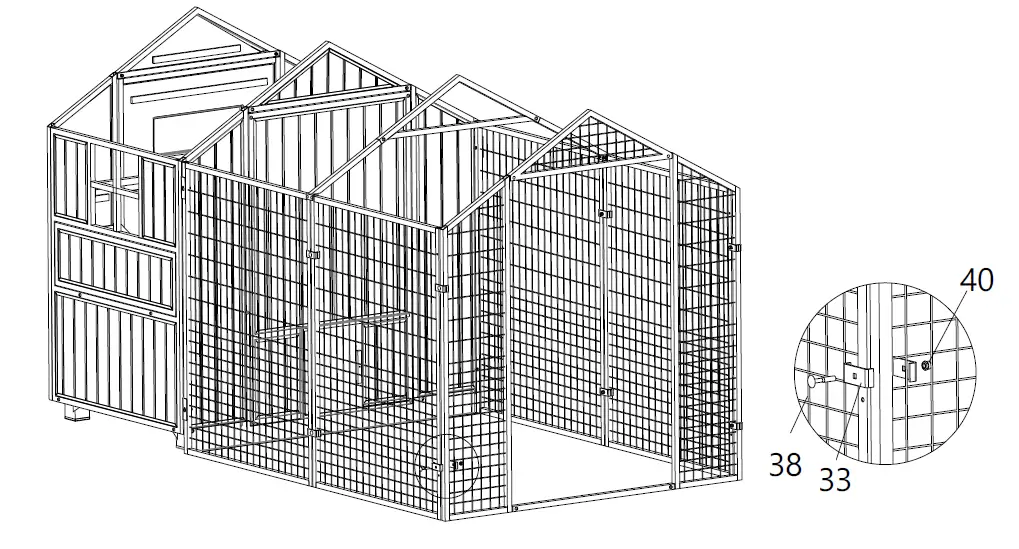
- Put the Mesh Side Panel (#20) next to the Coop Connecting Metal (#32), connect it to the Coop part by Bolt (#37) and Nut (#39).
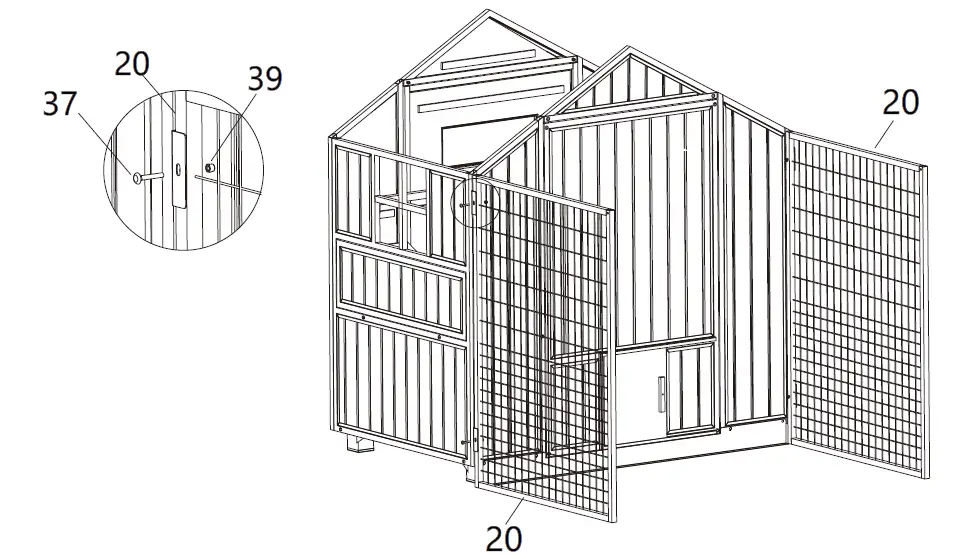
Step 13
- Continue to assemble the remaining 2pcs Mesh Side Panel (#20) by Clamps (#33), Bolt (#38) and Nut (#40).
Step 14
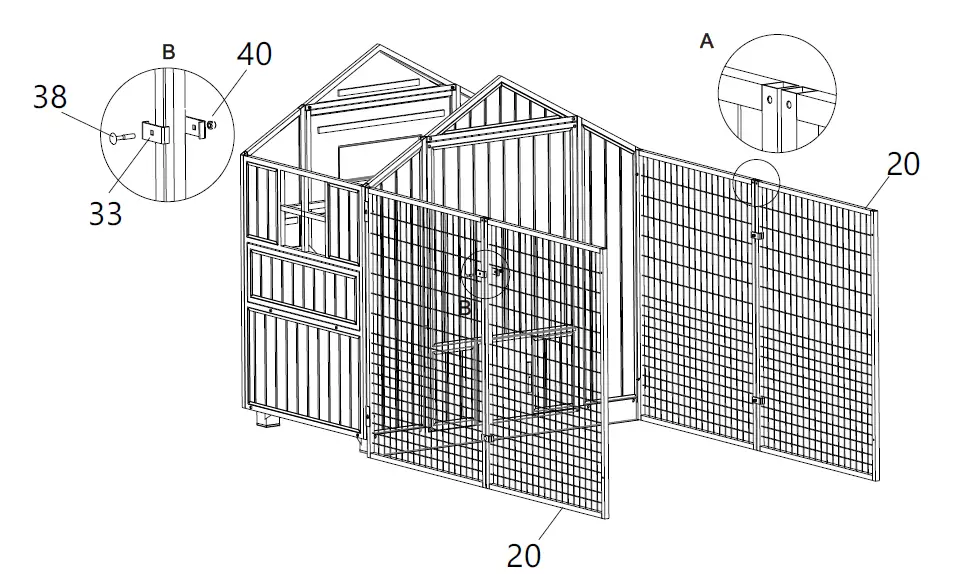
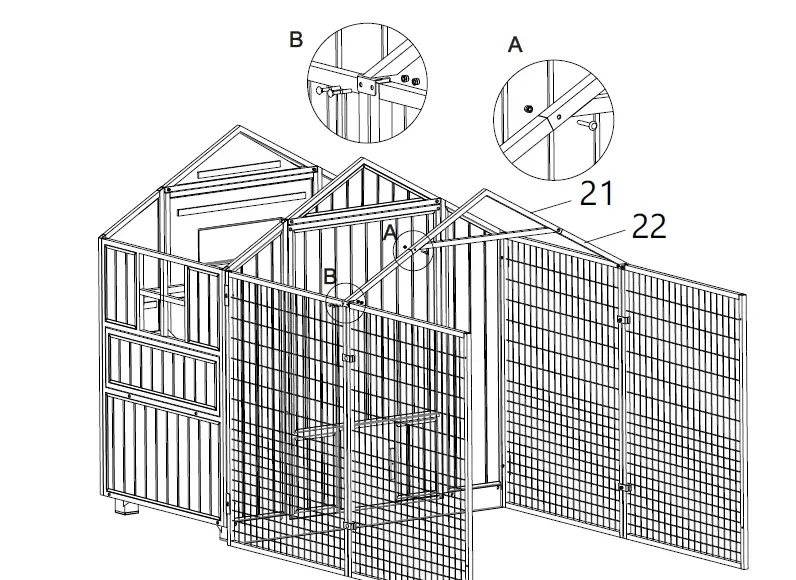
- Assemble Roof Support Frame 1 (#21) and Roof Support Frame 2 (#22) by Bolt (#37) and Nut (#39).
Step 15
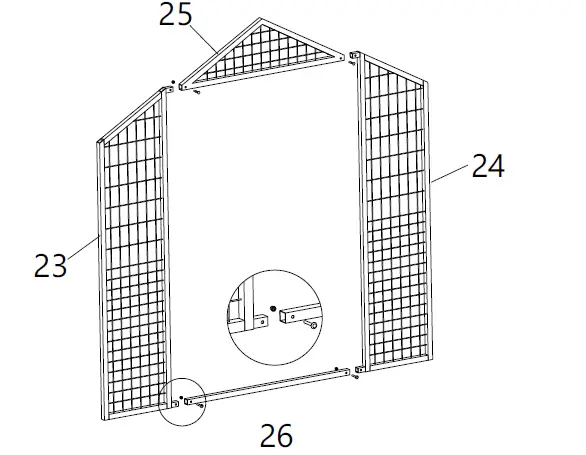
- Follow below diagram, use Mesh Door-Left Panel (#23), Mesh Door-Right Panel (#24), Mesh Door-Top Triangle Panel (#25) and Door Bottom Bar (#26), to finish the frame structure of the mesh door.
Step 16
- Attach the Mesh Door Frame from Step 15 into the main frame by Clamp (#33), Bolt (#38) and Nut (#40).
Step 17
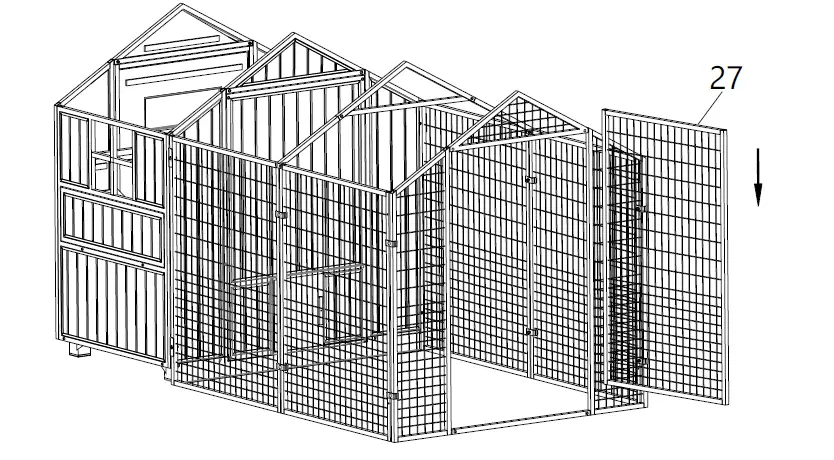
- Slide the Metal Door (#27) into its position.
Step 18
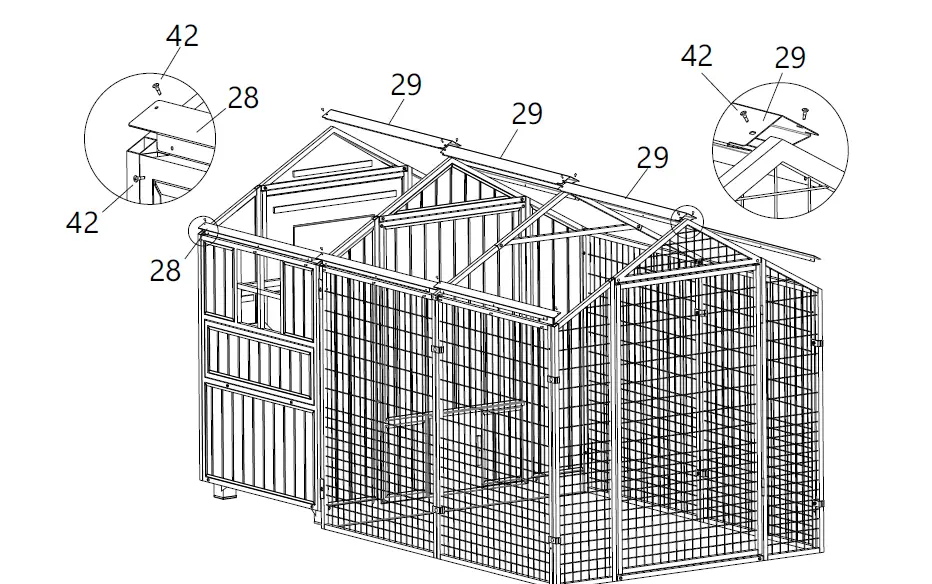
- Fix the Shoulder Support Frame (#28) and Ridge Support Frame (#29) by Hexagonal Self-tapping Screw (#42).
Step 19
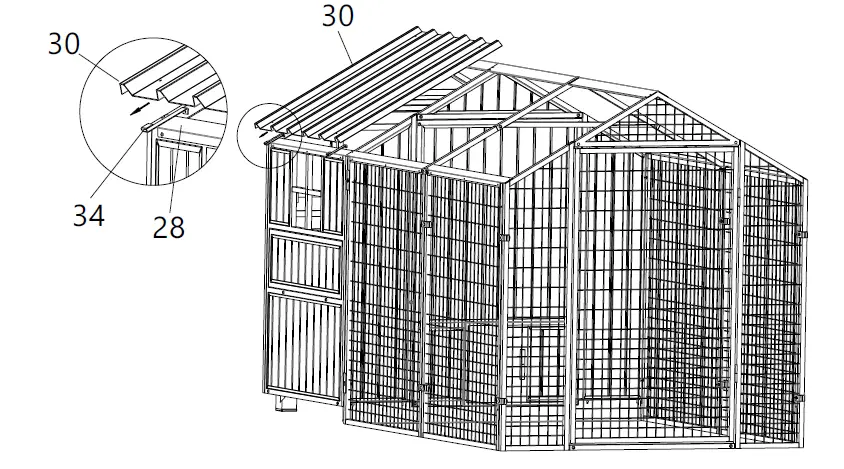
- Hook 2pc of Roof Panel Hook (#34) from one side of the Shoulder Support Frame (#28) as below diagram, then put one pc of PVC panel on the Panel Hook (#34). Keep the roof panel held in place with the help of (#34). Do not screw down the roof panel .
Step 20
- Repeat Step 19, put remaining panels on the roof frame, adjust to make sure they are properly aligned, then fix all the roof panel by Hexagonal Self-tapping Screw (#42).
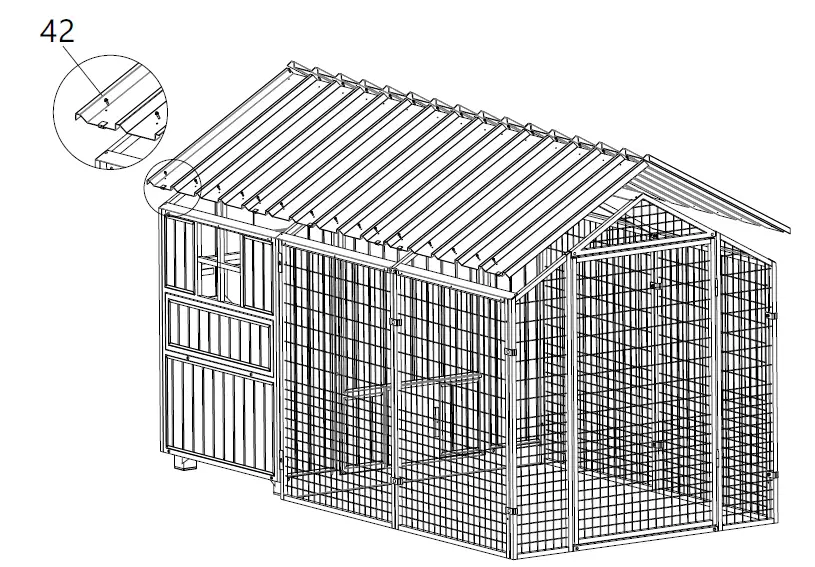
Step 21
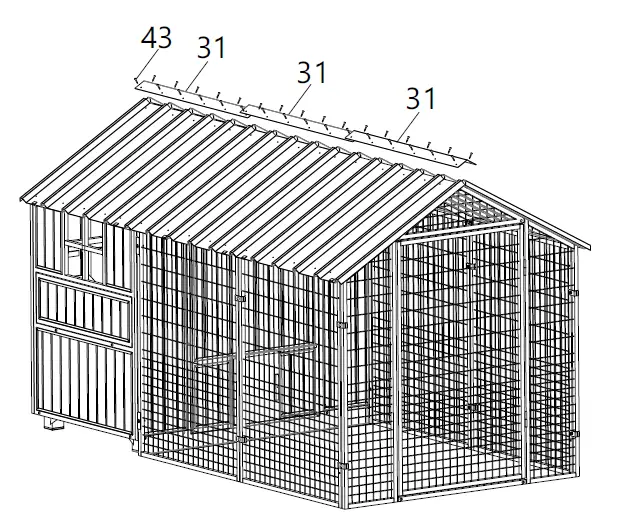
- Fix the Roof Ridge Metal Cover (#31) by Self Tapping Screw (#43).
Step 22
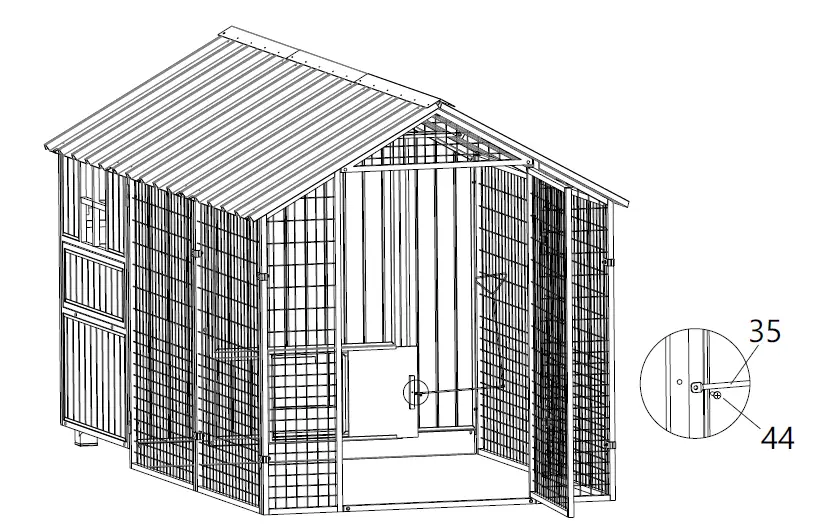
- Attach the Sliding Door Helper (#35) by Bolt (#44).
Step 23
- Fix the Door Latch on the mesh door and wood door separately, by Screw (#41).