SUPERATV SKL-P-RAN1K-002-02 Snorkel Kit Polaris Ranger 1000 Depth Finder
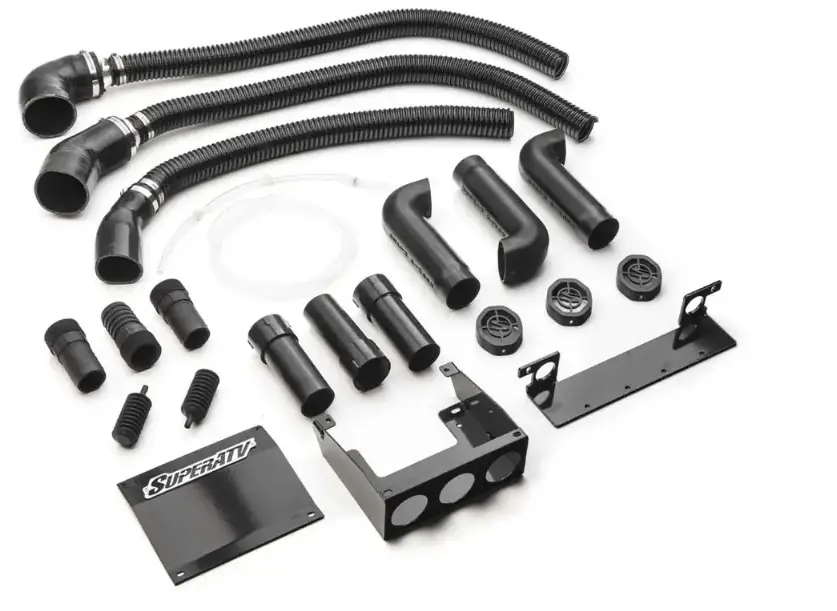
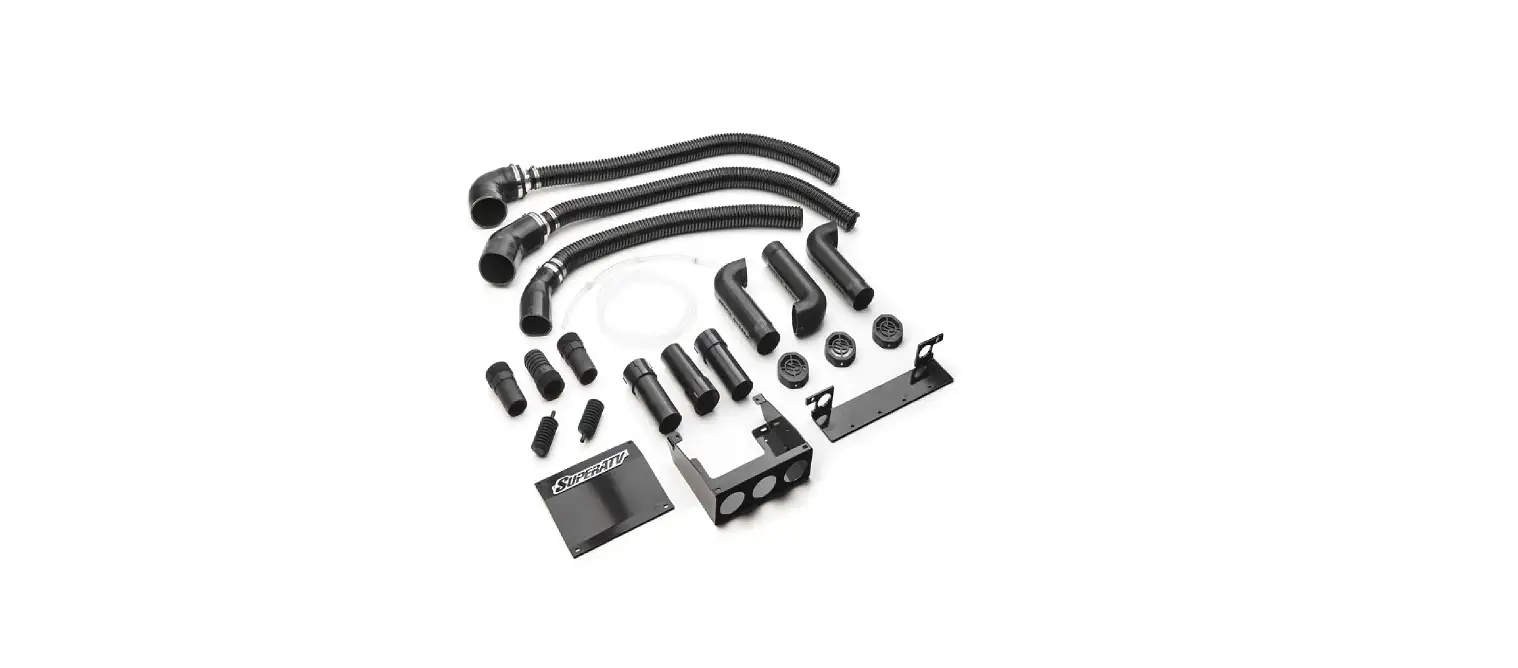
ITEM CONTENTS
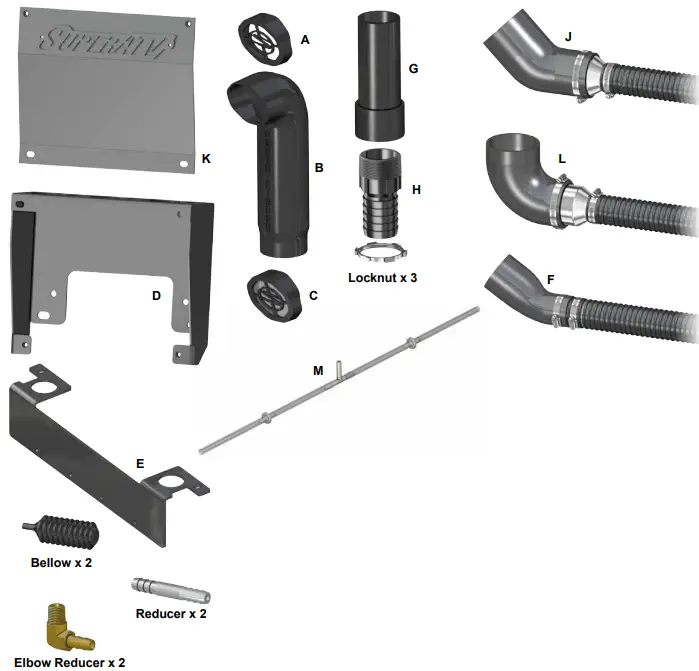
| Item | Description | Item | Description |
| A | Faceplate (no mesh) | G | Riser Pipe Assembly x 3 |
| B | Snorkle Riser x 3 | H | Fitting x 3 |
| C | Faceplate Assembly x 2 | J | Belt Exhaust |
| D | Riser Bracket | K | Cover |
| E | Bed Support | L | Belt Intake |
| F | Airbox Snorkle | M | Gas Tank Vent Hose |
kit contents
INSTALLATION INSTRUCTIONS
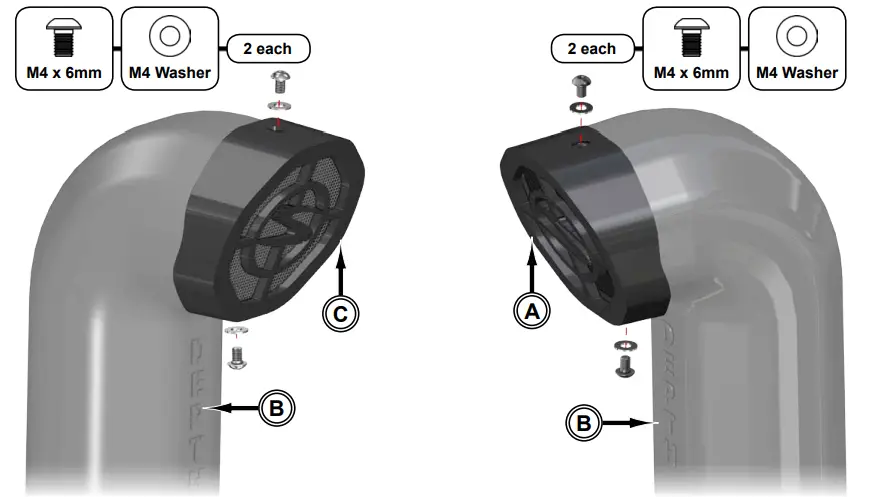
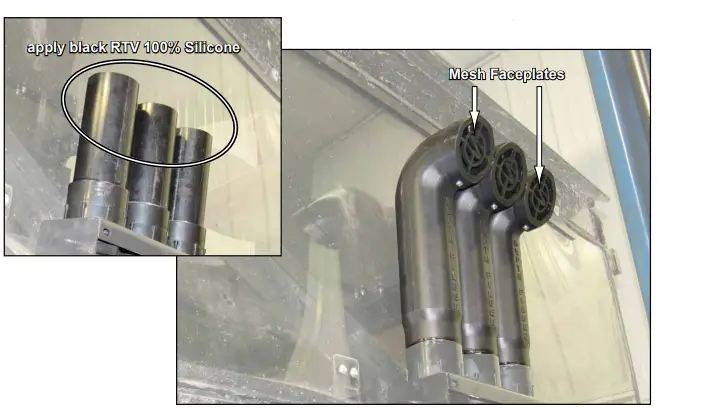
- install Faceplates to Snorkel Risers (B) with hardware shown and set aside

vehicles WITH Rear Windshield (without Rear Windshield)
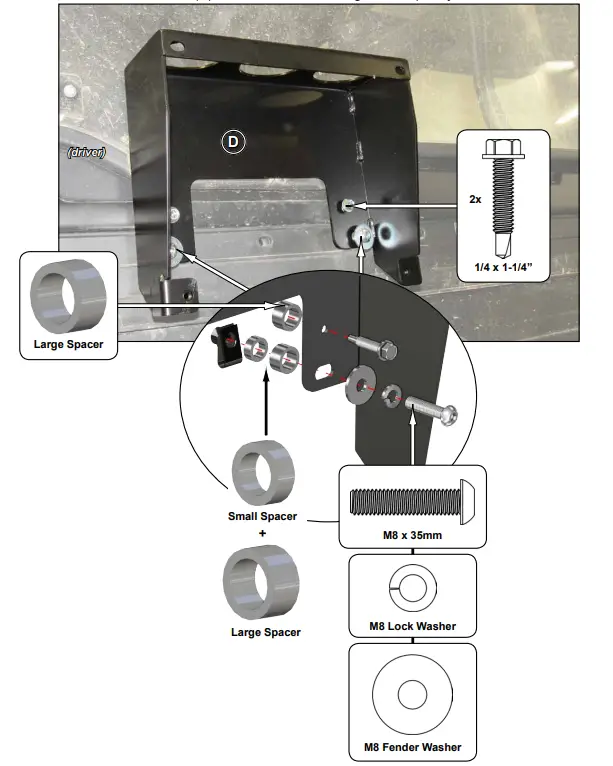
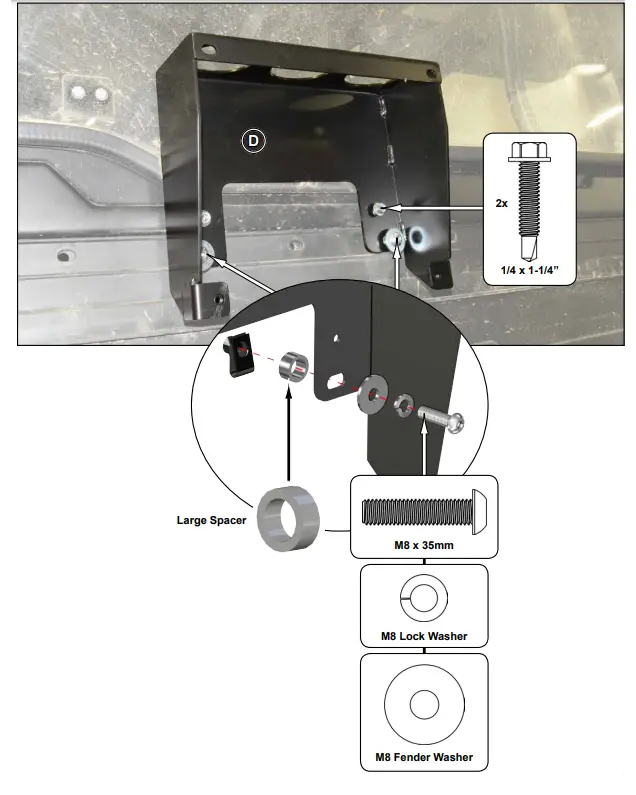
- secure Riser Bracket (D) with hardware shown; tighten completely
vehicles WITHOUT Rear Windshield
- secure Riser Bracket (D) with hardware shown; tighten completely
Riser Pipes
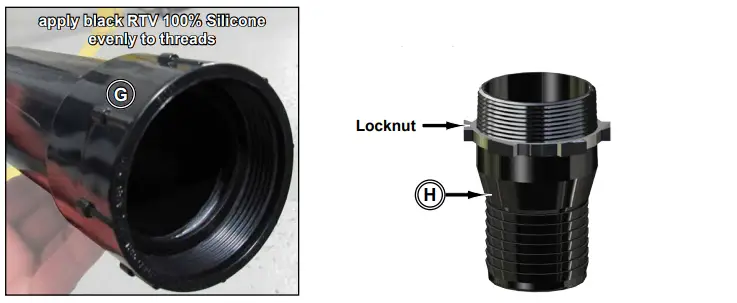
- install Locknut to the bottom of threads on Fitting (H)
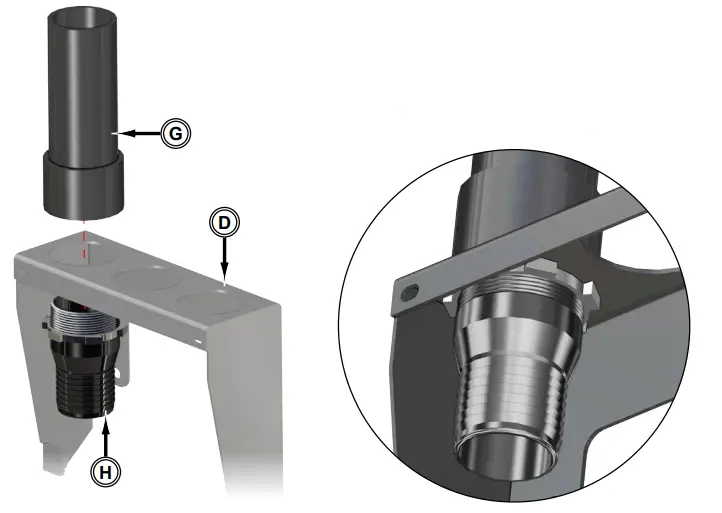
- install Riser Pipe (G) and Fitting (H) to Riser Bracket (D)
- tighten components completely
- remove any remaining slack by rotating Locknut up until tight against Riser Bracket (D)
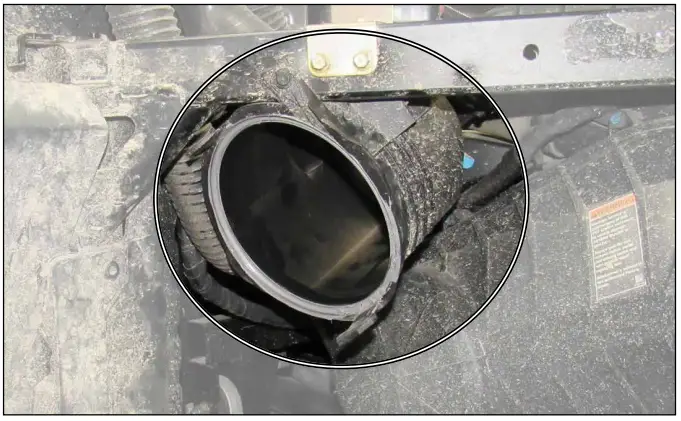
stock Ducting removal
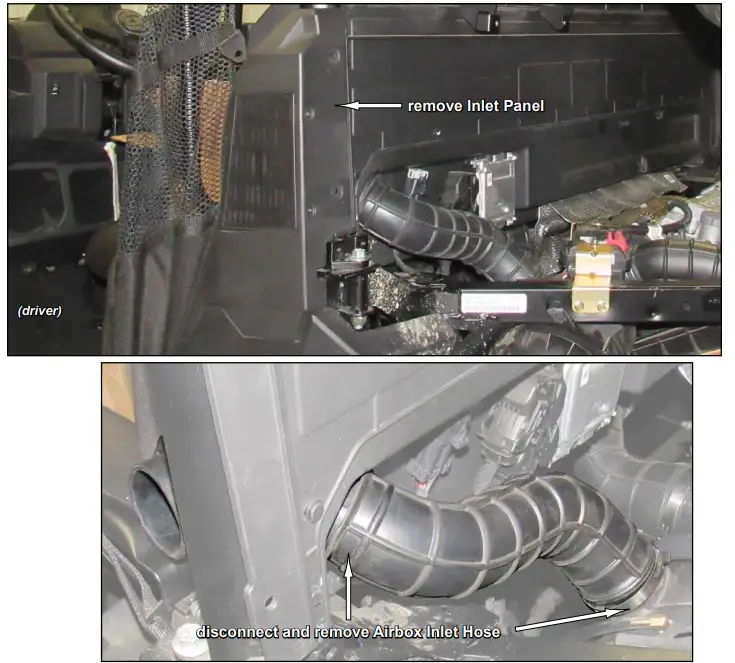

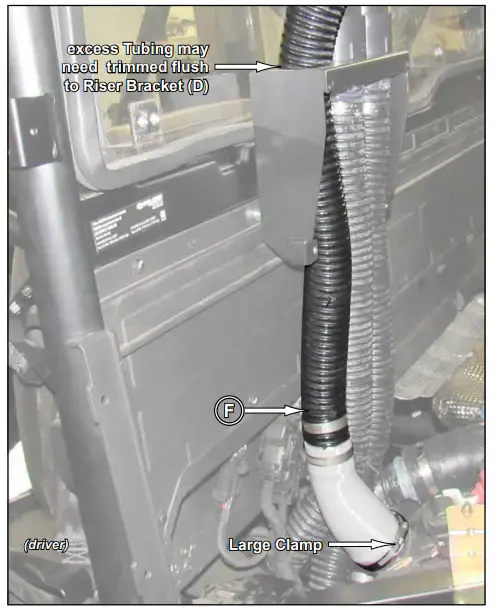
- install Airbox Snorkle (F) to Airbox Duct
- secure with provided Large Clamp; tighten completely
- remove Air Box Cover and Air Filter
- replace stock Air Box Seal with provided O-Ring
- Cover O-Ring with RTV 100% Silicone
- reinstall Air Filter and Air Box Cover
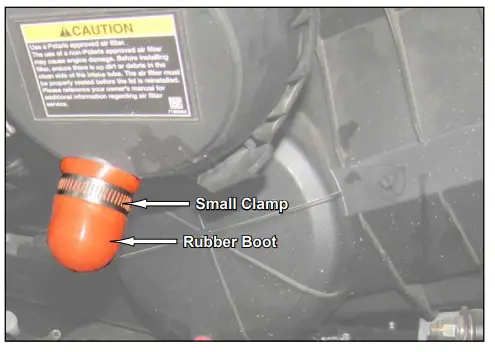
- remove stock Drain Plug from Air Box and install Rubber Boot
- secure with Small Clamp
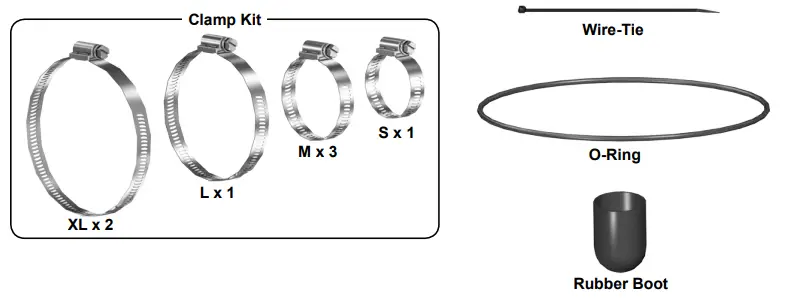
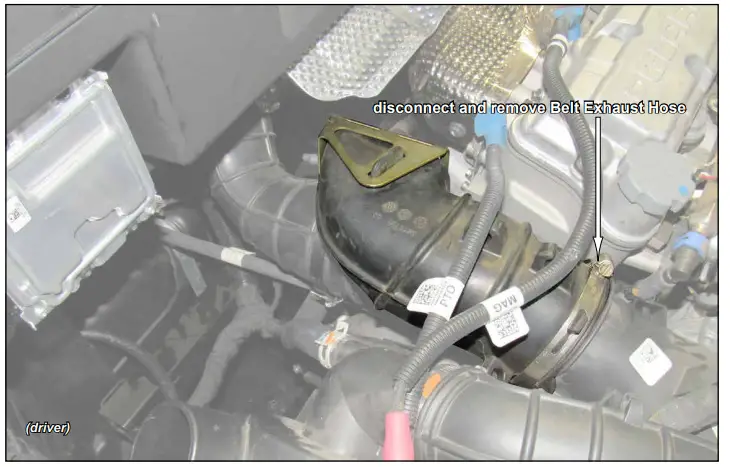
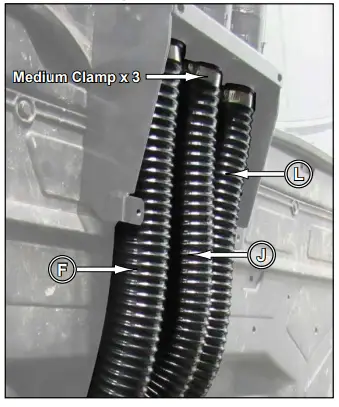
- install Belt Intake (L) and Belt Exhaust (J) assemblies
- secure with Clamps shown
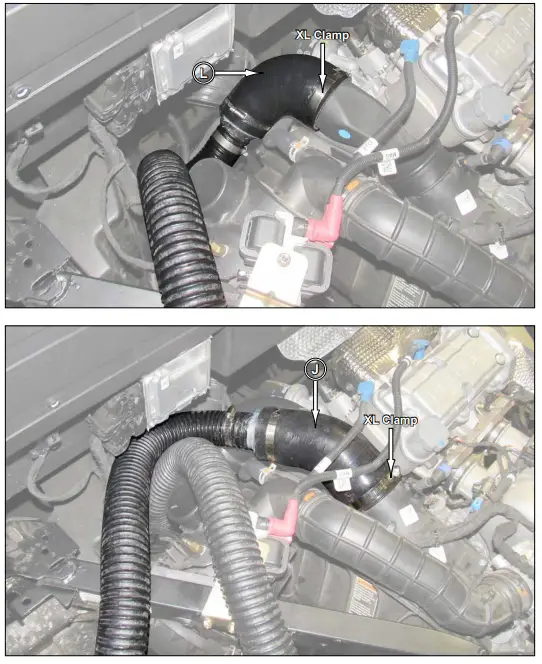
- install Snorkel Risers (B) onto Riser Pipe Assemblies (G)
- connect Hoses to Fittings (H) and secure with Clamps shown
- secure Hoses together with provided Wire-Ties
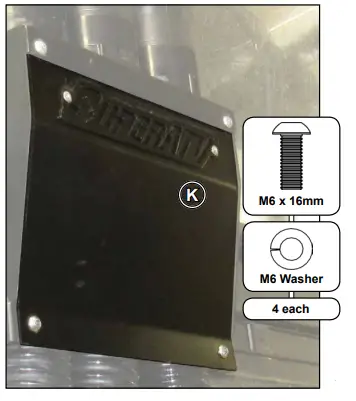
- install Cover (K) to Riser Bracket (D) with hardware shown
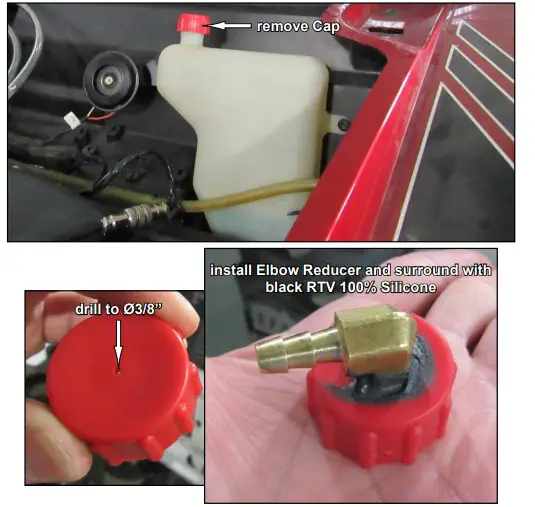
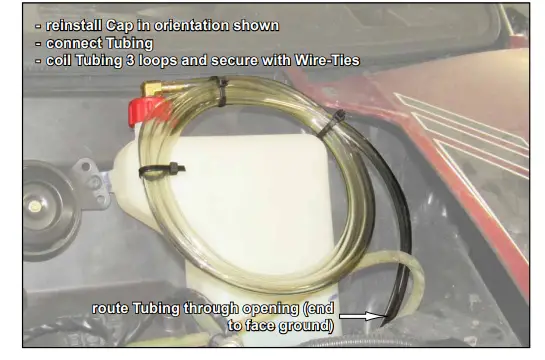
Coolant Vent Hose
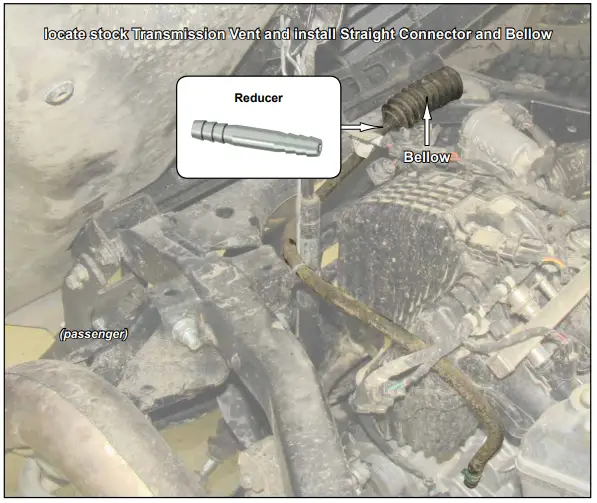
Transmission Vent Line
Front Differential Vent Line

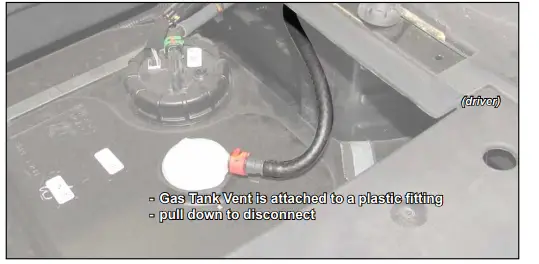
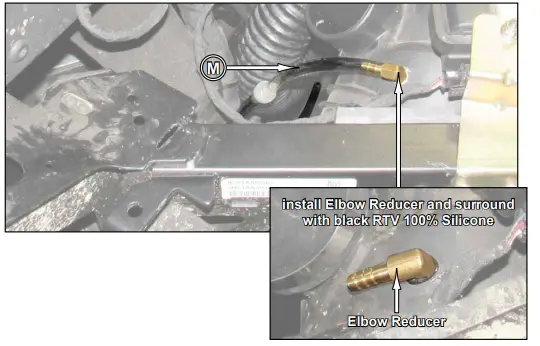
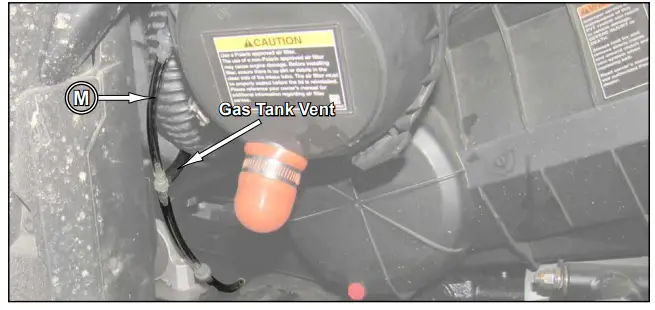
- remove Driver Side Seat and locate Gas Tank Vent\
- drill a Ø3/8” hole into Air Box and install Elbow Reducer
- connect Gas Tank Vent Hose (M) to Elbow Reducer
- route Gas Tank Vent Hose (M) towards bottom of machine
- connect stock Gas Tank Vent to Gas Tank Vent Hose (M)
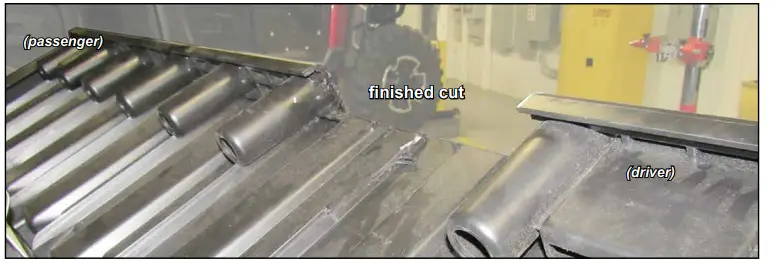
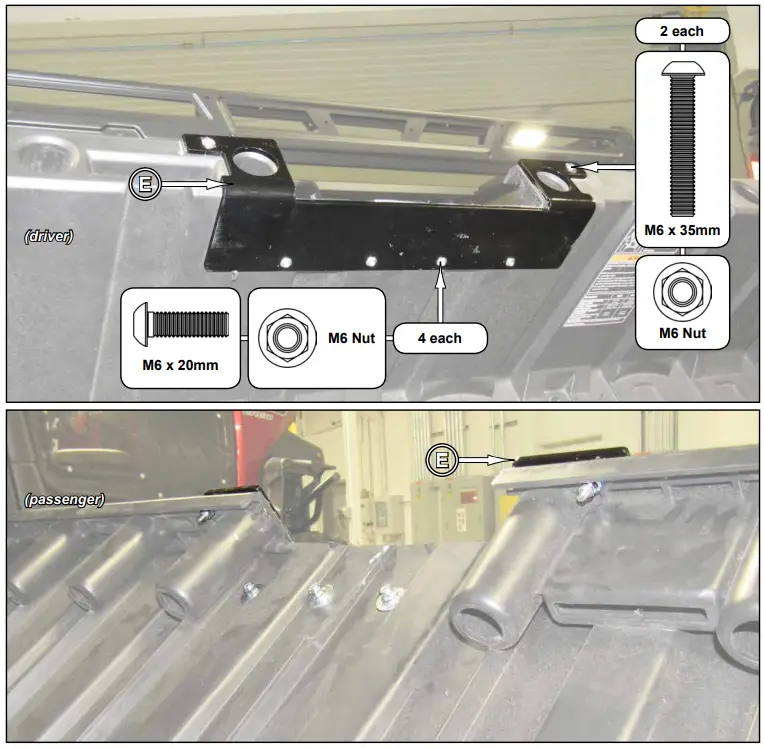
- place Bed Support (E) onto Bed in location shown
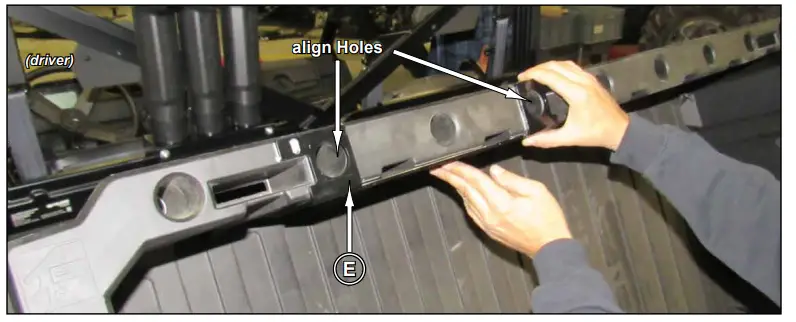
- trace Bed Support (E) outline onto Bed and cut

- install Bed Support (E) with hardware shown