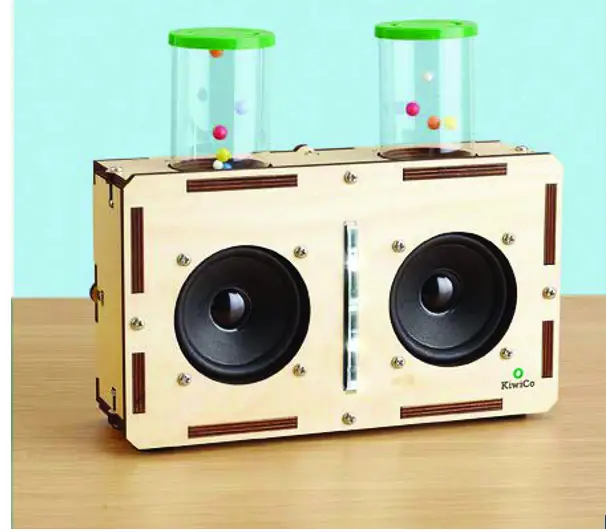
![]() Kinetic Light Up Speaker
Kinetic Light Up Speaker
Owner’s Manual
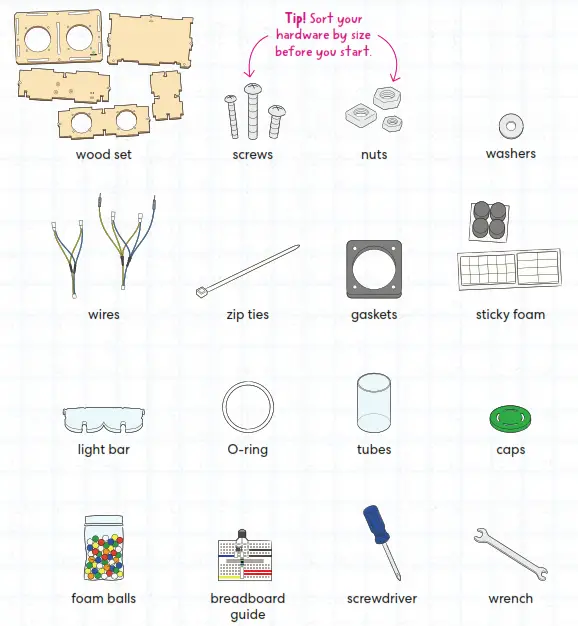
In this crate
You’ll build a speaker with real electronic components.
We’ve also provided everything else you need to build your speaker.
From home
Build the base
You’ll need:
- bottom panel
- wireless board
- medium screws
- small hex nuts
- USB cable
- zip ties
- screwdriver
- wrench
From home:
- scissors
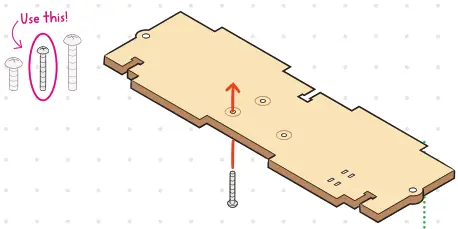
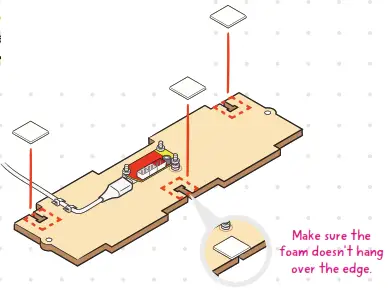
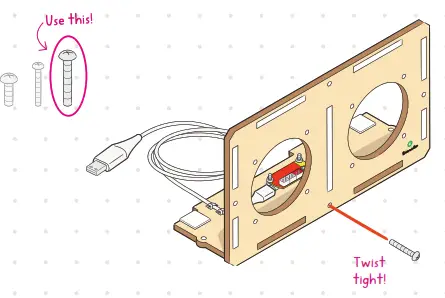
Step 1
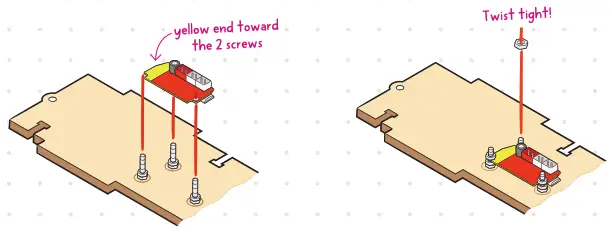
Grab the bottom panel and hold it with the etched side up. Poke a medium screw up through a circled hole.
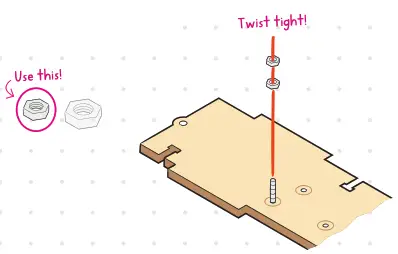
Step 2
Twist 2 small hex nuts onto the screw.
Step 3
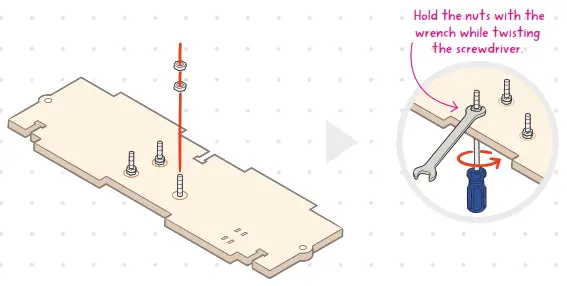
Repeat Steps 1–2 for the other holes.
Tighten all 3 screws with the screwdriver and wrench.
Step 4
Set the wireless board on top of the nuts.
Step 5
Twist another small hex nut onto each screw to hold the board in place.
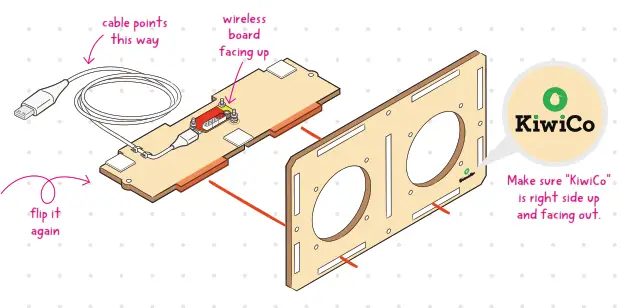
Step 6
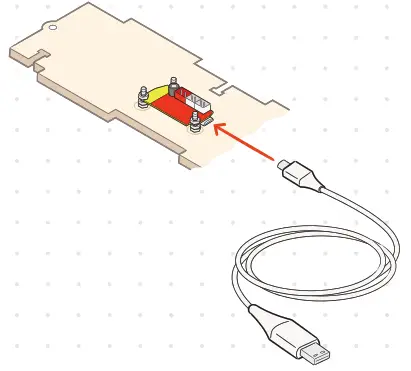
Plug the USB cable into the wireless board.
Step 7
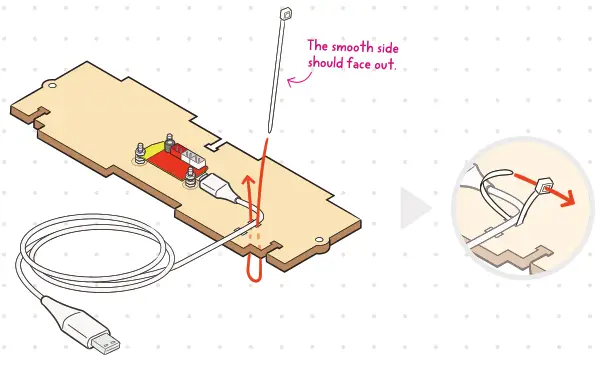
Line up the cable with the small rectangle holes. Poke a zip tie down through a hole and up through the other side. Pull it tight.
Step 8
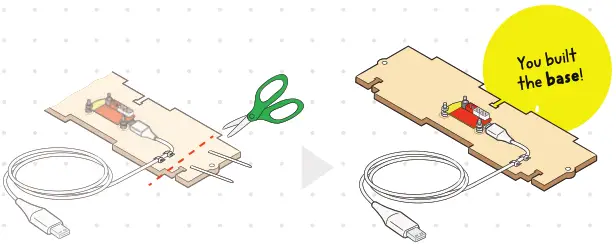
Repeat Step 7 to add another zip tie. Then trim both tails with scissors.
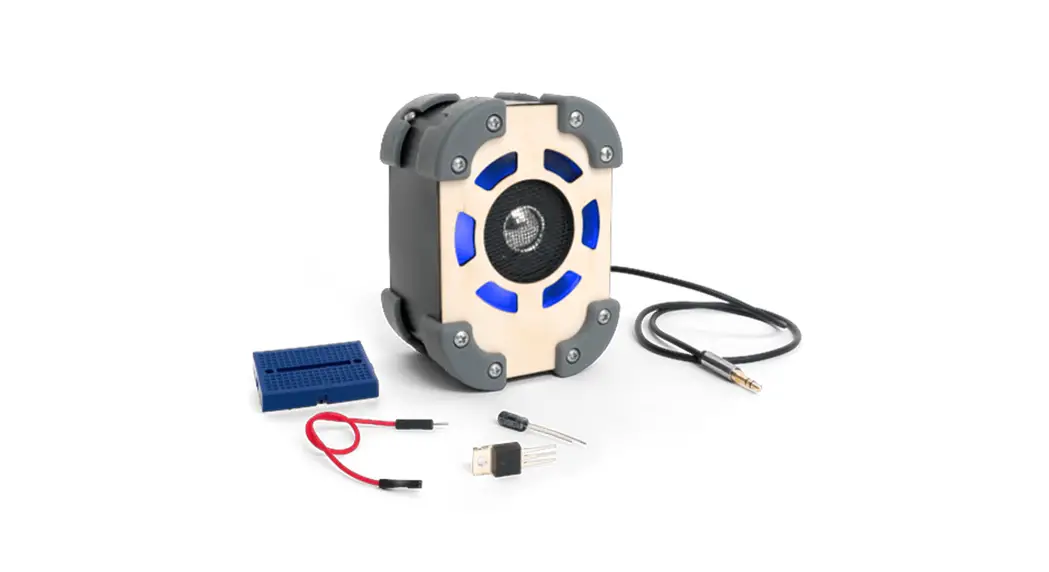
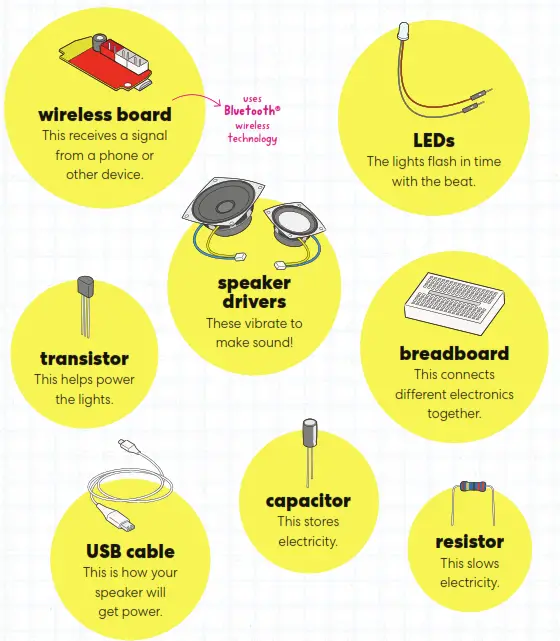
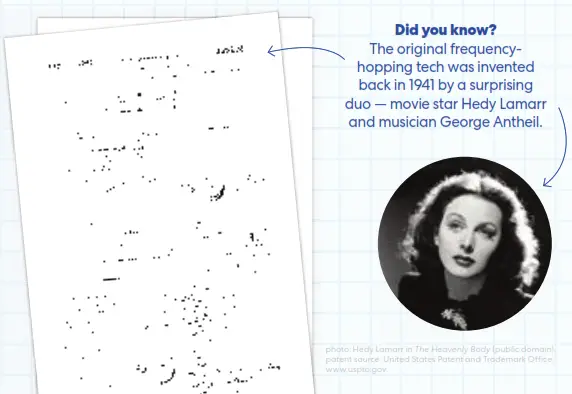
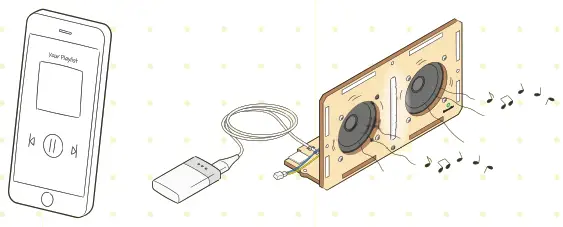
Wireless board
The wireless board receives signals from a phone (or other device) so your speaker can play music. The radio waves that carry the signals can change frequencies hundreds of times per second. This frequency hopping ensures that your signal doesn’t “bump into” any other signals in the air (like WiFi or phone calls).
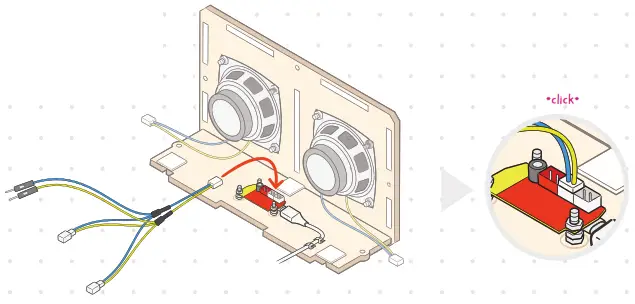
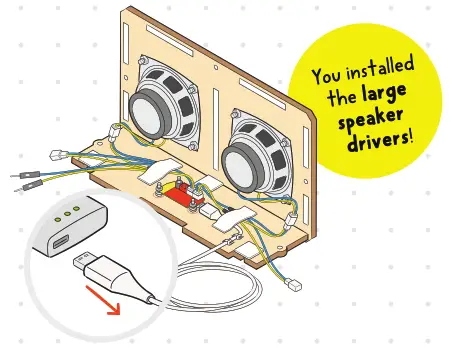
Add the large speaker drivers
You’ll need:
- finished base (from Part A)
- front panel
- sticky foam squares
- square nuts
- large hex nuts
- short screws
- long screw
- large speaker drivers
- wires
- sticky foam rectangles
- screwdriver
- wrench
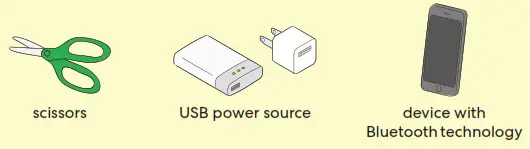
From home:
- USB power source
- device with Bluetooth technology
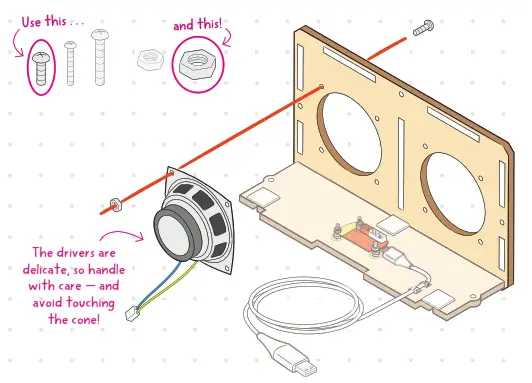
Step 1
Stick a sticky foam square over each T slot in the finished base.
Step 2
Press a square nut into each T slot.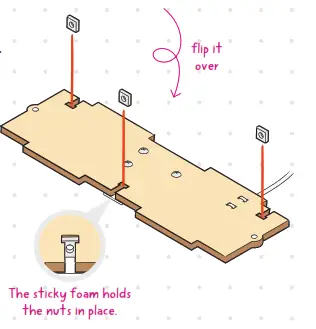 Step 3
Slide the bottom panel into the front panel.
Step 4
Secure the front panel with a long screw.
Step 5
Line up a large speaker driver with a big hole.
The white wire end should hang down.
Poke a short screw into a corner hole and twist on a large hex nut (by hand only).
Step 6
Repeat Step 5 to secure the other 3 corners. Tighten each corner with the screwdriver and the wrench.
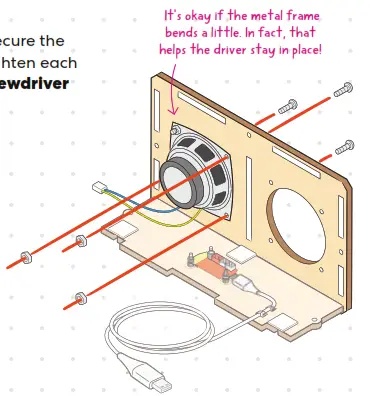
Step 7
Repeat Steps 5–6 to add the other large speaker driver.
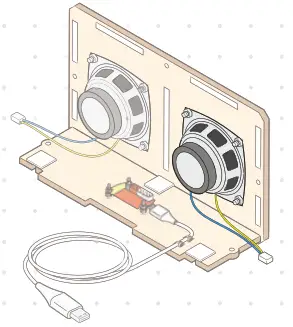
Step 8a
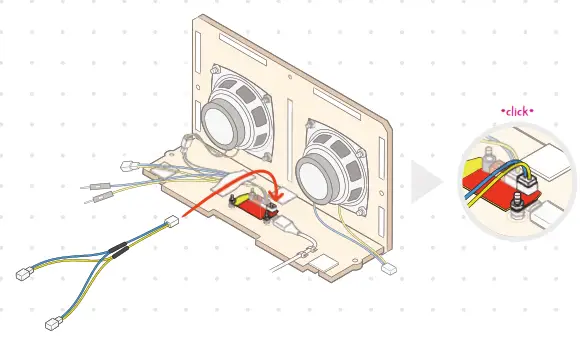
Grab the wire with 5 ends. Find the white end with 2 tiny holes.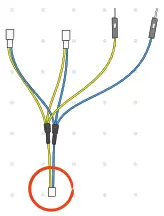 Step 8b
Plug that end into the wireless board, in the socket marked Rout+ and Rout-.
Step 9
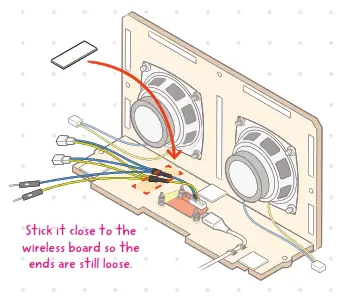
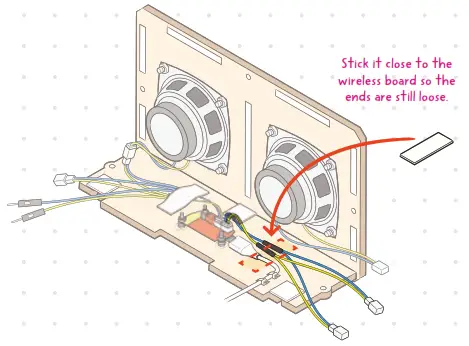
Stick down the wire with a sticky foam rectangle.
Step 10
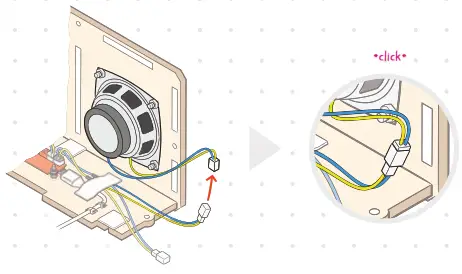
Plug 1 of the other white ends into the left speaker driver.

Step 11a
Grab the wire with 3 ends.
Find the end with 2 tiny holes.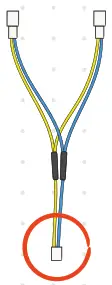
Step 11b
Plug that end into the wireless board, in the socket marked Lout+ and Lout-.
Step 12
Stick down the wire with a sticky foam rectangle.
Step 13
Plug 1 of the other white ends into the right speaker driver.
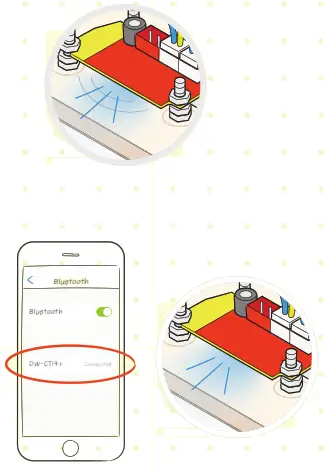
Stop & Test
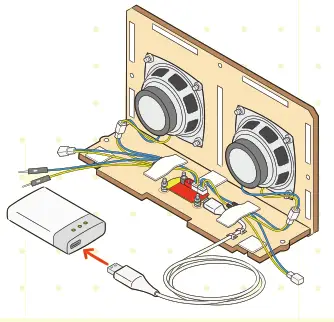
Pair and test your speaker!
- Plug the USB cable into a USB power source.
The speaker will beep!
- Check the wireless board. The blue light should be blinking. That means the speaker is ready to connect.
If the blue light is solid, your speaker is already connected to a device, and you can skip the next step.
- On your device with Bluetooth technology, go to the Bluetooth settings and enter pairing mode. Select DW-CT14+ to connect.
When paired, the speaker will beep again, and the blue light will turn solid. - Play some music!

Troubleshooting
If the blue light isn’t on, make sure the USB cable is firmly plugged into both the wireless board and a power source. The cable should draw electricity from any from any power source with a USB port.
![]()
If you can’t find the speaker on your device, make sure the speaker’s light is blinking. If it’s solid, the speaker is connected to a different device. Turn off the Bluetooth settings on that device for the speaker to enter pairing mode again.
| If your device can see DW-CT14+ but can’t connect, restart your device. | If the speaker beeps over and over, try a different power source. |
 | |
Stop!
Before you keep building, unplug the USB cable from the power source.
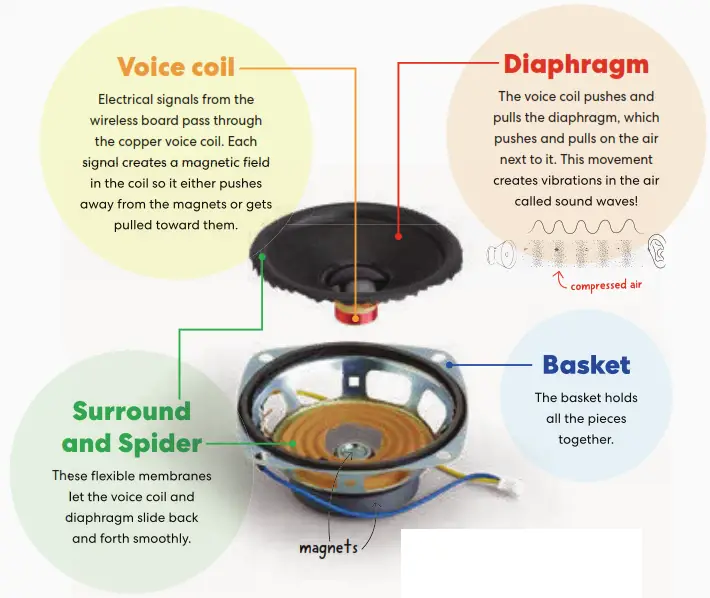
Inside aspeaker drivers
Sounds are waves in the air caused by vibrating objects — like your speaker drivers!
![]() WARNING:
WARNING:
D on’t take your speaker apart like this!
It won’t work anymore. (We sacrificed this one for a good cause.)
![]()


