![]() UP mini 3
UP mini 3
Quick Start Guide V1.0 Visit “www.tiertime.com – Support – Resource Center” to download the latest user manuals.
US Customer Service Hotline: 888-288-6124
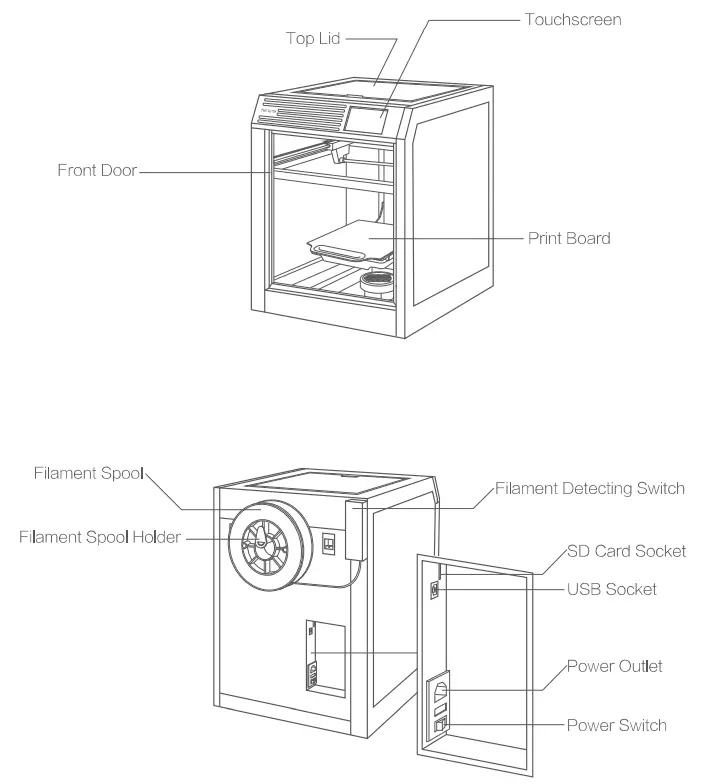
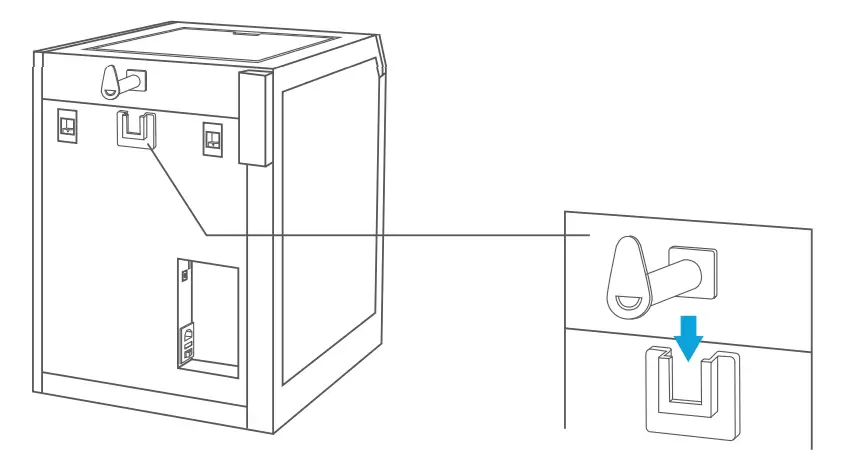
Machine Structure
Unboxing
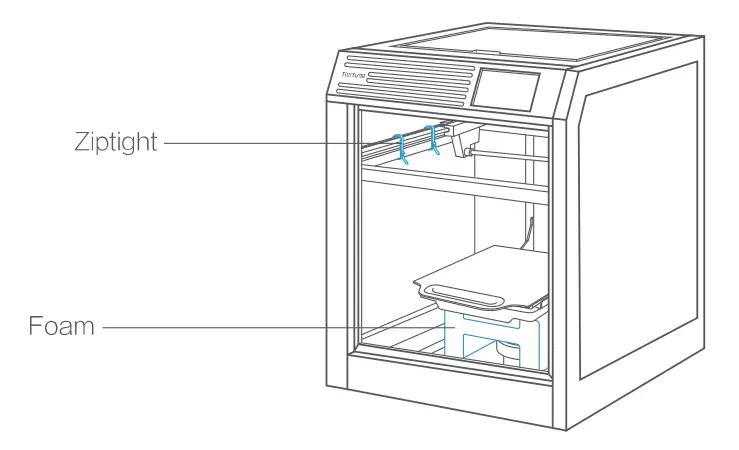
- Open the package and remove the printer and accessories. Remove the foams and zip tights in the machine. Check whether the accessories are complete.

- Insert the filament spool holder into the spool bracket on the back of the machine.

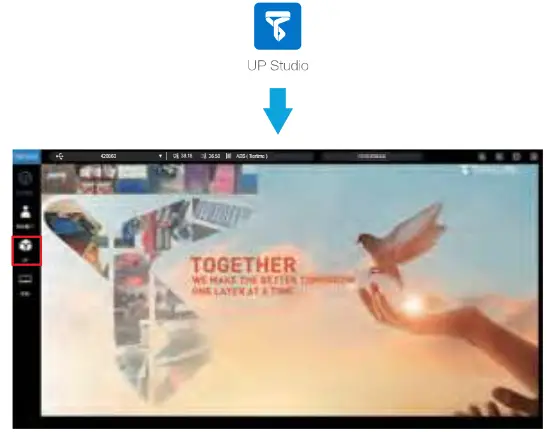
Software and Connect Printer
- Download the operation software UP Studio 2.X from https://www.tiertime.com and install i t on your computer.

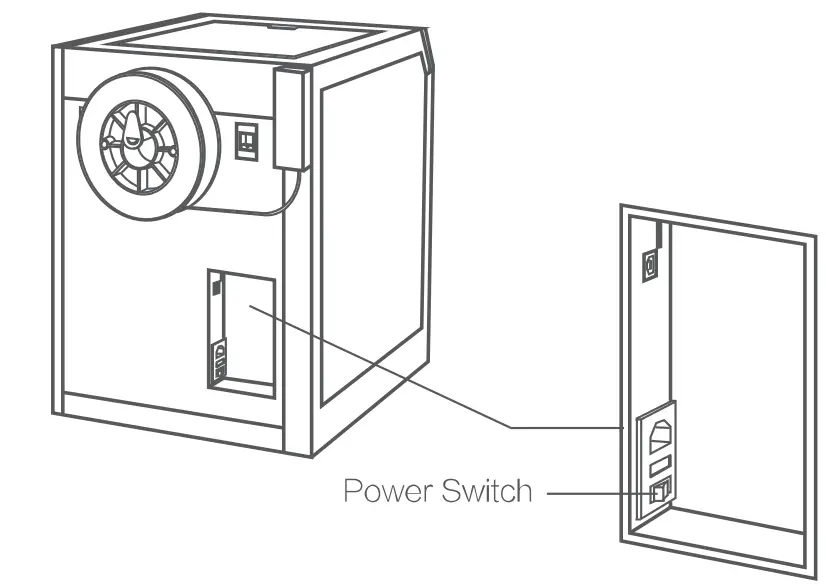
- Turn on the power switch at the back of the printer.

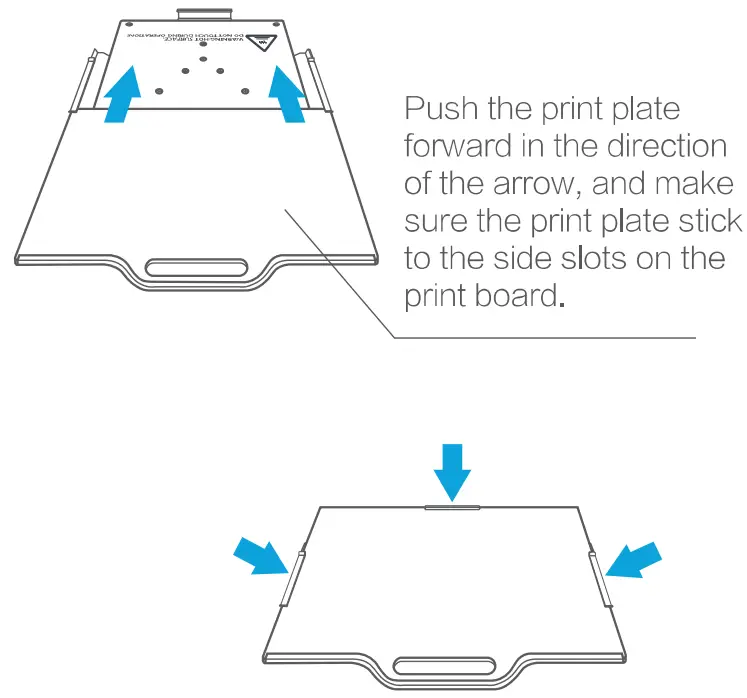
- Install the print plate, close the top lid and close the front door.

- Perform an automatic Calibration.

- Click the Initialize button to initialize the printer.

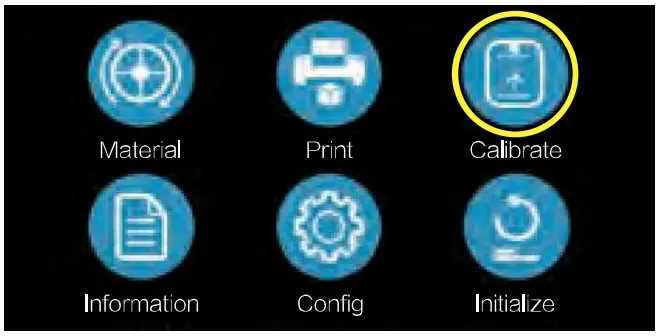
- Click the calibration button to enter the nozzle calibration interface.

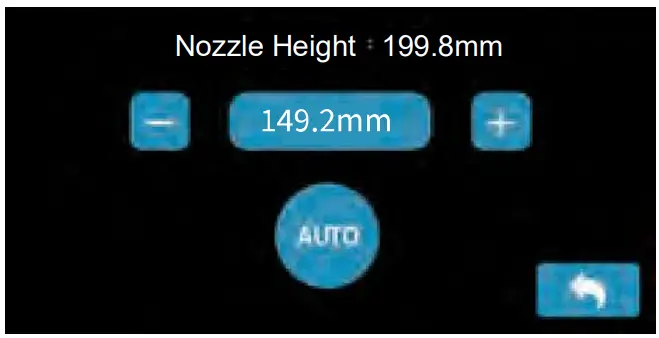
- Click the Auto button t o start the automatic nozzle height calibration.
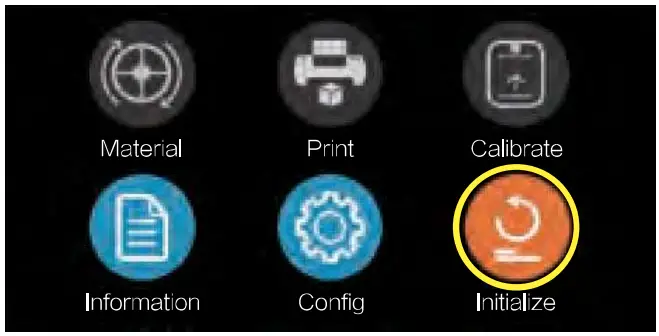
- Click the Initialize button to initialize the printer.
Install Filament Spool
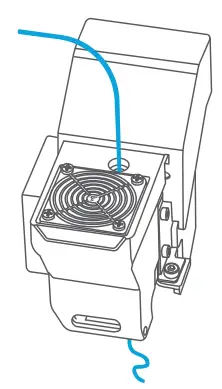
- Put one spool of filament on the spool holder at the back of the printer.

- Pull one end of the filament, feed the filament through the filament feeding system on the upper right at the back of the printer, and pull the filament close to the extruder.

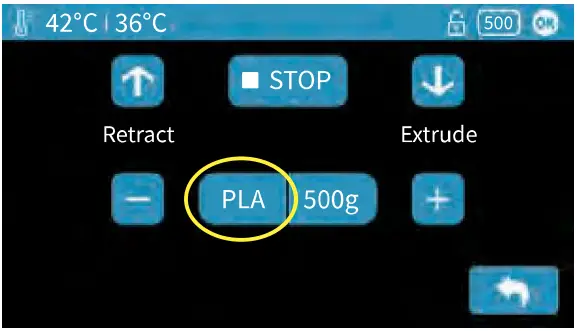
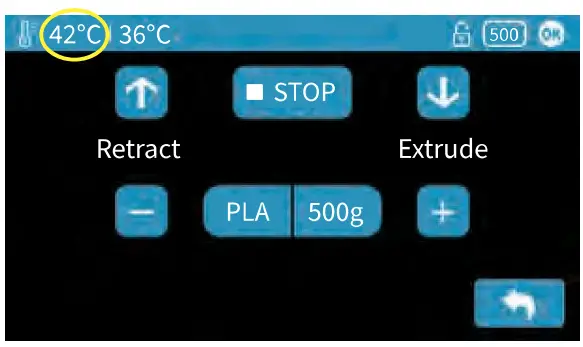
- Inthe “Material” interface of the touchscreen, click the material button in the circle switching among different types of Filaments. Choose the filament that you would like to use .

- After material selection, click the Extrude button in the Material interface. The nozzle starts being heated, and the heating progress willbe displayed on the upper left of the status bar.

- Gently press the end of the filament into the extruder inlet and push itto the end. When the temperature of the nozzle reaches the preset temperature, the printer will beep and the extruder will automatically grab the filament, and pullit in and extrude it through the nozzle.


Load and Print Models
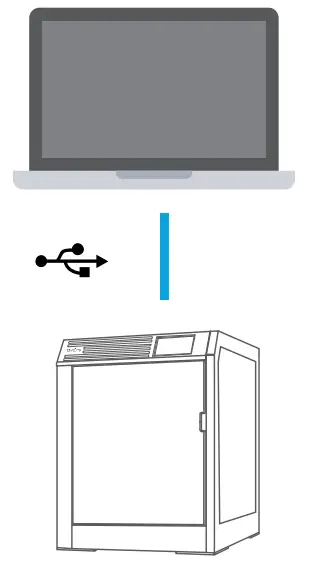
- Connect the printer to a computer via USB.
 Connect the power cord and turn on the power switch on the back of the printer .
 - Start the UP Studio2.x software fg. One the top area, the software showsthe Serial Number of the machine, nozzle temperature, print bed temperature, and material type.

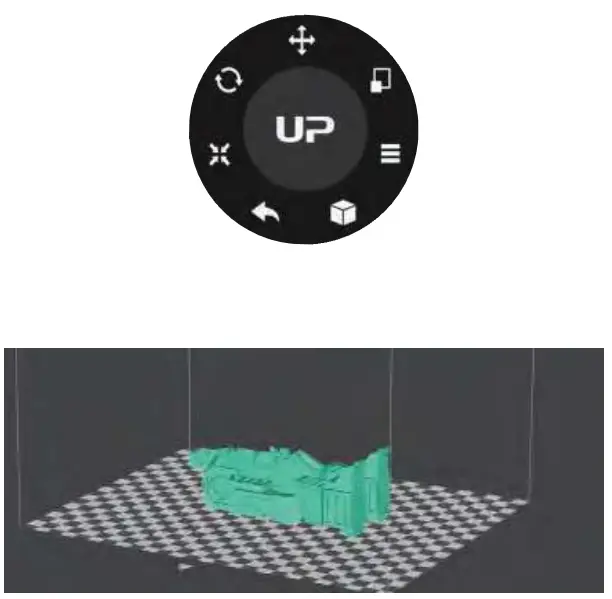
- Click the “UP” button on the main menu to open the print interface, then click Eid to load the STL.

- Use the Print Navigator t o adjust the 3D model.

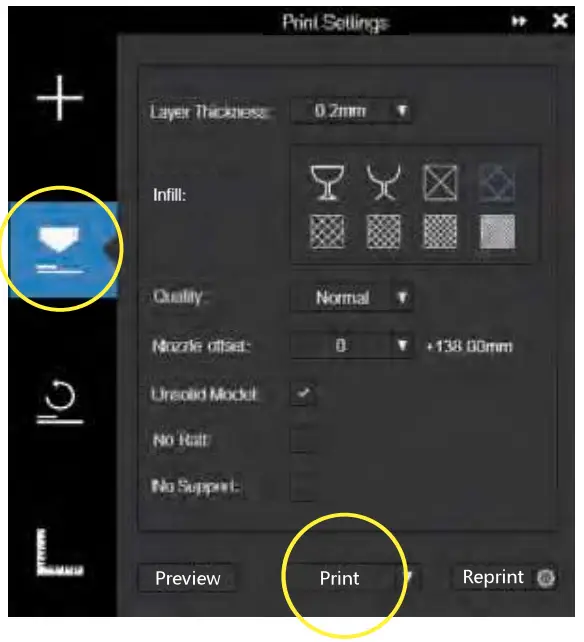
- Click the “Print” button and set print parameters.

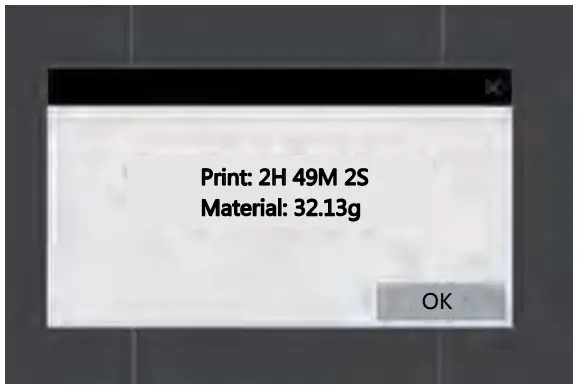
- Click “Print” to start transferring the model data to the printer . Once the transmission finishes, the software will prompt the estimated printing time and material consumption. At this time, the printer can be disconnected from the computer .

- After the data transmission i s completed, the nozzle starts to heat up, and the model starts to print after the nozzle reaches the system set temperature.

 Connect the power cord and turn on the power switch on the back of the printer .
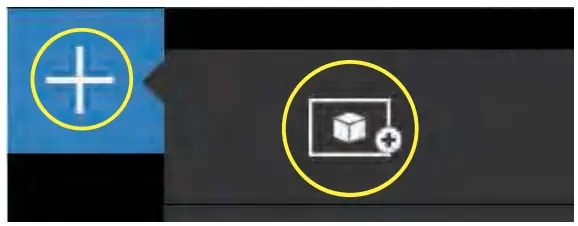

WIFI Setup Guide
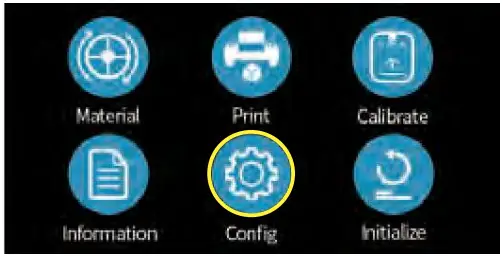
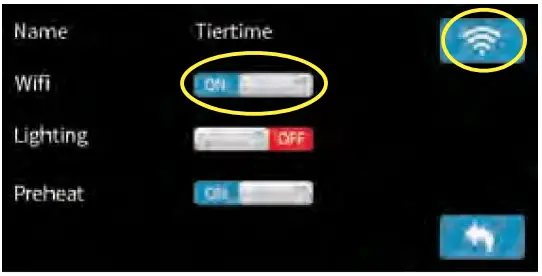
- Click the “Config” button.

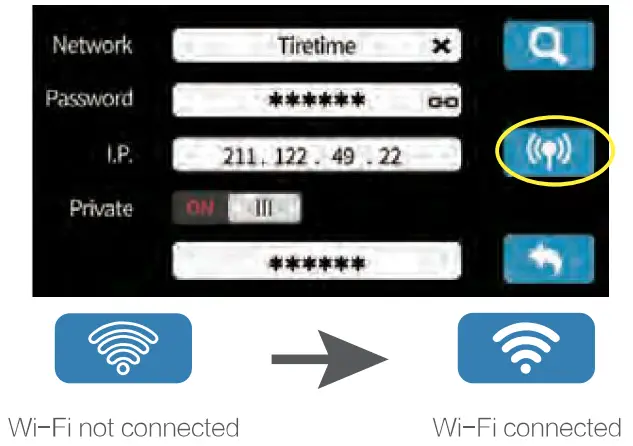
- Make sure the Wi-Fi option is “ON” , then click the Wi-Fi button in the upper right corner.

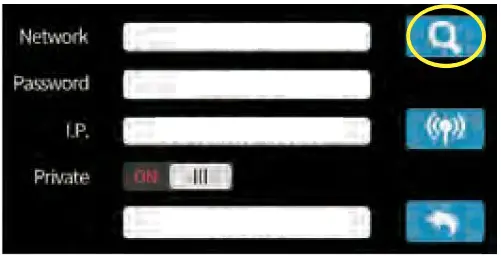
- Click the search button on the top right corner, and search for Wi-Fi.

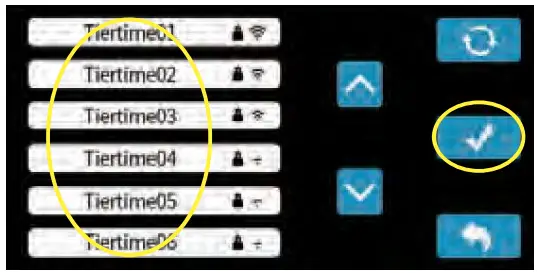
- In the network list, choose the Wi-Fi network that your computer is on.

- Click the Password field to enter a Wi-Fi password.

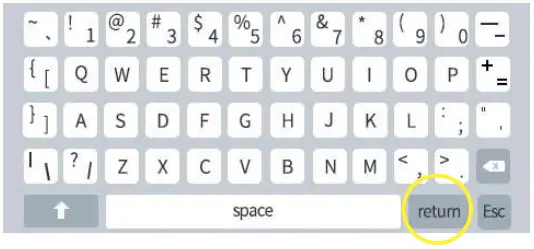
- Input the password, then press “return”.

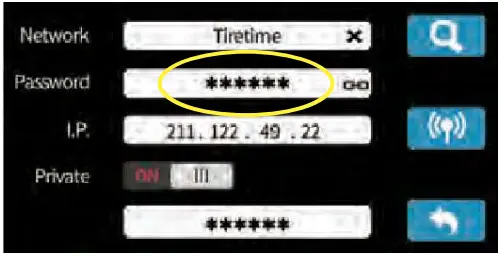
- Click the “Connect” button to finish. the top status bar w i l l change to connected.
If successful, the disconnected Wifi icon on
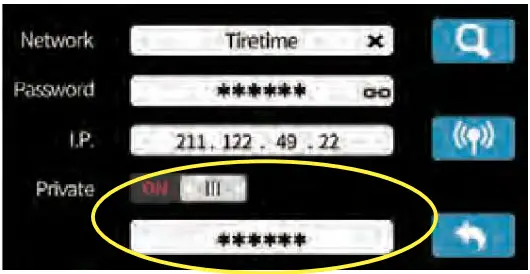
- Users can turn the toggle “Private” on and set a password for button the printer t o prevent unauthorized access to the printer.

This equipment has been tested and found to comply with the limits for a Class B digital device, pursuant to part 1 5 of the FCC Rules. These limits are designed to provide reasonable protection against harmful interference in a residential installation. This equipment generates, uses and can radiate radio frequency energy and, if not installed and used in accordance with the instructions, may cause harmful interference to radio communications. However, there is no guarantee that interference will not occur in a particular installation. If this equipment does cause harmful interference to radio o r television reception, which can be determined by turning the equipment off and on, the user is encouraged to try to correct the interference by one or more of the following measures:
- Reorient or relocate the receiving antenna.
- Increase the separation between the equipment and receiver.
- Connect the equipment into an outlet on a circuit different from that to which the receiver is connected.
- Consult the dealer or an experienced radio/TV technician for help.
Caution: Any changes or modifications to this device not explicitly approved by manufacturer could void your authority to operate this equipment.
This device complies with part 15 of the FCC Rules. Operation is subject to the following two conditions: (1) This device may not cause harmful interference, and (2) this device must accept any interference received, including interference that may cause undesired operation.
The device has been evaluated to meet general RF exposure requirement. This equipment complies with FCC radiation exposure limits set forth for an uncontrolled environment. This equipment should be installed and operated with minimum distance 20cm between the radiator & your body.
Tiertime
Beijing Tiertime Technology Co., Ltd![]() @tiertime
@tiertime ![]() @tiertine
@tiertine ![]() @tiertime
@tiertime ![]() @tiertime
@tiertime
Support: [email protected]
Web: http://www.tiertime.com


