
Assembly Instructions
![]()
www.step2health.com
www.facebook.com/step2bed
Tools needed:
— Phillips head screwdriver
— 13mm wrench.


“Remove all plastic wrap, corner step protectors and foam wrapping before assembly.”
(1) Long Rail [A] (1) Short Rail [B] (1) Crossbar [C]
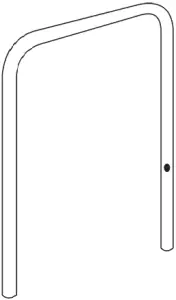
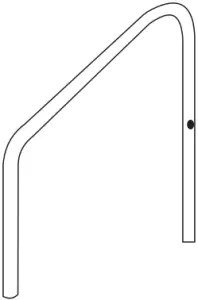
(1) Step [D] (4) Legs [E] (6) Bolts and Nuts [F]

![]()
 (M8*37mm)
  (M8)
(M8)
(1) LED Light [G]
1.
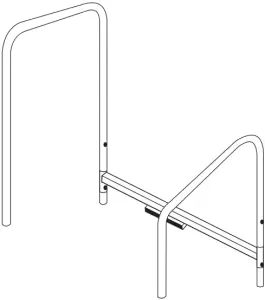
Insert A & B into holes of part C
(Part A towards head of bed)
(Part C with light bracket underneath cross bar)
2.

Raise part C to align with holes.
3.

Insert two bolts (F) then apply & tighten nuts.
4.
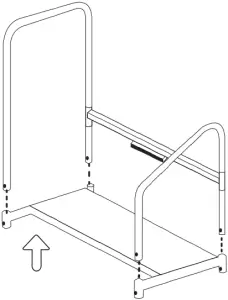
Insert A & B into holes of part D and raise to align with bolt holes.
5.
Turn step2bed XL on side.
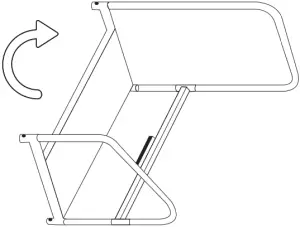
6.
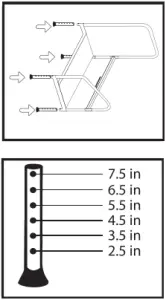
Insert all four legs (E) to desired height.
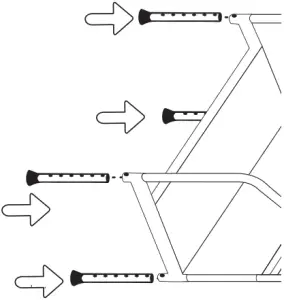
7.

Insert four bolts (F) then apply & tighten nuts.
8.
Stand step2bed XL upright.
9.
Peel two-sided tape off back of light (G) and attach to light bracket on part C with light & sensor facing out.
See other side for details.
Light Fixture
![]()
www.step2health.com
www.facebook.com/step2bed
– LED light ONLY works when environment is dark
– LED light ONLY works when motion sensor is activated by movement
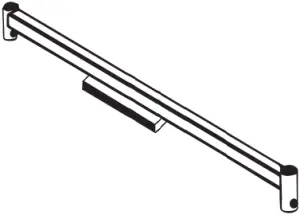
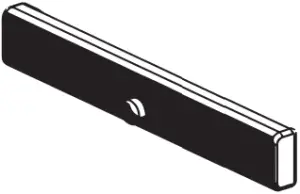
(1) LED Light [H] (1) Double-sided tape [I]
![]()
Features:
- Can be taped and applied without screws.
- Light will turn on automatically when passing by and turn off after leaving.
- If the light sensor detects enough lights, then it will not turn on even if there is movement of human body.
Specifications:
- Work voltage: DC3-6V
- Static features: 50uA
- Induction distance: 3-5m
- Induction angle: <110
- Delay time: 15s
- Power by: 4 *AAA battery
- Warm light
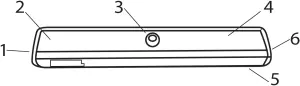
- battery cover
- light sensor
- motion sensor
- lighting luminous area
- magnet fixed bar
- switch
1.
 (light fixture)
![]() (back)
(back)![]() (front)
(front)
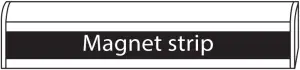
Locate light with magnet strip and double-sided tape.
2.
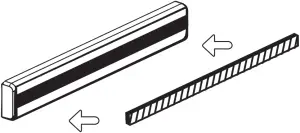

Attach magnet side (front) of double-sided tape to the magnet side of the light.
3.
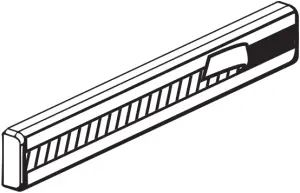
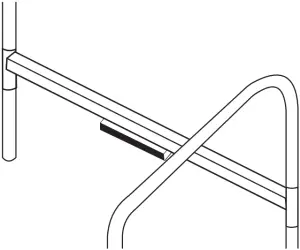
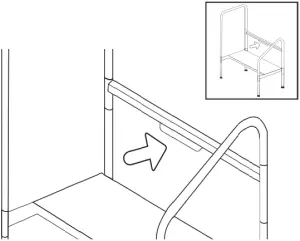
Remove liner on the tape, and attach to crossbar of Step2Bed.
Instructions For Attaching Velcro
![]()
www.step2health.com
www.facebook.com/step2bed
Thank you again for purchasing the step2bed XL! We hope it helps you and your loved ones like it has so many other families.
As a courtesy, we have also included velcro in this unit in order to make the step2bed even more stable.
(1) Velcro
![]()
SAFETY FIRST!
Please note that the velcro should not impede the use of the step2bed XL or cause any tripping hazard.

1. The velcro should be wrapped beneath the step – on and around the back legs closest to the bed.
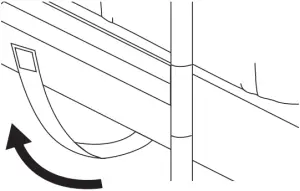
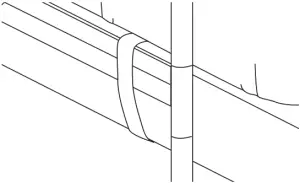
2. Next, wrap the other end around the bed frame, securely fastening the velcro ensuring a firm grip.
![]()
US Patent No. 10,034,807; other patents pending REV – 6/19


